by
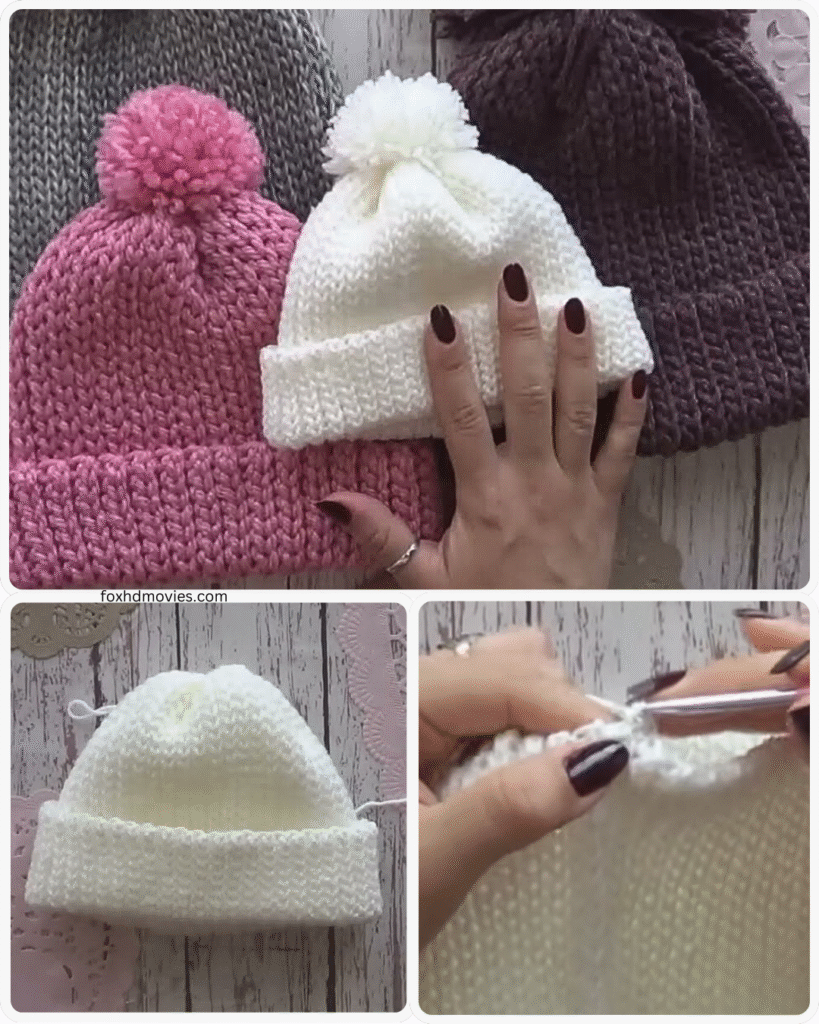
by here is a detailed pattern for an “Easy Peasy Crochet Beanie In Any Size.” This pattern is designed to be flexible, allowing you to create a beanie that fits any head size by adjusting your starting point, increase rounds, and overall length based on simple measurements.
This pattern utilizes the common top-down construction method, starting with a flat circle for the crown and then working straight down for the body of the hat. A simple ribbed brim is added at the end.
Skill Level: Easy
Materials:
- Worsted weight yarn (or any weight yarn with a corresponding hook) – The amount will vary depending on the size of the beanie.
- Crochet hook appropriate for your yarn weight (check the yarn label for a recommendation, or use a hook that gives you a fabric you like without large gaps or stiffness).
- Tapestry needle for weaving in ends.
- Scissors.
- Stitch marker (optional, but helpful for marking the beginning of rounds).
- Measuring tape.
Gauge:
Achieving the correct gauge is crucial for making a beanie that fits. Gauge is the number of stitches and rows per inch (or centimeter) using your chosen yarn and hook.
- Make a Swatch: Chain about 15-20 stitches and work in the stitch you will use for the main body of the hat (e.g., double crochet) for about 10-15 rows.
- Measure: Measure a 4×4 inch (10×10 cm) square within your swatch.
- Calculate: Count how many stitches and rows are in your 4×4 inch (10×10 cm) square.
- Adjust: If you have too many stitches or rows, try a larger hook. If you have too few, try a smaller hook. Repeat until your gauge is close to a standard worsted weight gauge (usually around 12-15 double crochet stitches and 8-10 rows per 4 inches, but this will vary based on your yarn and tension). Note: The exact gauge isn’t as critical as consistency once you have your desired crown diameter.
Key Measurements for Sizing:
You will need two key measurements for the desired beanie size:
- Crown Diameter: The diameter of the flat circle at the top of the hat.
- Hat Height: The measurement from the crown to the bottom edge of the beanie (or where you want the brim to start).
Refer to a standard hat size chart for average measurements based on age. You can easily find these online by searching for “crochet hat size chart.” Here is a general guideline:
| Size | Head Circumference (approx.) | Crown Diameter (approx.) | Hat Height (approx.) |
|---|---|---|---|
| Preemie | 9-12 inches | 3-4 inches | 4-5 inches |
| Newborn | 13-14 inches | 4-4.5 inches | 5-5.5 inches |
| 3-6 Months | 15 inches | 5 inches | 6-6.5 inches |
| 6-12 Months | 16-17 inches | 5.5-6 inches | 6.5-7 inches |
| Toddler (1-3T) | 18-19 inches | 6-6.5 inches | 7-8 inches |
| Child (4-10) | 19-20 inches | 6.5-7 inches | 7.5-8.5 inches |
| Teen/Small Adult | 20.5-21.5 inches | 7-7.5 inches | 8-9 inches |
| Adult Medium | 22-23 inches | 7.5-8 inches | 9-10 inches |
| Adult Large | 23-24 inches | 8-8.5 inches | 10-11 inches |
Export to Sheets
Note: Hat circumference is typically 1-2 inches smaller than head circumference for a snug fit. The crown diameter is the hat circumference divided by pi (approximately 3.14).
Abbreviations (US Terms):
- Ch: Chain
- Sl St: Slip Stitch
- SC: Single Crochet
- HDC: Half Double Crochet
- DC: Double Crochet
- BLO: Back Loop Only
- St(s): Stitch(es)
- Rnd: Round
- Rep: Repeat

The Pattern:
This pattern is written for Double Crochet (DC) stitches for the main body, which creates a relatively quick and easy fabric. You can substitute HDC for a slightly denser fabric, or SC for a very dense fabric, but you will need to adjust the number of stitches and rows accordingly and recalculate your increase rounds based on your gauge with that stitch.
Part 1: The Crown (Increasing Rounds)
The goal of this section is to create a flat circle that reaches your desired Crown Diameter. The number of stitches you start with and the increase pattern will depend on your chosen stitch and hook/yarn combination (your gauge). A common starting point for DC is 10-12 stitches in a magic circle or Ch 3 ring.
General Principle for Increases: To keep the circle flat, you will increase the same number of stitches in each round as you started with in the first round. The increases are spaced evenly around the circle.
- Your Starting Number of Stitches: Choose a starting number of stitches for your magic circle or Ch 3 ring. For DC, 10 or 12 is typical. Let’s call this number ‘X’.
- Increases Per Round: You will add ‘X’ stitches in each increase round.
Example using DC and starting with 12 stitches (X=12):
- Rnd 1: Create a magic circle (or Ch 3 and join with Sl St to first Ch). Ch 2 (does NOT count as a stitch). Work 12 DC into the circle. Join with Sl St to the top of the first DC. (12 sts)
- Rnd 2: Ch 2. Work 2 DC in each stitch around. Join with Sl St to the top of the first DC. (24 sts) – Increase 12 stitches (2 DC in each of the 12 stitches).
- Rnd 3: Ch 2. Work 1 DC in the first stitch, 2 DC in the next stitch. Rep from * around. Join with Sl St to the top of the first DC. (36 sts) – Increase 12 stitches (2 DC in every second stitch).
- Rnd 4: Ch 2. Work 1 DC in the first 2 stitches, 2 DC in the next stitch. Rep from * around. Join with Sl St to the top of the first DC. (48 sts) – Increase 12 stitches (2 DC in every third stitch).
- Rnd 5: Ch 2. Work 1 DC in the first 3 stitches, 2 DC in the next stitch. Rep from * around. Join with Sl St to the top of the first DC. (60 sts) – Increase 12 stitches (2 DC in every fourth stitch).
Continuing Increase Rounds:
You will continue this pattern of increasing by ‘X’ stitches each round, working one more regular stitch between the increases in each subsequent round.
- Rnd n: Ch 2. Work 1 DC in the first (n-2) stitches, 2 DC in the next stitch. Rep from * around. Join with Sl St to the top of the first DC. (Total stitches = n * X)
How to Know When to Stop Increasing:
Periodically lay your circle flat and measure across its widest point to check the diameter. Continue working increase rounds until your circle reaches the desired Crown Diameter for your chosen size (refer to the chart above).
- Important: Your final increase round should have a multiple of ‘X’ stitches.
Part 2: The Body (Even Rounds)
Once your crown has reached the correct diameter, you will stop increasing and work even rounds to create the sides of the beanie.
- Rnd after Increases: Ch 2. Work 1 DC in each stitch around. Join with Sl St to the top of the first DC.

Continuing Even Rounds:
Continue working even rounds (1 DC in each stitch around) without increasing until your beanie reaches the desired Hat Height (refer to the chart). Measure from the center of the crown down to the edge.
Part 3: The Ribbing (Optional but Recommended)
Ribbing creates a nice finished edge and helps the beanie fit snugly. A simple ribbed band can be made by working in the back loop only (BLO). You can adjust the number of rows in the ribbing to make it wider or narrower, or to create a fold-up brim.
- Determine Ribbing Height: Decide how tall you want your ribbed band to be (e.g., 1-3 inches).
- Chain for Ribbing: Ch the number of stitches equal to your desired ribbing height, plus 1 for the turning chain.
- Row 1: SC in the second chain from the hook and in each chain across. (Number of stitches will be your ribbing height). Ch 1, turn.
- Row 2: SC in the BLO of each stitch across. Ch 1, turn.
- Repeat: Rep Row 2 until the ribbed piece is slightly stretched and the same circumference as the bottom edge of your beanie body.
- Join Ribbing to Beanie: With the wrong side of the beanie facing out, line up the last row of your ribbing with the bottom edge of the beanie. Using a Sl St or a tapestry needle and yarn, join the ribbing to the beanie edge stitch by stitch.
- Join Ribbing Ends: Fold the ribbed band in half and join the raw ends together using a Sl St or by sewing with a tapestry needle to form a continuous loop.
Finishing:
- Cinch the Top (if needed): If there is a small hole at the very top of your crown (from using a Ch 3 ring instead of a magic circle), thread your tapestry needle with your starting tail and weave it through the stitches of the first round. Pull tightly to close the hole and secure.
- Weave in Ends: Weave in all remaining loose ends neatly using your tapestry needle.
- Optional: Add a pom-pom to the top of the beanie.
Video tutorial
Adjusting for Different Looks:
- Slouchy Beanie: To make a slouchier beanie, simply continue working even rounds for the body until the hat is longer than the standard height for your chosen size.
- Fold-Up Brim: To create a fold-up brim, make your ribbed band taller than a standard ribbing and fold it up when wearing.
By following these steps and using the provided measurements as a guide, you can easily crochet a beanie in virtually any size! Happy crocheting!