by
by 
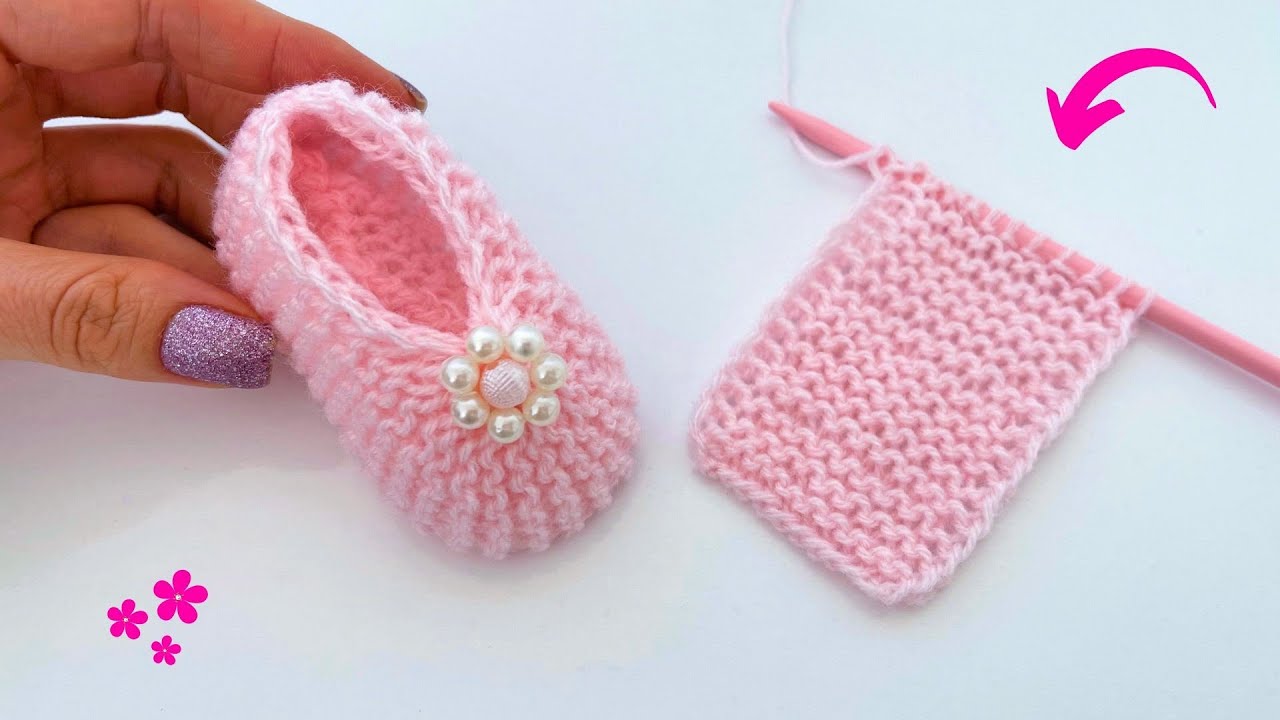
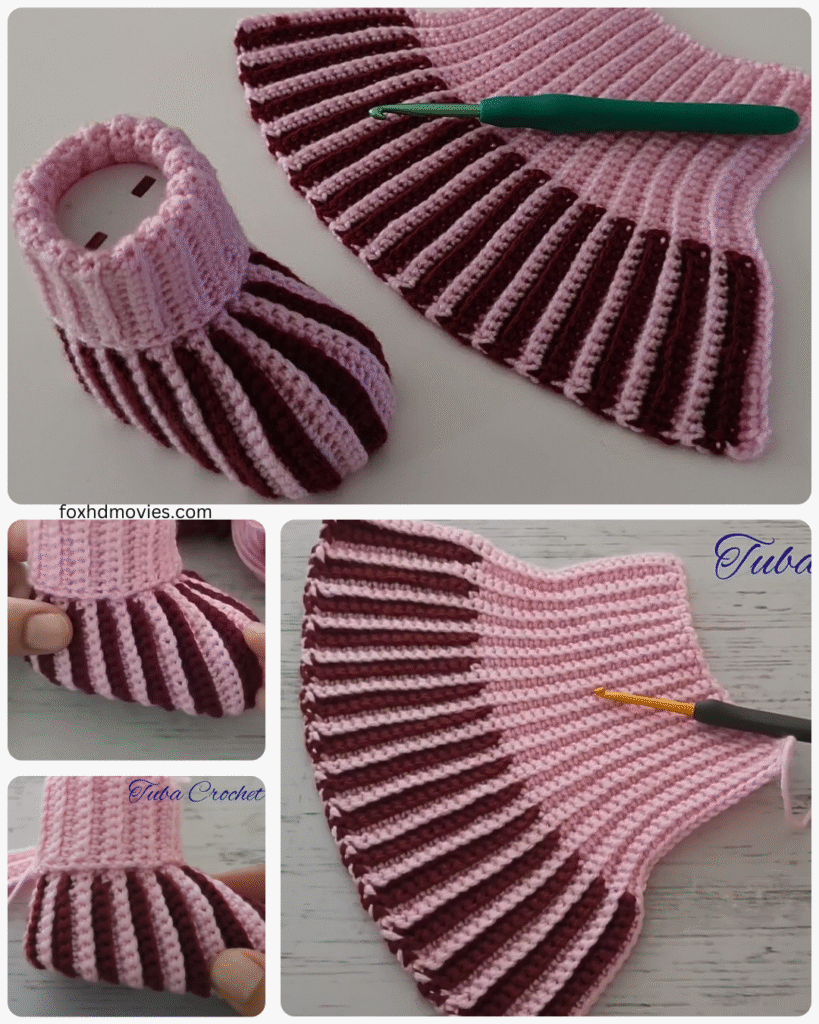
Hello, fellow yarn enthusiasts! Are you looking for a quick, adorable, and beginner-friendly crochet project? Look no further! Today, we’re diving into the delightful world of tiny footwear with this super easy crochet baby shoe pattern. These little booties work up in no time, making them perfect for last-minute baby shower gifts or simply adding a handmade touch to your little one’s wardrobe.
What makes these shoes so easy? We’ll be using basic crochet stitches and a simple construction, minimizing complicated shaping or intricate details. Even if you’re relatively new to crochet, you’ll be able to whip up a pair of these cuties with confidence.
So, grab your favorite yarn and let’s get started!
Materials You’ll Need:
- Yarn: Worsted weight yarn in your desired color(s). A soft yarn suitable for babies is recommended (cotton, acrylic blends). You won’t need a lot – scraps from other projects often work perfectly!
- Crochet Hook: Size H/8 (5.0 mm) or the size recommended for your yarn.
- Scissors: For snipping yarn.
- Tapestry Needle: For weaving in ends.
- Optional: Buttons, small appliques, or ribbon for embellishments.
Gauge:
While gauge isn’t critical for this small project, approximately 16 single crochet (sc) stitches and 18 rows should measure about 4 inches (10 cm).
Finished Size:
This pattern is written for approximately 0-3 months (sole length of about 3.5 inches). Adjust hook size to slightly alter the size if needed.
Abbreviations (US Crochet Terms):
- ch = chain
- sc = single crochet
- hdc = half double crochet
- dc = double crochet
- sl st = slip stitch
- st(s) = stitch(es)
- rep = repeat
Video tutorial
Let’s Get Crocheting!
Sole (Make 2):
- Ch 11.
- Row 1: Sc in the 2nd ch from the hook and in each ch across. (10 sts)
- Row 2: Ch 1, turn. 2 sc in the first st, sc in the next 8 sts, 2 sc in the last st. (12 sts)
- Row 3: Ch 1, turn. 2 sc in the first st, sc in the next 10 sts, 2 sc in the last st. (14 sts)
- Row 4: Ch 1, turn. 2 sc in the first st, sc in the next 12 sts, 2 sc in the last st. (16 sts)
- Rows 5-9: Ch 1, turn. Sc in each st across. (16 sts)
- Row 10: Ch 1, turn. Sc in the first 5 sts, hdc in the next 6 sts, sc in the last 5 sts. (16 sts)
- Fasten off and weave in the ends.
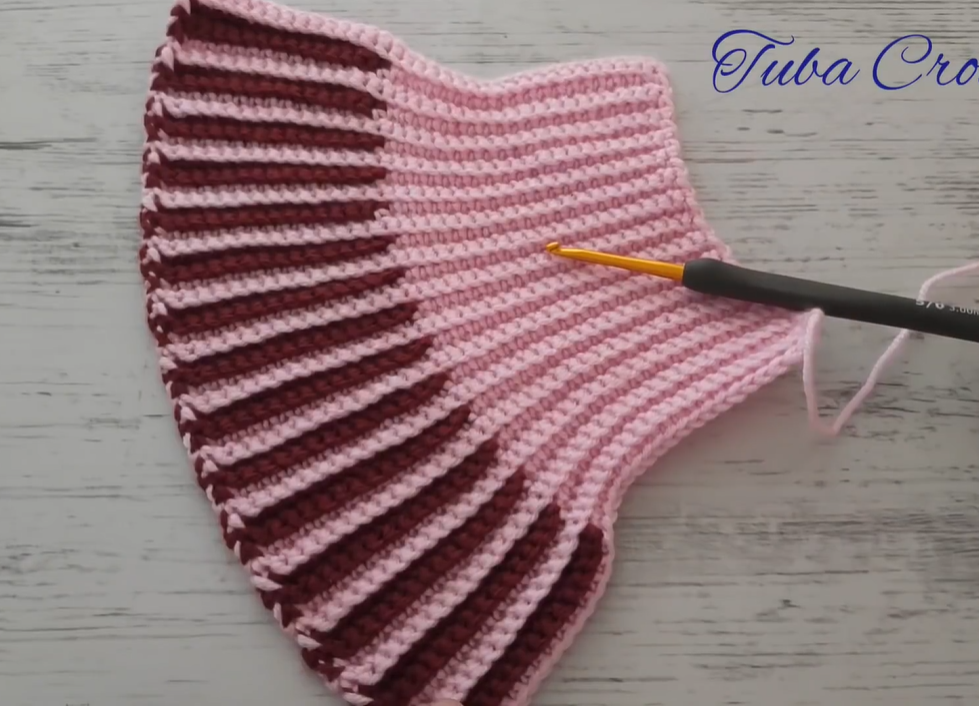
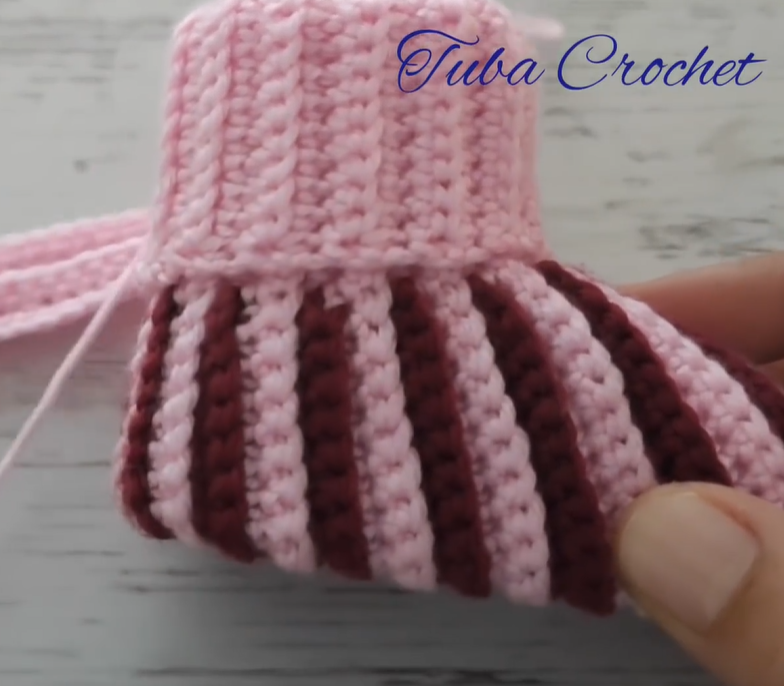
Upper Part (Make 2):
- With the right side of the sole facing you, join yarn with a sl st in any stitch of the last round of the sole.
- Round 1: Ch 1, sc evenly around the edge of the sole. You’ll want to place approximately 2 sc in the rounded ends and 1 sc along the straighter sides. Aim for an even number of stitches (around 36-40 sts). Sl st to the first sc to join.
- Round 2: Ch 1, sc in each st around. Sl st to the first sc to join.
- Round 3: Ch 1, sc in the first 10 sts. Ch 10 (this will form the strap). Skip the next 10 sts. Sc in the remaining sts around. Sl st to the first sc to join. (26 sc + 10 ch)
- Round 4: Ch 1, sc in the next 10 sts. Sc in each of the 10 ch sts. Sc in the remaining sts around. Sl st to the first sc to join. (36 sts)
- Round 5: Ch 1, sc in each st around. Sl st to the first sc to join.
- Fasten off and weave in the ends.

Assembly:
- Line up the two upper pieces so that the starting point of the strap (the chain) aligns.
- Using your tapestry needle and yarn, whip stitch or slip stitch the back seam of the shoe together, starting from the heel upwards for about 1.5 – 2 inches.
Finishing Touches (Optional):
- Button: Sew a button onto the side of the shoe opposite the strap. The ch-10 loop will act as the buttonhole.
- Appliques: Add a small crocheted or felt applique to the front or side of the shoe for extra cuteness.
- Ribbon: Weave a thin ribbon through the spaces in Round 2 of the upper part for a decorative touch.
Tips and Variations:
- Color Play: Get creative with colors! Use stripes, color blocking, or contrasting trim for a unique look.
- Texture: Experiment with different yarn textures to add visual interest.
- Larger Sizes: To make a slightly larger size, you can add a few more rows to the sole before starting the upper part. You may also need to adjust the length of the strap.
- Secure Straps: For extra security, you can add a small piece of Velcro instead of a button.
Congratulations! You’ve just created a pair of adorable and cozy crochet baby shoes. These little booties are sure to keep tiny feet warm and stylish. Make a few pairs in different colors – they make wonderful gifts!