by
by 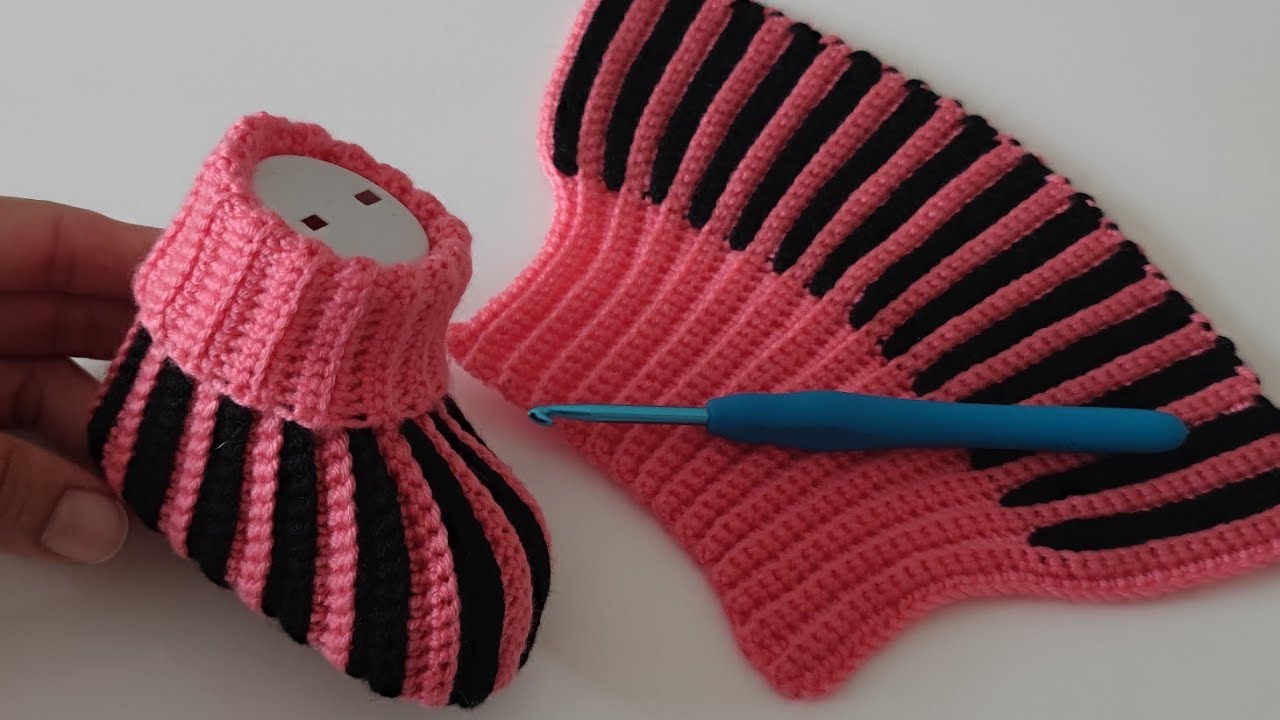
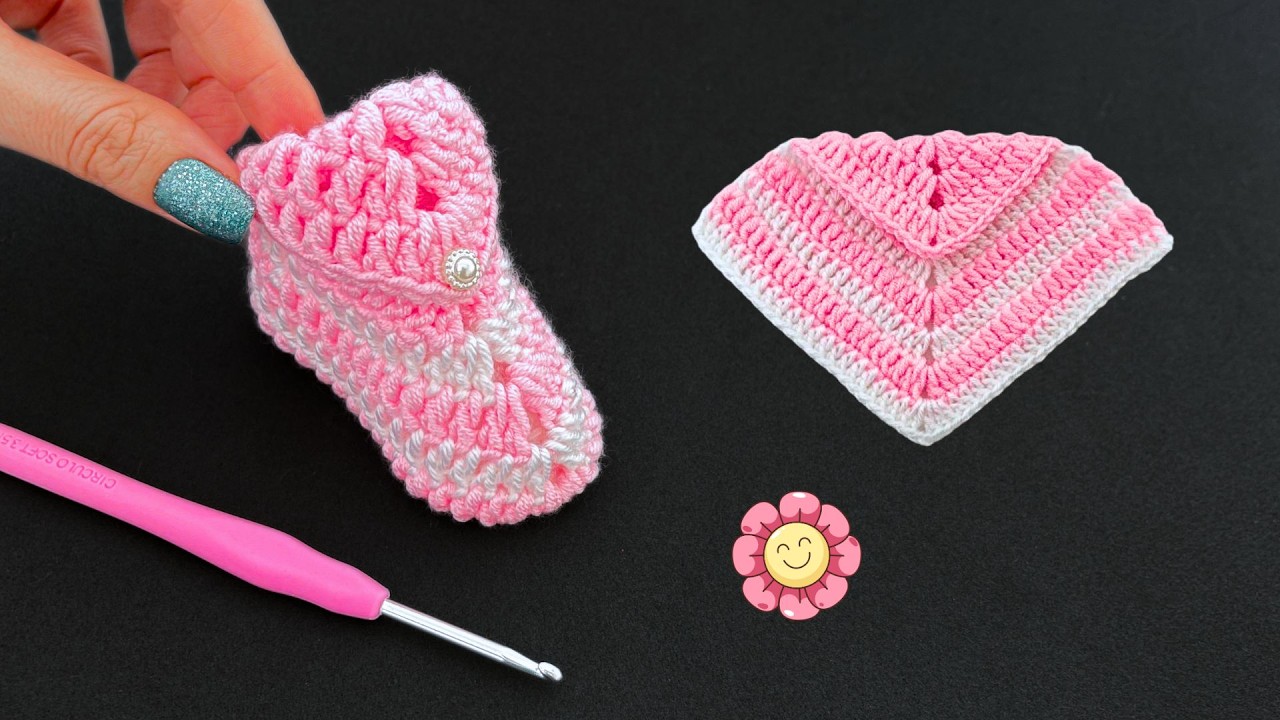
Hey there, crafty friends! Are you ready for an adorable and innovative crochet project? Today, we’re diving into the world of 3D mesh crochet to create the cutest, most breathable baby shoes you’ve ever seen! These little booties are not only stylish but also perfect for tiny, active feet, allowing for airflow while providing gentle support.
This pattern utilizes the beauty of mesh stitches to create a unique texture and structure. Don’t worry if you’re new to mesh crochet – I’ll guide you through each step with clear instructions and helpful tips. Get ready to hook some magic!

(Materials Needed – The Essentials)
Before we begin, let’s gather our supplies:
- Yarn: DK weight cotton or a soft acrylic yarn suitable for babies. Approximately 50-75 yards depending on the size. Choose a color (or two!) that you love.
- Crochet Hook: A size C/2 (2.75 mm) or D/3 (3.25 mm) hook, or the size recommended for your chosen yarn.
- Scissors: For snipping yarn ends.
- Tapestry Needle: For weaving in ends.
- Stitch Markers: These will be your best friends for keeping track of rounds and shaping.
- Measuring Tape: To ensure accurate sizing.
- Optional: Non-slip sole material (like suede or pre-cut sole inserts) for added grip.
(Gauge – Important for Sizing)
While baby feet can vary, achieving the correct gauge will help ensure the shoes fit as intended.
- Mesh Gauge: [Insert your gauge here, e.g., 10 dc and 10 ch-1 spaces = 4 inches] worked in the mesh pattern.
- Solid Fabric Gauge: [Insert your gauge here, e.g., 18 sc = 4 inches] worked in single crochet.
It’s always a good idea to make a small swatch using the mesh pattern to check your gauge. Adjust your hook size if necessary.
(Sizing – Tailoring to Tiny Feet)
This pattern provides instructions for a 0-3 month size (approximately 3.5 inches sole length). Adjust the starting chain and subsequent rounds to create larger sizes. Here’s a general guideline:
- 0-3 months: 3.5 inches sole length
- 3-6 months: 4 inches sole length
- 6-9 months: 4.5 inches sole length
- 9-12 months: 5 inches sole length
(Abbreviations – Decoding the Crochet Language)
- ch: chain
- sl st: slip stitch
- sc: single crochet
- hdc: half double crochet
- dc: double crochet
- tr: treble crochet
- sp(s): space(s)
- st(s): stitch(es)
- sk: skip
- rep: repeat
- beg: beginning
- inc: increase (work 2 stitches in the same stitch)
Video tutorial
(The Pattern – Step-by-Step Creation)
Part 1: The Sole
- Foundation Chain: Ch [number] (adjust for size – e.g., 11 for 0-3 months).
- Round 1: Sc in the 2nd ch from the hook and in each ch across. Work 3 sc in the last ch. Continue working along the other side of the chain, sc in each ch across. Work 2 sc in the last ch (which is the same st as the first sc of the round). Sl st to the first sc to join. (Total [number] sts)
- Round 2: Ch 1 (does not count as a st). Inc in the first sc, sc in the next [number] sts, inc in the next 3 sts, sc in the next [number] sts, inc in the last 2 sts. Sl st to the first sc to join. (Total [number] sts)
- Round 3: Ch 1. Sc in each st around, placing increases at the rounded ends to maintain an oval shape. You’ll likely work (sc, inc) a few times at each end. Sl st to the first sc to join. (Total [number] sts)
- Continue increasing in subsequent rounds as needed to achieve the desired sole length and oval shape. Aim for a flat, even sole. The number of rounds will depend on your gauge and desired size.
Part 2: The Sides and Mesh Upper
- Round [Number]: Ch 1. Sc in each st around. Sl st to the first sc to join. This round creates a slight “wall” for the shoe.
- Round [Number]: Ch 3 (counts as a dc). Sk the next st, dc in the following st, ch 1. Rep from * around. Sl st to the 3rd ch of the beginning ch-3. (This is the first mesh round).
- Round [Number]: Sl st into the first ch-1 sp. Ch 3 (counts as a dc). Dc in the next dc, ch 1. Rep from * around, making sure the dc stitches land in the dc stitches of the previous round and the ch-1 spaces are above the ch-1 spaces. Sl st to the 3rd ch of the beginning ch-3.
- Repeat Round [Number] until the mesh section reaches the desired height for the sides of the shoe. You can vary the number of mesh rounds depending on the look you want.

Part 3: Shaping the Toe
- Next Round: We will now start shaping the toe. Continue in the mesh pattern, but we will begin decreasing in the front section of the shoe. Mark the center front stitches (approximately 1/3 of the total stitches).
- Decrease Rounds: Work in the mesh pattern, but work two dc together (dc2tog) over the dc stitches in the marked front section to create a gradual curve for the toe. You might do this over 2-3 sets of dc stitches in each decrease round. Continue these decrease rounds until the toe has a rounded shape.
Part 4: Creating the Heel
- After shaping the toe, continue working in the mesh pattern for the back of the shoe. You can either maintain the same height as the sides or create a slightly higher back for better support.
- Optional Heel Shaping: For a more defined heel, you can work a few rows of solid stitches (sc or hdc) across the back section only, decreasing at the edges to create a curved heel.
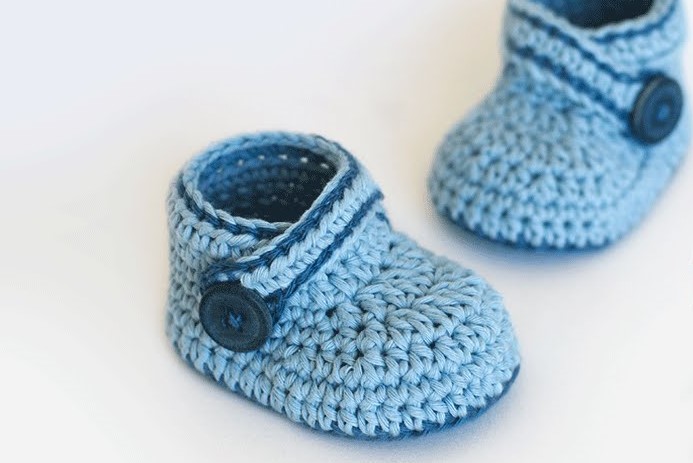
Part 5: The Ankle Strap (Optional)
- Attach yarn to one side of the shoe opening.
- Chain a length suitable for a strap that can comfortably fasten around the baby’s ankle (leaving room for growth).
- Work a row of sc back along the chain.
- Attach the other end of the strap to the opposite side of the shoe opening, ensuring a secure but not too tight fit. You can add a button or create a loop for fastening.

Part 6: Finishing Touches
- Weave in all loose ends securely using your tapestry needle.
- Optional: Attach non-slip soles to the bottom of the booties for added safety.
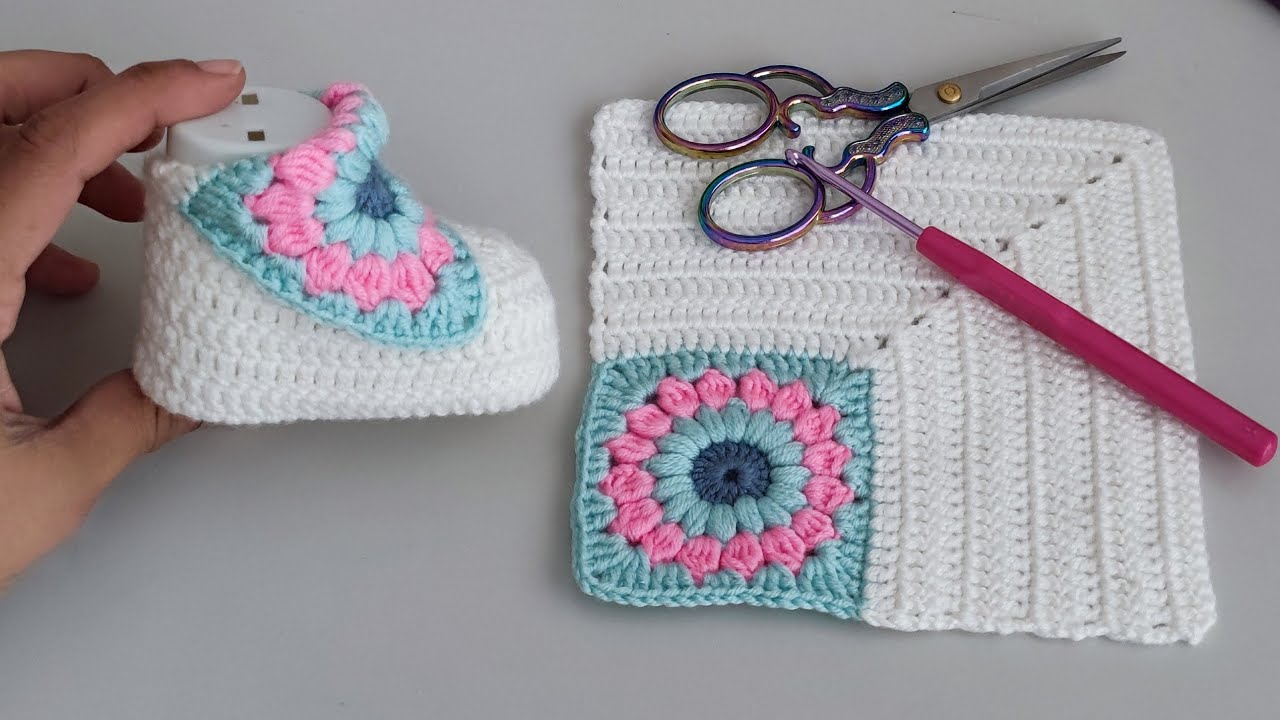
- Add any embellishments you desire, such as small crocheted flowers, buttons (ensure they are securely attached!), or embroidered details.
(Tips and Tricks for Success)
- Use stitch markers diligently, especially when shaping the toe.
- Maintain consistent tension throughout your work for a neat and even fabric.
- Don’t be afraid to adjust the pattern slightly to achieve the desired fit and look.
- Refer to online tutorials for visual guidance on mesh crochet and shaping techniques if you are unsure about any steps.
- Always prioritize safety when making items for babies. Ensure all embellishments are securely attached and use baby-safe yarn.

(Conclusion – The Joy of Creation)
Congratulations! You’ve just created a beautiful and unique pair of 3D mesh baby shoes. These breathable booties are a testament to your crochet skills and a thoughtful gift for any little one. Enjoy the process and the adorable result!
(Call to Action – Engage with Your Readers)
I’d love to see your creations! Share your finished baby shoes on Instagram using #[yourhashtag] or tag me @[yourinstagramhandle]. Happy crocheting!