by
by 
Easy Step-by-Step Baby Crochet Boots Pattern
This pattern is designed for beginners and uses basic crochet stitches. You’ll create a simple, comfortable pair of baby boots perfect for keeping little feet warm.
Skill Level: Easy
Materials:
- Worsted weight yarn (approx. 50-70 yards) – choose a soft, baby-friendly yarn.
- Crochet hook size H/8 (5.0 mm) or size needed to obtain gauge.
- Tapestry needle for weaving in ends.
- Scissors.
- Optional: Buttons, ribbon, or other embellishments.
Gauge:
While not strictly necessary for baby booties where exact size isn’t critical, achieving gauge will help ensure your boots match the intended size.
4 single crochet stitches x 4 rows = 1 inch (2.5 cm)
Abbreviations:
- ch: chain
- st(s): stitch(es)
- sl st: slip stitch
- sc: single crochet
- hdc: half double crochet
- dc: double crochet
- inc: increase (work 2 stitches in the same stitch)
- sk: skip
- FO: fasten off
Notes:
- This pattern is written for a size 0-3 months. You can adjust the length of the starting chain to make larger or smaller sizes.
- The pattern is worked in rounds.
- The initial chain does not count as a stitch.
Sole (Make 2)
We will start by creating an oval shape for the sole of the bootie.
Round 1: Ch 9. Work 2 hdc in the 2nd ch from hook. hdc in the next 6 chs. Work 5 hdc in the last ch.
Now you will work down the opposite side of the starting chain.
hdc in the next 6 chs. Work 2 hdc in the last ch (same ch as the very first 2 hdc). Join with a sl st to the top of the first hdc. (21 hdc)
Round 2: Ch 1 (does not count as a st). 2 hdc in the same st as join. 2 hdc in the next st. hdc in the next 6 sts. 2 hdc in the next 5 sts. hdc in the next 6 sts. 2 hdc in the last 2 sts. Join with a sl st to the top of the first hdc. (30 hdc)
Round 3: Ch 1 (does not count as a st). hdc in the same st as join. 2 hdc in the next st. (hdc in the next st, 2 hdc in the next st) once more. hdc in the next 6 sts. (hdc in the next st, 2 hdc in the next st) 5 times. hdc in the next 6 sts. (hdc in the next st, 2 hdc in the next st) twice. Join with a sl st to the top of the first hdc. (40 hdc)
Your sole should now be an oval shape.
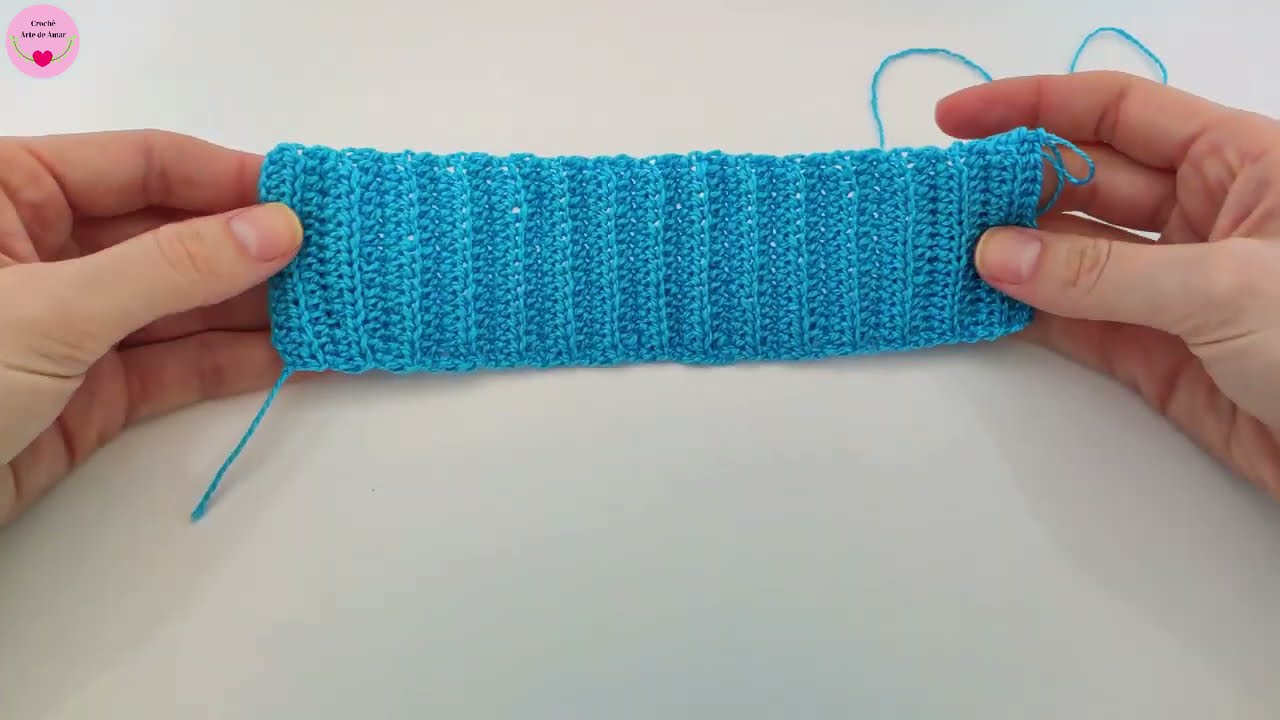
Upper
Now we will start building up the sides of the bootie.
Round 4: Ch 1 (does not count as a st). Work 1 sc in the back loop only of each st around. Join with a sl st to the top of the first sc. (40 sc)
Working in the back loop only creates a defined edge for the sole.
Round 5: Ch 1 (does not count as a st). sc in each st around. Join with a sl st to the top of the first sc. (40 sc)
Round 6: Ch 1 (does not count as a st). sc in the next 12 sts.
Now we will shape the toe.
(sc in the next st, sc2tog) 4 times. sc in the next 16 sts. Join with a sl st to the top of the first sc. (36 sc)
Round 7: Ch 1 (does not count as a st). sc in the next 11 sts.
More shaping for the toe.
(sc2tog) 7 times. sc in the next 11 sts. Join with a sl st to the top of the first sc. (29 sc)
Round 8: Ch 1 (does not count as a st). sc in the next 10 sts.
Final toe shaping.
(sc2tog) 4 times. sc in the next 11 sts. Join with a sl st to the top of the first sc. (25 sc)
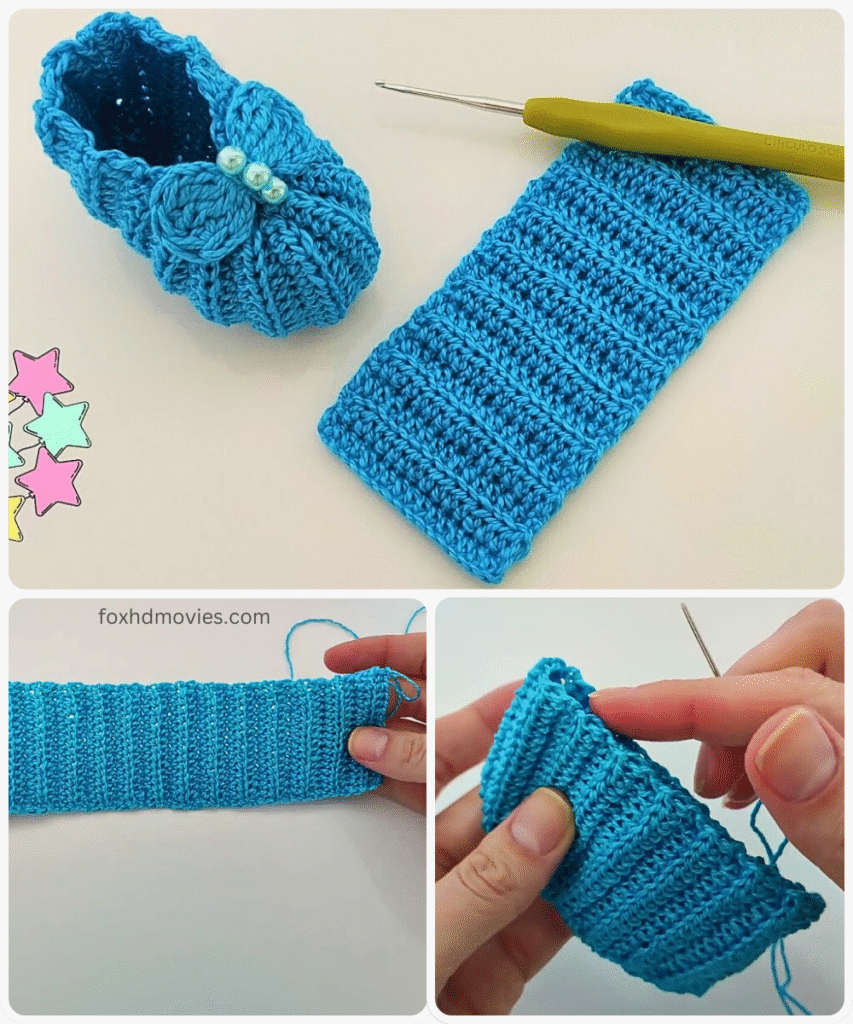
Cuff
Now we will work on the ankle cuff. You can make this as tall as you like by repeating Round 9.
Round 9: Ch 2 (does not count as a st). dc in each st around. Join with a sl st to the top of the first dc. (25 dc)
Round 10: Ch 2 (does not count as a st). dc in each st around. Join with a sl st to the top of the first dc. (25 dc)
Optional Cuff Height: Repeat Round 9 for a taller cuff.
Video tutorial
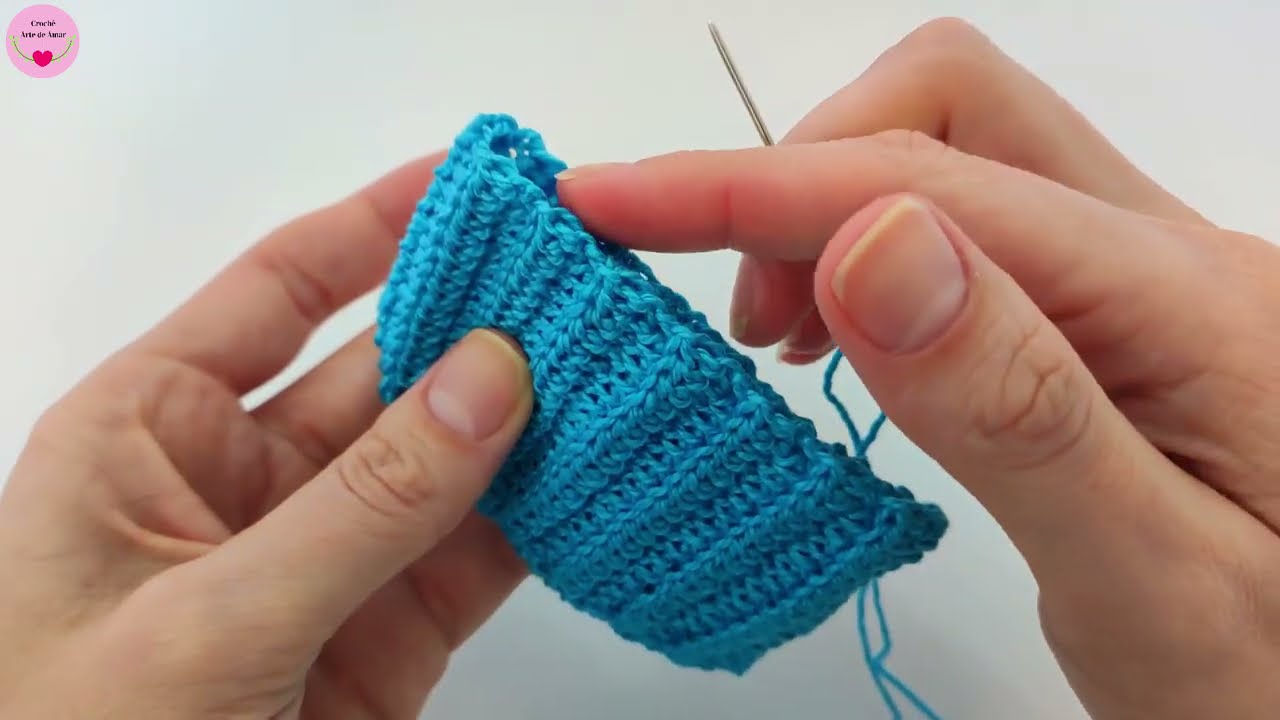
Finishing
Fasten off and weave in all loose ends securely using your tapestry needle.
Repeat all steps to make the second bootie.
Embellishments (Optional):
- Sew on buttons for decoration (ensure they are securely attached).
- Thread ribbon through the stitches around the ankle for ties.
- Add a small crochet flower or applique.
Your easy baby crochet boots are complete!