 by
by Hello, fellow makers!
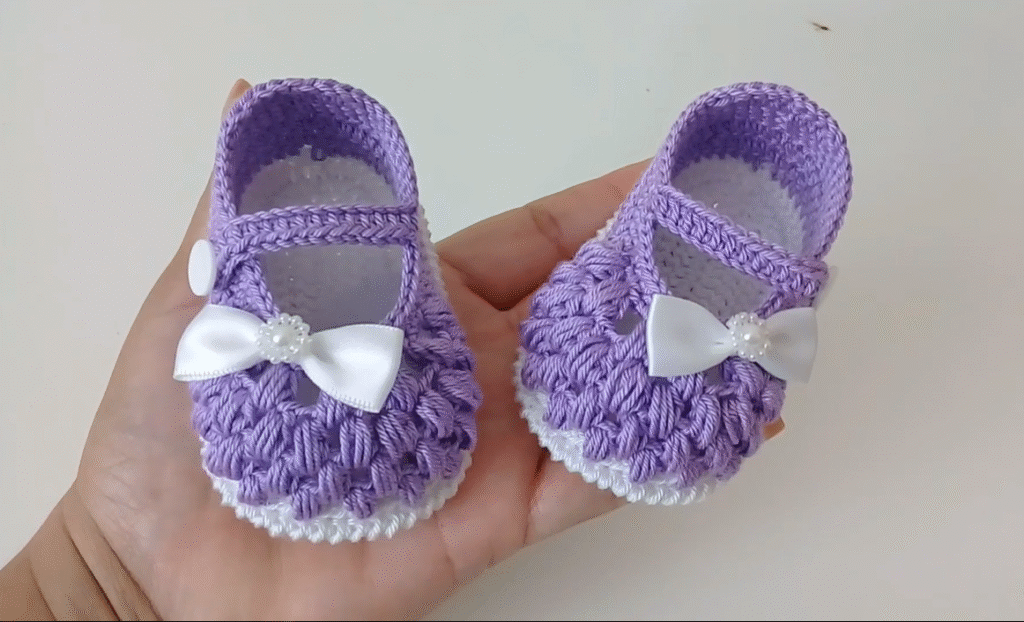
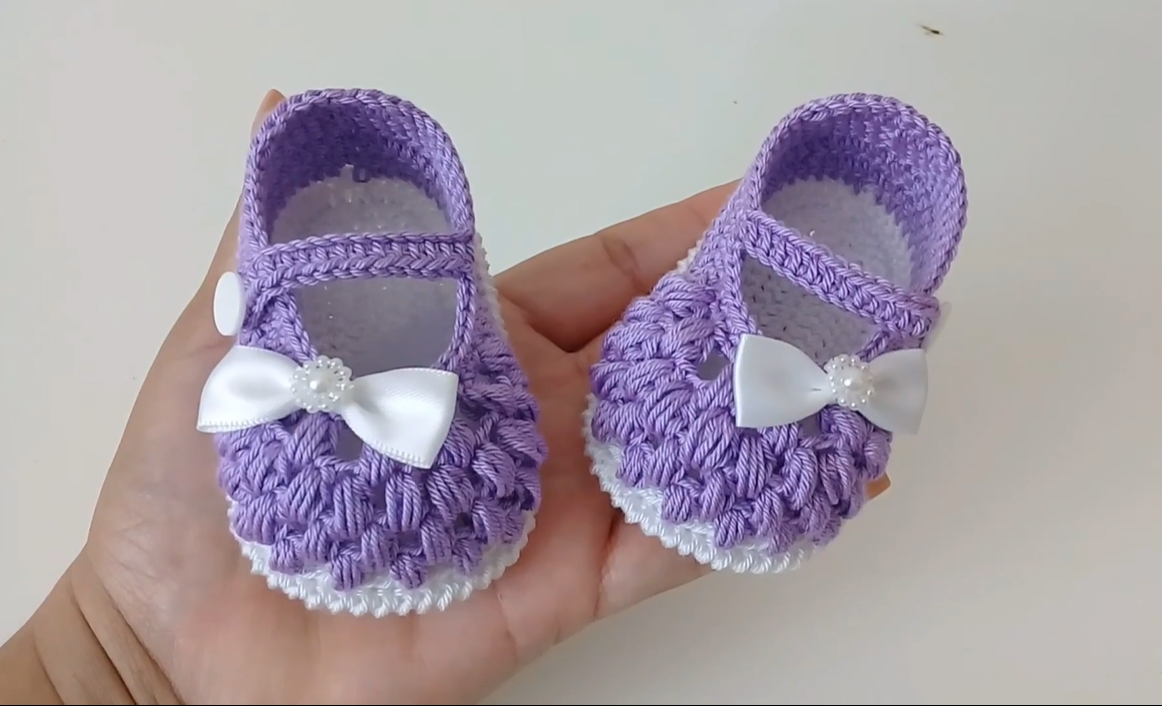
Oh, the joy of tiny feet! There’s nothing quite as sweet as a pair of handmade baby booties, and these charming lavender Mary Janes are no exception. With their delightful puff stitch texture, contrasting white sole, and dainty bows, they are simply irresistible!
Perfect for baby showers, first photo shoots, or just keeping little toes cozy, these booties are a labor of love that will be cherished. Let’s get crocheting!
Before we begin, here are a few important notes:
- Skill Level: Intermediate. While the stitches are straightforward, working with puff stitches and shaping the shoe requires a bit of attention.
- Yarn Choice: For baby items, softness is paramount! Choose a soft, lightweight baby yarn such as baby-weight acrylic (DK or Sport weight), cotton, or a cotton blend. You’ll need two contrasting colors (lavender/purple and white, as pictured).
- Hook Size: This will depend on your chosen yarn. Aim for a hook size that creates a dense fabric for the sole and allows your puff stitches to pop nicely without being too loose. (e.g., 3.0mm – 4.0mm).
- Gauge is Crucial! For baby shoes, gauge determines the size. Make a swatch of the sole section to ensure your booties will fit!
Let’s Gather Our Supplies!
Materials You’ll Need:
- Approx. 30-50 grams of baby yarn in your main color (lavender/purple)
- Approx. 10-20 grams of baby yarn in your contrasting color (white)
- Crochet hook (e.g., 3.5mm or 3.75mm, adjust for gauge)
- Stitch markers (essential for shaping!)
- Yarn needle
- Scissors
- 2 small white buttons (approx. 1/2 inch or 1.25 cm)
- 2 small white satin bows with pearl centers (or beads/pearls to add to simple bows)
- Sewing needle and thread (to attach bows/pearls)
Crochet Language Decoder (Abbreviations):
- ch: chain
- st(s): stitch(es)
- sl st: slip stitch
- sc: single crochet
- hdc: half double crochet
- dc: double crochet
- sk: skip
- sp: space
- [ ]: repeat instructions within brackets
- ( ): number of stitches at the end of the round/row
Gauge:
- Work the first few rounds of the sole with your white yarn.
- Example Gauge: 16 sc and 16 rows = 4 inches (10 cm). Adjust hook size to match gauge.
Key Stitch Patterns:
A. Puff Stitch (PS): This creates the beautiful raised texture on the main body of the shoe.
- PS: [Yarn over, insert hook into st, pull up a loop] 3 times in the same stitch. (You will have 7 loops on your hook). Yarn over, pull through all 7 loops on hook. Ch 1 to close.
B. Single Crochet (sc): Standard single crochet.

Pattern Instructions (Bottom-Up Construction):
This pattern starts with the sole and works upwards. Size: 0-3 Months (Approx. 3.5 – 3.75 inches / 9-9.5 cm sole length) (Adjust starting chain and increase rounds for larger/smaller sizes)
Part 1: The Sole (White Yarn)
- Ch 13.
- Rnd 1: Sc in 2nd ch from hook. Sc in next 10 ch. 3 sc in last ch. Working along the other side of the starting chain: Sc in next 10 ch. 2 sc in last ch. Join with sl st to first sc. (26 sts)
- Rnd 2: Ch 1 (does not count as st). 2 sc in first st. Sc in next 10 sts. 2 sc in next 3 sts. Sc in next 10 sts. 2 sc in next 2 sts. Join with sl st to first sc. (32 sts)
- Rnd 3: Ch 1. Sc in first st. 2 sc in next st. Sc in next 11 sts. 2 sc in next st. Sc in next st. 2 sc in next st. Sc in next 11 sts. 2 sc in next st. Sc in next st. Join with sl st to first sc. (38 sts)
- Rnd 4: Ch 1. Sc in first 2 sts. 2 sc in next st. Sc in next 12 sts. [2 sc in next st, sc in next 2 sts] twice. 2 sc in next st. Sc in next 12 sts. 2 sc in next st. Sc in last st. Join with sl st to first sc. (44 sts)
- Check your sole length here. It should be approximately 3.5 inches for 0-3 months.
- Fasten off white yarn.

Part 2: The Sides / Upper (Lavender Yarn)
- Rnd 1 (Joining & First Side Row): Attach lavender yarn with a sl st in the back center of the sole. Ch 1. Sc in the back loop only (BLO) of each st around. Join with sl st to first sc. (44 sts)
- This creates a neat ridge separating the sole from the upper.
- Rnd 2: Ch 1. Sc in each st around. Join with sl st. (44 sts)
- Rnd 3 (First Puff Stitch Row): Ch 1. Sc in first st. [Puff Stitch in next st, sc in next st]. Repeat [ ] around. Join with sl st to first sc. (22 Puff Stitches, 22 sc)
- Rnd 4: Ch 1. Sc in each sc and in the top of each puff stitch (the ch-1 that closes the puff). Join with sl st. (44 sts)
- Rnd 5 (Puff Stitch Row): Ch 1. Sc in first st. [Puff Stitch in next st, sc in next st]. Repeat [ ] around. Join with sl st. (22 Puff Stitches, 22 sc)
- Rnd 6: Ch 1. Sc in each sc and in the top of each puff stitch. Join with sl st. (44 sts)

Part 3: Shaping the Toe
Now we’ll shape the front of the shoe.
- Rnd 7: Ch 1. Sc in first 10 sts. [Sk next st, sc in next st] 12 times. Sc in next 10 sts. Join with sl st. (32 sts)
- You’ve now created the opening for the top of the foot.
- Rnd 8 (Toe Edging): Ch 1. Sc in first 10 sts. Sl st in next 12 sts. Sc in next 10 sts. Join with sl st. (20 sc, 12 sl st)
- This gives a neat edge to the foot opening.
- Fasten off. Weave in ends.
Part 4: The Strap (Lavender Yarn)
- Ch 18.
- Row 1: Sc in 2nd ch from hook. Sc in next 14 ch. Ch 3 (this forms the buttonhole). Sk next 2 ch. Sl st in last ch. (15 sc + ch-3 buttonhole)
- Adjust ch length for buttonhole if your button is larger/smaller.
- Fasten off, leaving a long tail for sewing.
Part 5: Finishing & Assembly
- Attach the Strap:
- Place the shoe on a flat surface. Position the strap across the top of the foot opening, with the buttonhole end on the outside of the shoe.
- Using your yarn needle, securely sew the non-buttonhole end of the strap to the inside of the heel, near the top edge of the shoe. Weave in ends.
- Attach the Button:
- With the strap fastened, align the buttonhole. Mark where the button should be sewn on the opposite side of the shoe (the inside top edge).
- Using a sewing needle and matching thread, securely sew the small button in place.
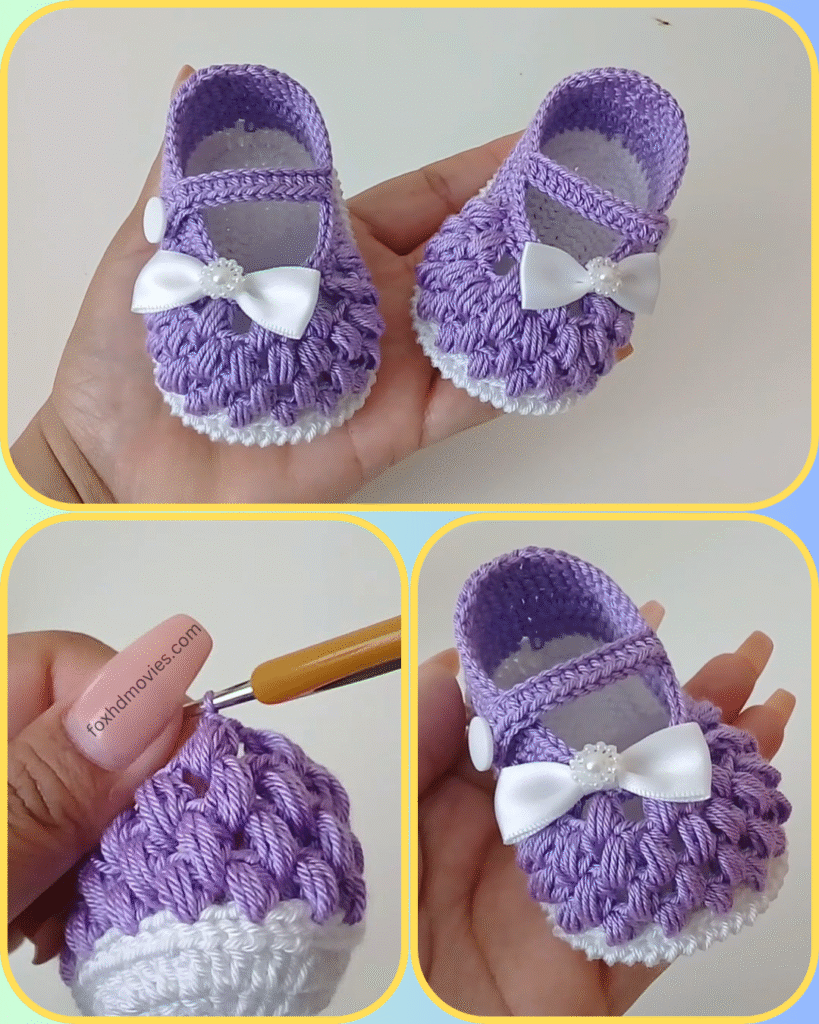
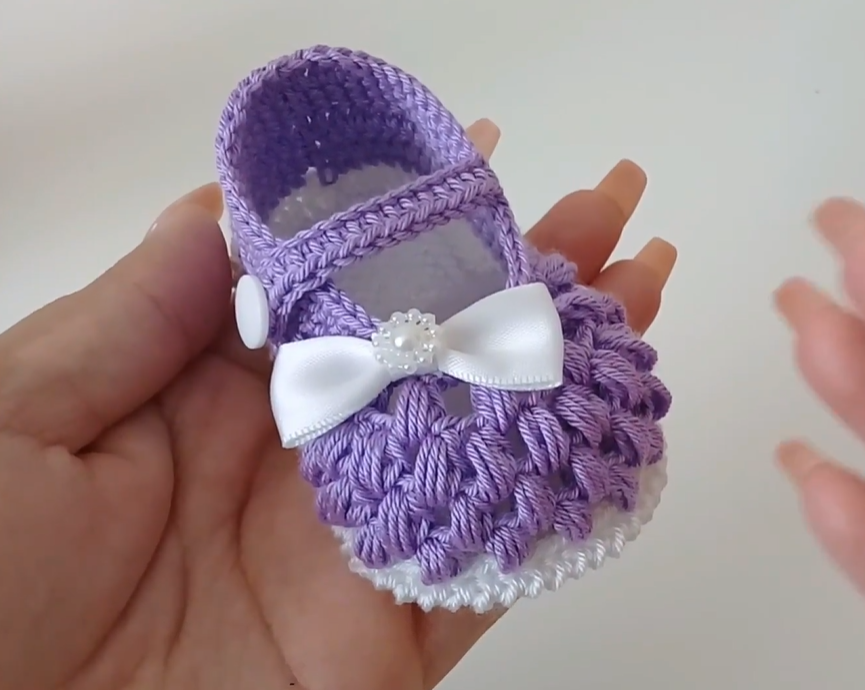
- Attach the Bow:
- Carefully hand-sew the small satin bow onto the strap, just above where the button is. If your bow doesn’t have a pearl, sew a small pearl bead to the center of the bow.
- Repeat all steps for the second shoe!
- Weave in any remaining loose ends for both booties.
Video tutorial
Your Adorable Baby Booties Are Done!
Take a moment to admire your beautiful creation! These sweet Mary Jane booties are not just cozy and comfortable for little feet, but also absolutely charming.
You can customize these by using different color combinations, adding a different type of button, or even embroidering small details.
Don’t forget to share your finished booties! I’d love to see your unique color choices and how you’ve personalized your little creations. Tag me on social media or send me a picture!
Happy crocheting!