by
by 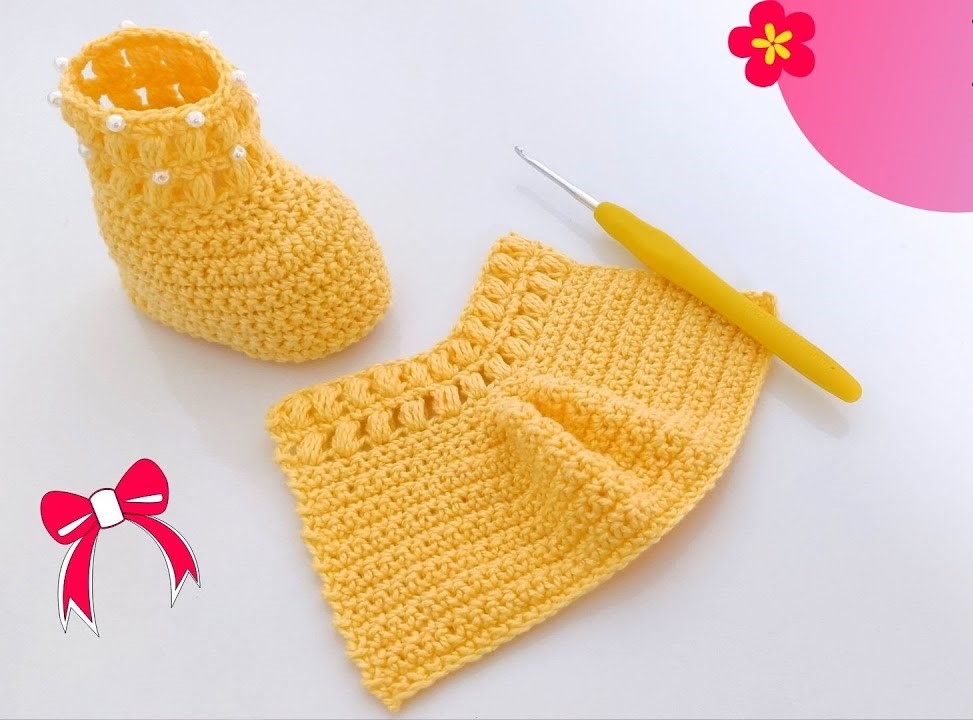
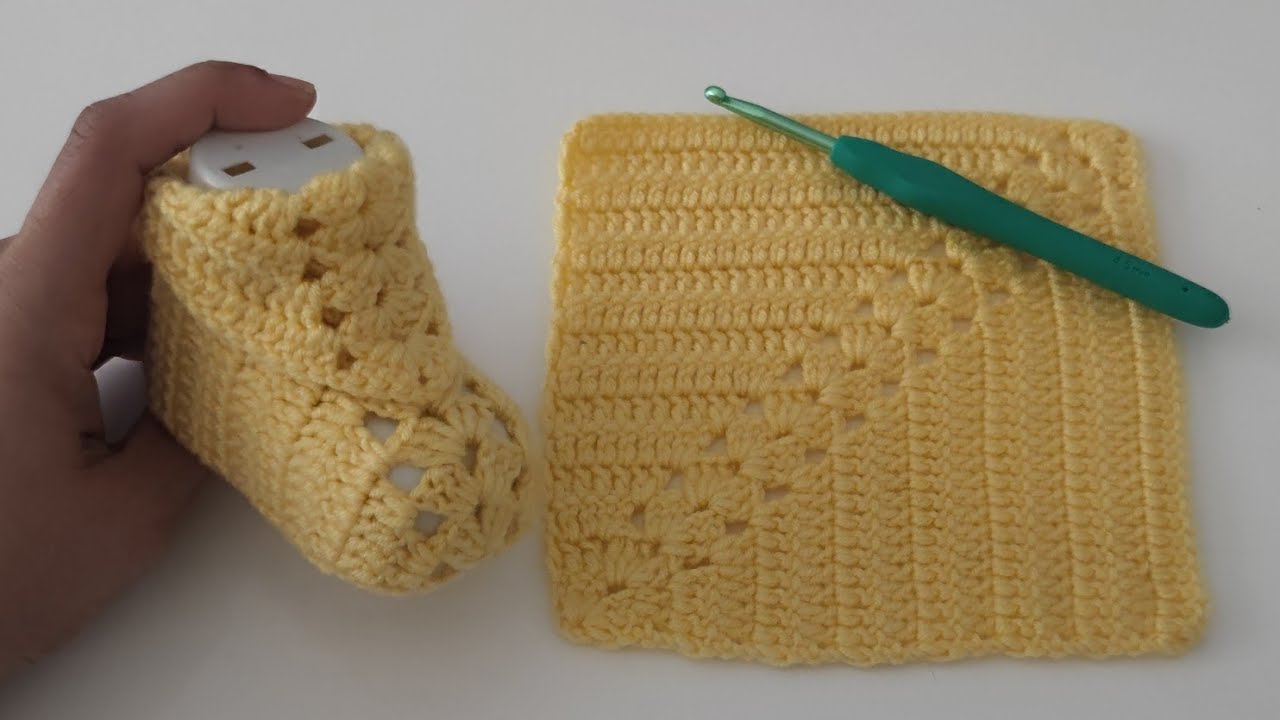
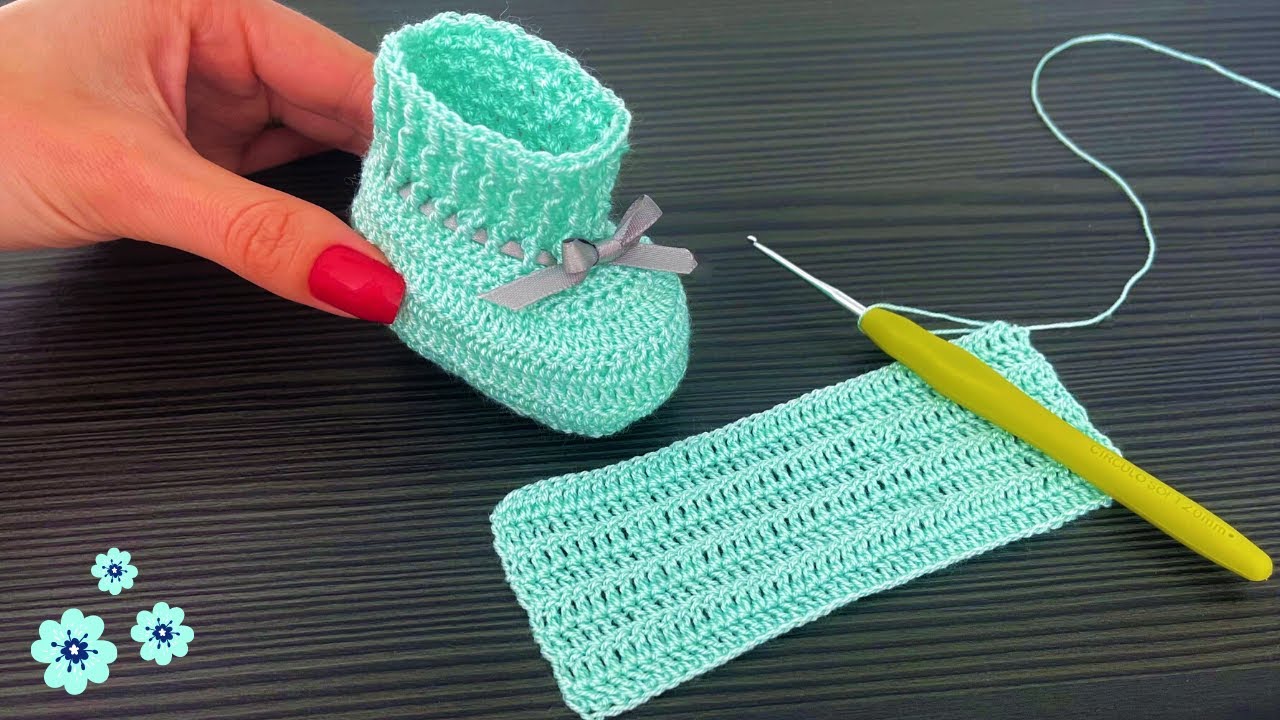
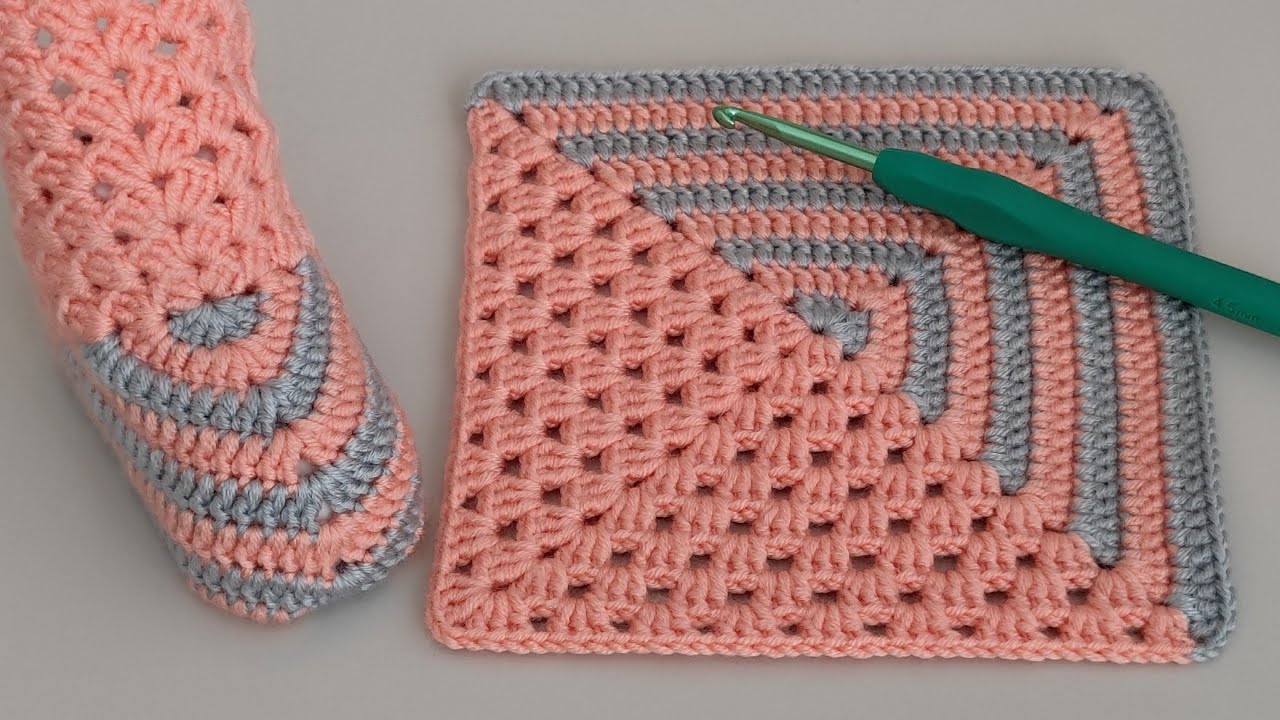
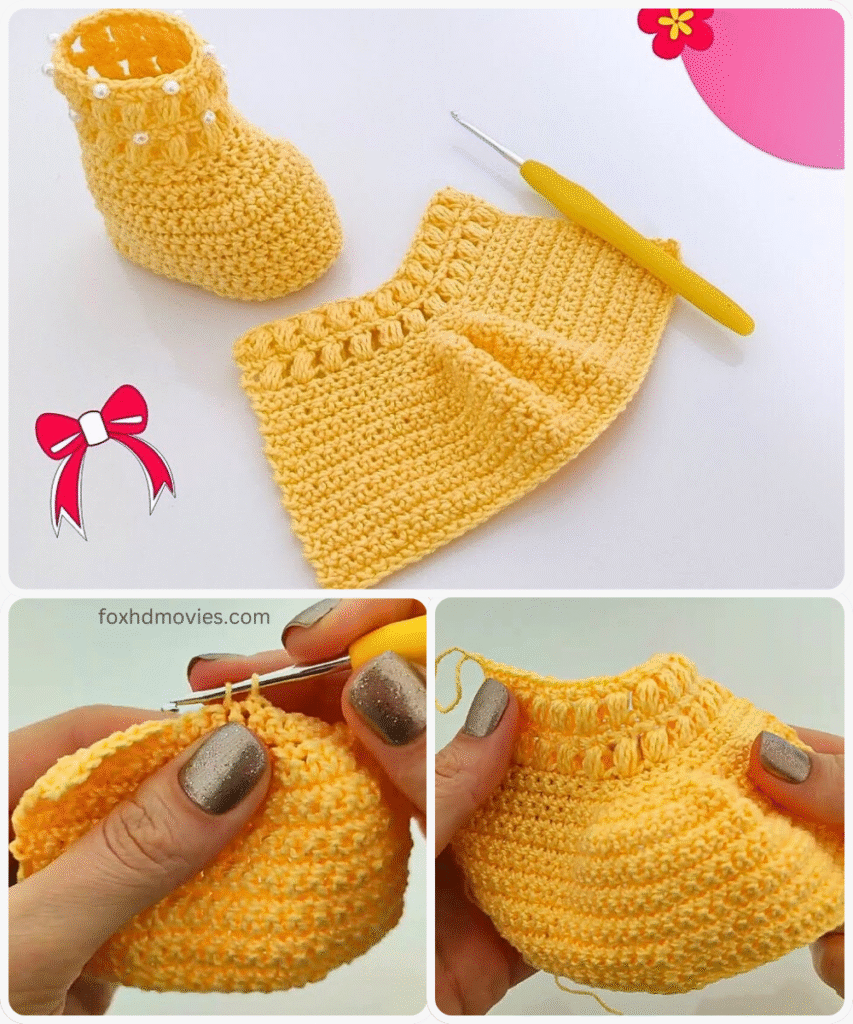
Creating adorable and cozy crochet baby boots can be a rewarding project, even for beginners. This pattern is designed to be simple and easy to follow, guiding you through each step to create a sweet pair of booties perfect for little feet.
Skill Level: Easy
Materials You Will Need:
- Worsted weight yarn in your desired color(s) (cotton or acrylic blends are soft for babies)
- A crochet hook appropriate for your yarn (the yarn label will usually recommend a size, but a common size for worsted weight is H/8 (5.0 mm) or I/9 (5.5 mm))
- Yarn needle for weaving in ends
- Scissors
- Optional: Stitch marker, buttons, ribbon, or other embellishments
Gauge: While gauge isn’t critical for baby booties as long as you are consistent, achieving a certain size will depend on your yarn, hook, and tension. A typical gauge for baby items using worsted weight yarn might be around 4 single crochet stitches per inch. If your booties are coming out too large or too small, you can adjust your hook size.

Abbreviations:
- ch: chain
- st(s): stitch(es)
- sl st: slip stitch
- sc: single crochet
- hdc: half double crochet
- dc: double crochet
- inc: increase (work 2 stitches in the same stitch)
- sc2tog: single crochet two together (single crochet decrease)
- hdc2tog: half double crochet two together (half double crochet decrease)
- BLO: back loop only
Let’s Get Started! (Making the Sole)
This pattern starts by creating the sole of the bootie, working in rounds.
Round 1: Ch 9 (this is the foundation chain for the sole).
- Make 2 hdc in the 2nd ch from the hook.
- Hdc in the next 6 chs.
- Make 5 hdc in the last ch (this creates the curve for the heel).
- Now you will work along the other side of the foundation chain. Hdc in the next 6 chs.
- Make 3 hdc in the last ch (this completes the curve for the toe).
- Join with a sl st to the first hdc. (19 hdc)
Round 2: Ch 2 (does not count as a stitch).
- Make 2 hdc in the same st as the join.
- Inc in the next st (2 hdc in one st).
- Hdc in the next 6 sts.
- Inc in the next 5 sts.
- Hdc in the next 6 sts.
- Inc in the next 2 sts.
- Join with a sl st to the first hdc of the round. (29 hdc)
Round 3: Ch 2 (does not count as a stitch).
- Hdc in the same st as the join.
- Inc in the next st, hdc in the next st. Repeat from * to * 2 more times.
- Hdc in the next 6 sts.
- Inc in the next st, hdc in the next st. Repeat from * to * 4 more times.
- Hdc in the next 6 sts.
- Inc in the next st, hdc in the next st. Repeat from * to * one more time.
- Join with a sl st to the first hdc of the round. (39 hdc)
Building the Body of the Bootie
Now we will start working on the sides of the bootie.
Round 4: Ch 1 (does not count as a stitch).
- Work 1 sc in the BLO of each st around. This creates a defined edge for the sole.
- Join with a sl st to the first sc of the round. (39 sc)
Round 5: Ch 1 (does not count as a stitch).
- Sc in each st around.
- Join with a sl st to the first sc of the round. (39 sc)
Round 6: Ch 2 (does not count as a stitch).
- Hdc in the first 11 sts.
- Hdc2tog 8 times (this starts shaping the toe).
- Hdc in the last 12 sts.
- Join with a sl st to the first hdc of the round. (31 hdc)
Round 7: Ch 2 (does not count as a stitch).
- Hdc in the first 10 sts.
- Hdc2tog 5 times.
- Hdc in the last 11 sts.
- Join with a sl st to the first hdc of the round. (26 hdc)
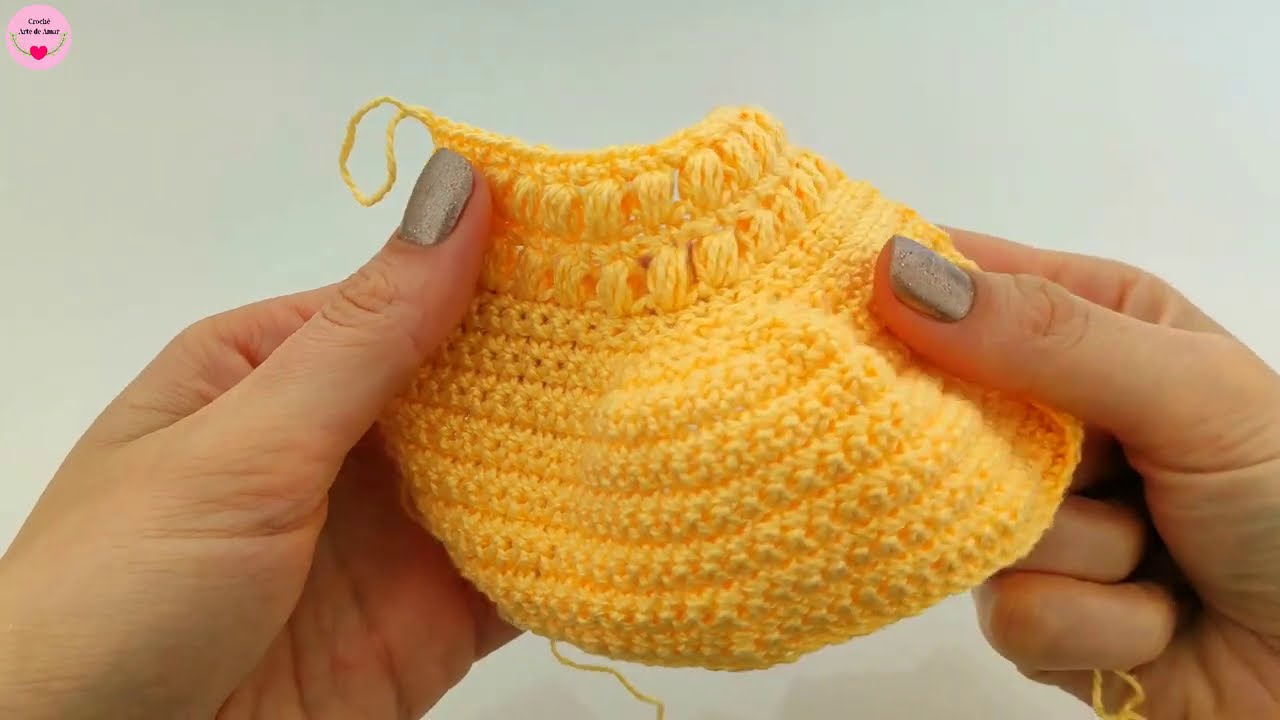
Creating the Ankle and Cuff
Now we will work on the upper part of the bootie. You can change color here if you like.
Round 8: Ch 2 (does not count as a stitch).
- Hdc in each st around.
- Join with a sl st to the first hdc of the round. (26 hdc)
Rounds 9-11: Repeat Round 8. (Or continue for more rounds if you want a taller bootie).
Finishing the Bootie
Round 12 (Optional Cuff): Ch 1 (does not count as a stitch).
- Sc in each stitch around.
- Join with a sl st to the first sc.
- Fasten off and weave in your ends securely.
Making the Second Bootie:
Repeat all the steps above to create the second bootie.
Video tutorial
Adding Embellishments:
- Buttons: You can sew a button onto the side of the bootie and create a small loop with yarn or a chain stitch on the opposite side for a closure.
- Ribbon or Ties: Thread ribbon or a crocheted chain through some stitches around the ankle to create ties.
- Appliques: Sew on small crochet appliques like hearts or stars.
- Fold-over Cuff: You can simply fold down the top rounds to create a sweet cuff.
Tips for Beginners:
- Use a stitch marker to mark the beginning of each round, especially in the initial rounds, to help you keep track of your stitches.
- Count your stitches at the end of each round to ensure you are on track.
- Don’t worry if your first bootie isn’t perfect. Crochet takes practice! The second one will likely be even better.
- Watch video tutorials if you are unsure about a specific stitch or technique. Many free resources are available online.