 by
by 
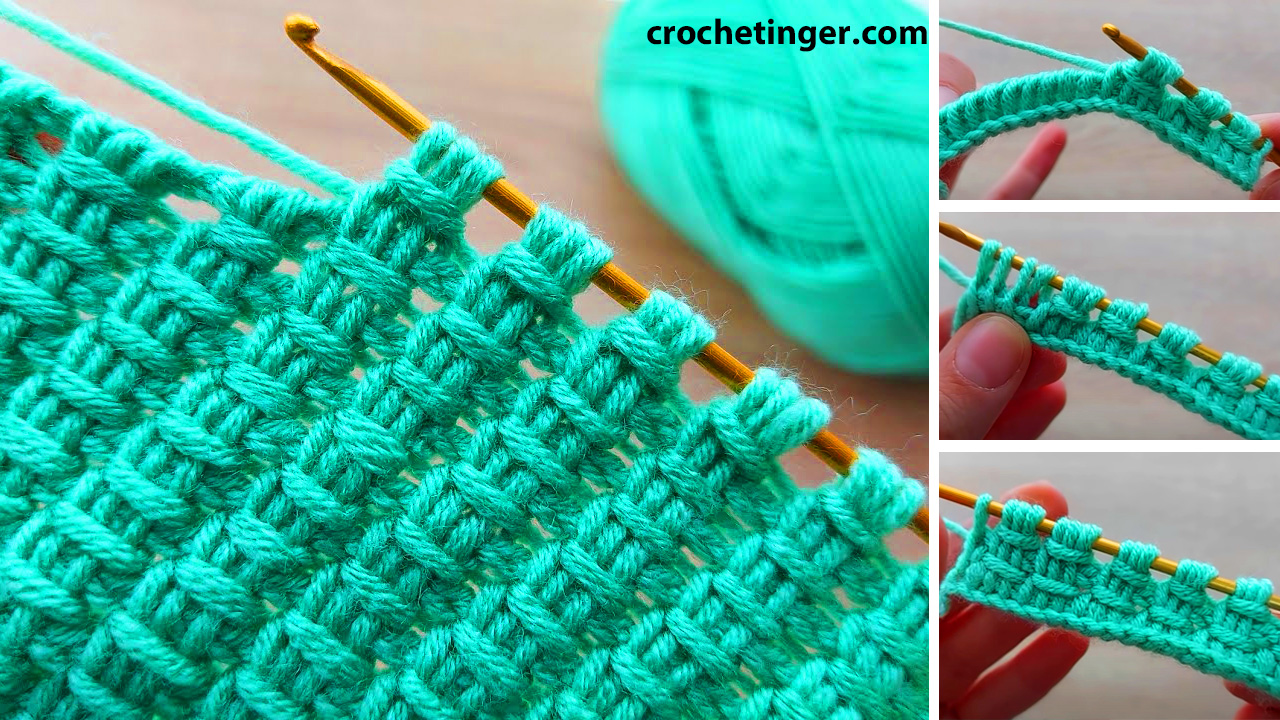
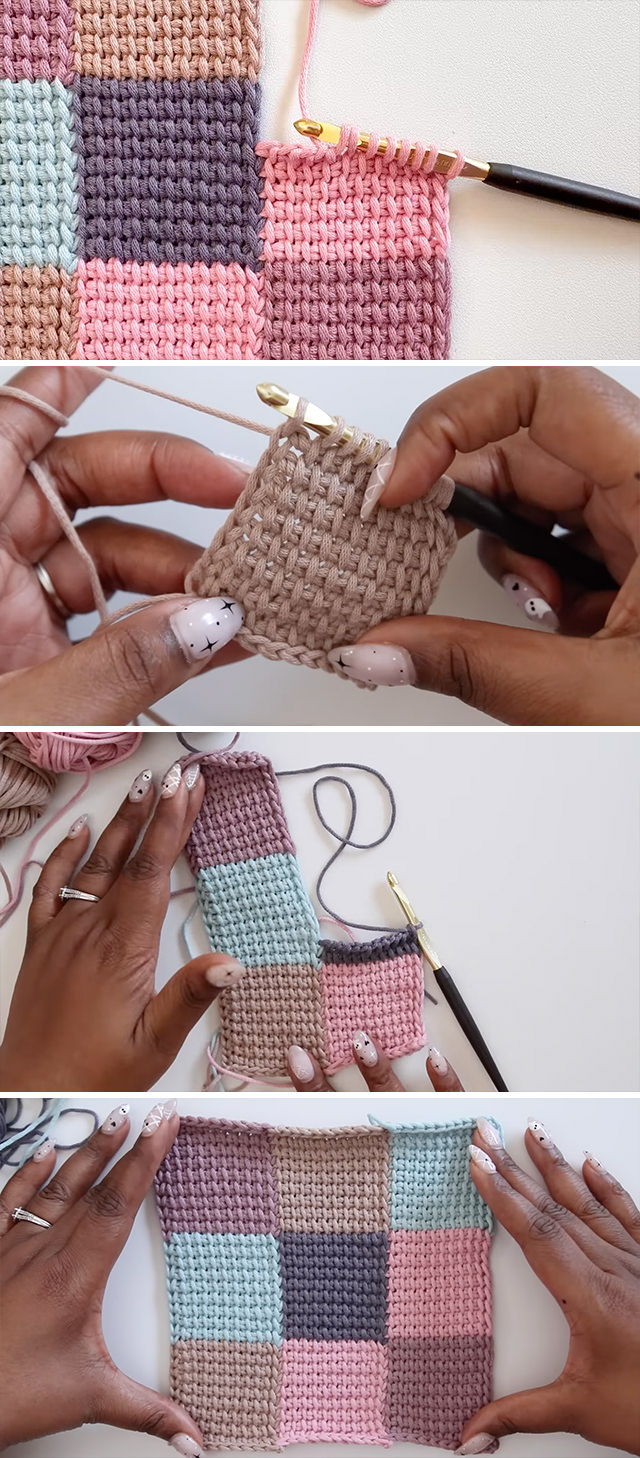
let’s get you started on the Tunisian Simple Stitch (TSS)! It’s a fantastic stitch that creates a dense, woven-like fabric. Here’s a detailed pattern to guide you:
Understanding the Basics
- Tunisian Crochet Hook: You’ll need a longer crochet hook with a stopper at the end because you’ll be holding multiple loops on your hook at once.
- Forward Pass (FwP): This is where you pick up loops onto your hook.
- Return Pass (RetP): This is where you work the loops off your hook.
- Working in Rows: Tunisian crochet is typically worked in rows, not rounds.
Getting Started
- Make a Slip Knot: Create a slip knot and place it on your Tunisian crochet hook.
- Chain (ch): Chain the number of stitches you want for the width of your project. For this tutorial, let’s say you chain 15.
Row 1: Foundation Row
- Forward Pass (FwP):
- Insert your hook into the second chain from your hook.
- Yarn over (yo) and pull up a loop. Do not yarn over and pull through. You should now have 2 loops on your hook.
- Insert your hook into the next chain.
- Yarn over and pull up a loop. You should now have 3 loops on your hook.
- Continue this process, inserting your hook into each remaining chain, yarn over, and pulling up a loop. You will end up with the same number of loops on your hook as the number of chains you started with (15 in our example).
- Return Pass (RetP):
- Yarn over and pull through one loop on your hook. This is your chain 1 (ch 1) that starts the return pass.
- Yarn over and pull through the next two loops on your hook.
- Continue yarn over and pull through two loops until only one loop remains on your hook. This single loop is the first loop of the next row.
Row 2 and Beyond: Tunisian Simple Stitch (TSS)
- Forward Pass (FwP):
- Skip the first vertical bar. The first vertical bar is the loop already on your hook.
- Insert your hook from front to back behind the next vertical bar. These vertical bars are the loops created in the previous forward pass.
- Yarn over and pull up a loop.
- Continue inserting your hook behind each subsequent vertical bar, yarn over, and pull up a loop until you reach the last vertical bar.
- For the last stitch of the row, insert your hook under both loops of the edge stitch (this helps create a neater edge). Yarn over and pull up a loop. You should again have the same number of loops on your hook as your starting chain (15 in our example).
- Return Pass (RetP):
- Yarn over and pull through one loop on your hook (ch 1).
- Yarn over and pull through the next two loops on your hook.
- Continue yarn over and pull through two loops until only one loop remains on your hook.
Repeating the Pattern
Repeat Row 2 for as many rows as your project requires.
Binding Off
When you’re finished with your project, you need to bind off to secure the stitches.
- Bind-Off Pass:
- Insert your hook behind the next vertical bar (or both loops of the edge stitch).
- Yarn over and pull up a loop.
- Slip stitch (sl st): Yarn over and pull through both loops on your hook.
- Continue this process across the row, working a slip stitch for each vertical bar (and the edge stitch).
- Once you reach the end, fasten off your yarn and weave in the ends.
Video tutorial
Key Things to Remember
- Keep Your Tension Consistent: Consistent tension is crucial for a smooth and even fabric in Tunisian crochet.
- Counting Stitches: Always count your loops at the end of the forward pass to ensure you have the correct number of stitches.
- Edge Stitches: Working under both loops of the edge stitch in the forward pass helps prevent the edges from curling excessively, which can be a common issue with Tunisian crochet.
- Practice Makes Perfect: Don’t get discouraged if your first attempt isn’t perfect. Keep practicing, and you’ll get the hang of it!