by
by 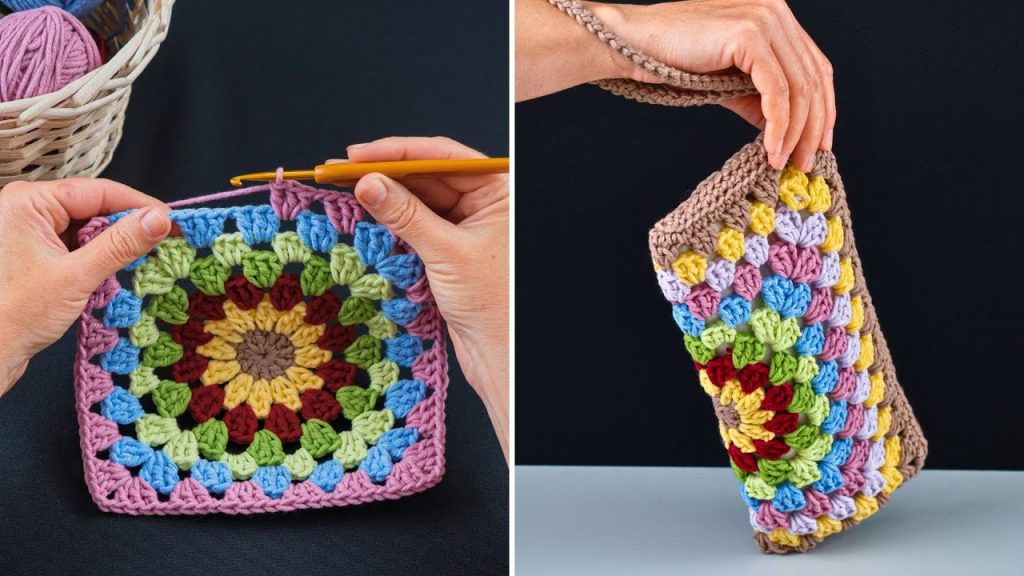
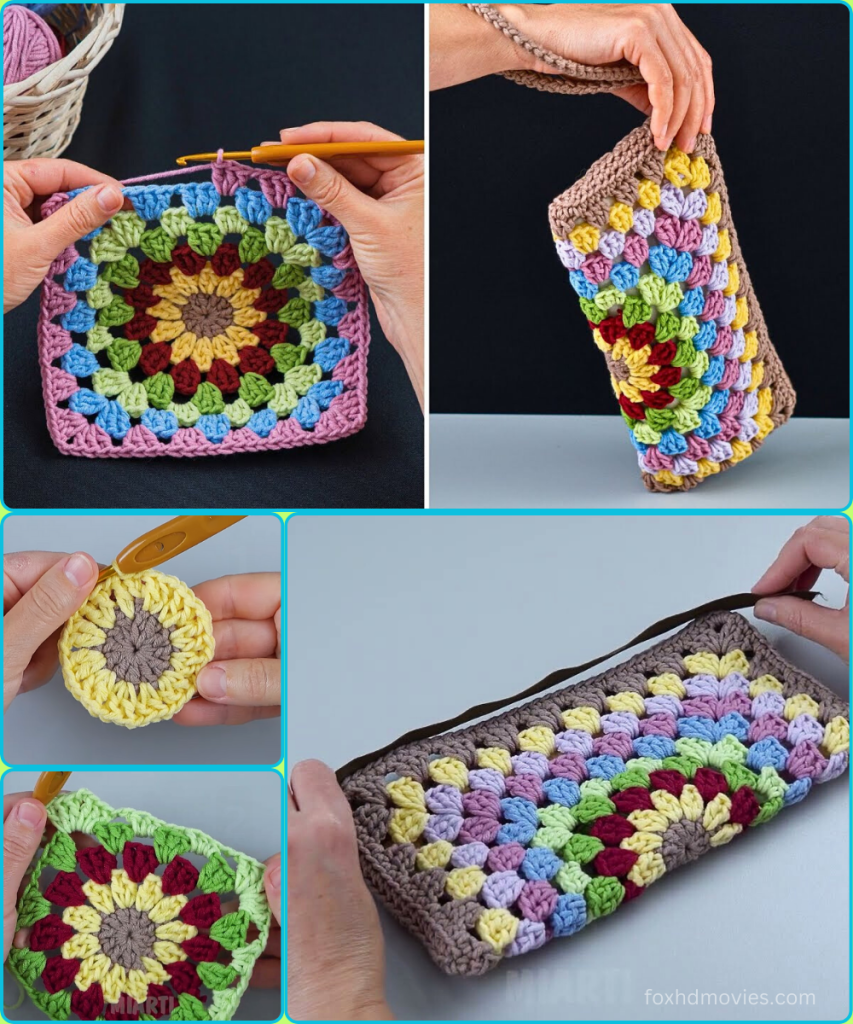
Ready to turn your yarn stash into a stunning and practical accessory? This small, colorful bag is made from just one large granny square, making it a quick and gratifying project. The design uses concentric rings of color to create a captivating visual effect, and the simple construction transforms the flat square into a sturdy and stylish pouch. It’s the perfect size for a wristlet, a small handbag, or a pouch to hold your essentials.
The pattern builds on a classic granny square motif but with a unique twist, using a different color for each round to create a dynamic, multi-hued look.
What You’ll Need:
- Yarn: Worsted weight (Aran/10 ply) yarn. Cotton is a great choice for its durability and firm fabric, but acrylic would also work well. This project is ideal for using up leftover yarn.
- You will need approximately 15-25 yards of each of the 8-9 colors. The example uses:
- Color A (Center): Yellow
- Color B: Maroon
- Color C: Green
- Color D: Blue
- Color E: Pink
- Color F: Yellow
- Color G: Light Blue
- Color H: Brown
- Color I (Final Border & Strap): Pink/Lilac
- You will need approximately 15-25 yards of each of the 8-9 colors. The example uses:
- Crochet Hook: Size H/5.0mm (or hook size to achieve a firm fabric that holds its shape).
- Yarn Needle: For weaving in ends and seaming.
- Scissors
Abbreviations Used:
- ch: chain
- sl st: slip stitch
- sc: single crochet
- dc: double crochet
- st(s): stitch(es)
- sp: space
- rnd: round
- FO: fasten off
- [ ]: repeat instructions in brackets
- ( ): stitch count at the end of the round
Gauge:
Your finished granny square should measure approximately 25 cm x 25 cm (10 inches x 10 inches). Achieving this size is important for the final dimensions of your bag. If your square is coming out significantly smaller or larger, adjust your hook size.
Part 1: The Large Granny Square
We will create one large, multi-color granny square by adding a new color each round.
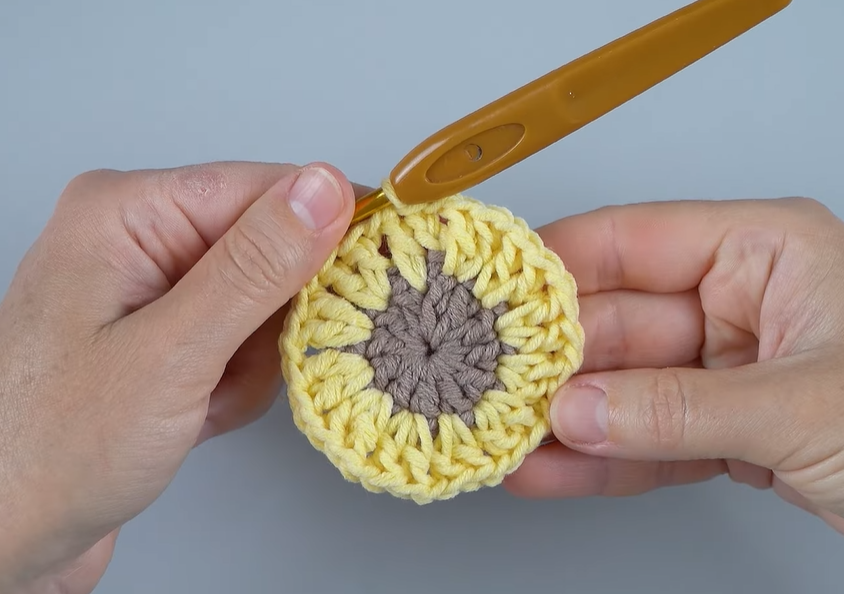
Using Color A (Yellow)
Rnd 1 (Center):
- Make a magic ring (or ch 4 and sl st to first ch to form a ring).
- Ch 3 (counts as 1st dc), work 11 dc into the ring.
- Join with a sl st to the top of the initial ch 3. (12 dc)
- Pull the magic ring tight to close the center. FO Color A.
Using Color B (Maroon)
Rnd 2:
- Join Color B in any stitch. Ch 3 (counts as 1st dc).
- Work 1 dc in the same stitch. Work 2 dc in each stitch around.
- Join with a sl st to the top of the initial ch 3. (24 dc)
- FO Color B.
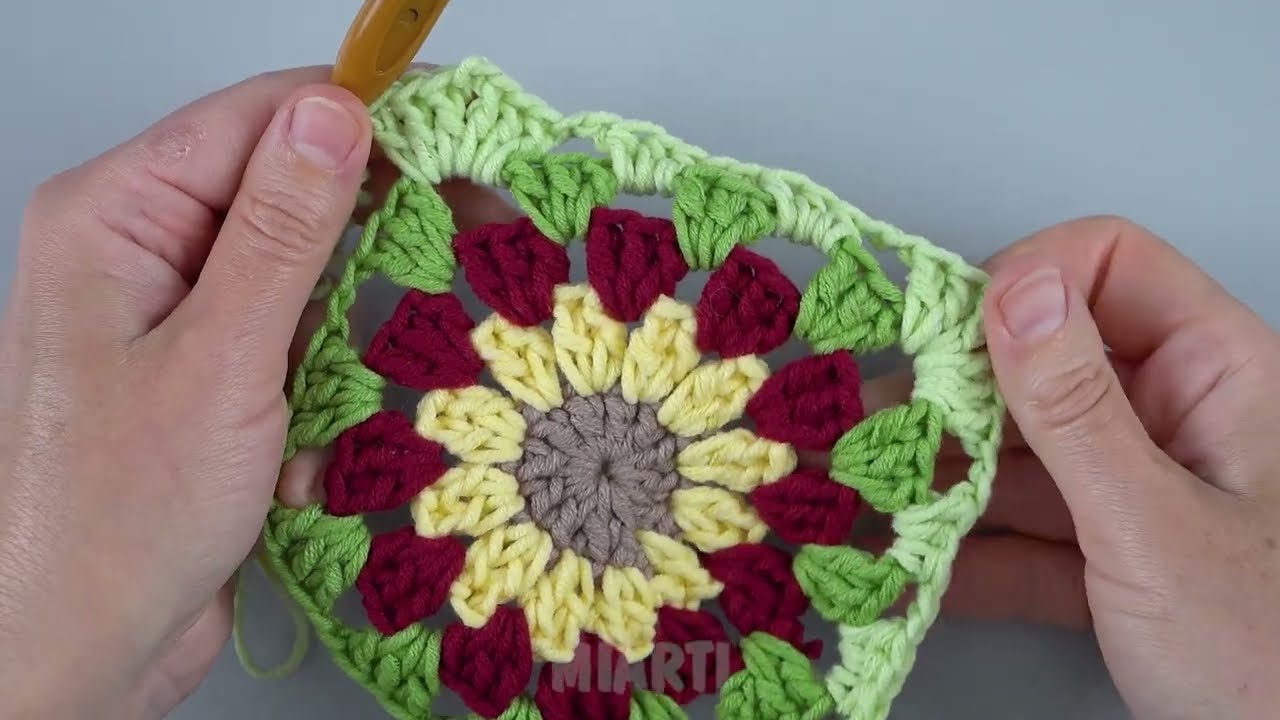
Using Color C (Green)
Rnd 3 (Beginning the Granny):
- Join Color C in any stitch. Ch 3 (counts as 1st dc), 2 dc in the same stitch.
- [Ch 1, skip 2 stitches, 3 dc in the next stitch] around.
- After the last cluster, ch 1. Join with a sl st to the top of the initial ch 3. (8 clusters of 3 dc, 8 ch-1 spaces)
- FO Color C.
Using Color D (Blue)
Rnd 4:
- Join Color D in any ch-1 space. Ch 3 (counts as 1st dc), 2 dc in the same space, ch 2, 3 dc in the same space (this is your first corner).
- Ch 1, 3 dc in the next ch-1 space (this is your first side).
- [Ch 1, (3 dc, ch 2, 3 dc) in the next ch-1 space (corner made), ch 1, 3 dc in the next ch-1 space (side made)] – Repeat around for the remaining sides and corners.
- After the last side, ch 1. Join with a sl st to the top of the initial ch 3.
- FO Color D.
Using Color E (Pink)
Rnd 5:
- Join Color E in any ch-2 corner space. Ch 3 (counts as 1st dc), 2 dc in the same space, ch 2, 3 dc in the same space (first corner).
- [Ch 1, 3 dc in the next ch-1 sp] 2 times.
- [Ch 1, (3 dc, ch 2, 3 dc) in the next ch-2 corner sp, [ch 1, 3 dc in the next ch-1 sp] 2 times] – Repeat around for the remaining sides and corners.
- After the last side, ch 1. Join with a sl st to the top of the initial ch 3.
- FO Color E.
Using Color F (Yellow)
Rnd 6:
- Join Color F in any ch-2 corner space. Ch 3 (counts as 1st dc), 2 dc in the same space, ch 2, 3 dc in the same space.
- [Ch 1, 3 dc in the next ch-1 sp] 3 times.
- [Ch 1, (3 dc, ch 2, 3 dc) in the next ch-2 corner sp, [ch 1, 3 dc in the next ch-1 sp] 3 times] – Repeat around.
- Join with a sl st to the top of the initial ch 3.
- FO Color F.
Using Color G (Light Blue)
Rnd 7:
- Join Color G in any ch-2 corner space. Ch 3 (counts as 1st dc), 2 dc in the same space, ch 2, 3 dc in the same space.
- [Ch 1, 3 dc in the next ch-1 sp] 4 times.
- [Ch 1, (3 dc, ch 2, 3 dc) in the next ch-2 corner sp, [ch 1, 3 dc in the next ch-1 sp] 4 times] – Repeat around.
- Join with a sl st to the top of the initial ch 3.
- FO Color G.
Using Color H (Brown)
Rnd 8:
- Join Color H in any ch-2 corner space. Ch 3 (counts as 1st dc), 2 dc in the same space, ch 2, 3 dc in the same space.
- [Ch 1, 3 dc in the next ch-1 sp] 5 times.
- [Ch 1, (3 dc, ch 2, 3 dc) in the next ch-2 corner sp, [ch 1, 3 dc in the next ch-1 sp] 5 times] – Repeat around.
- Join with a sl st to the top of the initial ch 3.
- FO Color H.
Using Color I (Pink/Lilac)
Rnd 9 (Final Border):
- Join Color I in any ch-2 corner space. Ch 3 (counts as 1st dc).
- Work 1 dc in the same space, ch 2, 2 dc in the same space (first corner).
- Work 1 dc in each stitch and ch-1 space around the side until you reach the next corner.
- [Work (2 dc, ch 2, 2 dc) in the next ch-2 corner sp, work 1 dc in each stitch and ch-1 sp around the side] – Repeat around.
- Join with a sl st to the top of the initial ch 3. Do not fasten off.
- Weave in all ends securely before assembling your bag.
Part 2: Assembly
- Lay your square flat with the right side facing down.
- Fold the square in half.
- Using the yarn still attached to your hook, ch 1.
- Work sc stitches through both layers to join the two sides together.
- Work 1 sc in each stitch, from the folded bottom corner up to the top edge on one side.
- Secure with a sl st, then cut the yarn and weave in the end.
- Attach yarn to the other bottom corner and repeat steps 4-6 to seam the second side.
- Turn the bag right side out.
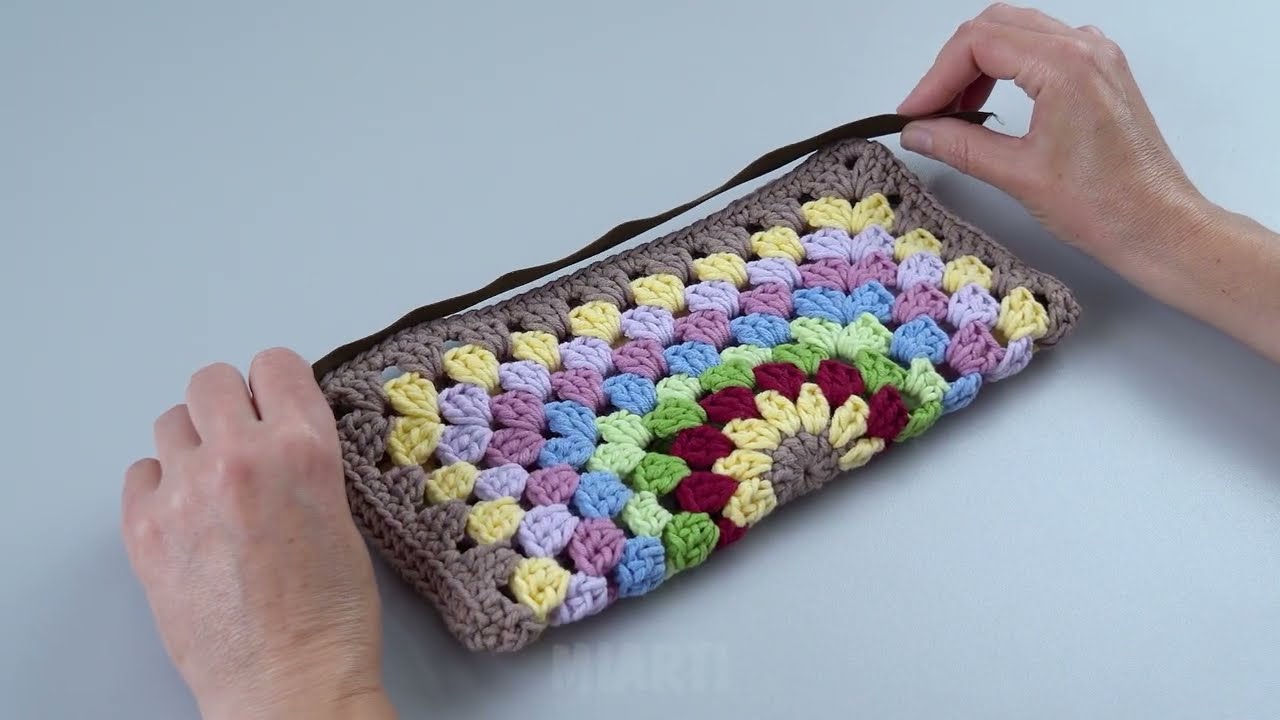
Part 3: The Crocheted Strap
The strap in the image is simple and attached to a single corner, making it a perfect wristlet or handle.
- With the yarn still attached from your final border round, ch 30 (or your desired length for a wristlet/handle).
- Turn your work.
- Starting in the second chain from the hook, sc back down the chain, working 1 sc into each chain.
- Sl st into the top of the bag on the same corner to form a loop.
- FO and weave in the end.
Video tutorial
Finishing Touches:
- Final Weaving: Double-check that all of your ends are woven in securely to prevent unraveling.
- Blocking (Optional): Gently steam or spritz your bag with water, then stuff it with a towel to help it hold its shape and allow it to air dry. This will help the stitches and seams look clean and even.
You’ve now created a beautiful and unique granny square bag that’s all your own! Enjoy your new accessory.