by
by 
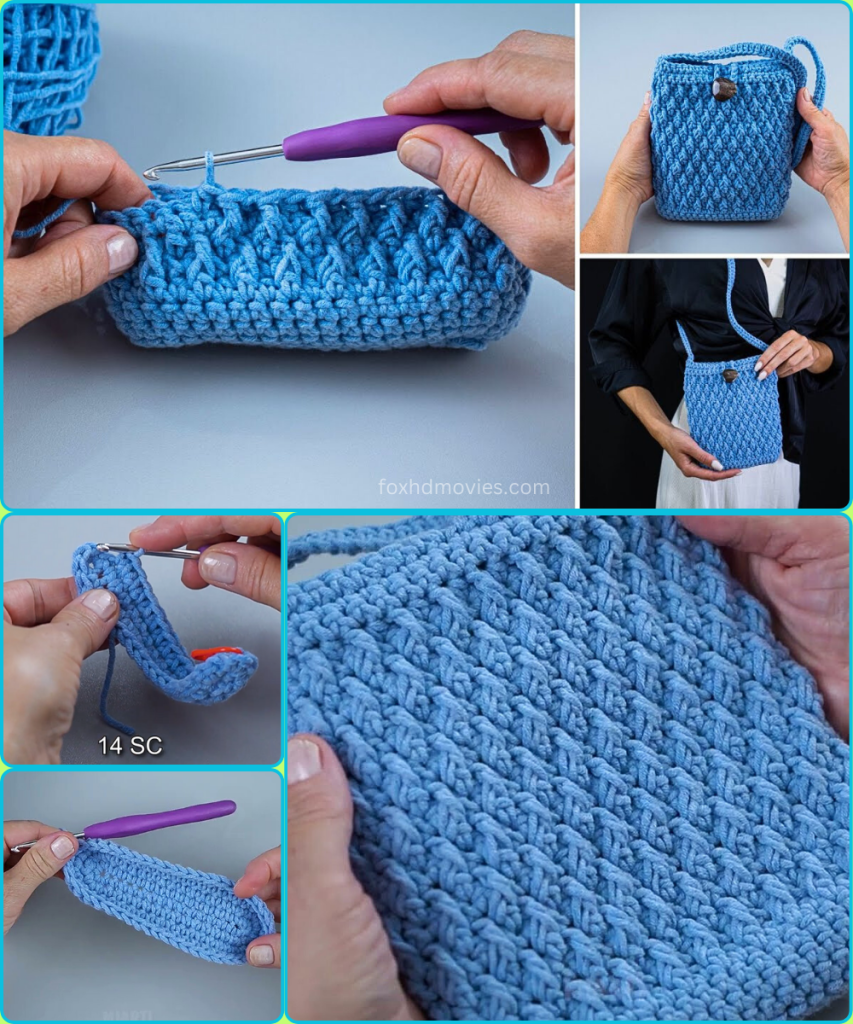
Welcome, fellow crocheters! Today, we’re making a stylish and practical accessory that’s perfect for carrying your essentials without being weighed down. This Skyfall Crosshatch Cell Phone Pouch is a charming little bag designed to hold your phone, keys, and a card or two. It features a beautiful, textured crosshatch stitch that gives it a sophisticated look, and it’s worked entirely in the round for a seamless finish. This pattern is long and detailed, making it perfect for an intermediate crocheter eager to try a new stitch and create a structured piece.
Materials Needed
- Approximately 100-120g of worsted weight (or aran weight) cotton or cotton blend yarn. The image shows a beautiful sky blue. Cotton yarn provides excellent stitch definition and a sturdy feel.
- A 4.0mm (G-6) crochet hook.
- A decorative button for the flap closure (about 1 inch / 2.5 cm diameter).
- Scissors.
- Tapestry needle for weaving in ends.
- Stitch marker (essential for working in continuous rounds).
Gauge
Gauge is not strictly critical for this project, but achieving a consistent tension will ensure your stitches are uniform and the bag holds its shape well.
- 16 single crochets (sc) and 18 rows = 4 inches (10 cm).
- The finished base should measure approximately 6 inches (15 cm) long by 2 inches (5 cm) wide.
Stitches and Abbreviations
- ch: chain
- sl st: slip stitch
- sc: single crochet
- dc: double crochet
- sc inc: single crochet increase (work 2 sc in the same stitch)
- fpdc: front post double crochet (yarn over, insert hook from front to back around the post of the specified stitch, yarn over, pull up a loop, [yarn over, pull through 2 loops] twice)
- bpdc: back post double crochet (yarn over, insert hook from back to front around the post of the specified stitch, yarn over, pull up a loop, [yarn over, pull through 2 loops] twice)
- sk: skip
- […]: repeat instructions within brackets
- ( … ): number of stitches at the end of the round or row
Construction Overview
This cell phone pouch is worked in continuous spiral rounds, starting with the base. You’ll then work straight up for the body, using a unique textured stitch pattern. Finally, you’ll create a top flap with a buttonhole and a long, sturdy strap to finish the bag.
Part 1: The Base
We will start with an oval-shaped base to give the pouch a nice flat bottom.
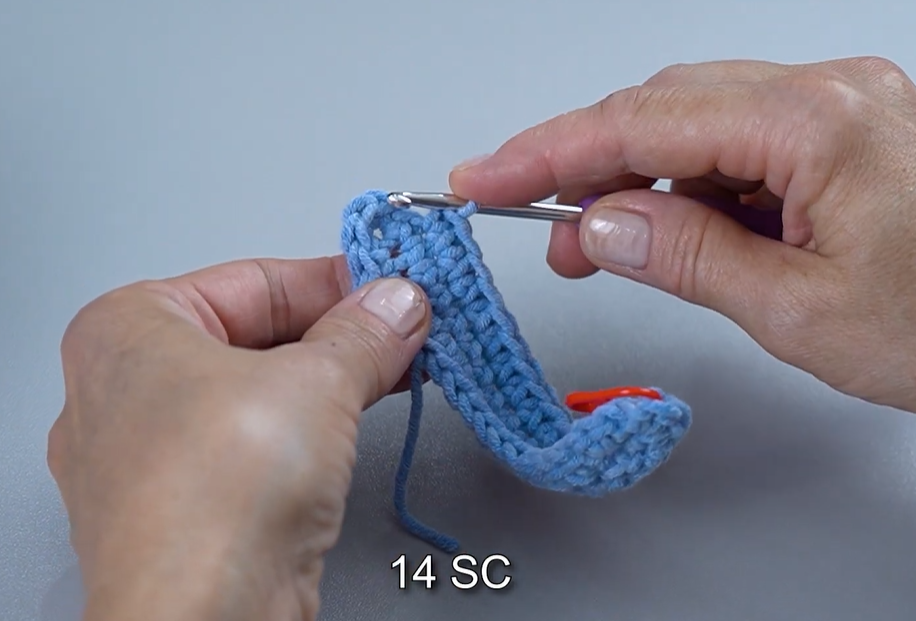
Round 1: Ch 21. Sc in the 2nd ch from the hook. Sc in the next 18 chs. Work 3 sc in the last ch. Rotate your work to crochet down the other side of the starting chain. Sc in the next 19 chs. Work 2 sc in the last ch. Do not join, continue in a spiral. (44 sc)
Round 2: Sc in the first 19 sc. Work 2 sc in each of the next 3 sc. Sc in the next 19 sc. Work 2 sc in each of the last 3 sc. Do not join. (50 sc)
Round 3: Sc in the first 20 sc. Work 2 sc in each of the next 3 sc. Sc in the next 21 sc. Work 2 sc in each of the last 3 sc. Do not join. (56 sc)
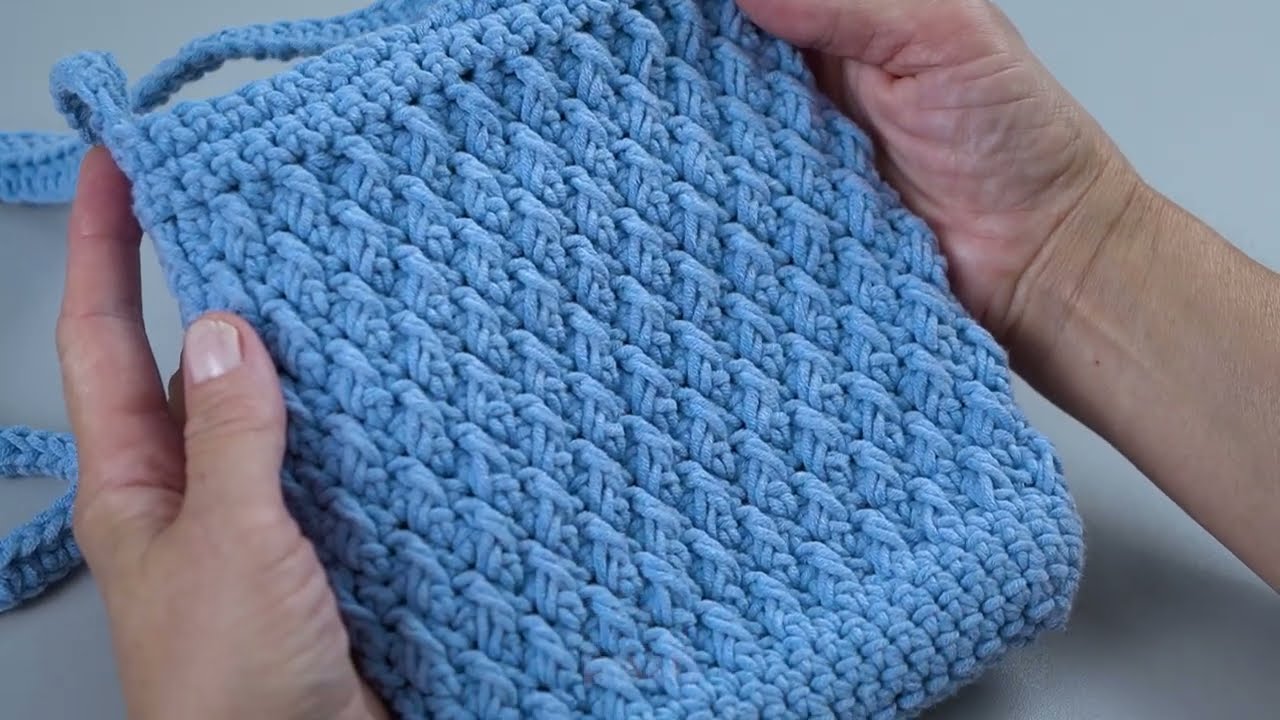
Part 2: The Body of the Pouch
Now we will work in continuous spiral rounds without increasing. This will create the upright sides of the pouch.
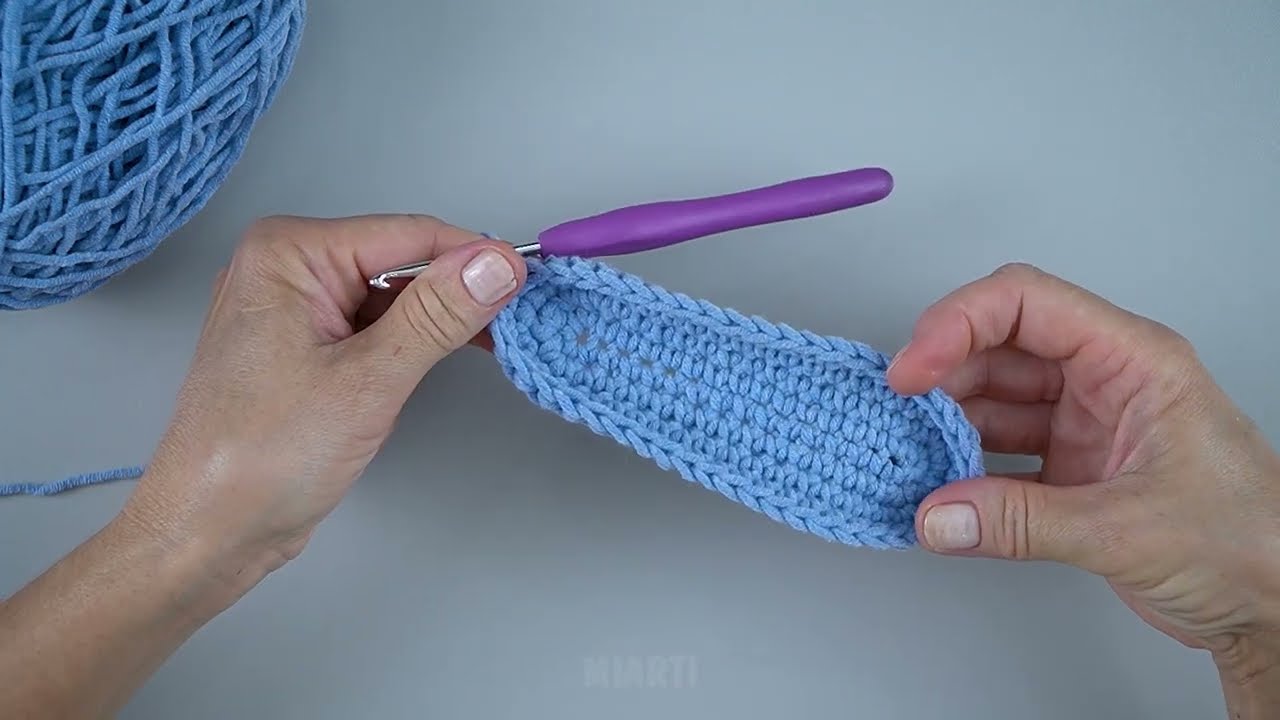
Round 4: Working in the back loop only, sc in each stitch around. This creates a clean edge and helps the bag stand upright. (56 sc)
Round 5: Sc in each sc around. (56 sc)
Round 6 (Textured Row): Ch 2 (counts as first dc). [Sk 1 sc, dc in the next sc. Then, working behind the dc just made, dc into the skipped sc]. Repeat from * to * around. You will create a crossed double crochet stitch. At the end of the round, you will have 28 crossed dc sets (56 stitches total). Do not join, continue in a spiral.
Round 7: Sc in each of the 56 stitches around. (56 sc)
Round 8: Sc in each of the 56 stitches around. (56 sc)
Rounds 9-20: Repeat Rounds 6-8 four more times, or until your bag reaches the desired height. The image shows about 5-6 sets of the textured row.
Part 3: The Top Flap
We’ll now work in rows to create the top flap that closes the pouch.
Row 1: Sc in the next 28 stitches. Turn your work. (28 sc) This will form the flap at the back of the pouch.
Row 2: Ch 1. Sc in each of the 28 sc. Turn. (28 sc)
Row 3: Ch 1. Sc in the first 2 sc. sc dec in the next 2 sts. Sc in the next 20 sc. sc dec in the next 2 sts. Sc in the last 2 sc. Turn. (26 sc)
Row 4: Ch 1. Sc in each of the 26 sc. Turn. (26 sc)
Row 5: Ch 1. Sc in the first 2 sc. sc dec in the next 2 sts. Sc in the next 18 sc. sc dec in the next 2 sts. Sc in the last 2 sc. Turn. (24 sc)
Row 6 (Buttonhole Row): Ch 1. Sc in the first 10 sc. Ch 2. Sk 2 sts. Sc in the last 12 sc. Turn. (24 stitches, with a ch-2 sp for the buttonhole)
Row 7: Ch 1. Sc in each sc and work 2 sc in the ch-2 space. Sc across the row. (24 sc)
Fasten off and weave in ends.
Part 4: The Strap
Now, we’ll create a long, sturdy handle.
Strap Construction: Ch 120 (or to your desired length for a crossbody strap). Sc in the 2nd ch from the hook and in each ch across. (119 sc) Fasten off, leaving a long tail for sewing.
Attaching the Strap: Using your tapestry needle, sew one end of the strap securely to the top-side corner of the pouch, at the base of the flap. Repeat for the other side. Make sure the strap is not twisted.
Final Touch: Sew your decorative button onto the front of the pouch, aligning it with the buttonhole on the flap.
Video tutorial
Your Skyfall Crosshatch Cell Phone Pouch is now complete! The structured base, the beautiful texture, and the practical design make this a fantastic accessory for hands-free convenience. Enjoy your new creation!