by
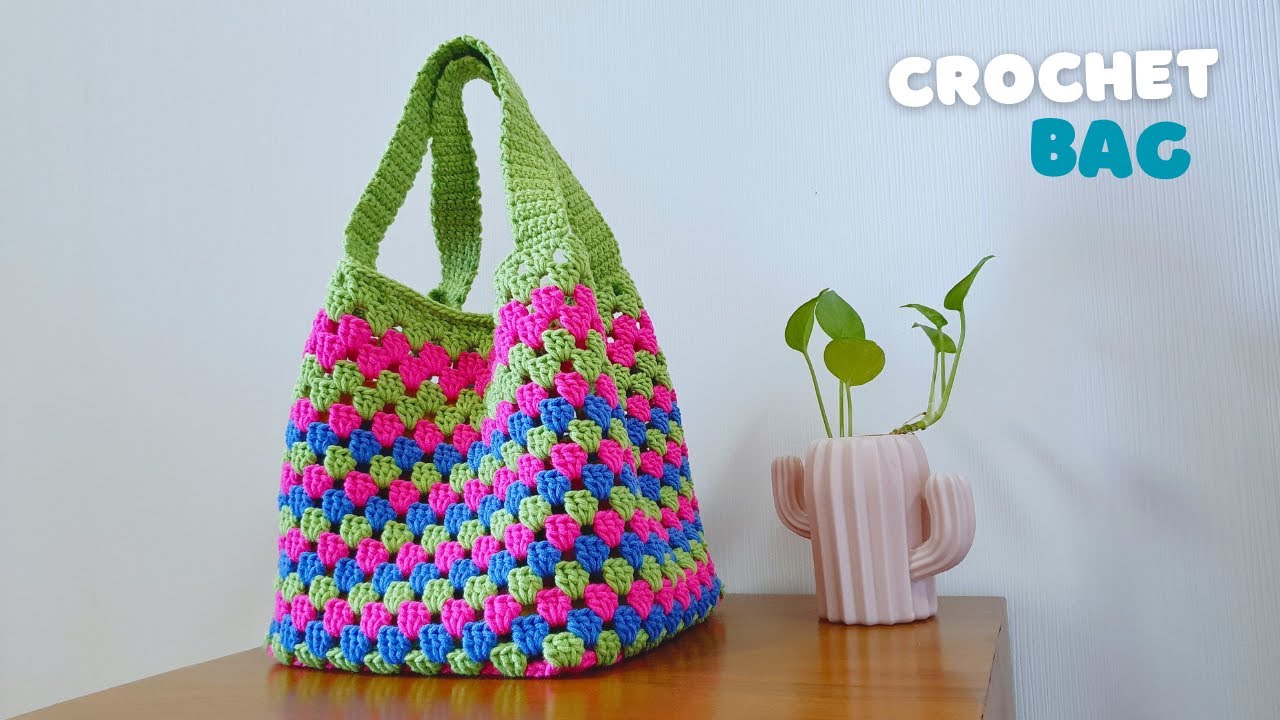
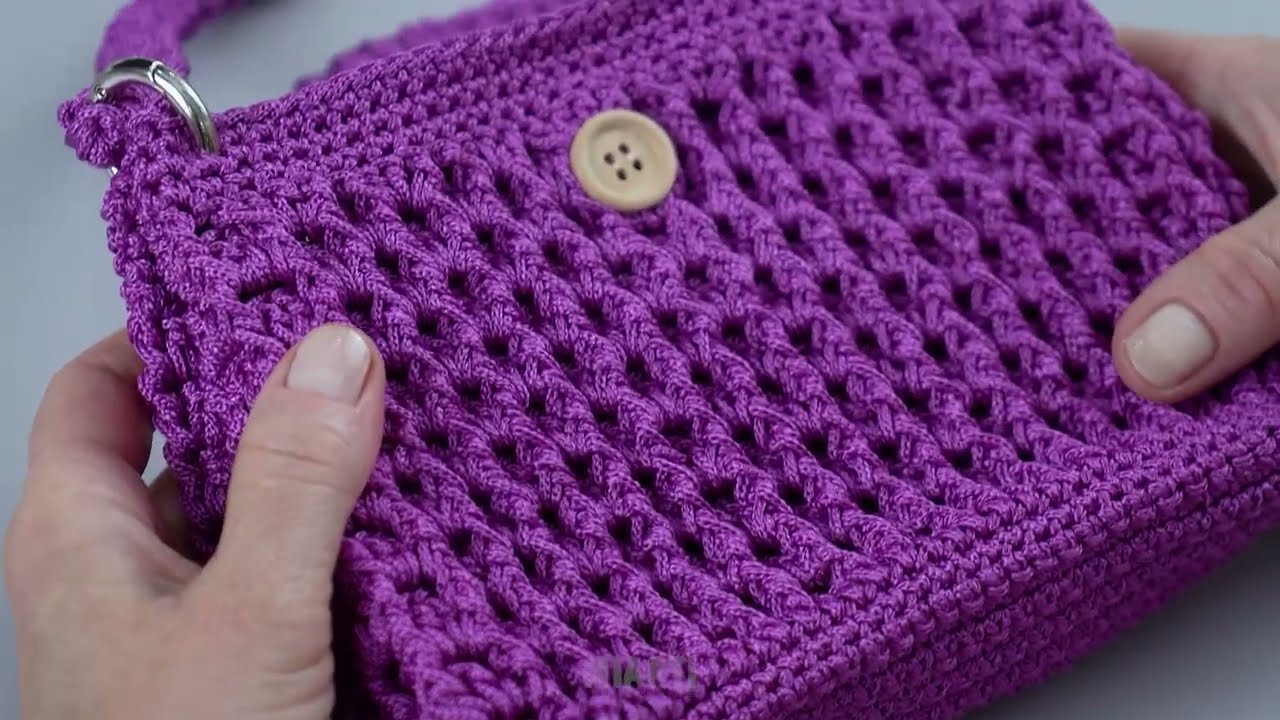
by This pattern creates a stylish and compact shoulder bag with a unique textured stitch and a comfortable braided strap.
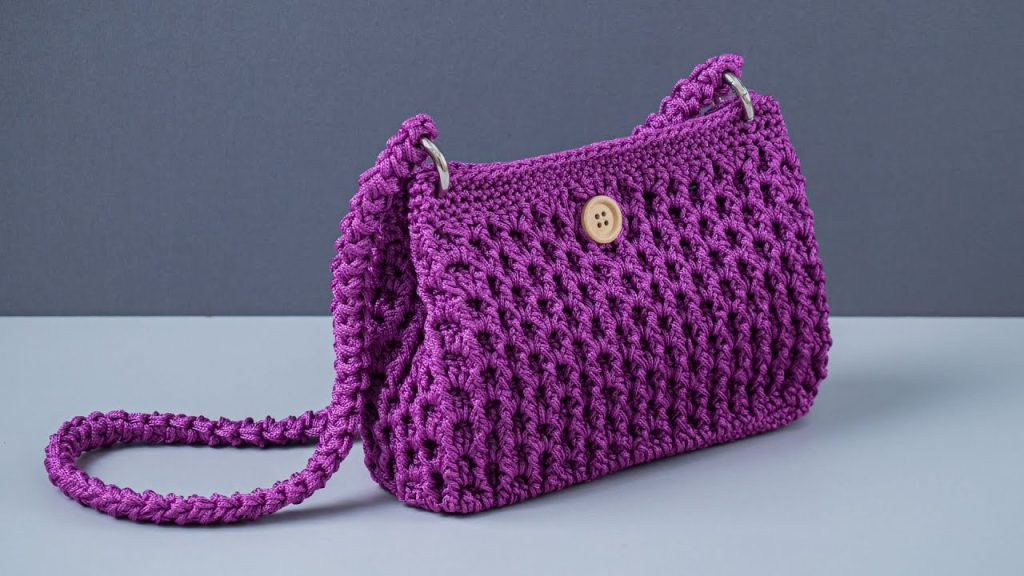
Approximate Finished Size:
- Width: 10-11 inches (25-28 cm)
- Height (at center): 6-7 inches (15-18 cm)
- Depth (at base): 3-4 inches (7.5-10 cm)
- Strap Length: Customizable (approx. 20-24 inches / 50-60 cm)
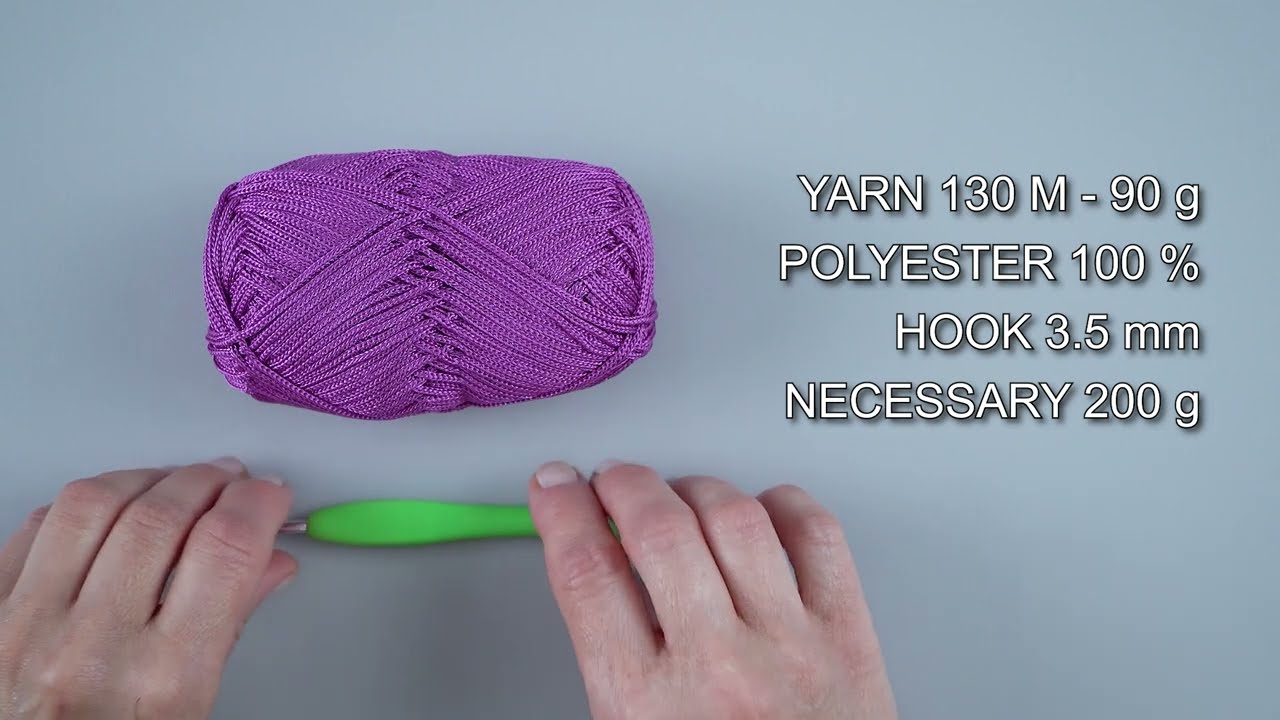
Materials:
- Yarn: Macrame yarn, T-shirt yarn, or a sturdy worsted weight cotton/acrylic blend (Category 4 or 5) in purple (or desired color).
- Approx. 250-350 yards (230-320 meters)
- Crochet Hook: 4.5mm (7) or 5.0mm (H/8) hook (adjust to achieve desired fabric stiffness and stitch definition).
- D-Rings or O-Rings: Two (2) metal rings (approx. 1 inch / 2.5 cm diameter) for strap attachment.
- Button: One (1) wooden or decorative button (approx. 0.75-1 inch / 2-2.5 cm diameter).
- Yarn Needle: For weaving in ends and sewing on the button.
- Scissors
- Stitch Markers (optional but recommended)
Gauge: Working in the textured stitch (explained below), approximately 12 stitches x 8 rows = 4 inches (10 cm).
- Gauge is important for the bag’s size and structure. Adjust hook size as needed.
Abbreviations (US Terms):
- ch: chain
- sl st: slip stitch
- sc: single crochet
- hdc: half double crochet
- dc: double crochet
- tr: treble crochet (yarn over twice, insert hook, yarn over, pull up loop, [yarn over, pull through 2 loops] 3 times)
- sk: skip
- sp: space
- st(s): stitch(es)
- F.O.: Fasten Off
- “V” stitch (V-st): (
dc,ch 1,dc) in the same stitch/space. - Popcorn Stitch (PC): Work 4
dcin the same stitch/space. Remove hook from the lastdc. Insert hook into the firstdcof the 4dc. Insert hook into the loop of the lastdc. Yarn over and pull loop through.Ch 1to close the popcorn.
Pattern Instructions: The Bag Body
The bag is worked in joined rounds from the base up.
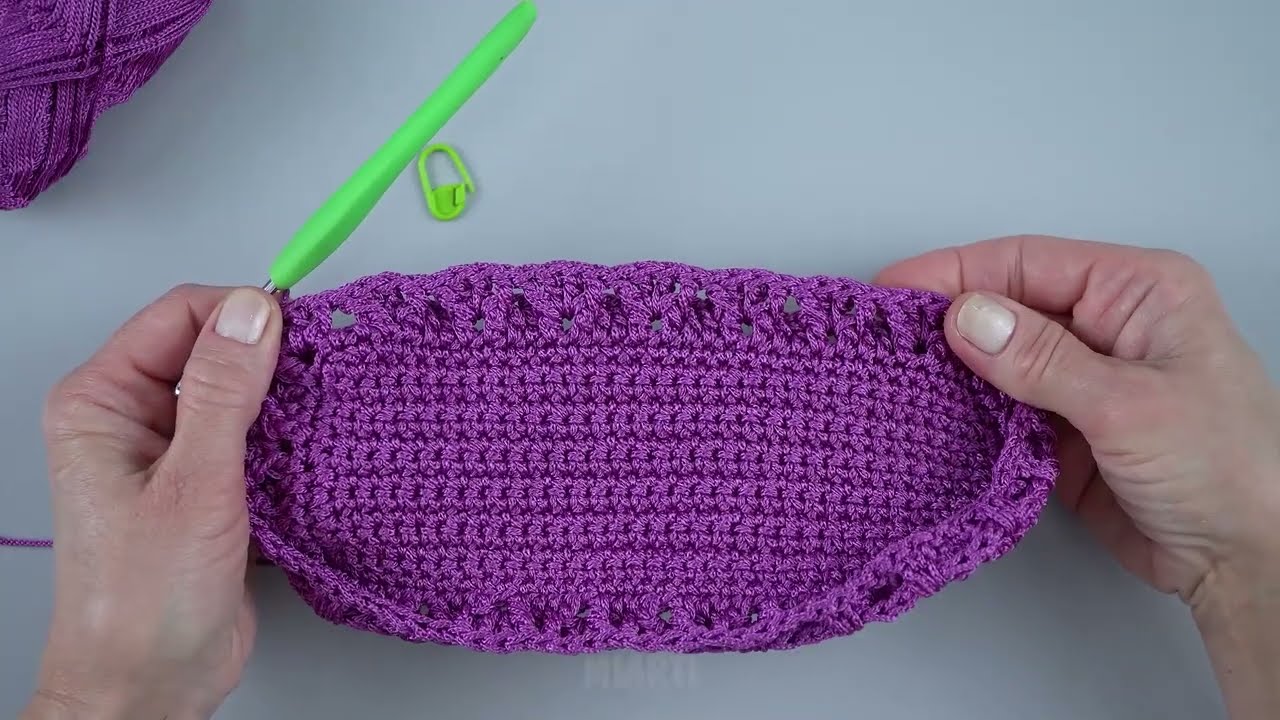
Part 1: Base of the Bag (Oval)
Start with your main color yarn.
Foundation Chain: Ch 27.
Round 1: Sc in the 2nd ch from the hook. Sc in the next 24 chs. Work 3 sc in the last ch. (This turns the corner). Now working on the other side of the foundation chain, sc in the next 24 chs. Work 2 sc in the last ch (same ch as first sc). Sl st to the first sc to join. (54 sc total).
Round 2: Ch 1 (does not count as a stitch). Sc in the first sc. Sc in the next 24 sts. Inc in the next 3 sts. Sc in the next 24 sts. Inc in the next 2 sts. Sl st to the first sc. (60 sc total).
Round 3: Ch 1. Sc in BLO of each st around. Sl st to the first sc. (60 sc total). * This round creates a defined edge for the base of the bag to stand up.
Part 2: Body of the Bag (Textured Stitch)
The bag uses a textured stitch that looks like a combination of V-stitches and possibly Popcorn stitches. We will use a modified V-stitch and Popcorn stitch pattern.
Round 1 (Set up for texture): Ch 3 (counts as first dc). Dc in each st around. Sl st to the top of the beginning ch 3. (60 dc)
Round 2 (Textured Stitch – Popcorn Layer): Ch 1 (does not count as a stitch). Sc in the first st. *Popcorn Stitch in the next st, sc in the next st*. Repeat from * to * around. Sl st to the first sc. (30 Popcorn stitches and 30 sc)
Round 3 (Textured Stitch – V-Stitch Layer): Ch 4 (counts as dc + ch 1). Dc in the same st (this forms a V-stitch over the sc from previous row). *Sk the next Popcorn Stitch. (Dc in the next sc, ch 1, dc in the same sc – V-stitch).* Repeat from * to * around. Sl st to the 3rd ch of the beginning ch 4. (30 V-stitches)
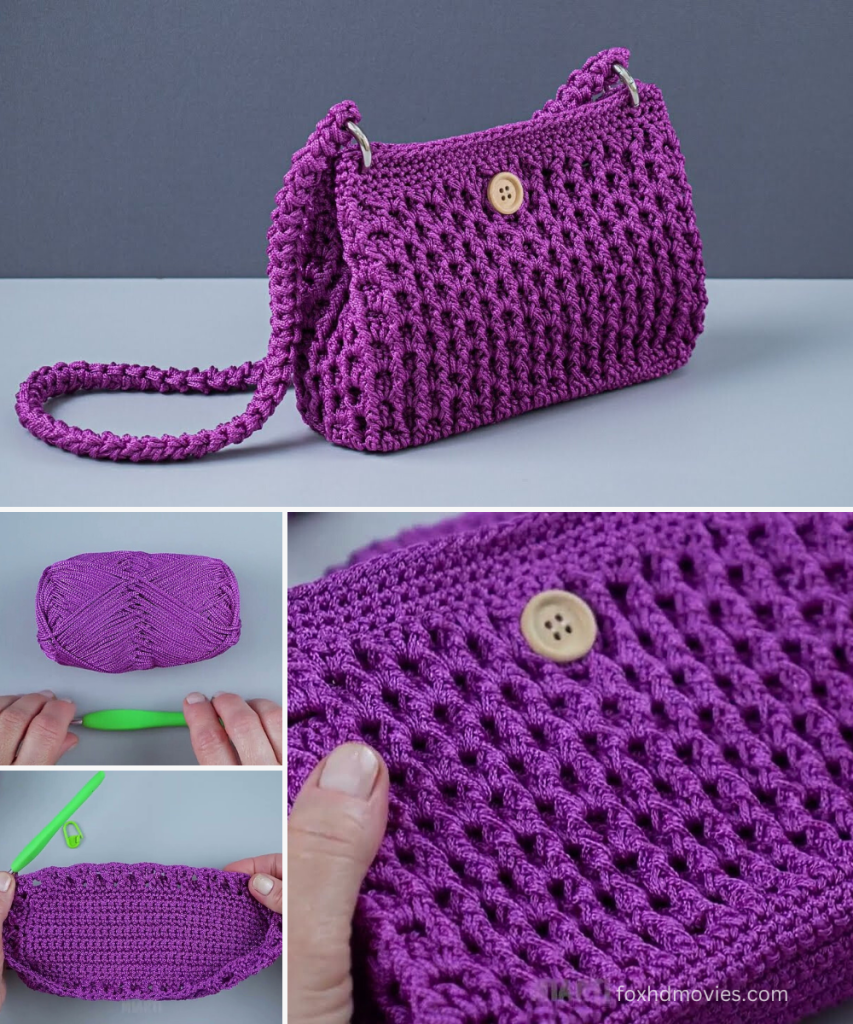
Repeat Rounds 2 and 3 for the body of the bag until it reaches approximately 5-6 inches (13-15 cm) in height from the base. The image shows about 7-8 sets of these two rounds.
- End with a Round 3 (V-stitch layer) before moving to the top shaping.
Part 3: Top Shaping and Edging
This section creates the slightly curved top edge of the bag.
Round 1 (Decrease Round): Ch 1. Sc in the first dc of the first V-stitch. Sc in the ch 1 sp. Sc in the second dc. Sc into the top of the next Popcorn Stitch (where a V-stitch would normally be). Sc in the first dc of the next V-stitch. Sc in the ch 1 sp. Sc in the second dc. Sc into the top of the next Popcorn Stitch. Repeat from * to * around. Sl st to the first sc. (Approx. 60 sc or slightly less due to the nature of covering the V-stitches and popcorns more densely). * This round aims to flatten the texture and prepare for a clean edge.
Round 2: Ch 1. Hdc in each st around. Sl st to the first hdc.
Round 3 (Creating openings for D-rings): Ch 1. Sc in the first 10 sts. Ch 5 (creates a loop for the D-ring, adjust if needed). Sk 5 sts. Sc in the next 20 sts. Ch 5. Sk 5 sts. Sc in the remaining sts. Sl st to the first sc. * Adjust sc counts to center the D-ring loops.
Round 4 (Finishing edge): Ch 1. Sc in each sc. When you reach a ch 5 space, work 5-6 sc stitches around the D-ring and into the ch 5 space simultaneously, securing the D-ring. Continue sc in all remaining sc stitches. Sl st to the first sc. * Ensure the D-rings are firmly attached and covered.
Finishing the Bag Body: F.O. Weave in all loose ends securely.
Pattern Instructions: Braided Strap
The strap in the image looks like a sturdy 3-strand crochet braid.
Instructions:
- Cut 3 long pieces of yarn. The length of each piece should be at least 3 times your desired finished strap length. For a 20-24 inch strap, each piece should be approximately 60-72 inches (150-180 cm) long.
- Fold each of the 3 pieces in half.
- Gather the 6 strands together.
- Make a slip knot with all 6 strands together, approximately 1-2 inches from the folded end.
- Divide the 6 strands into 3 sections (2 strands per section).
- Braid the 3 sections together tightly and evenly until you reach your desired strap length.
- Secure the end of the braid with a simple knot to prevent unraveling.
- You can then either sew the ends of the braid directly onto the D-rings, or create small crochet loops at the ends of the braid to attach them.
Alternative Strap (Crocheted Chain Stitch Strap – simpler): Ch a long chain (approx. 80-100 chains for a 20-24 inch strap). Sl st into the 2nd ch from hook. Sl st in each ch across. F.O. Make two of these, then braid them together using a simple 2-strand twist or a 3-strand braid if you prefer. Attach the ends to the D-rings by sewing securely.
Video tutorial
Assembly:
- Attach the Strap: Thread the finished braided strap through the D-rings on the bag. Secure the ends of the braid to themselves or sew them firmly to the D-rings.
- Attach the Button: Position the wooden button on the front flap of the bag, roughly in the center, as shown in the image. Use your yarn needle to sew it securely.
- Create a Loop Closure: On the opposite side of the bag (the back flap), locate the stitch directly behind the button. Using a small piece of yarn, create a
ch 8-10loop (adjust to fit your button securely).Sl stinto the bag to secure the loop. Weave in ends.
Your elegant crocheted shoulder bag is now complete!