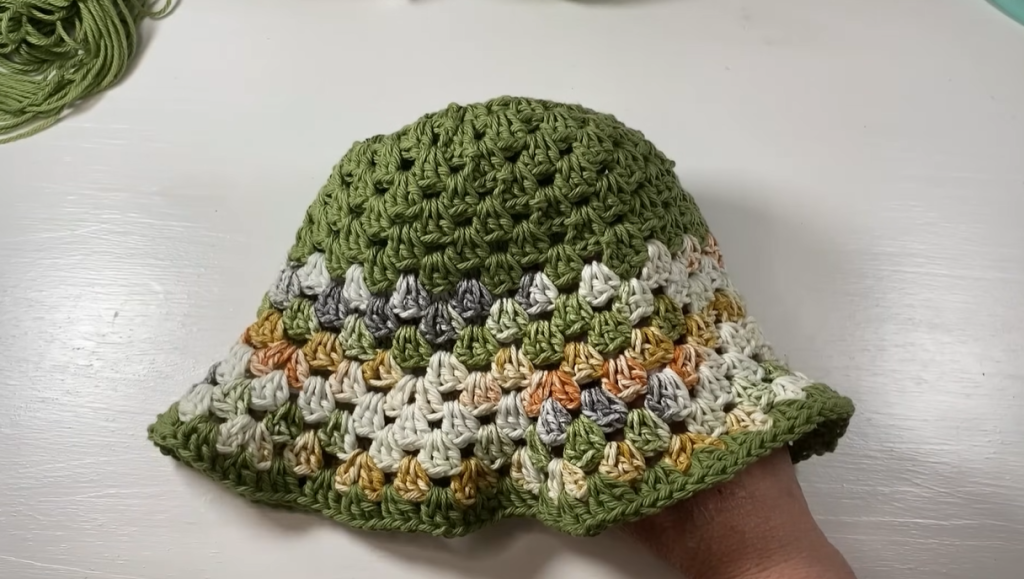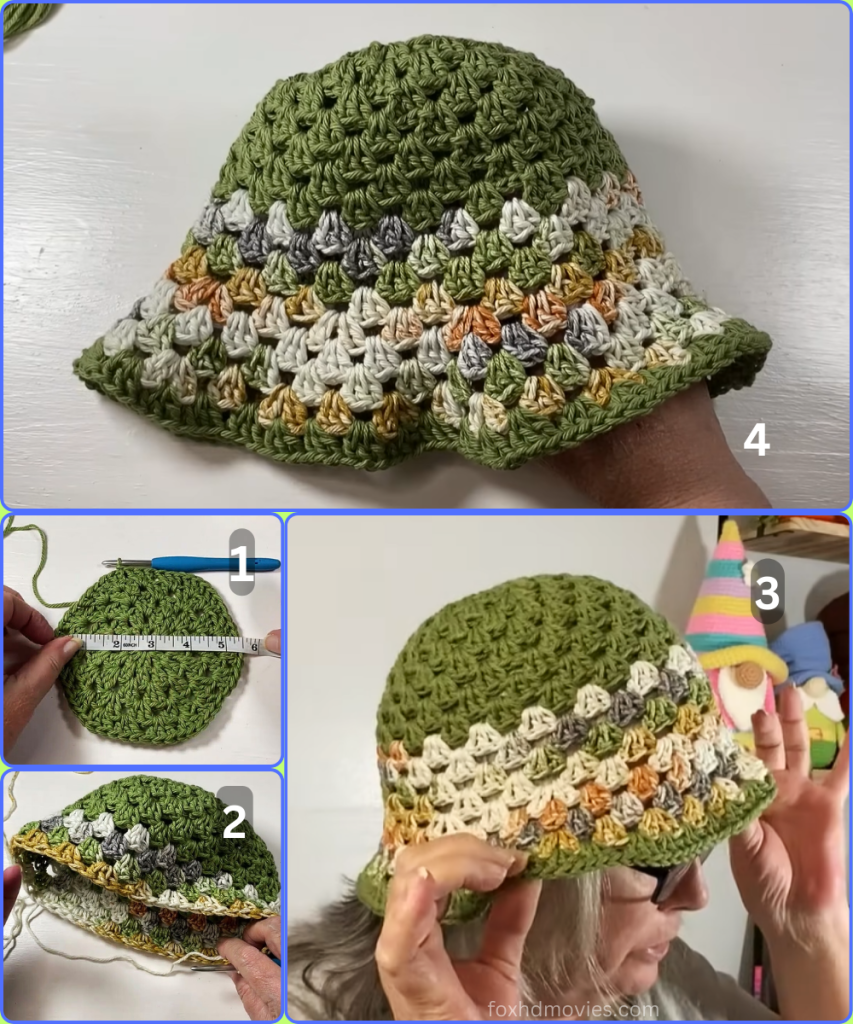
Welcome, fellow makers, to a fun and creative project that’s perfect for using up those beautiful variegated yarns! This “Granny Garden” bucket hat is a modern take on a classic stitch, combining a solid-colored crown with a vibrant, multi-colored body and brim. The simple granny cluster stitch creates a wonderful, textural fabric that drapes beautifully and makes this hat a joy to wear.
This pattern is designed to be comprehensive and easy to follow, guiding you through each stage, from the solid crown to the colorful brim. Whether you’re a seasoned crocheter or looking for a fun new challenge, you’ll love watching this beautiful hat come to life!

Materials You’ll Need:
- Yarn: Approximately 200-250 yards of worsted weight (Category 4) yarn. You will need two types:
- Solid Color (Color A, e.g., olive green): Approximately 50-75 yards for the crown.
- Variegated or Multi-colored Yarn (Color B): Approximately 150-175 yards for the body and brim.
- Crochet Hook: A size H/8 (5.00 mm) hook.
- Scissors
- Yarn Needle: For weaving in ends.
Abbreviations (US Terms):
- ch: chain
- sl st: slip stitch
- dc: double crochet
- st(s): stitch(es)
- sp: space
- rep: repeat
- Rnd: round
- granny cluster: 3 dc worked in the same stitch or space
Gauge:
- For the Crown: After Rnd 4, the diameter should be approximately 3.5 inches (9 cm).
- The finished hat should have a circumference of about 21-22 inches, which fits most adult heads.
Part 1: The Crown (Solid Color)
The crown is worked in the round, from the top down.

Starting with Color A and your H/8 hook:
- Rnd 1: Create a magic ring. Ch 3 (counts as 1st dc). Work 11 more dc into the ring. Sl st to the top of the beginning ch 3 to join. (12 dc)
- Rnd 2: Ch 3 (counts as 1st dc). Work 1 dc in the same st. Work 2 dc in each st around. Sl st to the top of the beginning ch 3 to join. (24 dc)
- Rnd 3: Ch 3 (counts as 1st dc). Work 1 dc in the same st. Dc in the next st, 2 dc in the next st. Rep from * to * around. Sl st to the top of the beginning ch 3 to join. (36 dc)
- Rnd 4: Ch 3 (counts as 1st dc). Work 1 dc in the same st. Dc in the next 2 sts, 2 dc in the next st. Rep from * to * around. Sl st to the top of the beginning ch 3 to join. (48 dc)
- Rnd 5: Ch 3 (counts as 1st dc). Work 1 dc in the same st. Dc in the next 3 sts, 2 dc in the next st. Rep from * to * around. Sl st to the top of the beginning ch 3 to join. (60 dc)
- Rnd 6: Ch 3 (counts as 1st dc). Dc in the next 9 sts, 2 dc in the next st. Rep from * to * around. Sl st to the top of the beginning ch 3 to join. (66 dc)
The crown is now complete. At the end of Rnd 6, fasten off Color A and join Color B.
Part 2: The Body (Multi-color)
Now we will transition to the colorful granny clusters, working without increases to form the straight sides of the hat.

Starting with Color B:
- Rnd 7: Sl st into the sp between the ch 3 and the first dc from the previous round. Ch 3 (counts as 1st dc), 2 dc in the same sp. Sk 3 sts, work a granny cluster (3 dc) in the next sp between the sts. Rep from * to * around. Sl st to the top of the beginning ch 3 to join. (22 granny clusters)
- Rnd 8: Sl st into the sp between the last granny cluster and the first granny cluster from the previous round. Ch 3, 2 dc in the same sp. Work a granny cluster in the sp between the next two granny clusters. Rep from * to * around. Sl st to the top of the beginning ch 3 to join. (22 granny clusters)
- Repeat Rnd 8 for a total of 6-8 rounds, or until the hat is about 6 inches high from the top of the crown. This will form the body of the hat.
Part 3: The Brim (Multi-color)
Now we will create the flared brim by increasing the number of granny clusters.

- Rnd 1 (Brim Increase): Sl st into the sp between the last and first granny cluster. Ch 3, 2 dc in the same sp. Work a granny cluster in the sp between the next two granny clusters. Rep from * to * 10 times. In the sp between the next two clusters, work 2 granny clusters. Work a granny cluster in the sp between the next two granny clusters. Rep from * to * 10 times. In the sp between the next two clusters, work 2 granny clusters. Sl st to the top of the beginning ch 3 to join. (24 granny clusters)
- Rnd 2: Sl st into the sp between the last and first granny cluster. Ch 3, 2 dc in the same sp. Work a granny cluster in the sp between the next two granny clusters. Rep from * to * around. Sl st to the top of the beginning ch 3 to join. (24 granny clusters)
- Rnd 3: Sl st into the sp between the last and first granny cluster. Ch 3, 2 dc in the same sp. Work a granny cluster in the sp between the next two granny clusters. Rep from * to * around. Sl st to the top of the beginning ch 3 to join. (24 granny clusters)
- Rnd 4 (Final Edging): Ch 1 (does not count as a st). Sc in each st around, working 3 sc into each granny cluster and 1 sc in each sp between the clusters. Sl st to the first sc to join.
Fasten off and weave in all loose ends. Your beautiful “Granny Garden” bucket hat is now complete!
Video tutorial
Final Thoughts:
This hat is a fun and stylish accessory that is perfect for sunny days. The use of a simple solid color for the crown and a beautiful variegated yarn for the body creates a stunning visual contrast. Enjoy wearing this hat, and feel proud of the beautiful item you’ve created!


