 by
by 
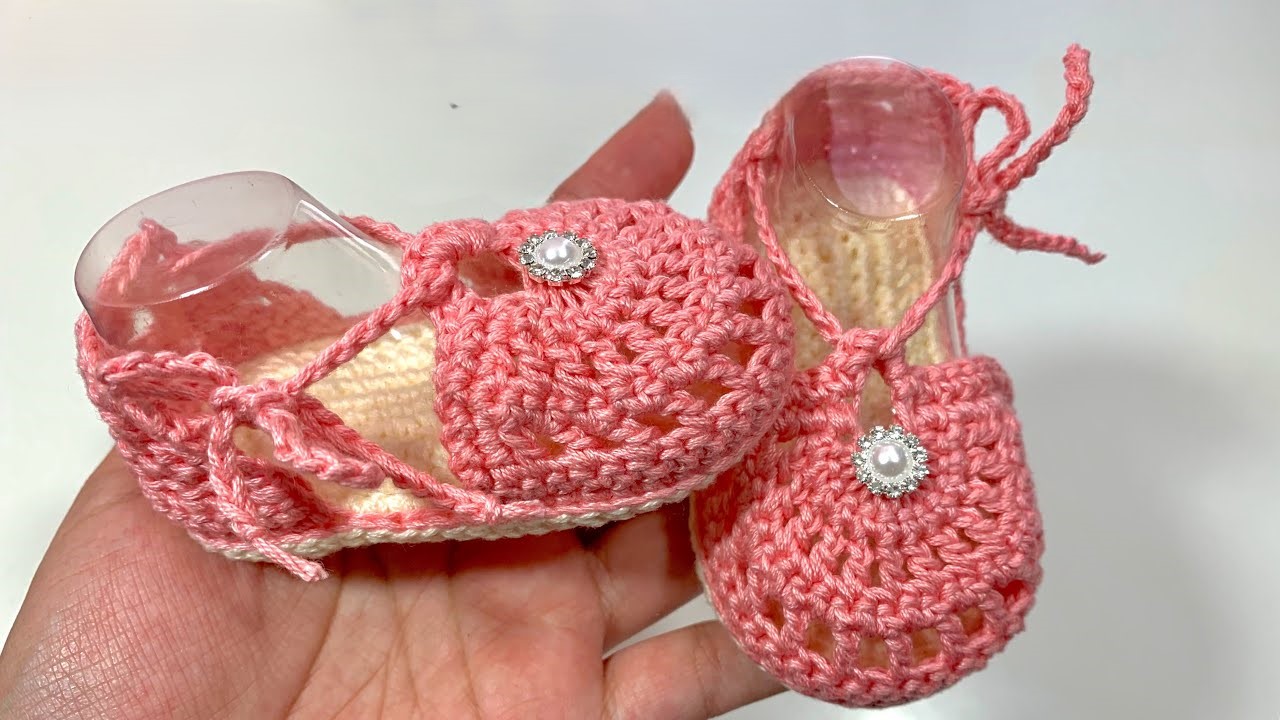
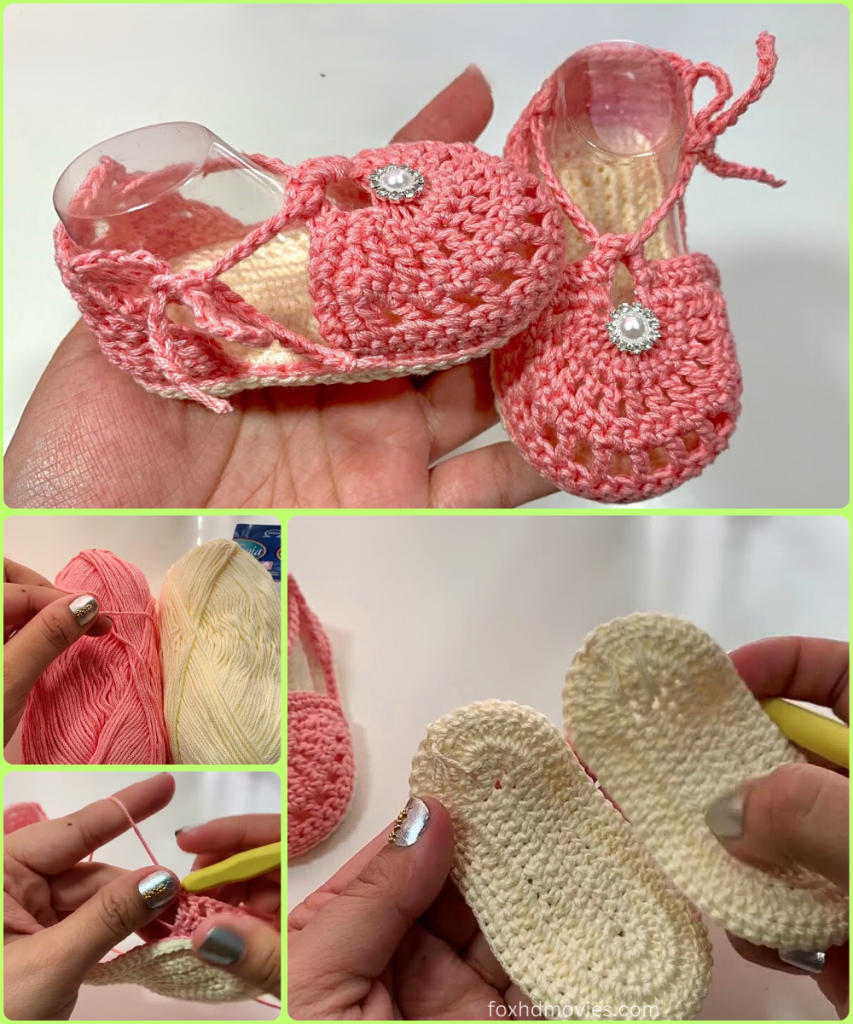
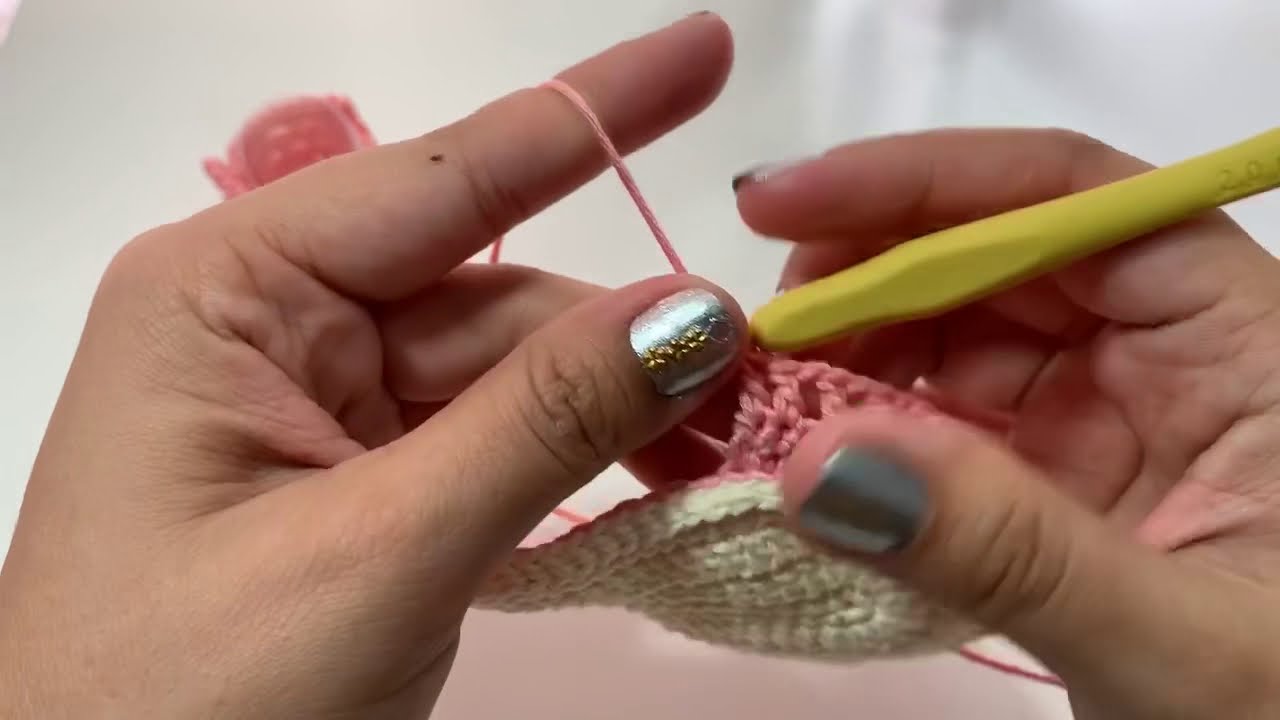
Welcome, fellow crocheters, to an exciting project where we’ll create a pair of the most darling baby sandals you ever did see! These “Dewdrop Blossom Baby Sandals” are inspired by the delicate beauty of tiny flowers kissed by morning dew. Featuring a comfortable, contrasting sole, an intricate, openwork upper, a secure and stylish T-strap, and sweet tie-up ankle straps, all finished with a sparkling pearl embellishment, these sandals are a labor of love that will be treasured.
This pattern is written for a baby approximately 3-6 months old, but instructions on how to adjust the size will be included. Prepare yourself for a delightful journey of hooks and yarn!
Skill Level: Intermediate – Requires familiarity with basic crochet stitches and the ability to follow detailed instructions.
Materials You’ll Need:
- Yarn:
- Approximately 60-70 yards of sport (size 2) or DK (size 3) weight yarn in your chosen main color (let’s use a beautiful baby pink as shown in the image). Ensure it’s a soft and baby-friendly yarn.
- Approximately 30-40 yards of sport (size 2) or DK (size 3) weight yarn in a contrasting color for the sole (a lovely cream or off-white will work wonderfully).
- Crochet Hook: A size G/6 (4.0mm) crochet hook is recommended for sport or DK weight yarn. Adjust if your tension differs significantly.
- Scissors: For snipping yarn ends.
- Yarn Needle: For weaving in all those pesky loose ends securely.
- Stitch Markers: These little helpers will be crucial for keeping track of your rounds and stitch counts.
- Measuring Tape: To ensure your sole and strap lengths are just right.
- 2 Small Pearl Beads (approximately 6-8mm): For that touch of sparkle on the T-straps. You can also use small buttons or other embellishments if preferred.
- Optional: Non-slip fabric or sole inserts: If you plan for the baby to wear these on slippery surfaces once walking, you might consider adding a non-slip element later.
Gauge: While gauge isn’t critical for baby shoes, aiming for approximately 4-5 single crochet stitches per inch with your chosen yarn and hook will result in a sandal size suitable for a 3-6 month old.
Detailed Pattern Instructions (Make Two Sandals)
We will work in rounds for the sole and then transition to rows and smaller rounds for the upper and straps. Remember to work tightly and consistently for the best results.
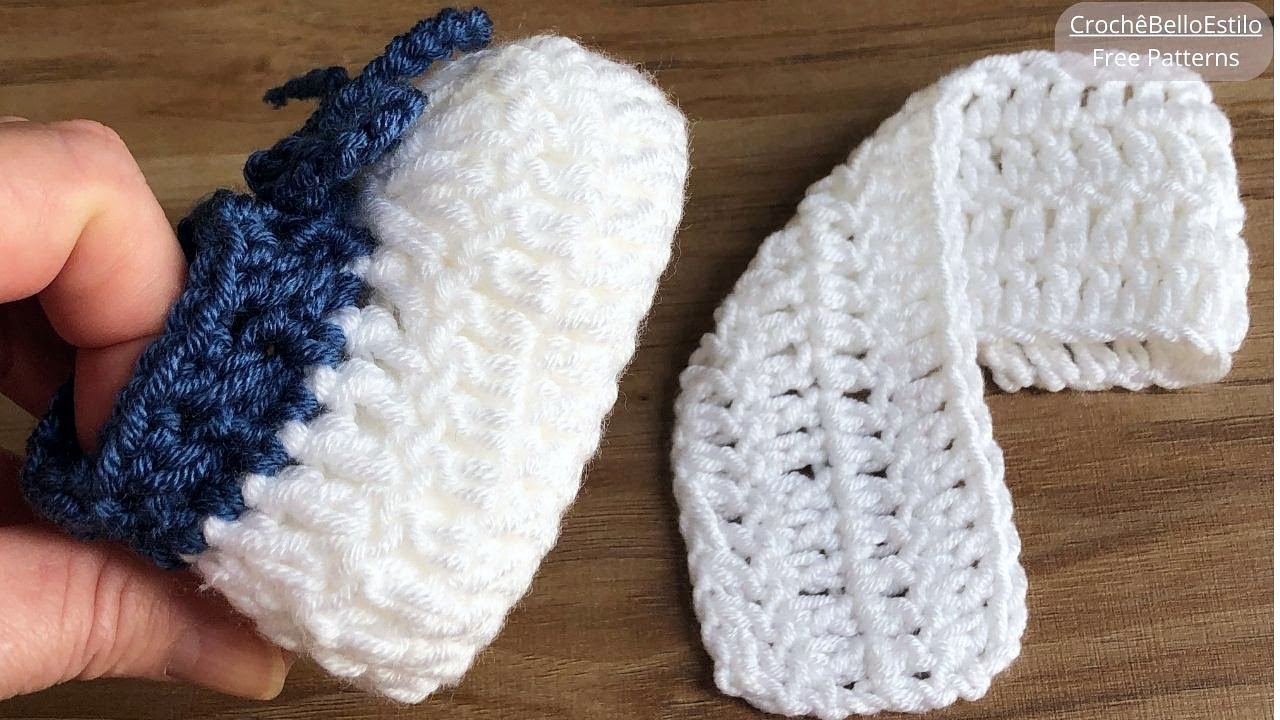
Part 1: The Foundation – The Comfortable Sole (Cream Yarn)
The sole needs to be sturdy and provide a good base for the sandal. We’ll create an oval shape using a combination of single crochet and increases.

- Starting Chain: With your cream-colored yarn, chain 11. This initial chain sets the length of the sole.
- Round 1:
- In the second chain from your hook, work 2 single crochet (sc) stitches. This creates our first increase.
- Work 1 sc in each of the next eight chains.
- In the very last chain, work 4 single crochet (sc) stitches. This creates a rounded end.
- Now, working along the opposite side of your foundation chain (turning the work), work 1 sc in each of the next eight chains.
- In the very last chain (which is the same stitch where you started the round with 2 sc), work 2 more single crochet (sc) stitches.
- Slip stitch (sl st) to the first single crochet of the round to join. (Total: 24 stitches)
- Round 2:
- Chain 1 (this does not count as a stitch).
- Work 2 single crochet (sc) in the next two stitches (increases).
- Work 1 single crochet (sc) in each of the next eight stitches.
- Work 2 single crochet (sc) in each of the next four stitches (increases).
- Work 1 single crochet (sc) in each of the next eight stitches.
- Work 2 single crochet (sc) in each of the last two stitches (increases).
- Slip stitch (sl st) to the first single crochet of the round to join. (Total: 32 stitches)
- Round 3: Creating the Defined Edge:
- Chain 1 (does not count as a stitch).
- Work 1 single crochet (sc) in each stitch around, but this time, work only in the back loop of each stitch. This technique creates a nice ridge that defines the edge of the sole and makes it easier to work the upper.
- Slip stitch (sl st) to the first single crochet of the round to join. (Total: 32 stitches)
Part 2: Crafting the Delicate Upper (Pink Yarn)
Now we’ll switch to our main color and begin shaping the top part of the sandal, focusing on creating an open and airy design over the toes.
- Joining the Pink: With your pink yarn, join with a slip stitch to any stitch on Round 3 of the sole.
- Round 4: First Row of the Upper:
- Chain 1 (does not count as a stitch).
- Work 1 single crochet (sc) in each stitch around the sole. This round anchors the pink yarn and forms the base of the upper.
- Slip stitch (sl st) to the first single crochet of the round to join. (Total: 32 stitches)
- Round 5: Marking the Toe Section:
- Chain 1 (does not count as a stitch).
- Work 1 single crochet (sc) in each of the next 10 stitches.
- Place a stitch marker in the next stitch. This marker indicates the approximate center of the toe section. We will be working the openwork pattern over the stitches around this marker.
- Continue working 1 single crochet (sc) in each of the remaining stitches around the heel.
- Slip stitch (sl st) to the first single crochet of the round to join. (Total: 32 stitches)
- Round 6: The Openwork Toe Pattern:
- Chain 3 (this counts as your first double crochet – dc).
- Work 1 double crochet (dc) in the next stitch.
- Chain 2, skip the next 2 stitches.
- Work a fan stitch in the following stitch: 3 double crochet (dc) in the same stitch.
- Chain 2, skip the next 2 stitches.
- Work another fan stitch in the following stitch: 3 double crochet (dc) in the same stitch.
- Chain 2, skip the next 2 stitches.
- Work 1 double crochet (dc) in each of the next two stitches.
- Continue working 1 single crochet (sc) in each of the remaining stitches around the heel section (approximately 12 stitches, but count to ensure).
- Slip stitch (sl st) to the top of the initial chain 3 to join.
- Round 7: Connecting the Toe:
- Chain 1 (does not count as a stitch).
- Work 1 single crochet (sc) in the top of each of the first two double crochet stitches.
- Work 1 single crochet (sc) in the chain-2 space.
- Work 1 single crochet (sc) in each of the three double crochet stitches of the fan stitch.
- Work 1 single crochet (sc) in the next chain-2 space.
- Work 1 single crochet (sc) in each of the three double crochet stitches of the next fan stitch.
- Work 1 single crochet (sc) in the next chain-2 space.
- Work 1 single crochet (sc) in the top of each of the last two double crochet stitches.
- Continue working 1 single crochet (sc) in each of the remaining stitches around the heel section.
- Slip stitch (sl st) to the first single crochet of the round to join.
Part 3: Creating the Secure Straps (Pink Yarn)
The straps are crucial for keeping the sandals on those wiggly little feet. We’ll create a T-strap that secures over the toes and ankle straps that tie at the back.

A. The Central T-Strap:
- Finding the Starting Point: Locate the stitch marker you placed earlier at the center of the toe. Count three stitches back from this marker along the top of the sandal. Join your pink yarn with a slip stitch in this stitch.
- Creating the Vertical Strap: Chain 10 (or more/less depending on the desired length to reach the ankle area – measure against your baby’s foot if possible).
- Attaching to the Toe: Slip stitch into the stitch where you placed the stitch marker (the approximate center of the toe).
- Finishing: Fasten off the pink yarn, leaving a long tail (about 8-10 inches). This long tail will be used to securely sew the base of the T-strap to the sandal. Use your yarn needle to neatly sew the beginning of the strap to the sandal for extra security.
B. The Tie-Up Ankle Straps (Make Two per Sandal):
These straps will emerge from the sides of the sandal near the ankle and tie at the back to ensure a snug fit.
- First Ankle Strap: Join your pink yarn with a slip stitch to the side of the sandal, approximately where the heel section begins to curve upwards towards the ankle.
- Creating the Tie: Chain 35 (or more/less depending on how long you want the ties to be – remember they need to be long enough to tie a bow).
- Fastening Off: Fasten off the pink yarn.
- Second Ankle Strap: Repeat steps 1-3 on the opposite side of the sandal, ensuring the straps are attached symmetrically.
Part 4: The Sparkling Finale – Embellishments and Finishing Touches
Now for the details that elevate these sandals to something truly special.
- Weaving in Ends: Take your yarn needle and meticulously weave in all the loose yarn ends, both from the cream sole and the pink upper and straps. Ensure they are secure so they won’t unravel with wear.
- Attaching the Pearl Beads: Using your yarn needle and the pink yarn, carefully sew one small pearl bead to the base of each T-strap, where it attaches to the center of the toe. This adds a beautiful focal point and a touch of elegance.
- Blocking (Optional): If your sandals seem a little uneven or you want to enhance their shape, you can gently block them. Pin them to a soft surface in their desired shape and lightly mist them with water. Allow them to air dry completely.
Sizing Adjustments:
- Smaller Size: Use a smaller hook size and/or a thinner yarn. You can also reduce the number of chains in the foundation chain and the number of stitches in the rounds.
- Larger Size: Use a larger hook size and/or a thicker yarn. You can also increase the number of chains in the foundation chain and add more stitches to the rounds, ensuring the proportions remain balanced. For a noticeably larger size, you might need to add an extra round or two to the sole.
Care Instructions:
- Hand wash gently in cool water with a mild soap.
- Reshape and allow to air dry completely.
- Avoid harsh detergents or bleach.
Video tutorial
Congratulations, you’ve just crocheted a beautiful and detailed pair of “Dewdrop Blossom Baby Sandals”! These little works of art are not just footwear; they are a testament to your skill and a loving creation for a special little one. Imagine the sweet little feet these sandals will adorn!
We hope you enjoyed this detailed journey in crochet. Please feel free to share your finished sandals with us using the hashtag #DewdropBlossomSandals – we would absolutely love to see your beautiful creations!
Happy Crocheting!