 by
by 
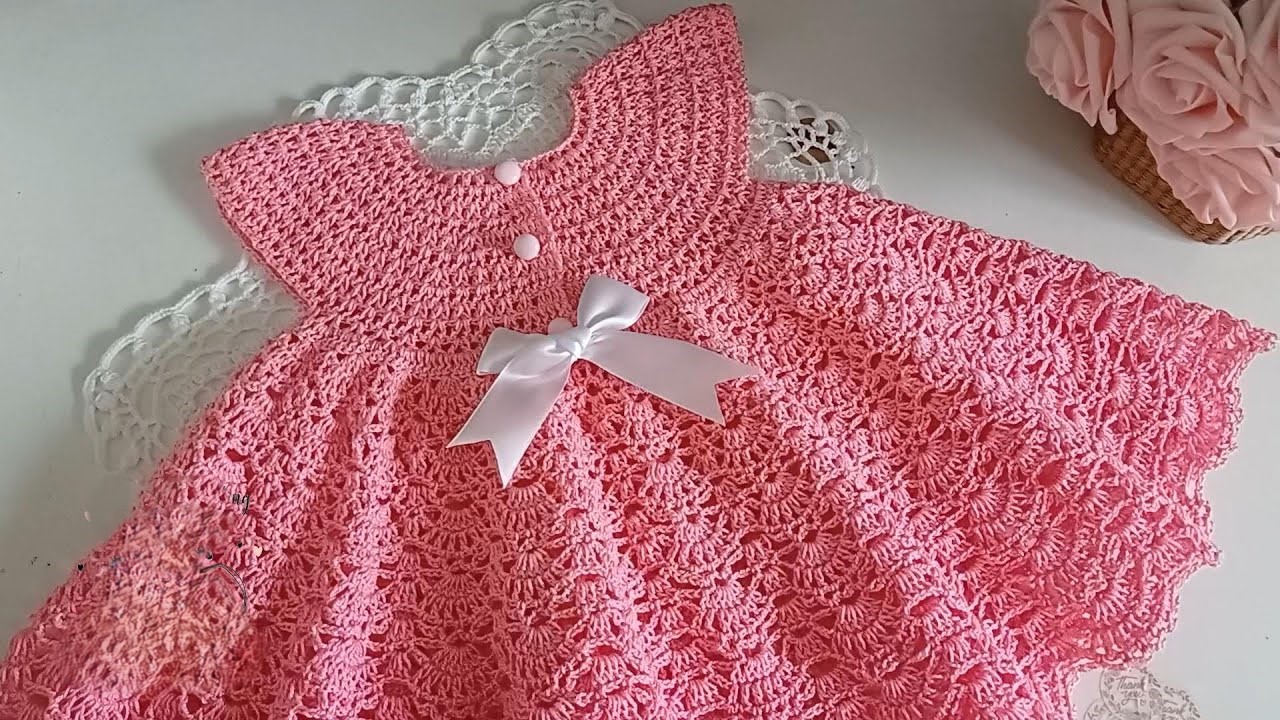
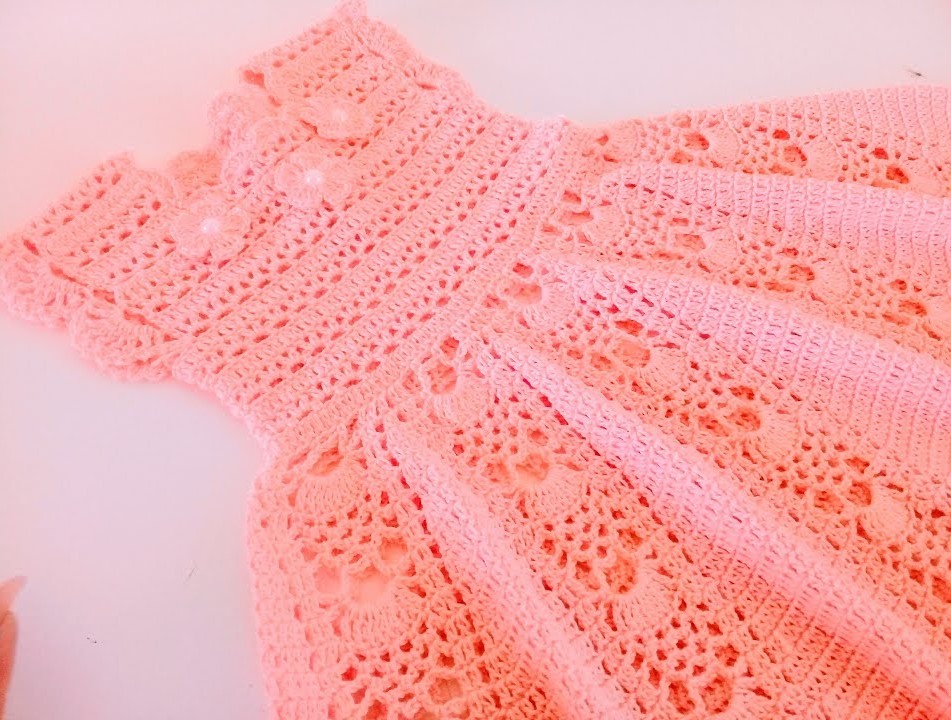
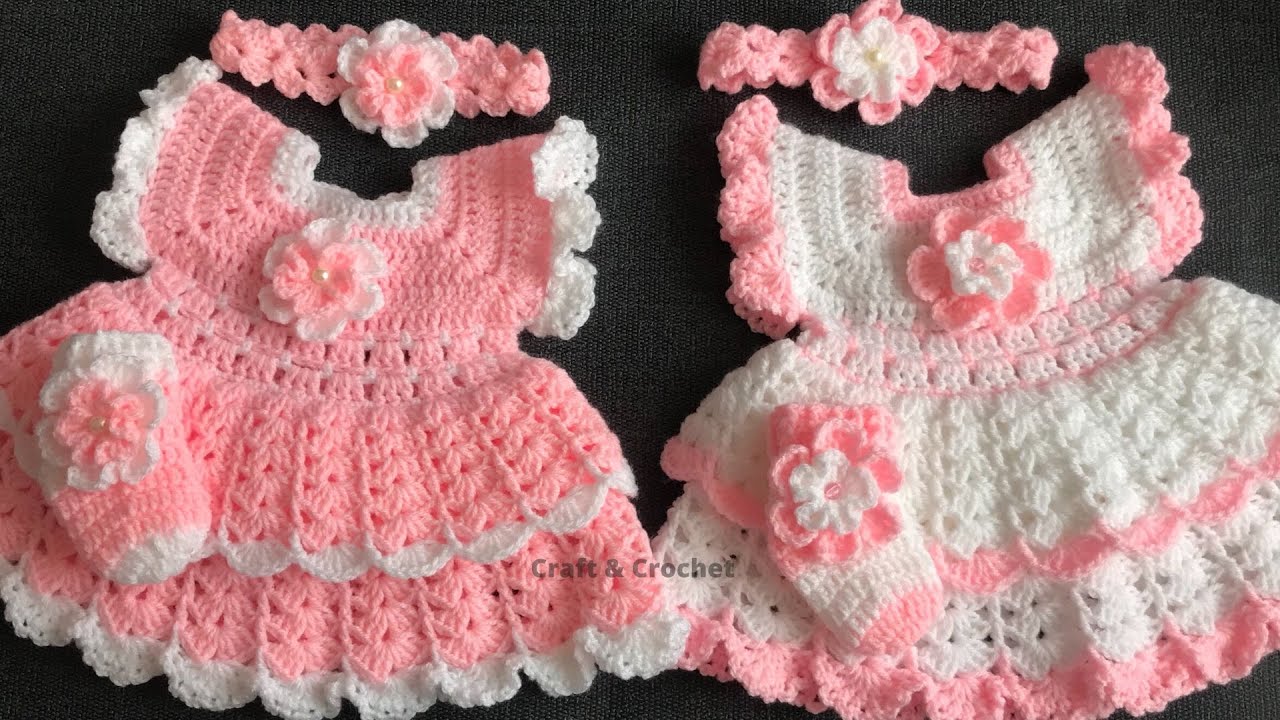
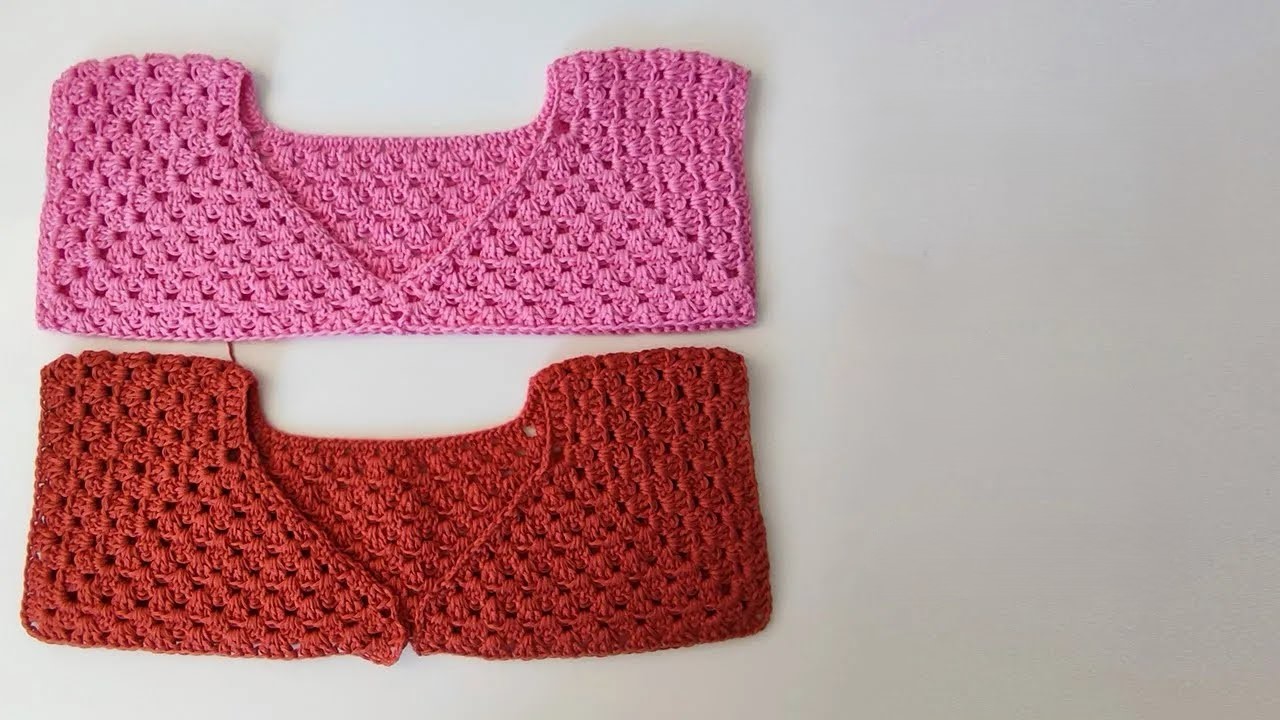
Create a beautiful and seamless yoked garment with this detailed crochet pattern! This guide will walk you through crafting a charming circular yoke, the perfect start to a delightful baby or toddler dress. The simple yet elegant stitch design creates a smooth fabric that drapes beautifully, making this project a joy to crochet and a treasure to wear.
Skill Level: Advanced Beginner
This pattern uses basic stitches and a continuous round construction with strategically placed increases. You should be comfortable with chain, single crochet, double crochet, and slip stitch.
Finished Size (Approximate):
- Size: 9-12 months old.
- Chest Circumference: Approximately 19-20 inches (48-51 cm).
- Yoke Depth: Approximately 5 inches (13 cm).
- Important: The final size can vary slightly depending on your yarn weight, hook size, and personal tension.
Materials You’ll Need:
- Yarn: Approximately 150-200 grams of a soft, DK weight (light worsted) yarn, preferably a cotton or acrylic blend suitable for baby clothes.
- Crochet Hook: A 3.5 mm (E/4) crochet hook. Adjust the hook size if necessary to achieve the correct gauge.
- Scissors
- Yarn Needle: For weaving in ends.
- Stitch Markers: 4 stitch markers to mark the increase points.
Gauge:
18 double crochet stitches and 9 rows should measure approximately 4 inches (10 cm) by 4 inches (10 cm). Always create a gauge swatch before beginning your project to ensure the finished garment will fit as intended.
Abbreviations (US Crochet Terms):
- ch: chain
- sl st: slip stitch
- sc: single crochet
- dc: double crochet
- inc: increase (2 dc in the same stitch)
- st(s): stitch(es)
- FO: Fasten off
Let’s Crochet Your Circular Yoke!
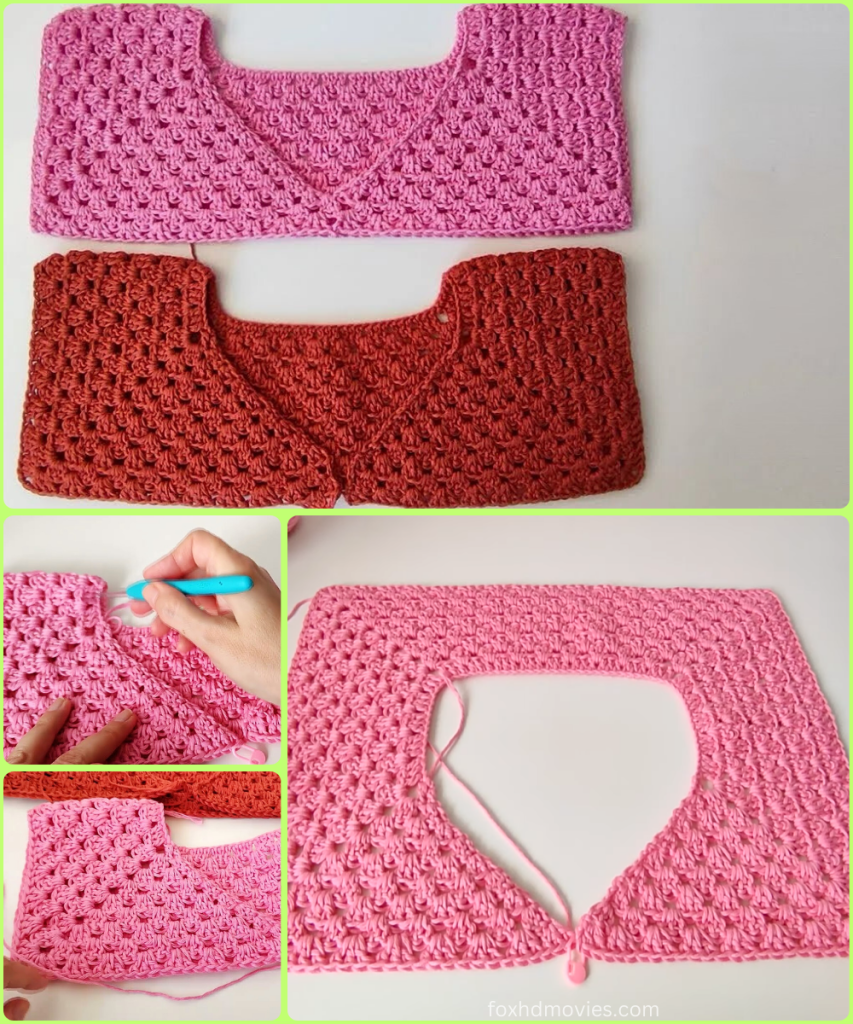
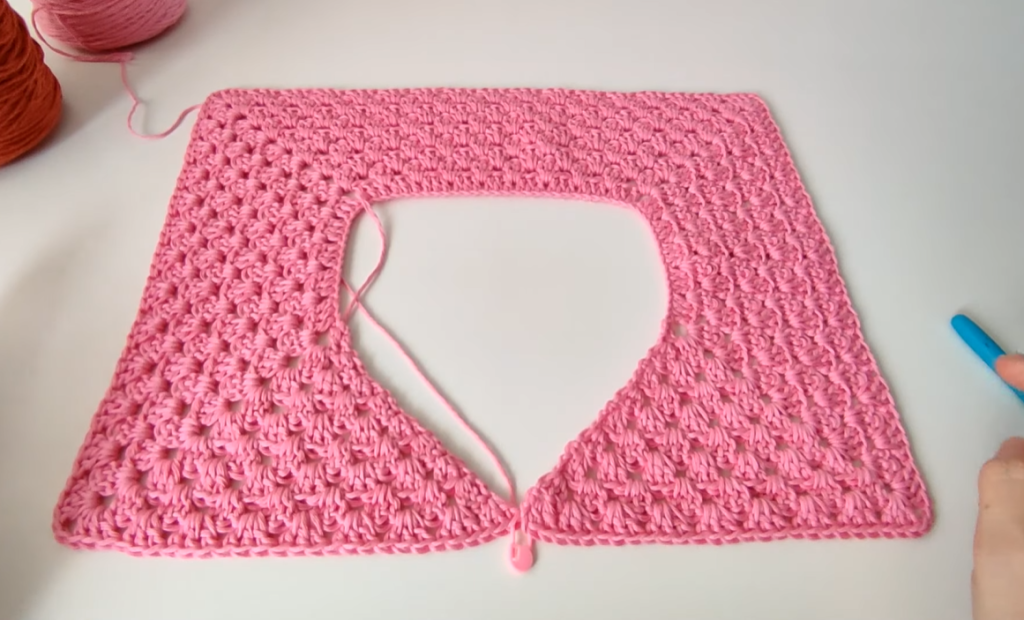
This yoke is worked seamlessly in rounds from the neckline down. The increases are strategically placed to create the circular shape and allow for the armhole openings.
Part 1: The Neckline
- Start: Chain 72 stitches.
- Join: Slip stitch into the first chain to form a ring. Be careful not to twist the chain.
- Round 1: Chain 2 (does not count as a stitch), double crochet in each chain around. Slip stitch to the first double crochet to join. (72 dc)

Part 2: Increasing for the Yoke
The following rounds will establish the increase points that shape the circular yoke. Place stitch markers to divide your work into front, back, and sleeve sections. For a balanced yoke, you’ll typically divide the stitches as follows: Back (24 sts), Sleeve 1 (12 sts), Front (24 sts), Sleeve 2 (12 sts). Adjust these numbers slightly if needed to accommodate your stitch count. Remember to move your stitch markers up in each round.
- Round 2: Chain 2, double crochet in the first stitch. Increase in the next stitch, double crochet in the following 5 stitches. Repeat from * around. Slip stitch to the first double crochet to join. (84 dc)
- Round 3: Chain 2, double crochet in the first stitch. Double crochet in the next stitch, increase in the following stitch, double crochet in the following 6 stitches. Repeat from * around. Slip stitch to the first double crochet to join. (96 dc)
- Round 4: Chain 2, double crochet in the first stitch. Double crochet in the next 2 stitches, increase in the following stitch, double crochet in the following 7 stitches. Repeat from * around. Slip stitch to the first double crochet to join. (108 dc)
- Round 5: Chain 2, double crochet in the first stitch. Double crochet in the next 3 stitches, increase in the following stitch, double crochet in the following 8 stitches. Repeat from * around. Slip stitch to the first double crochet to join. (120 dc)
Continue increasing in this manner, adding one double crochet stitch between each increase point in every round. In each round, you will be increasing by 12 stitches (4 increase points with 3 increases at each point).
- Round 6: (132 dc)
- Round 7: (144 dc)
- Round 8: (156 dc)
- Round 9: (168 dc)
- Round 10: (180 dc)
- Round 11: (192 dc)
- Round 12: (204 dc)
- Round 13: (216 dc)
- Round 14: (228 dc)
- Round 15: (240 dc)
Continue working increase rounds until your yoke reaches the desired depth (approximately 5 inches or 13 cm). For a 9-12 month size, you might aim for around 15-17 increase rounds, resulting in approximately 240-264 double crochet stitches. Adjust the number of rounds based on your gauge and the size you are aiming for.

Part 3: Separating for the Sleeves
Once the yoke is the desired size, you will separate the stitches for the body and sleeves.
- Round 16 (or your last increase round): Chain 2, double crochet in each stitch until you reach your first stitch marker.
- Skip for Sleeve 1: Chain 3 (this forms the underarm space). Skip all the stitches between the first and second stitch markers. Double crochet in the stitch after the second stitch marker.
- Continue for Back: Double crochet in each stitch until you reach your third stitch marker.
- Skip for Sleeve 2: Chain 3. Skip all the stitches between the third and fourth stitch markers. Double crochet in the stitch after the fourth stitch marker.
- Finish the Round: Double crochet in each remaining stitch. Slip stitch to the first double crochet to join.

You have now created the armhole openings.
Part 4: The Body
You will now work in rounds to create the body of the dress or sweater.
- Round 17: Chain 2, double crochet in each stitch around, including the chain spaces under the arms. Slip stitch to the first double crochet to join.
- Continue Rounds: Continue working double crochet in each stitch around until the body of the garment reaches your desired length. You can incorporate different stitch patterns or shaping techniques here if desired.
Part 5: Edging (Optional)
- Neckline Edging: You can add a simple round of single crochet or a picot edge around the neckline for a finished look.
- Sleeve Edging: Similarly, add a round of single crochet or a picot edge around the armhole openings.
- Bottom Edging: Finish the bottom of the dress with a row of single crochet, a decorative shell stitch, or a picot border.
Part 6: Finishing
- Fasten Off: Once you have completed the body and any desired edging, fasten off your yarn securely.
- Weave in Ends: Use your yarn needle to weave in all loose yarn ends neatly on the wrong side of your work.
Video tutorial
Versatile Uses for Your Circular Yoke:
- Baby Dress: Continue crocheting a skirt from the bottom of the yoke.
- Baby Top/Sweater: Finish the body at a shorter length for a top or continue with a different stitch pattern and potentially add sleeves for a sweater.
Customization & Tips:
- Size Adjustment: To make a larger or smaller yoke, adjust the initial chain count and the number of increase rounds. Remember to adjust the stitch markers accordingly. You can also use different yarn weights and hook sizes.
- Stitch Patterns: Experiment with different stitch patterns for the body of the dress or sweater after completing the yoke.
- Embellishments: Add buttons, ribbons, or small crocheted appliques to personalize your garment.
Enjoy crocheting your own beautiful and seamless circular yoke! This versatile pattern provides a wonderful foundation for creating a variety of adorable garments for little ones.