by
by 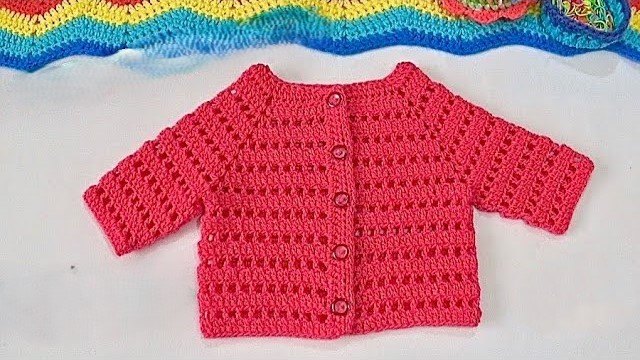
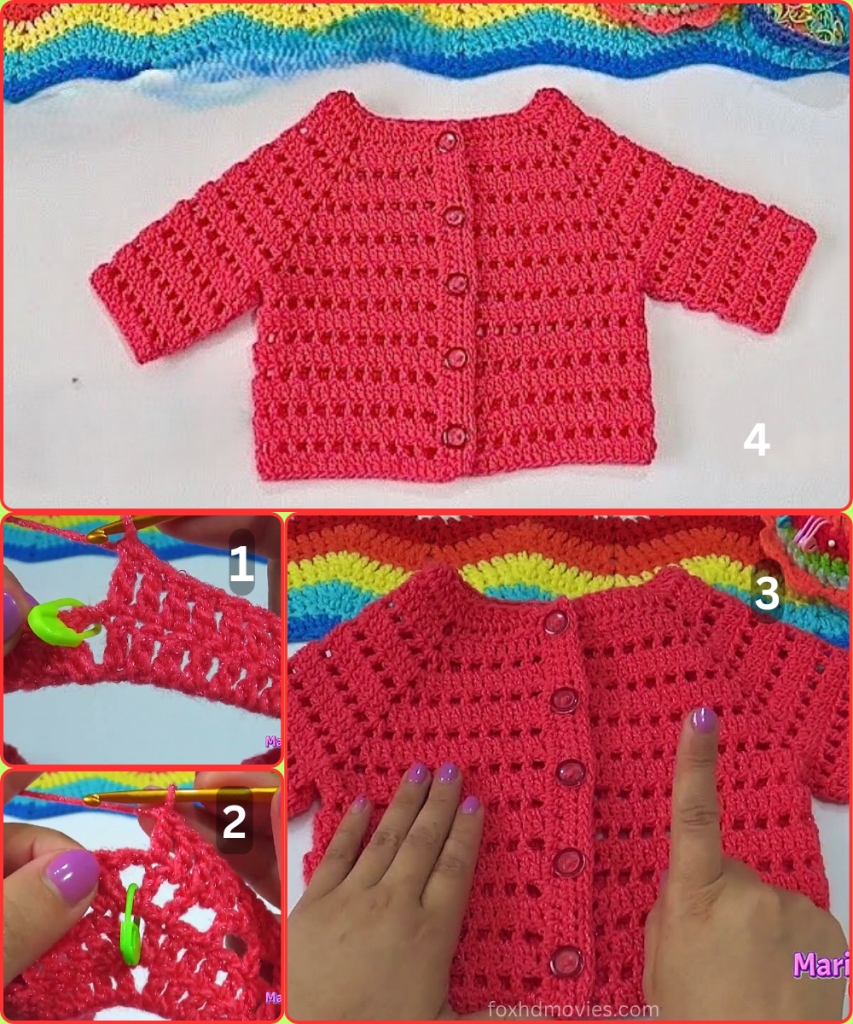
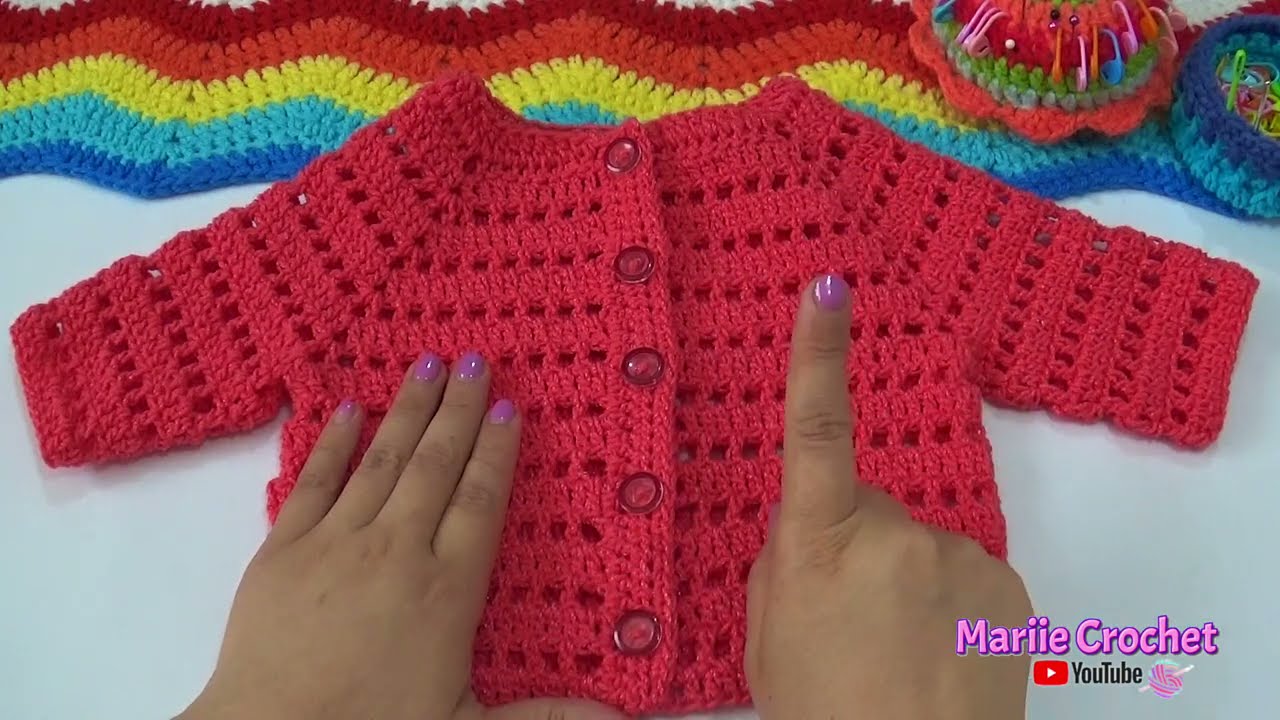
Welcome to our crochet blog! Today, we’re diving into the wonderful world of baby clothes with a pattern for an adorable, lightweight cardigan that’s perfect for any little one. This Little Berry Baby Cardigan is a timeless piece, made with a simple stitch that creates a lovely, lacy texture. It’s an ideal project for an intermediate beginner ready to try their hand at a wearable garment. The pattern is written for a 0-3 month size, but with a bit of simple math, you can easily adjust it for a larger size.
Materials Needed
- Approximately 100-120g of DK weight (or light worsted weight) yarn. For the best result, choose a soft, machine-washable yarn like acrylic, a cotton blend, or superwash merino wool.
- A 4.0mm (G-6) crochet hook.
- 5-6 small buttons (about 1.5 cm or ⅝ inch).
- Tapestry needle for weaving in ends.
- Scissors.
- Stitch markers (optional, but highly recommended).
Gauge
To ensure your cardigan turns out to the correct size, it’s crucial to check your gauge.
- 18 double crochets (dc) and 10 rows = 4 inches (10 cm).
If your gauge swatch is smaller than this, try using a larger hook. If it’s larger, use a smaller hook.
Stitches and Abbreviations
- ch: chain
- sl st: slip stitch
- sc: single crochet
- dc: double crochet
- ch-1 sp: chain-1 space
- sk: skip
- dc2tog: double crochet two together (a decrease)
- […]: repeat instructions within brackets
- ( ): number of stitches at the end of the row
Construction Overview
This cardigan is worked from the top down, meaning we will start at the neckline and increase stitches to create the yoke before separating the sleeves from the body. This method allows you to try on the piece as you go and adjust the length of the body and sleeves as desired.
The Yoke
Row 1: Ch 55. Dc in the 4th ch from the hook (the first 3 chs count as your first dc) and in the next 5 chs. Place a stitch marker in the last dc you made. This is your right front. [Ch 2, sk 1 ch, dc in the next 10 chs.] Place a stitch marker in the last dc. This is your sleeve. [Ch 2, sk 1 ch, dc in the next 18 chs.] Place a stitch marker in the last dc. This is your back. [Ch 2, sk 1 ch, dc in the next 10 chs.] Place a stitch marker in the last dc. This is your sleeve. [Ch 2, sk 1 ch, dc in the last 7 chs.] This is your left front. (52 dc, 4 ch-2 spaces)

Row 2: Ch 3 (counts as dc). Turn. Dc in the first dc and in each dc until you reach the ch-2 sp. In the ch-2 sp, work [2 dc, ch 2, 2 dc]. This creates the corner increase. Repeat the increase in each of the remaining three ch-2 spaces. Dc in each dc until the end of the row. (68 dc, 4 ch-2 spaces)
Row 3: Ch 3. Turn. Dc in each dc until you reach the ch-2 sp. In the ch-2 sp, work [2 dc, ch 2, 2 dc]. Repeat this increase in the next three ch-2 spaces. Dc in each dc to the end. (84 dc, 4 ch-2 spaces)
Row 4: Ch 3. Turn. [Dc in the first dc. Ch 1, sk 1 dc, dc in the next dc. Repeat from * to * until you reach the ch-2 sp.] In the ch-2 sp, work [dc, ch 2, dc]. Repeat this in the next three ch-2 spaces. Continue the [dc, ch 1, sk 1] pattern between the increases. End with dc in the last stitch. (88 dc, 44 ch-1 sps, 4 ch-2 sps)

Row 5: Ch 3. Turn. [Dc in each dc and each ch-1 sp until you reach the ch-2 sp.] In the ch-2 sp, work [2 dc, ch 2, 2 dc]. Repeat this increase in the next three ch-2 spaces. Continue working dc in each dc and ch-1 sp between the increases. End with dc in the last stitch. (124 dc, 4 ch-2 sps)
Row 6: Ch 3. Turn. [Dc in each dc until you reach the ch-2 sp.] In the ch-2 sp, work [2 dc, ch 2, 2 dc]. Repeat this increase in the next three ch-2 spaces. Dc in each dc to the end. (140 dc, 4 ch-2 sps)
Rows 7-8: Repeat rows 4 and 5. At the end of row 8, you should have 184 dc.
Row 9: Repeat row 6. You should now have 200 dc.
Separating the Sleeves and Body
Now, we’ll create the armholes by joining the front and back sections.
Row 10 (Separation Row): Ch 3. Turn. Dc in the first dc and in each dc until you reach the first ch-2 sp. Ch 2, sk the ch-2 sp and all stitches to the next ch-2 sp. Dc in the next ch-2 sp. This joins the front and back, creating an armhole. Dc in each dc until you reach the next ch-2 sp. Ch 2, sk the ch-2 sp and all stitches to the next ch-2 sp. Dc in the next ch-2 sp. Dc in each dc to the end of the row. (96 dc, 4 chs under the armpits)
The Body
You will now work back and forth on the 96 stitches of the body.
Row 11: Ch 3. Turn. [Ch 1, sk 1 dc, dc in the next dc]. Repeat from * to * across the row. The row should end with a dc. (48 dc, 48 ch-1 sps)
Row 12: Ch 3. Turn. Dc in each dc and each ch-1 sp across. (96 dc)
Repeat Rows 11 and 12 until your cardigan reaches your desired length. The image shows approximately 7-8 total rows after the separation.
Last Row of Body: Ch 1. Turn. Sc in each stitch across. Fasten off and weave in your end.
Sleeves (Make 2)
Row 1: Join your yarn at the center of one of the ch-2 spaces you created for the armhole. Ch 3 (counts as dc). Work dc in the same space. Dc in the next ch. [Ch 1, sk 1 dc, dc in the next dc] around the armhole opening. When you reach the underarm, work [dc, ch 1, dc] in the ch-2 sp. Join with a sl st to the top of the beginning ch-3. (18 dc, 18 ch-1 sps)
Row 2: Ch 3. Turn. Dc in each dc and each ch-1 sp around. Join with a sl st to the top of the beginning ch-3. (36 dc)
Row 3: Ch 3. Turn. [Ch 1, sk 1 dc, dc in the next dc] around. Join with a sl st to the top of the beginning ch-3. (18 dc, 18 ch-1 sps)
Repeat Rows 2 and 3 until the sleeve reaches the desired length, or about 10 rows. To decrease for a tapered look, you can dc2tog at the beginning and end of a round every 3rd or 4th row.
Last Row of Sleeve: Ch 1. Turn. Sc in each stitch around. Join with a sl st and fasten off. Weave in all loose ends.
Video tutorial
Video tutorial 2
Finishing Touches
Button Band and Buttonholes:
- Join yarn at the bottom right corner of the cardigan front opening.
- Row 1 (Right Front): Ch 1. Work sc evenly up the entire right front edge, around the neckline, and down the left front edge. Make sure to work enough sc so that the edges don’t pucker. (Tip: work 2 sc in each dc row end and 1 sc in each sc row end).
- Row 2 (Buttonholes): Ch 1. Turn. Sc in the first 2 sc. [Ch 2, sk 2 sc, sc in the next 5 sc]. Repeat for a total of 5-6 buttonholes, placing the last buttonhole just below the neckline. Sc to the top of the neckline. Continue working sc down the other side of the cardigan.
- Row 3: Ch 1. Turn. Sc in each stitch and work 2 sc in each ch-2 sp across the buttonhole row. Sc down the entire length of the cardigan. Fasten off.
Sew on your buttons opposite the buttonholes. Weave in any remaining ends and admire your beautiful, handmade creation!
This pattern is a perfect starting point for customizing your own cardigan. You can add a decorative shell stitch border to the bottom or cuffs, or use different colors to make stripes. The possibilities are endless!