 by
by 
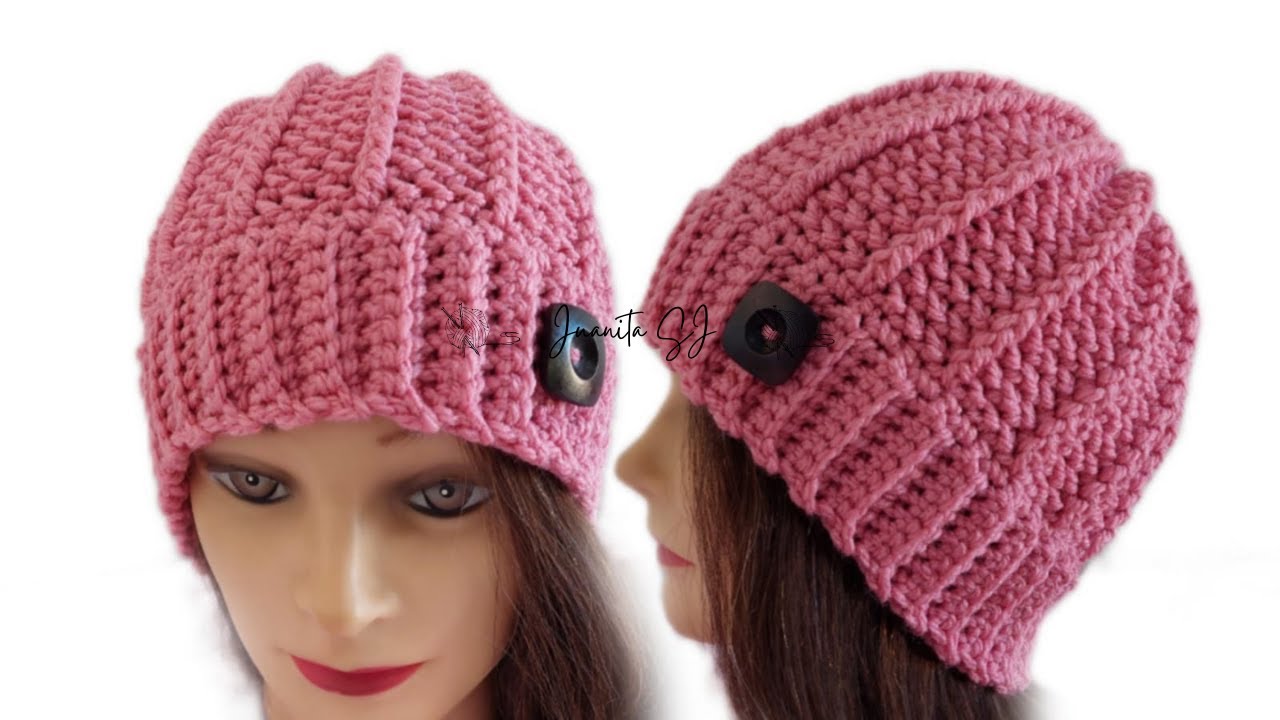
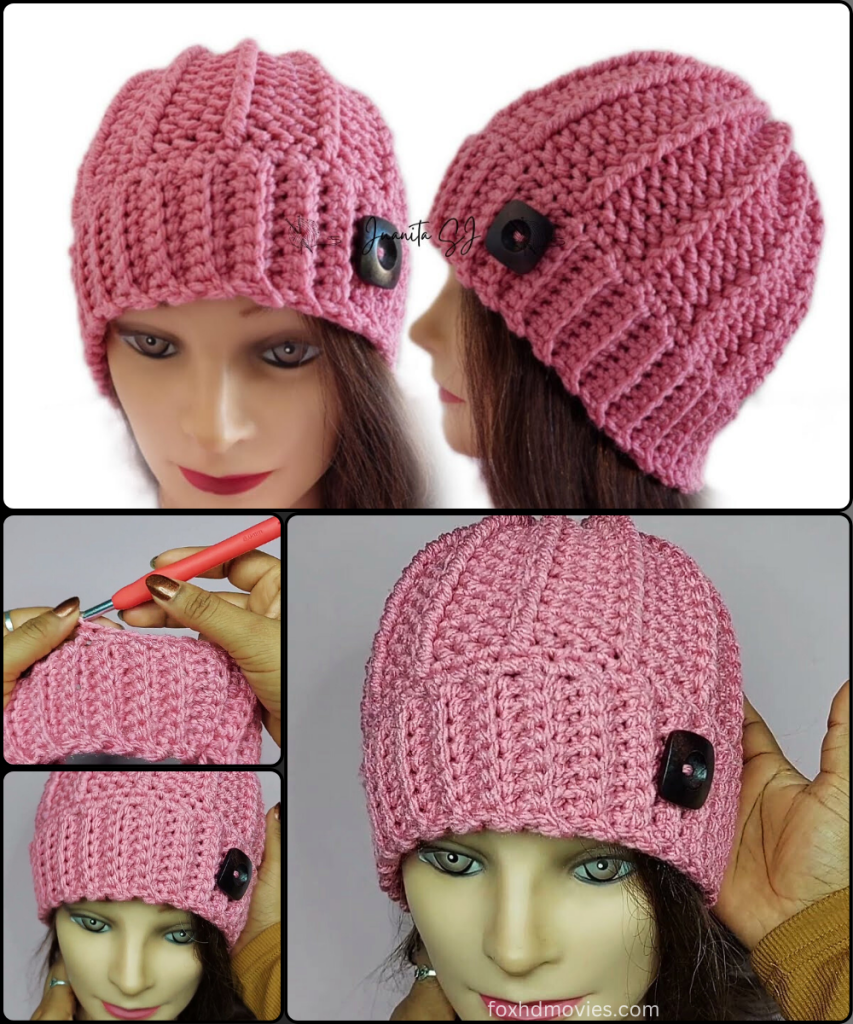
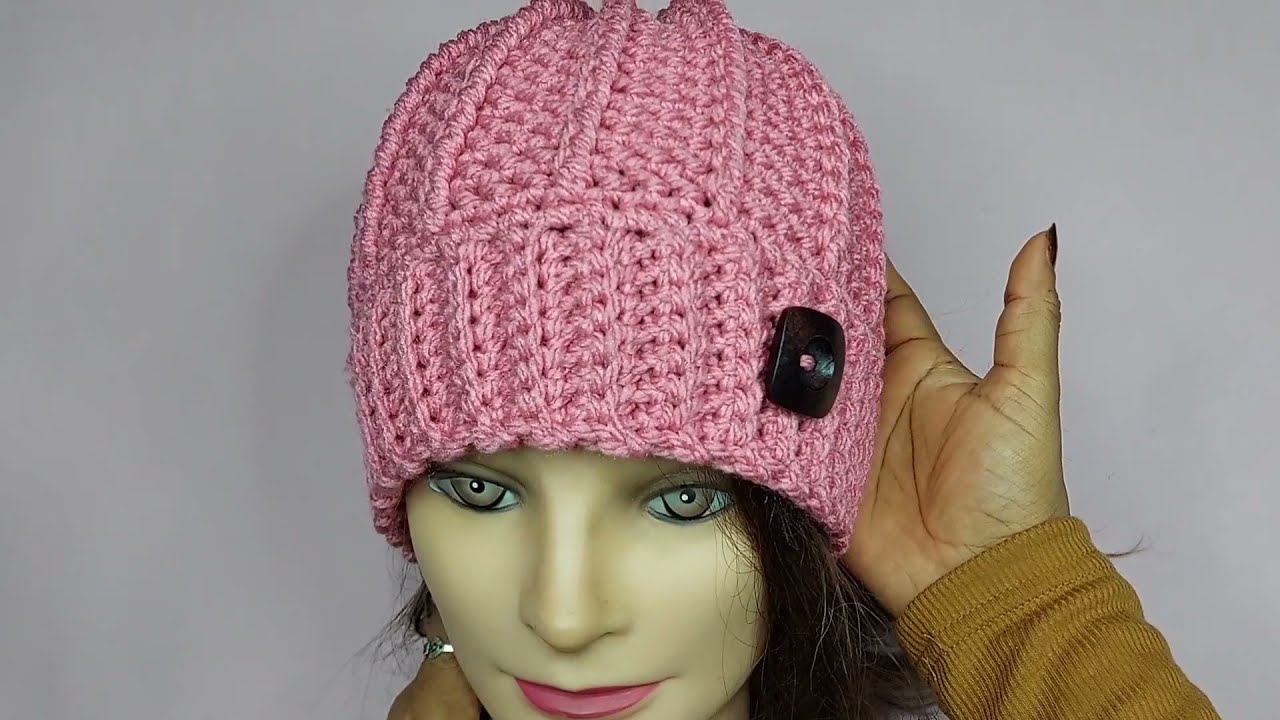
Create your own cozy and stylish hat with this easy-to-follow crochet pattern! Inspired by a detailed tutorial, this design guides you through crafting a simple beanie using a thick yarn. This is a fantastic project for a beginner crocheter who wants to make a personalized accessory for themselves or as a thoughtful gift.
Skill Level: Beginner
Finished Size (Approximate):
- Varies based on the size chart provided in the video.
- The video includes a size chart for different ages, showing head circumference and hat height.
- Size can vary based on yarn, hook, and tension.
Materials You’ll Need:
- Yarn: Approximately 100-150g of a bulky or chunky yarn (5mm thick).
- The video uses a specific yarn, but any yarn of a similar weight would be ideal.
- Crochet Hook: A 6.0 mm crochet hook (or a hook size appropriate for your chosen yarn).
- Wool Needle: For weaving in ends and stitching the top of the hat.
- Tape Measure: To measure the head circumference and hat height.
- Scissors
- Wooden Button (Optional): For decoration.
Gauge:
Achieving consistent gauge is important for sizing. Make sure your stitches are not too loose or too tight. If your fabric is too loose, go down a hook size.
Abbreviations (US Crochet Terms):
- ch: chain
- sl st: slip stitch
- sc: single crochet
- dc: double crochet
- st(s): stitch(es)
- MR: Magic Ring
- FO: Fasten off
Let’s Crochet Your Beanie Hat!
This hat is constructed by first crocheting a flat rectangular piece and then stitching it together to form the hat shape.
Part 1: The Hat Body

- Start: Make a slip knot and chain a length that corresponds to the height of your hat, as per the size chart in the video.
- Row 1: Sc in the second ch from the hook and in each ch across.
- Continue crocheting rows: The video guides you through crocheting the body of the hat using a specific stitch pattern. Continue crocheting rows until the piece is long enough to fit around the circumference of the head.
- FO: Cut the yarn, leaving a long tail for sewing.
Part 2: Assembly

- Sew the Sides: Fold the hat in half, with the right side facing out. Use your wool needle and the long tail of yarn to sew the side seams together, forming a tube.
- Close the Top: With the hat still turned right side out, use your wool needle and a length of yarn to stitch a running stitch along the top edge of the tube.
- Pull the yarn tight to gather the top of the hat, closing the opening. Sew a few more stitches to secure the top.
- Weave in all ends: Use your wool needle to neatly weave in any remaining loose yarn tails.
Part 3: Final Touches
- Turn the hat right side out.
- If you have a wooden button, sew it onto the front of the hat for decoration.
Video tutorial
Versatile Uses for Your Beanie Hat:
- Everyday Wear: Keep your head warm and cozy in style.
- Gift: A thoughtful and impressive handmade gift for a friend or family member.
Customization & Tips:
- Color Choice: Experiment with different yarn colors for a unique look.
- Size Adjustment: Use the size chart in the video to create a hat for any age.
- Yarn Choice: You can use a different yarn type, but be sure to adjust your hook size and gauge accordingly.
- Decoration: Add a pom-pom, an embroidered design, or a different kind of button for a personalized touch.
Enjoy crocheting your own beautiful, practical, and unique beanie hat! It’s a fantastic way to create a personalized accessory that’s sure to become a favorite.