 by
by 
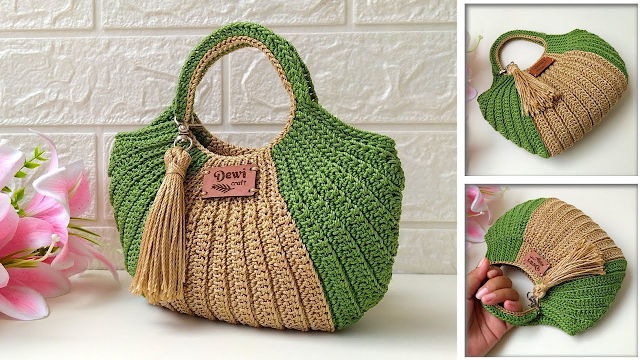
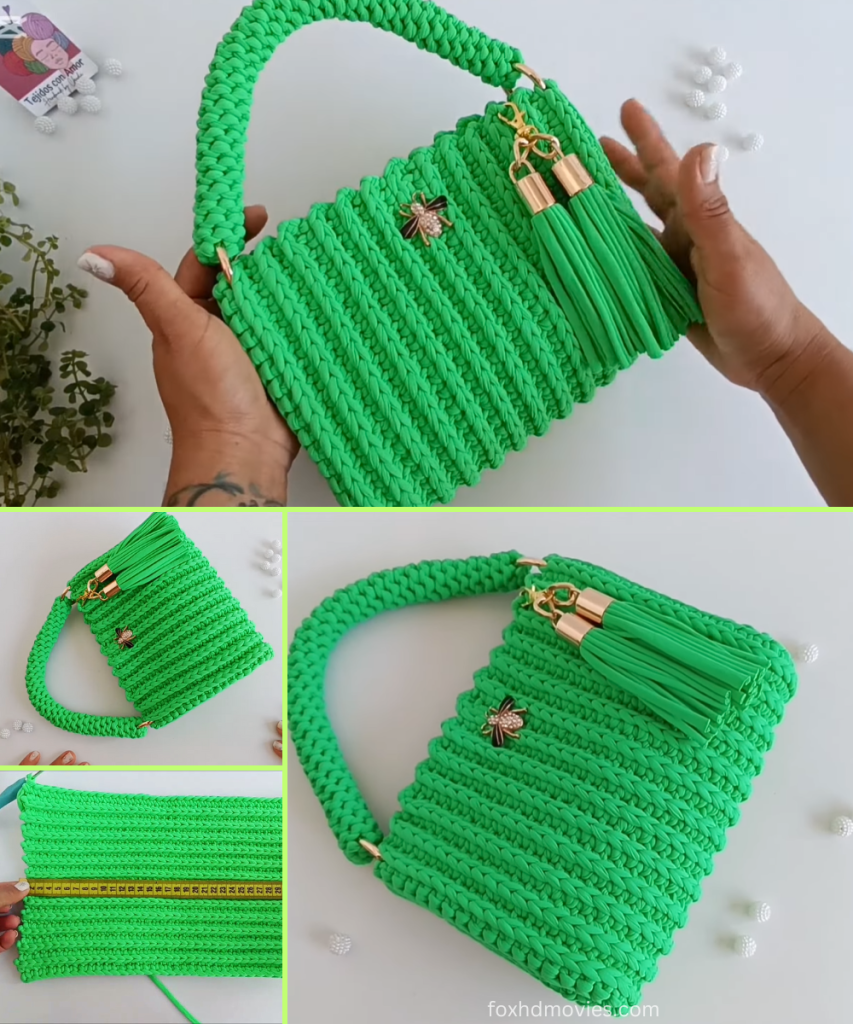
Craft your own trendy and elegant handbag with this surprisingly simple crochet pattern! Inspired by a detailed tutorial, this project uses a basic single crochet stitch to create a stylish accessory that’s both economical and chic. Whether you’re a seasoned crocheter or looking for your next functional project, you’ll love how quickly this bag comes together with minimal material.
Skill Level: Easy to Intermediate
Finished Size (Approximate):
- Bag Body: Approximately 14.5 inches (37 cm) long x 8.25 inches (21 cm) wide
- Handle: Approximately 11 inches (28 cm) long
- Size can vary based on yarn, hook, and tension.
Materials You’ll Need:
- Yarn: Approximately 410 grams of Trapillo yarn (T-shirt yarn) or a bulky/super bulky weight yarn that achieves a similar sturdy fabric.
- The video specifically mentions Trapillo. If using regular yarn, ensure it’s a sturdy fiber like cotton blend or acrylic, and you may need to hold multiple strands together to achieve the desired thickness and stiffness.
- Crochet Hook: A hook size appropriate for your chosen yarn.
- The video doesn’t specify the hook size, but for Trapillo or super bulky yarn, typically a 7.0 mm (L) to 10.0 mm (N/P) hook is used. Choose one that creates a firm, dense fabric.
- Tapestry Needle: For seaming and weaving in ends.
- Scissors
- Stitch Marker (Optional): To mark the beginning of rows or specific stitches.
- Magnetic Clasp: One set of magnetic snap closures for the bag opening.
- Carabiner Rings (Optional): Two carabiner rings (or D-rings) for attaching the handle.
- Bell Caps & Tassels (Optional): Small bell caps and extra yarn for decorative tassels.
- Decorative Appliqué (Optional): For embellishing the clasp or bag.
Gauge (Crucial for Bag Shape!):
While not explicitly stated in the video, achieving a firm, dense fabric is crucial for this bag to hold its shape. Work a swatch to ensure your stitches are tight enough. If your fabric is too loose, go down a hook size.
Abbreviations (US Crochet Terms):
- ch: chain
- sl st: slip stitch
- sc: single crochet
- dec: decrease (sc2tog – single crochet 2 stitches together)
- st(s): stitch(es)
- FO: Fasten off
- BLO: Back Loop Only
Let’s Crochet Your Chic Handbag!
This bag is constructed in three main parts: the main body, two side panels, and the handle.
Part 1: The Bag Body (Main Color)
The bag body is a flat rectangle worked in rows.
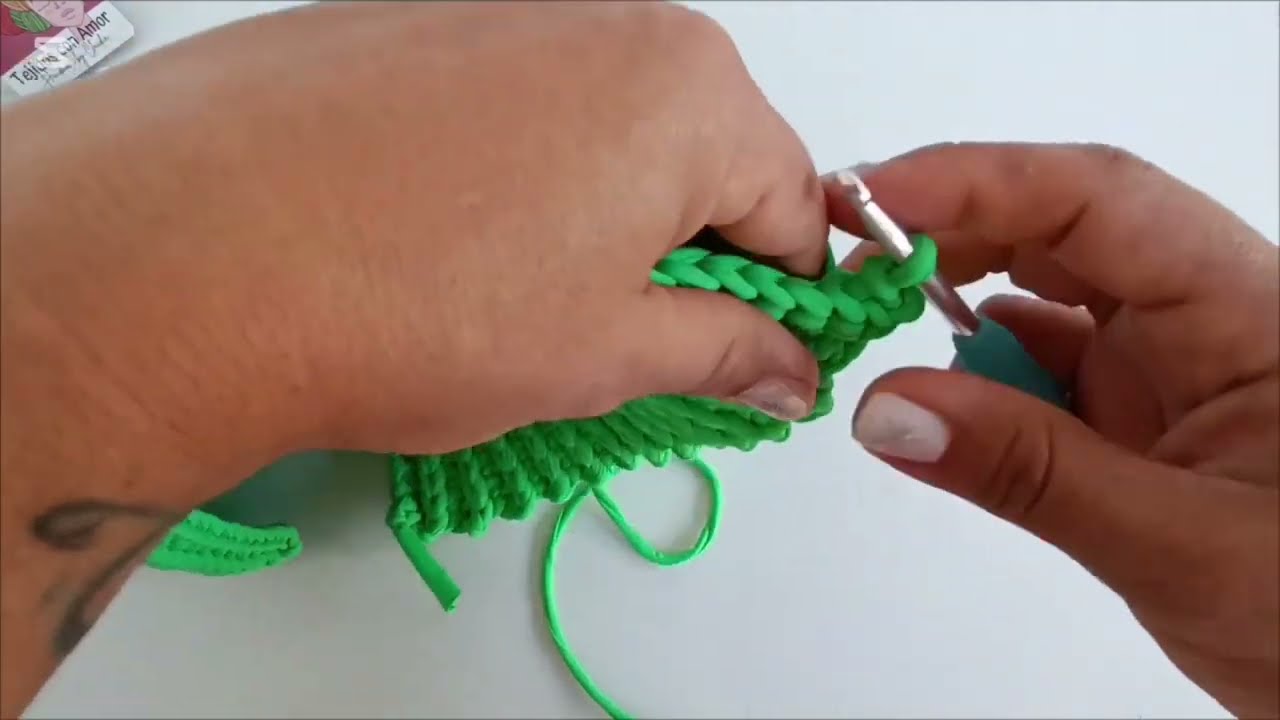
- Ch 43.
- Row 1: Sc in 2nd ch from hook and in each ch across. Ch 1, turn. (42 sc)
- Row 2 – 45 (or until desired height): Sc in BLO of each sc across. Ch 1, turn. (42 sc)
- The video states the final body dimensions are 37 cm long and 21 cm wide. Adjust the number of rows to achieve a width of approximately 21 cm (8.25 inches).
- Working in the BLO creates a subtle ribbed texture, adding to the bag’s elegance.
FO, leaving a long tail (approx. 20-25 inches / 50-65 cm) for seaming.
Part 2: The Side Panels (Make 2 – Main Color)
These panels will give your bag its depth and shape. They are shaped with decreases.
- Ch 10. (This will be the initial width of your side panel. Adjust for a wider/narrower bag).
- Row 1: Sc in 2nd ch from hook and in each ch across. Ch 1, turn. (9 sc)
- Row 2 – 20 (or until desired length before shaping): Sc in BLO of each sc across. Ch 1, turn. (9 sc)
- The video shows a gradual decrease to shape the sides. You’ll need to determine the length of the straight section based on your desired bag depth.
- Let’s assume approximately 20 rows for the straight part before shaping.

Shaping the Side Panel (Decreases):
- Row 21: Sc in BLO of first 2 sc, dec over next 2 sc, sc in BLO of next 3 sc, dec over next 2 sc, sc in BLO of last sc. Ch 1, turn. (7 sc)
- Row 22: Sc in BLO of first sc, dec over next 2 sc, sc in BLO of next 3 sc, dec over next 2 sc. Ch 1, turn. (5 sc)
- Row 23: Sc in BLO of first sc, dec over next 2 sc, sc in BLO of next 2 sc. Ch 1, turn. (4 sc)
- Row 24: Sc in BLO of first sc, dec over next 2 sc, sc in BLO of last sc. Ch 1, turn. (3 sc)
- Row 25: Dec over next 2 sc, sc in BLO of last sc. Ch 1, turn. (2 sc)
- Row 26: Dec over next 2 sc. (1 sc)
FO, leaving a long tail for seaming. Repeat all steps to make a second identical side panel.
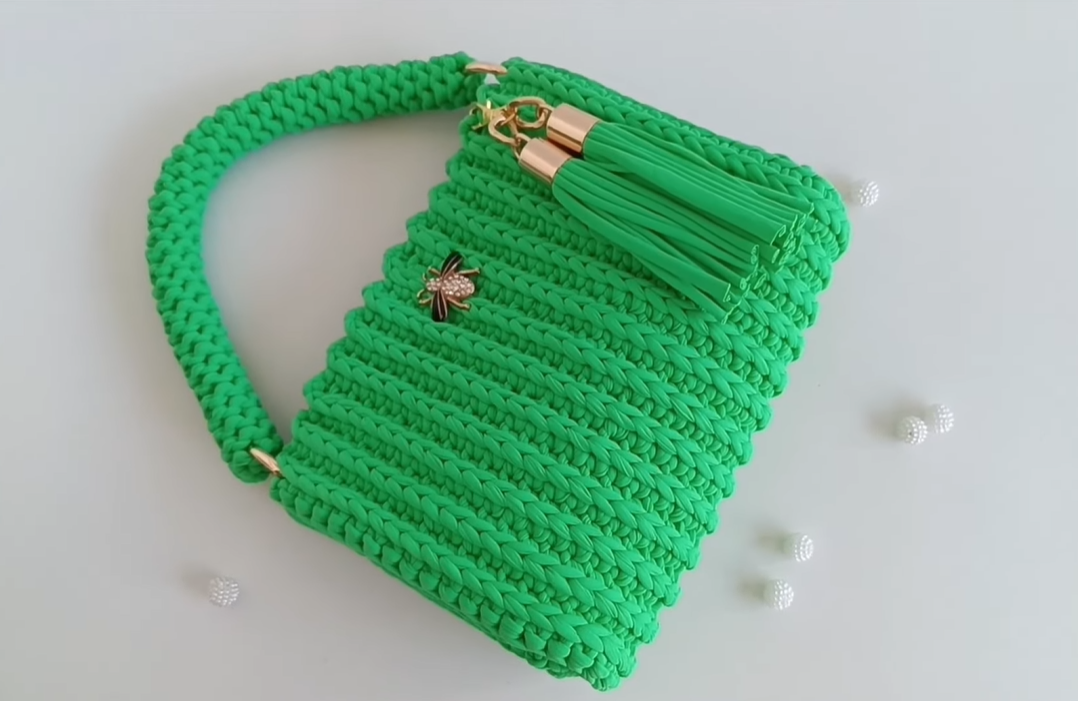
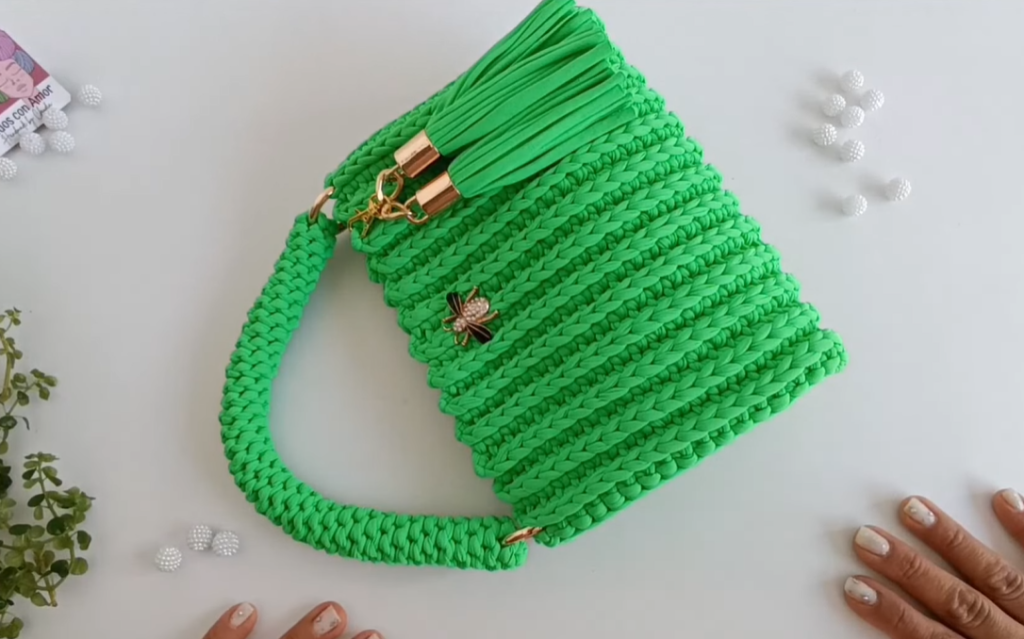
Part 3: The Handle (Main Color)
The video shows a rounded handle made with continuous slip stitches.
- Ch 6. (Adjust for desired handle width/thickness).
- Row 1: Sl st in 2nd ch from hook and in each ch across. Ch 1, turn. (5 sl st)
- Row 2 – 60 (or until desired length): Sl st in BLO of each sl st across. Ch 1, turn. (5 sl st)
- The video states the handle is about 28 cm (11 inches) long. Adjust the number of rows to achieve this length.
- Working in BLO with slip stitches creates a very dense, sturdy, and rounded cord-like handle.
FO, leaving a long tail for attaching.
Part 4: Assembly
- Attach Side Panels to Body:
- Take one side panel and align it with one of the short ends of the main bag body.
- Using your tapestry needle and the long tail from the side panel, begin sewing the side panel to the main body. The video suggests using a simple whip stitch or mattress stitch for a clean finish.
- Sew along the short end and then up the long side of the bag body, following the curve of the side panel.
- Repeat for the second side panel on the opposite side of the bag body.
- Attach Magnetic Clasp:
- Determine the center of the bag opening.
- Following the instructions for your magnetic clasp, sew one half to the inside top edge of the front of the bag and the other half to the inside top edge of the back of the bag. Ensure they align perfectly when the bag is closed.
- Attach Handle:
- The video shows attaching the handle using carabiner rings. If using these, simply loop the ends of your crocheted handle through the rings and sew them securely. Then, attach the carabiner rings to the top corners of your bag.
- If not using rings, simply sew the ends of the handle directly to the top corners of the bag, making sure they are securely attached.
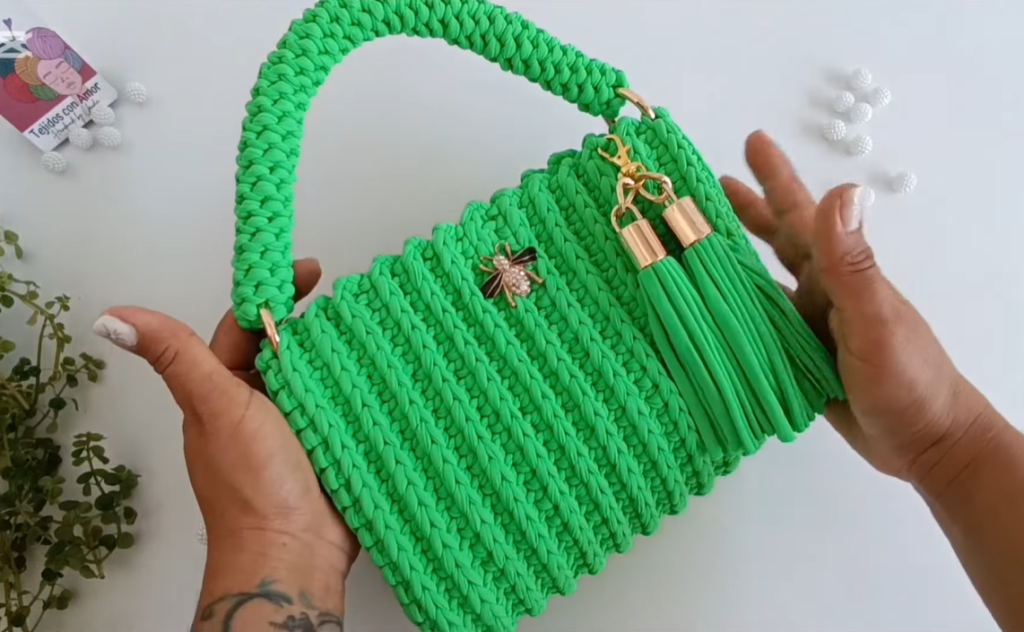
Part 5: Finishing Touches & Embellishments (Optional)
- Weave in all ends: Use your tapestry needle to neatly weave in any remaining loose yarn tails throughout the bag.
- Decorative Tassels (Borlitas):
- Cut several strands of yarn (e.g., 10-15 strands, 6-8 inches long).
- Fold them in half and loop them through a small bell cap.
- Tie a knot around the top to secure.
- Trim the ends evenly.
- Attach these tassels to the handle or sides of the bag for extra flair.
- Decorative Appliqué:
- If you have a decorative appliqué (e.g., a small crocheted flower, a fabric patch), sew it onto the magnetic clasp or anywhere on the bag for a personalized touch.
Video tutorial
Versatile Uses for Your Chic Handbag:
- Everyday Purse: Perfect for carrying essentials like your phone, wallet, and keys.
- Project Bag: A stylish way to carry a small crochet or knitting project.
- Gift: A thoughtful and impressive handmade gift for friends or family.
Customization & Tips:
- Yarn Choice: While Trapillo is used, experiment with other sturdy yarns. Consider holding two strands of worsted weight cotton together for a similar effect.
- Size Adjustment:
- Larger Bag: Increase the initial chain count for the bag body and the number of rows. Adjust the side panel dimensions accordingly.
- Smaller Bag: Decrease the initial chain count for the bag body and the number of rows. Adjust the side panel dimensions.
- Handle Style: Instead of the slip stitch handle, you could crochet a flat single crochet strap, or use a pre-made leather or chain handle for a different look.
- Lining (Optional): For extra durability and to prevent items from slipping through stitches, you can sew a fabric lining inside the bag.
Enjoy crocheting your own trendy and economical handbag! It’s a fantastic way to create a unique accessory that’s sure to turn heads.