 by
by 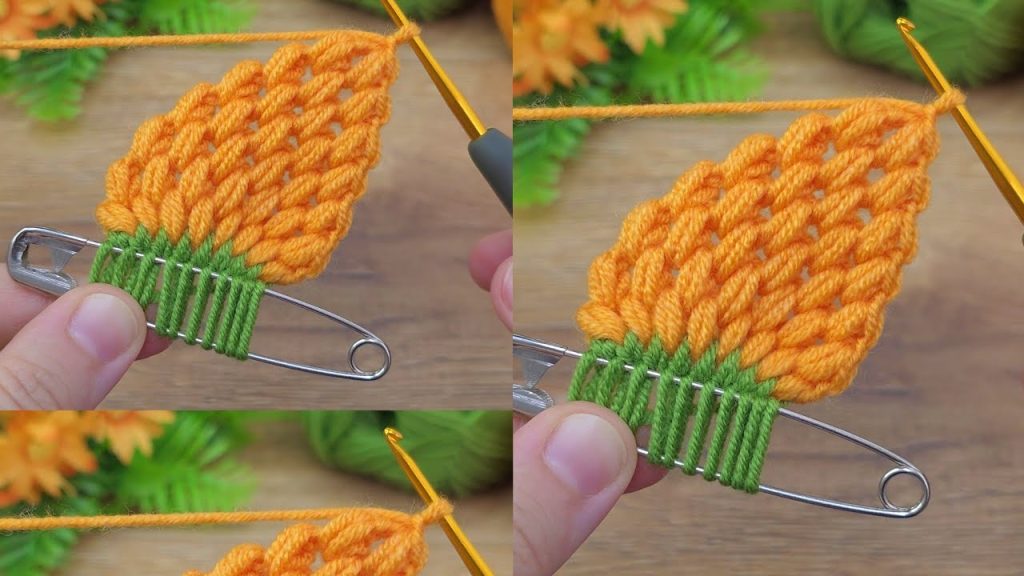
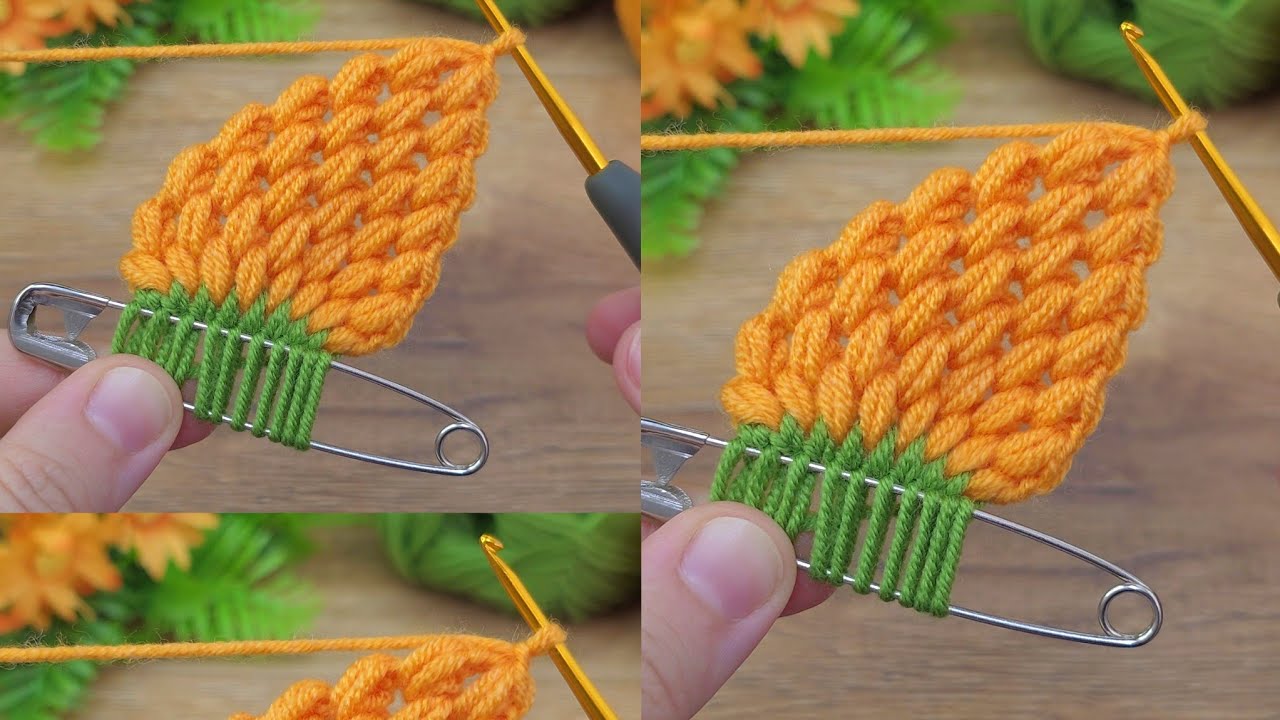
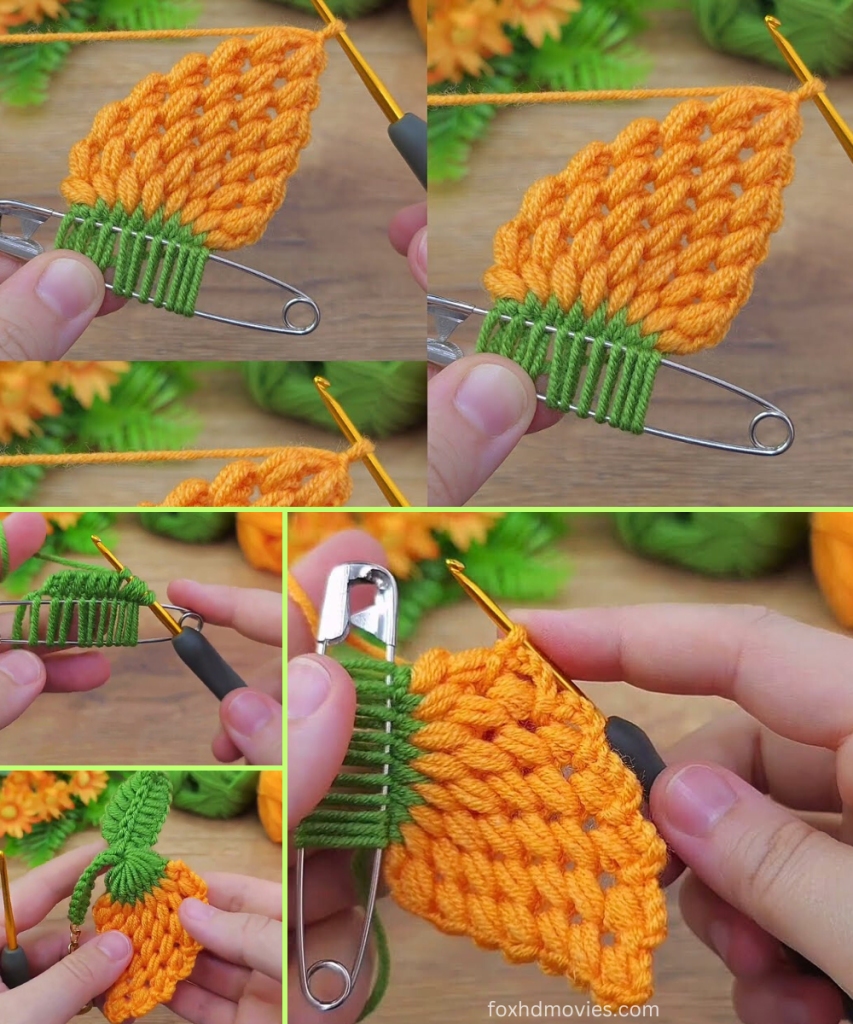
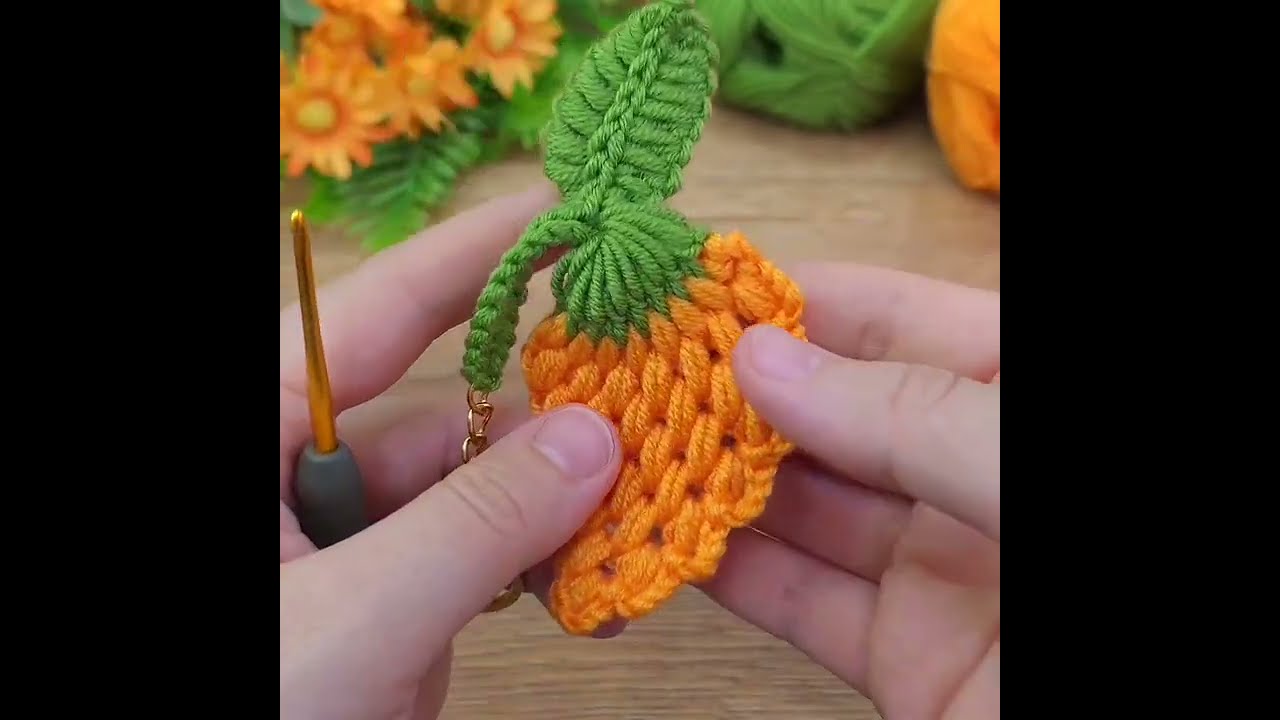
Add a touch of whimsical charm to your keys or bag with this adorable crocheted carrot keychain! Inspired by a clear and concise tutorial, this pattern is quick to make and creates a delightful, textured carrot with a fun green top. It’s a perfect project for beginners and a wonderful way to personalize your accessories or create thoughtful, handmade gifts.
Skill Level: Easy
Finished Size (Approximate):
- Carrot Length (including top): Approximately 3.5 – 4.5 inches (9 – 11.5 cm)
- Size can vary slightly based on yarn, hook, and tension.
Materials You’ll Need:
- Yarn: Small amounts of DK weight (Light Worsted / 8 ply) yarn in two colors:
- Color A (Carrot Body): Orange
- Color B (Carrot Top): Green
- Any smooth acrylic or cotton yarn will work beautifully.
- Crochet Hook: C/2 (2.20 mm) or size needed to obtain a firm fabric.
- A smaller hook than recommended for your yarn weight will help the carrot hold its shape, especially for a keychain.
- Keychain Ring/Clasp: One standard keychain ring or lobster clasp.
- Tapestry Needle: For weaving in ends and assembling the top.
- Scissors
- Stitch Marker (Optional but Recommended): To mark the beginning of rounds when working in continuous spirals.
- Small amount of Fiberfill or Yarn Scraps (Optional): For stuffing the carrot body.
Gauge (Not Critical, but Aim for a Firm Fabric!):
Since this is a small decorative item, exact gauge isn’t crucial. However, aim for a fabric that is firm and without large gaps to ensure your carrot holds its shape nicely. If your stitches are too loose, go down a hook size.
Abbreviations (US Crochet Terms):
- ch: chain
- sl st: slip stitch
- sc: single crochet
- inc: increase (2 sc in the same stitch)
- dec: decrease (sc2tog – single crochet 2 stitches together)
- st(s): stitch(es)
- MR: Magic Ring
- FO: Fasten off
Let’s Crochet Your Cute Carrot Keychain!
This carrot is worked in two parts: the orange body (worked in a continuous spiral) and the green top.
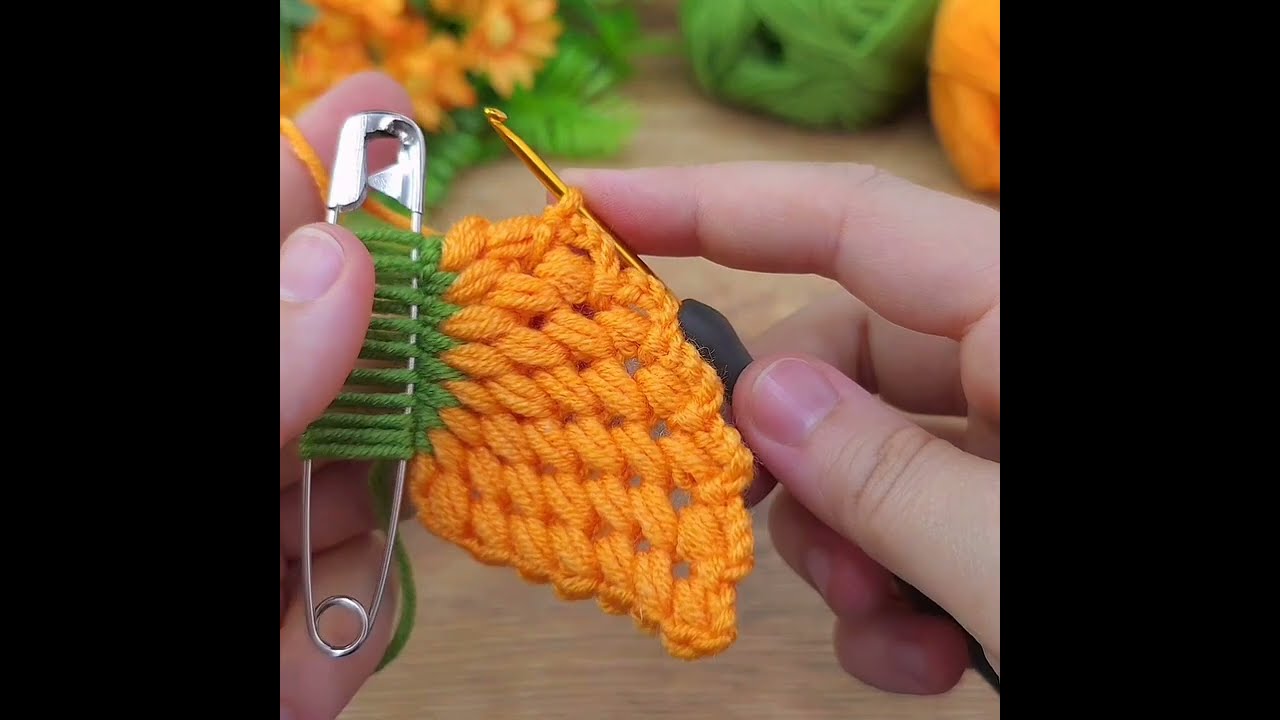
Part 1: The Carrot Body (Color A – Orange)
Start with Color A (Orange). We will work in continuous rounds, so use a stitch marker to mark the first stitch of each round.
Rnd 1: Create a Magic Ring (MR). Work 6 sc into the MR. (6 sc)
- Pull the MR tight to close. This forms the tip of your carrot.
Rnd 2: Sc in each sc around. (6 sc)
Rnd 3: Sc in first sc, inc in next sc. Repeat from * to * 3 times. (9 sc)
Rnd 4: Sc in each sc around. (9 sc)
Rnd 5: Sc in first 2 sc, inc in next sc. Repeat from * to * 3 times. (12 sc)
Rnd 6: Sc in each sc around. (12 sc)
Rnd 7: Sc in first 3 sc, inc in next sc. Repeat from * to * 3 times. (15 sc)
Rnd 8 – 10: Sc in each sc around. (15 sc)
- Work 3 rounds without increases to give your carrot some length.
Rnd 11: Sc in first 3 sc, dec over next 2 sc. Repeat from * to * 3 times. (12 sc)
- Begin decreasing to shape the top of the carrot.
Rnd 12: Sc in first 2 sc, dec over next 2 sc. Repeat from * to * 3 times. (9 sc)
- Stuffing (Optional): Lightly stuff the carrot body with fiberfill or yarn scraps. Don’t overstuff, as you want it to remain slightly flexible.
Rnd 13: Sc in first sc, dec over next 2 sc. Repeat from * to * 3 times. (6 sc)
FO Color A, leaving a long tail (approx. 10-12 inches / 25-30 cm) for closing and attaching the top.
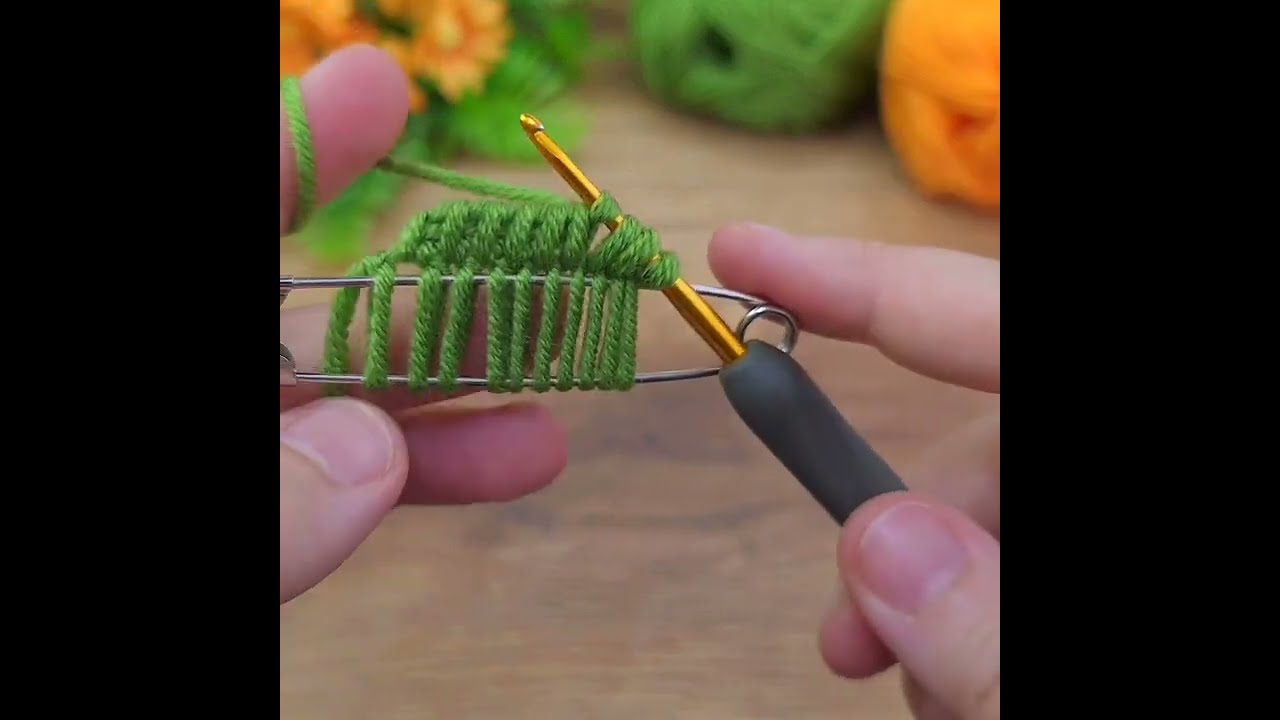
Part 2: The Carrot Top (Color B – Green) – Make 3-4 pieces
Start with Color B (Green). The video uses a safety pin technique for the top, but we’ll use a simple crocheted “leaf” for a similar effect.
For each leaf piece (make 3-4):
- Ch 10.
- Sl st in 2nd ch from hook. Sc in next ch. Hdc in next ch. Dc in next ch. Tr in next ch. Dc in next ch. Hdc in next ch. Sc in next ch. Sl st in last ch. (This creates one leaf shape).
- FO, leaving a tail (approx. 4-6 inches / 10-15 cm) for assembly.
Part 3: Assembly & Finishing Touches
- Close Carrot Body: Using the long tail from the orange carrot body and your tapestry needle, weave the tail through the front loop of each remaining 6 stitches. Pull tight to close the opening. Secure with a knot.
- Attach Carrot Top:
- Gather all the green leaf pieces.
- Using the tails from the green leaves and your tapestry needle, sew them securely to the top (closed end) of the orange carrot body. Arrange them to fan out naturally, creating the leafy top.
- Weave in all remaining green tails.
- Create Keychain Loop:
- Using the orange tail from the carrot body (or a new piece of green yarn if you prefer the loop to be green), create a loop at the very top center of the carrot.
- Ch 15 (or desired length for your keychain loop). Sl st back into the top center of the carrot to form the loop.
- Secure well with a knot and weave in any remaining yarn.
- Attach Keychain Ring: Thread your keychain ring or lobster clasp onto the crocheted loop.
Finishing Touches:
- Weave in all ends: Use your tapestry needle to neatly weave in any remaining loose yarn tails.
- Shape: Gently shape your carrot to ensure it has a nice, even form.
Video tutorial
Versatile Uses for Your Crochet Carrot Keychain:
- Keychains: A fun and unique addition to your keys.
- Bag Charms: Clip onto backpacks, purses, or tote bags.
- Zipper Pulls: Add a cute touch to jackets or pouches.
- Small Gifts: Perfect for Easter baskets, party favors, or a quick handmade token for gardeners!
- Play Food: Make a larger version for a child’s play kitchen.
Customization & Tips:
- Size Adjustment:
- Larger Carrot: Use a thicker yarn (e.g., worsted weight) and a larger hook (e.g., H/5.0 mm). Increase the initial stitch count and the number of increase/decrease rounds to make it longer and wider.
- Smaller Carrot: Use a finer yarn (e.g., fingering or lace weight) and a smaller hook (e.g., 1.5 mm). Reduce the initial stitch count and the number of rounds.
- Carrot Top Variation: Instead of individual leaves, you could make a small chain and then work sc/sl st into it to create a more “bushy” top.
- Stuffing: For a firmer carrot, stuff more densely. For a softer, squishier one, stuff lightly.
Enjoy creating your sweet and simple crochet carrot keychain! It’s a fantastic way to add a personal and whimsical touch to your everyday items.