by
by 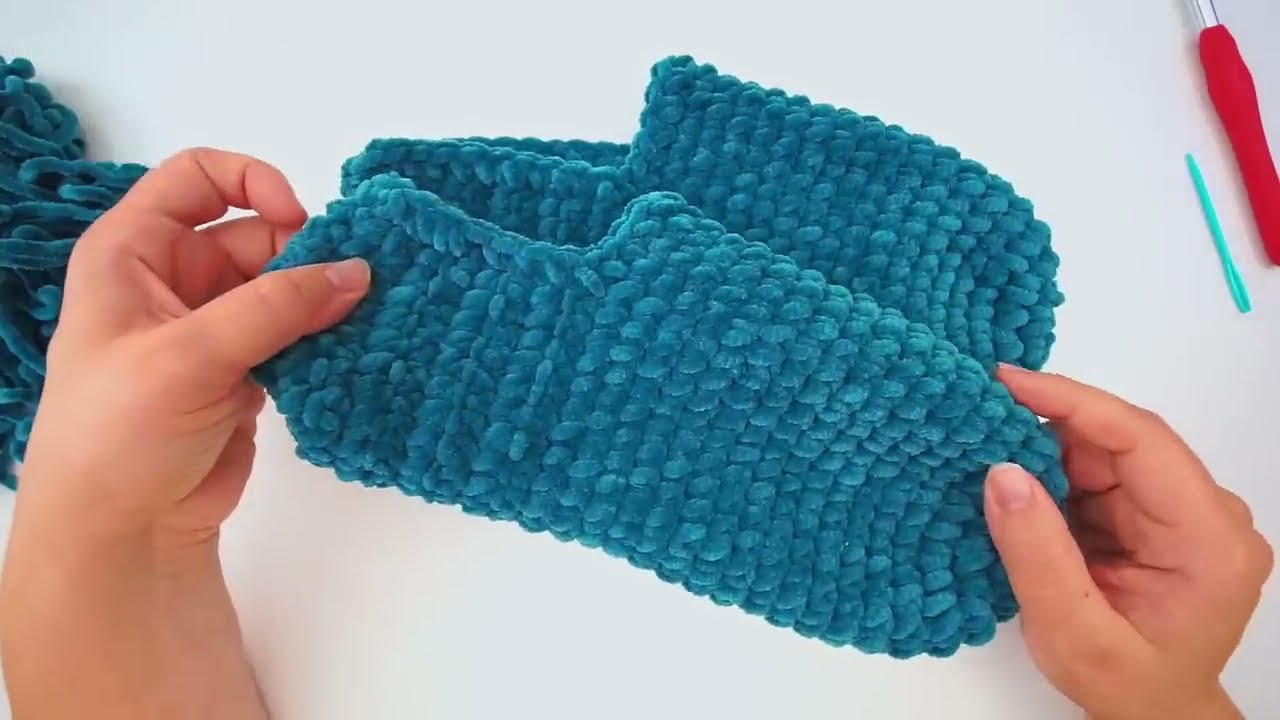
These slippers are designed for ultimate comfort, using a super bulky yarn to create a soft, plush fabric that molds to your feet. They are worked in rounds, building up from the toe to the heel.
Skill Level: Easy Yarn: Super Bulky (Category 6) chenille or blanket yarn (e.g., Bernat Blanket Yarn). Approximately 150-200 yards per pair. Hook: 9.0 mm (M/N) or 10.0 mm (N/P) crochet hook (or hook size recommended for your chosen yarn to achieve a dense but flexible fabric). Notions: Yarn needle, scissors, stitch marker.
Gauge: Not critical, but aim for a dense fabric that holds its shape. Approximately 6 sc x 6 rows = 4 inches (un-stretched).
Finished Size: Adult Medium (US Women’s 7-9, Men’s 6-8). Instructions for adjusting size are included.
Abbreviations (US Terms):
- ch: chain
- sl st: slip stitch
- sc: single crochet
- inc: increase (2 sc in the same stitch)
- dec: decrease (sc2tog – single crochet 2 together)
- st(s): stitch(es)
- fo: fasten off
Pattern Notes:
- This slipper is worked from the toe upwards and then shaped for the heel.
- The entire slipper is worked in continuous rounds (unless otherwise specified for the heel shaping). Use a stitch marker to keep track of the beginning of each round.
- The stitch count at the end of each round is crucial for proper shaping.
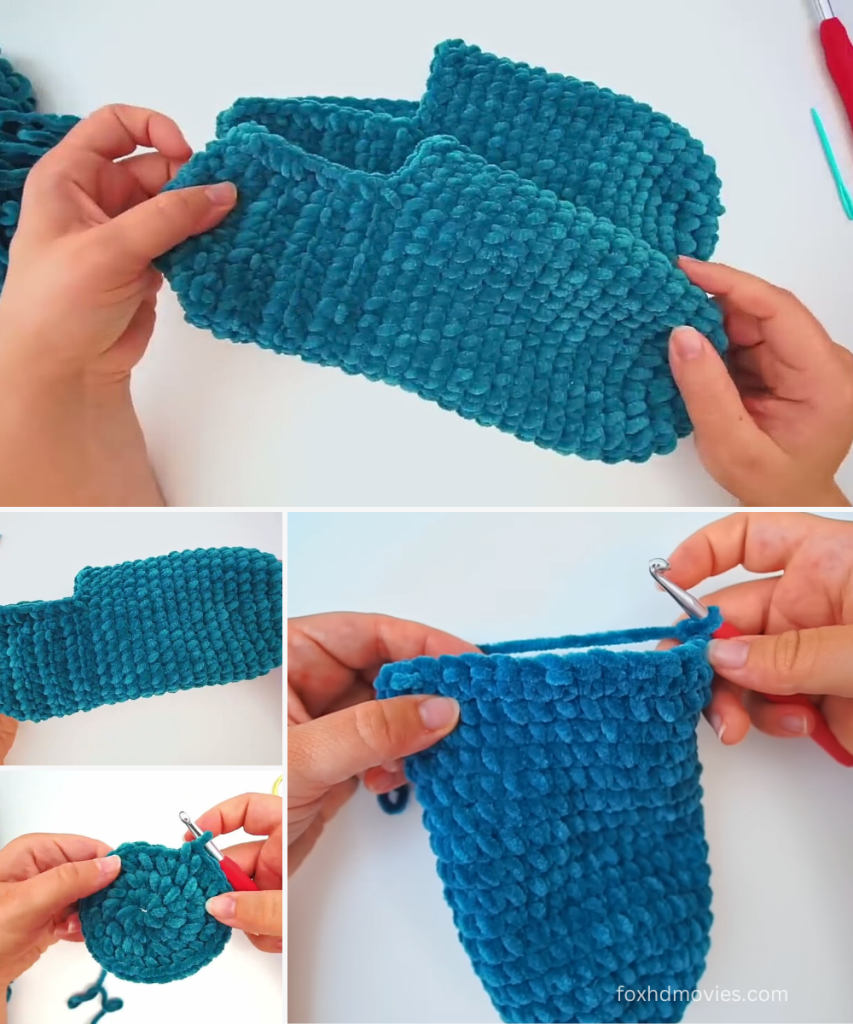
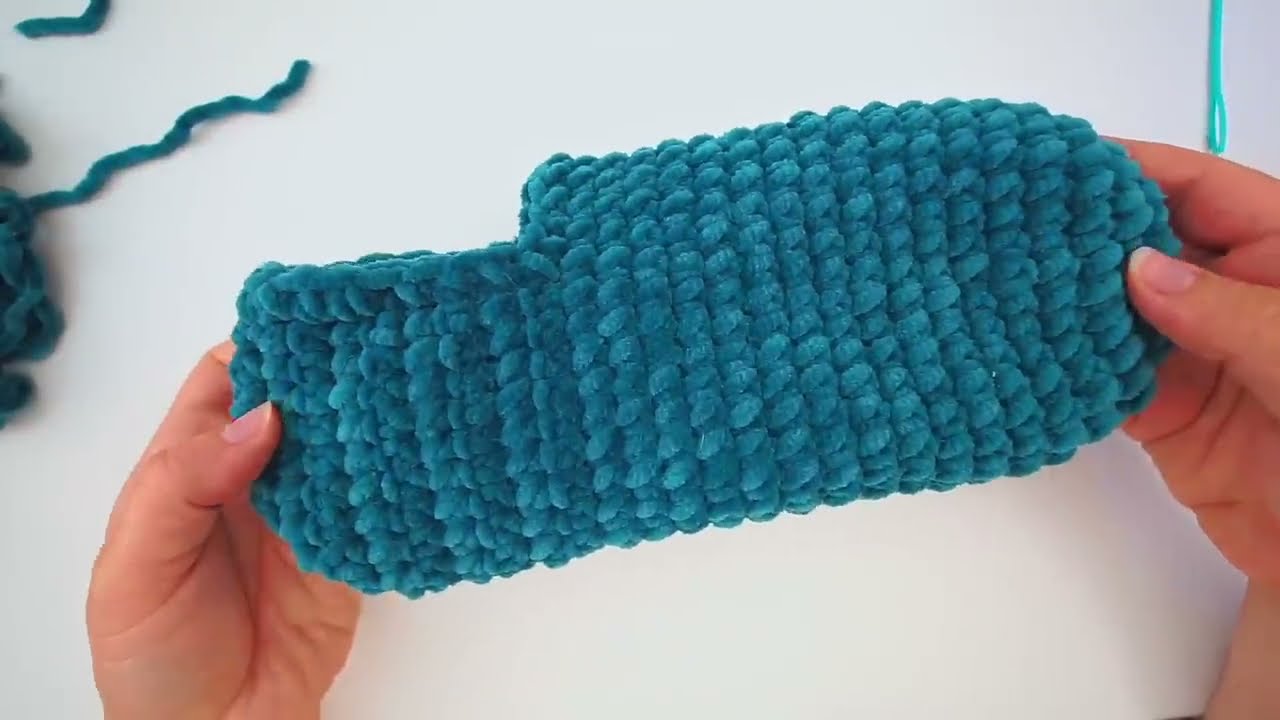
Part 1: The Toe and Foot Base
We start by creating a flat oval for the toe and then build up the sides.
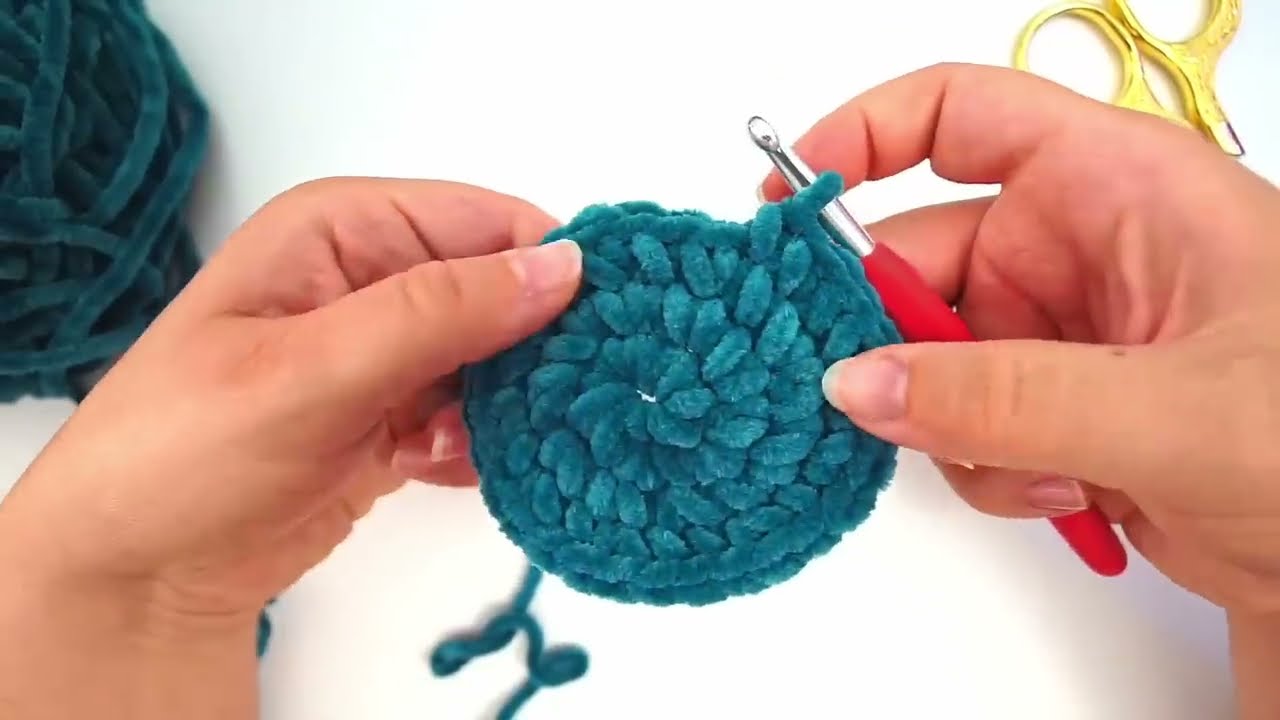
Starting Chain: Ch 7 (this will form the initial toe length. Adjust by adding or removing chains for different foot lengths: longer for larger feet, shorter for smaller feet).
Round 1: Sc in 2nd ch from hook. Sc in next 4 ch. 3 sc in last ch. Working down the other side of the chain: Sc in next 4 ch. 2 sc in last ch (this completes the oval). (14 sts)
Round 2: Inc in first st. Sc in next 4 sts. Inc in next 3 sts. Sc in next 4 sts. Inc in next 2 sts. (20 sts)
Round 3: (Sc in next st, inc) x 1. Sc in next 4 sts. (Sc in next st, inc) x 3. Sc in next 4 sts. (Sc in next st, inc) x 2. (26 sts)
Round 4: (Sc in next 2 sts, inc) x 1. Sc in next 4 sts. (Sc in next 2 sts, inc) x 3. Sc in next 4 sts. (Sc in next 2 sts, inc) x 2. (32 sts)
- For wider feet or larger sizes, you can add another increase round here, following the established increase pattern.
Building the Foot (No more increases): Now we will work even rounds to create the body of the slipper.
Round 5: Sc in each st around. (32 sts)
- Place your stitch marker at the beginning of this round.
Round 6 – 15 (or until desired length before heel shaping): Sc in each st around. (32 sts)
- Work these rounds until the slipper reaches the point where your foot bends into the heel, usually around the back of the arch. Try it on if possible, keeping in mind it will stretch.
- For a longer slipper (larger size), add more rounds here. For a shorter slipper (smaller size), do fewer rounds.
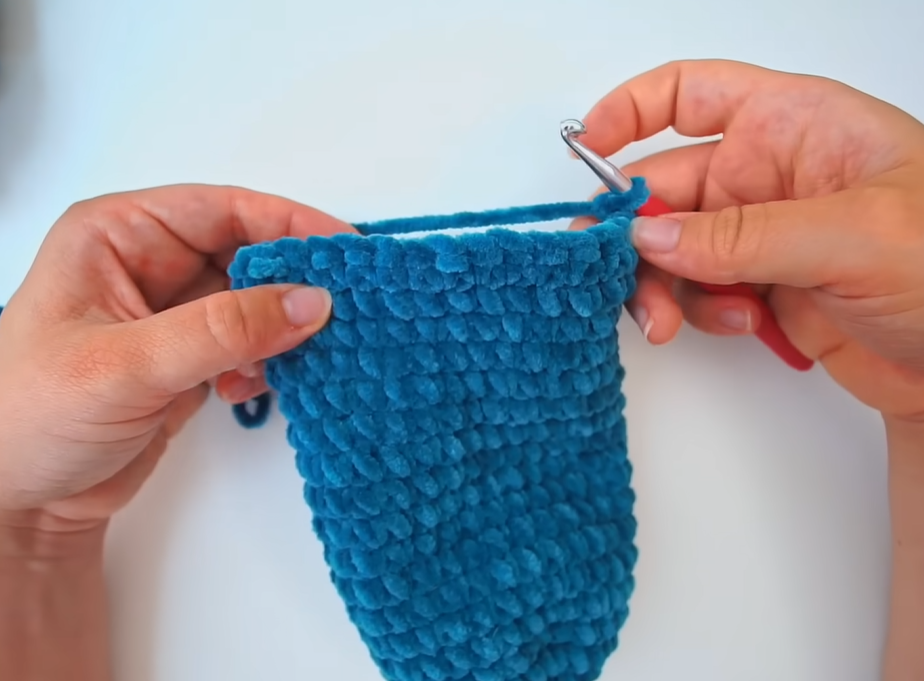
Part 2: Shaping the Heel
The heel is created by working back and forth in rows, along with decreases, to form the cup shape.
Important Note: Do NOT join rounds or chain 1 at the beginning of these heel shaping rows. We will work directly into the stitches.
Row 1 (Heel Base): Identify the center back of your slipper opening. You will work across approximately 16-18 stitches to start the heel flap (about half your total stitches, centered at the back).
- Sc in the next 16-18 sts. Do NOT turn. (You are now at the other side of the heel opening).
Row 2 (First Decrease Row):
- Do NOT turn. Sl st into the first sc of this current row (this creates a subtle turn and keeps the fabric dense). Sc in the next 14-16 sts (skip the sl st you just made).
- Dec over the last 2 sts of the row. Do NOT turn. (You should now have 15-17 sts).
Row 3:
- Do NOT turn. Sl st into the first st of this current row. Sc in next sts until 2 sts remain.
- Dec over the last 2 sts. Do NOT turn. (You should have 1 st less than the previous row).
Repeat Row 3: Continue repeating Row 3 until you have approximately 6-8 stitches remaining for the heel opening. This forms the curved heel.
Part 3: Closing the Heel
You now have a small opening at the back. We will stitch this closed.
- Leave a long tail (approx. 10-12 inches) and cut the yarn.
- Thread the tail onto your yarn needle.
- Carefully align the edges of the heel opening.
- Using your yarn needle, stitch the opening closed using a whip stitch or mattress stitch. Stitch through both layers of the heel opening to create a strong, invisible seam. Pull tightly to close any gaps.
- Secure the yarn end and weave it into the inside of the slipper.
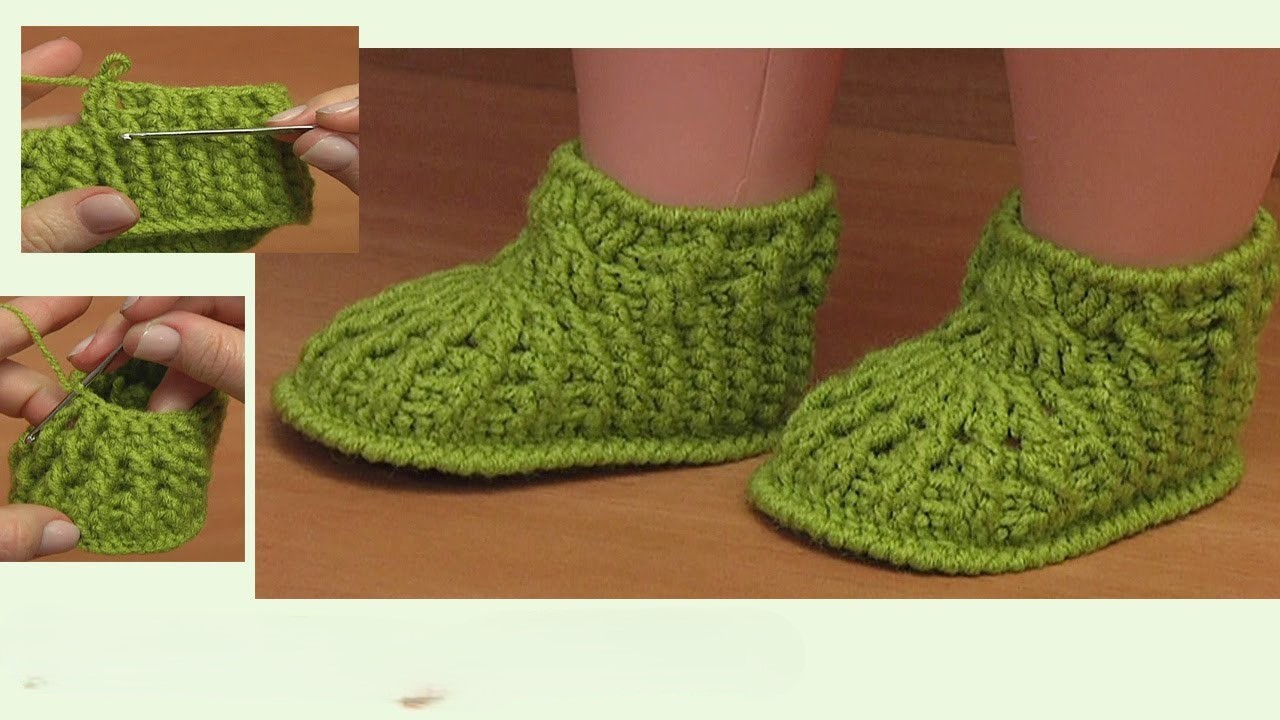
Video tutorial
Part 4: Finishing
- Weave in any remaining loose ends securely.
- Repeat all steps for the second slipper. Ensure they are symmetrical.
Tips for Success with Chenille/Blanket Yarn:
- Stitch Definition: It can be hard to see individual stitches. Rely on feeling the stitches with your hook.
- Slippery Yarn: This yarn can be slippery. Take care to keep your tension consistent.
- No Gaps: Aim for tight single crochets to prevent gaps, but not so tight that the fabric is stiff.
Enjoy your incredibly soft and cozy handmade slippers!