by
by 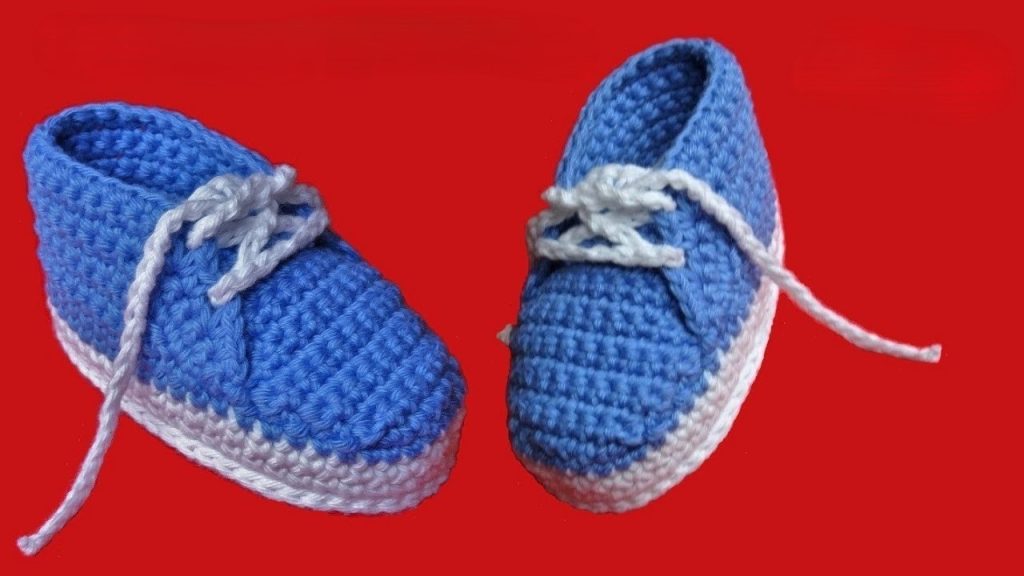
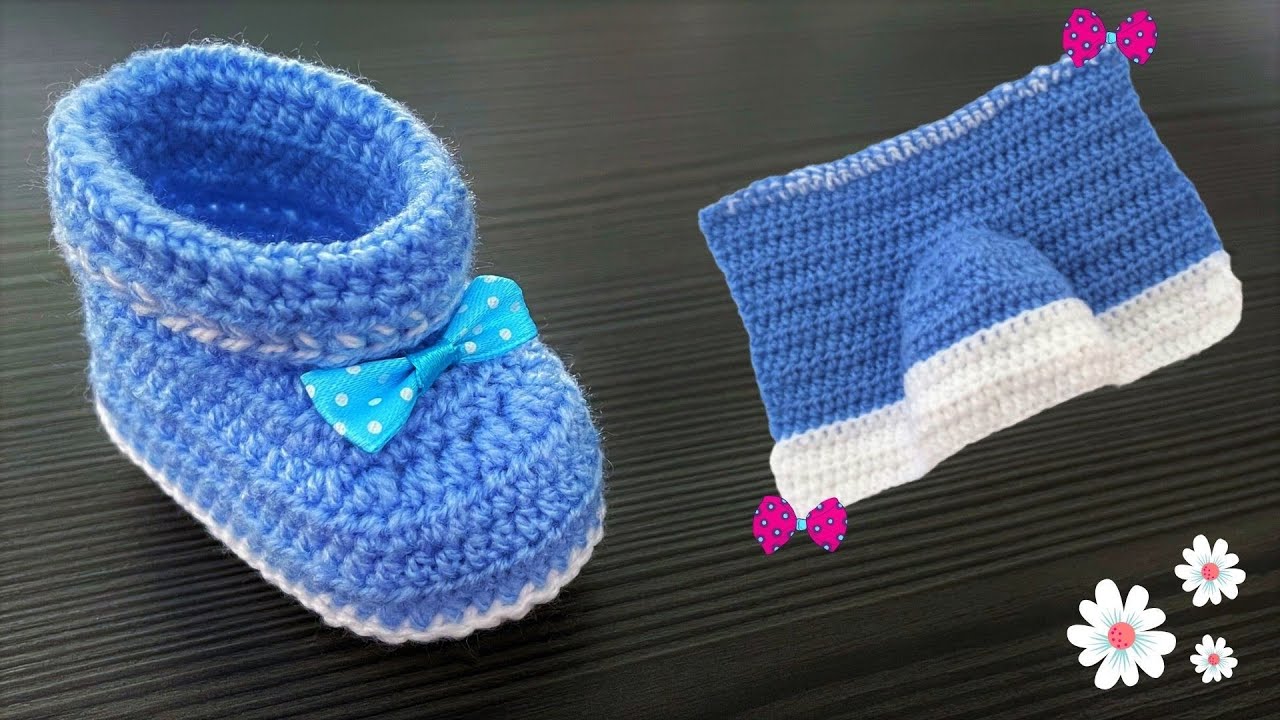
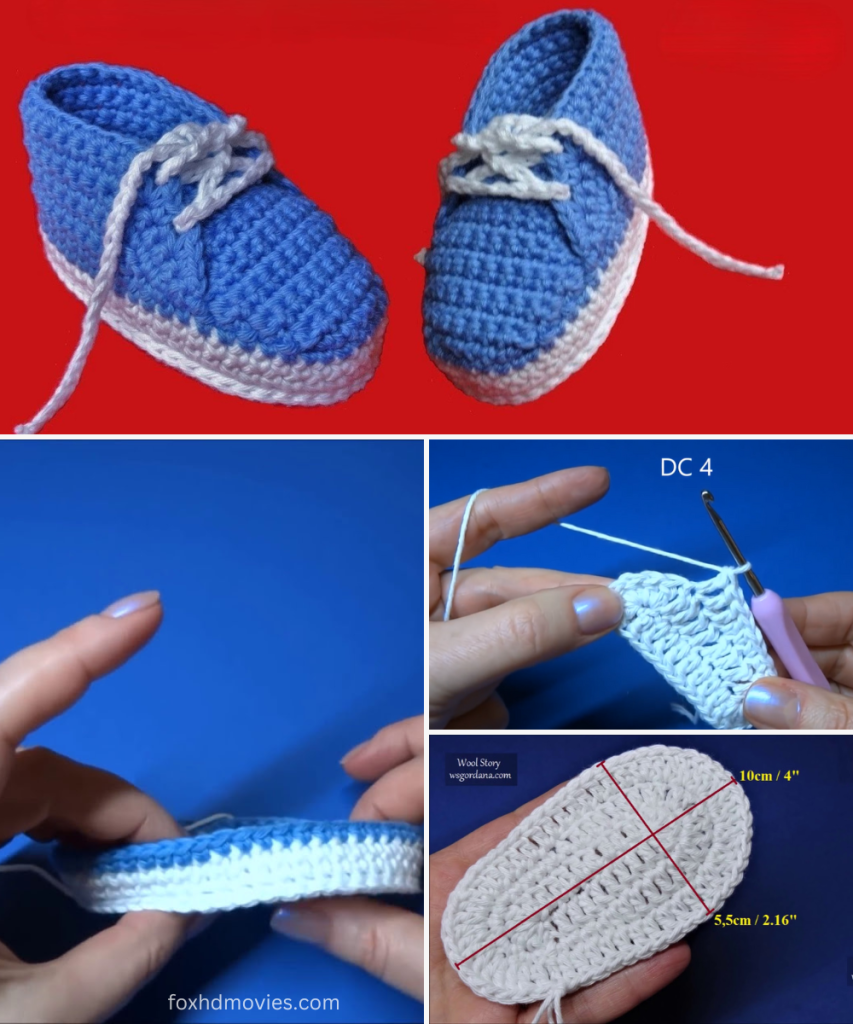
Oh, the sweetness of tiny feet! There’s something incredibly heartwarming about crafting little items for babies, and these adorable crochet baby sneakers are no exception. With their classic sneaker shape, contrasting sole, and even tiny laces, they’re the perfect handmade gift for a baby shower, a newborn arrival, or just because you love making cute things!
These little booties are designed to look like miniature sneakers, making them utterly charming. They’re also quite practical, offering warmth and a soft touch for delicate baby feet. While they might look intricate, the process is broken down into manageable steps, making this a rewarding project for intermediate crocheters, or determined beginners looking to expand their skills.
Let’s get ready to make some tiny, stylish kicks!
Materials You’ll Need:
- DK Weight (Light Worsted) Yarn:
- Main Color (MC) – Approximately 50-70 yards (e.g., Bright Blue)
- Contrasting Color (CC) – Approximately 20-30 yards (e.g., White)
- Crochet Hook: Size C/2.75mm or D/3.25mm (or size needed to obtain gauge)
- Using a smaller hook than usual for DK weight yarn helps create a denser fabric, ideal for baby booties to hold their shape.
- Yarn Needle: For weaving in ends and seaming.
- Scissors
- Stitch Markers (Highly Recommended!): Especially useful for the sole and toe shaping.
Gauge (Crucial for Sizing Baby Items!)
Getting the correct gauge is absolutely essential for baby shoes, as even a small difference can mean they don’t fit. 22 sc stitches x 24 rows = 4 inches (10 cm) using your chosen hook.
Work up a swatch before you begin! Adjust your hook size until you meet this gauge. If your swatch is larger, go down a hook size. If it’s smaller, go up.
Sizing Notes:
This pattern is written for a baby shoe size approximately 0-3 months.
- Finished Sole Length: Approximately 3.5 inches (9 cm)
To adjust for larger sizes:
- 3-6 Months (approx. 4 inches / 10 cm sole): Add 2-3 chains to the starting chain for the sole and add 1-2 more increase rounds to the sole. Use a D/3.25mm hook.
- 6-12 Months (approx. 4.5 inches / 11.5 cm sole): Add 4-5 chains to the starting chain for the sole and add 2-3 more increase rounds. Use an E/3.5mm hook.
- Always check the sole measurement against a baby’s actual foot or a size chart.
Abbreviations (US Terms):
- ch: chain
- sl st: slip stitch
- sc: single crochet
- hdc: half double crochet
- dc: double crochet
- inc: increase (2 sc in the same stitch)
- sc2tog: single crochet 2 stitches together (decrease)
- fo: fasten off
- MC: Main Color
- CC: Contrasting Color
- FLO: Front Loop Only
- BLO: Back Loop Only
Let’s Get Crocheting!
We’ll start with the sole, then build up the sides, shape the toe, and finally add those adorable laces.
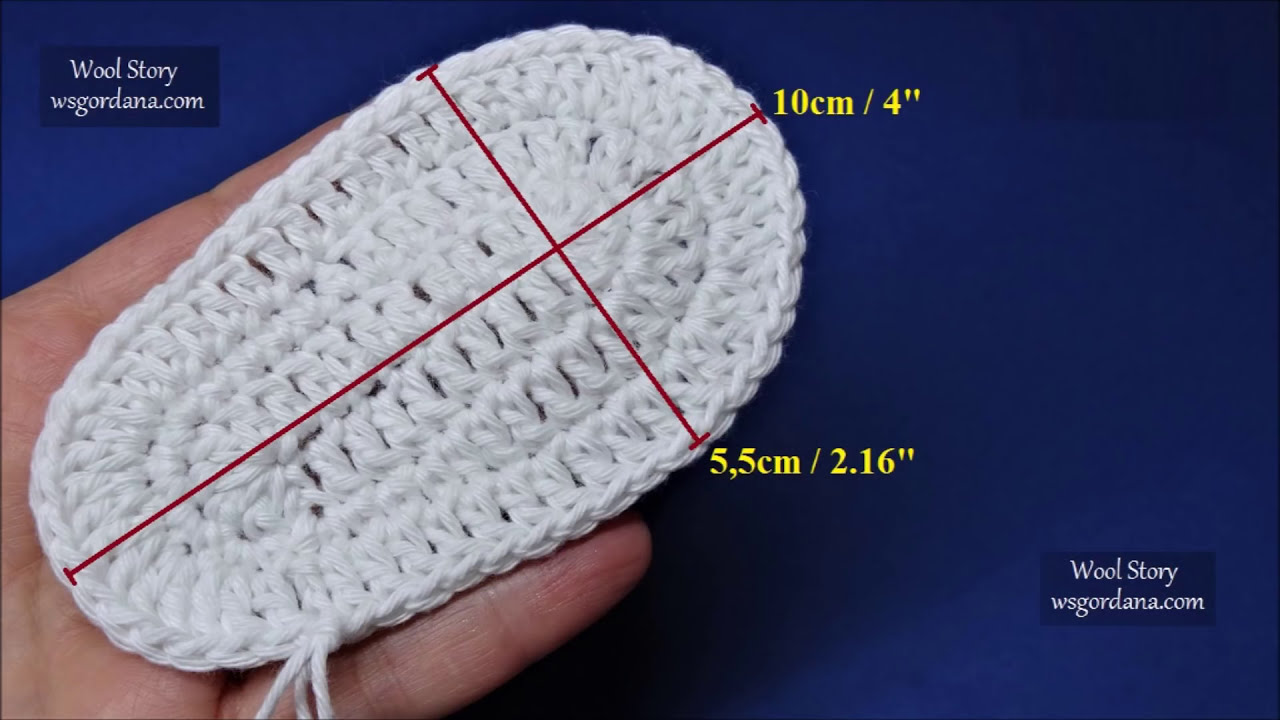
Part 1: The Sole (Make 2)
We’re creating an oval base.
Using CC:
Ch 13. (This creates the core length of the sole. Adjust this number for different sizes.)
Round 1: 2 sc in 2nd ch from hook, sc in next 10 ch, 4 sc in last ch. Working down the opposite side of the chain: sc in next 10 ch, 2 sc in last ch. Join with sl st to first sc. (28 stitches)
- Place a stitch marker in the first sc of the round if you find it helpful.
Round 2: Ch 1. Inc in next 2 sc, sc in next 10 sc, inc in next 4 sc, sc in next 10 sc, inc in next 2 sc. Join with sl st to first sc. (36 stitches)
Round 3: Ch 1. (Sc in next sc, inc in next sc) 2 times, sc in next 10 sc, (sc in next sc, inc in next sc) 4 times, sc in next 10 sc, (sc in next sc, inc in next sc) 2 times. Join with sl st to first sc. (44 stitches)
- Your sole should now be approximately 3.5 inches (9 cm) long. If you’re adjusting for larger sizes, add more increase rounds, distributing the increases evenly around the ends of the oval.
Fasten off CC. Weave in ends securely. Repeat for the second sole.
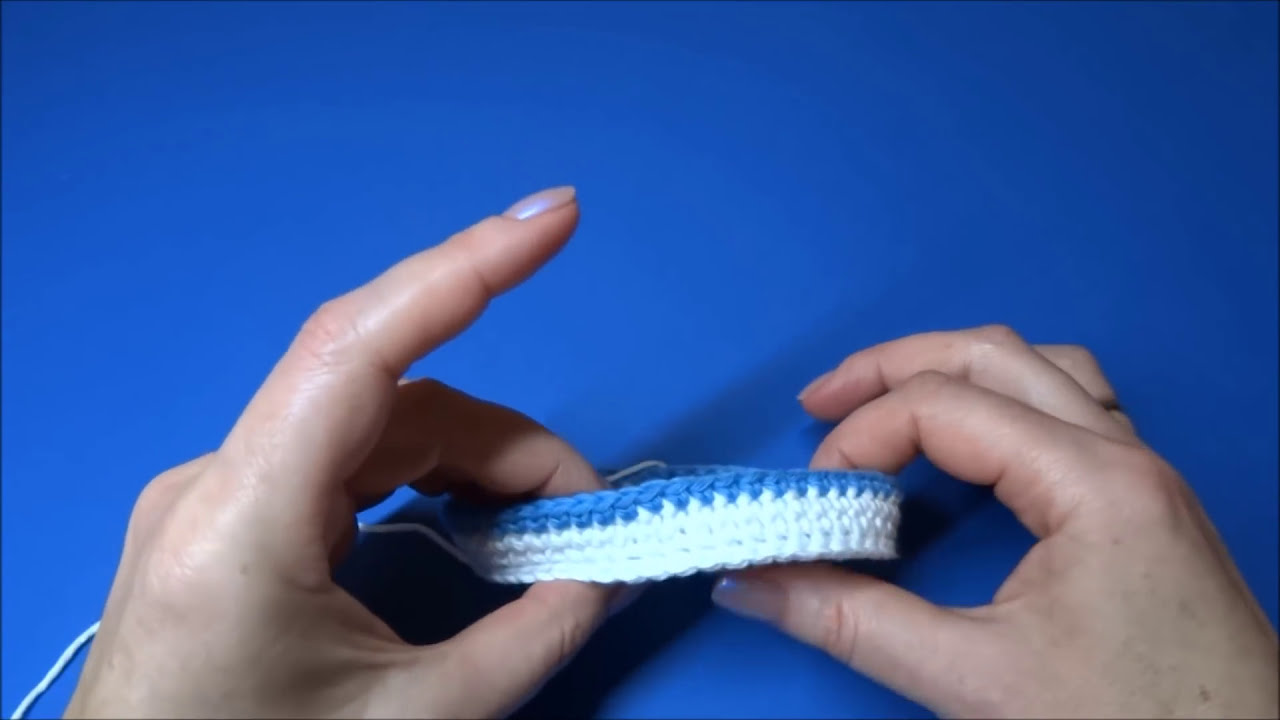
Part 2: Building the Slipper Sides (White Band)
Now we’ll add the first visible “sneaker” band in white.
Attach CC with a sl st in any stitch of the sole.
Round 1: Ch 1. Sc in each stitch around, working in the back loop only (BLO). Join with sl st to first sc. (This creates a neat ridge separating the sole from the body of the shoe). (44 sc)
Round 2: Ch 1. Sc in each stitch around. Join with sl st to first sc. (44 sc)
Fasten off CC.
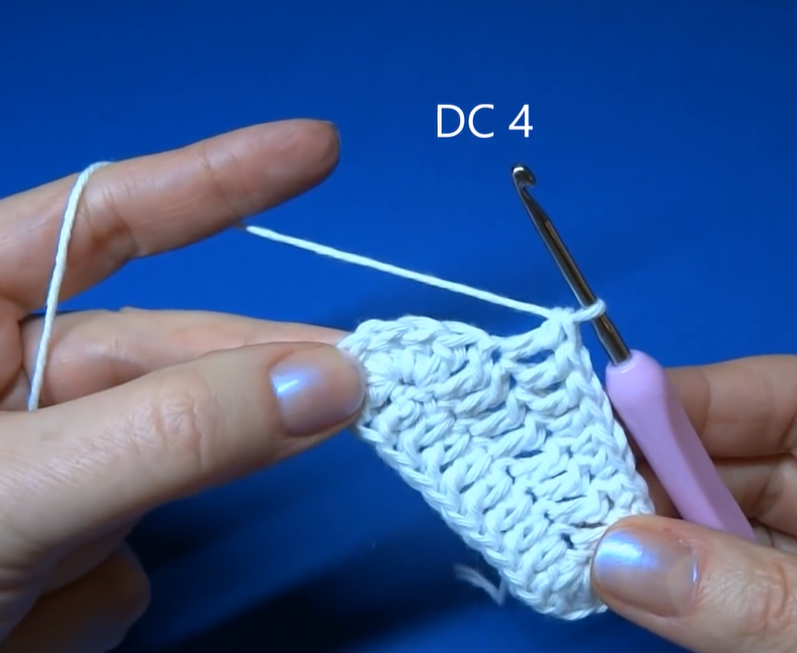
Part 3: The Sneaker Body (Main Color)
Now for the main color of the shoe!
Attach MC with a sl st in any stitch.
Round 1: Ch 1. Sc in each stitch around. Join with sl st to first sc. (44 sc)
Round 2: Ch 1. Sc in each stitch around. Join with sl st to first sc. (44 sc)
Round 3 (Toe Shaping – first decrease round): Ch 1. Sc in next 12 sc. (Sc2tog, sc in next sc) 6 times. Sc in last 12 sc. Join with sl st to first sc. (38 sc)
- The sc2tog stitches are decreasing the toe area.
Round 4 (Toe Shaping – second decrease round): Ch 1. Sc in next 10 sc. (Sc2tog) 9 times. Sc in last 10 sc. Join with sl st to first sc. (29 sc)
Round 5 (Collar/Ankle): Ch 1. Sc in each stitch around. Join with sl st to first sc. (29 sc)
- This round forms the opening for the ankle.
Fasten off MC. Weave in ends.
Part 4: The Sneaker Tongue (Optional but adds a nice touch)
You can add a small “tongue” if desired.
Using MC:
Ch 6. Row 1: Sc in 2nd ch from hook and in next 4 ch. Ch 1, turn. (5 sc) Rows 2-5: Sc in each sc across. Ch 1, turn. (5 sc) Fasten off, leaving a tail for sewing.
Attach the Tongue: Position the tongue at the top front of the shoe opening, centering it over the toe decreases. Stitch securely with your yarn needle.
Part 5: The Laces
The perfect finishing touch!
Using CC:
Ch 60-70. (The exact length depends on how long you want them to be. You can always trim later.) Fasten off.
Lacing the Sneaker: Thread one end of your chain into a yarn needle. Starting from the outside edge of the shoe, thread the lace through the stitches around the ankle opening, mimicking how shoelaces are strung. You can go through a stitch on one side, then across the opening to a stitch on the other side, then back again. Tie a small bow at the top.
Video tutorial
Your Adorable Baby Sneakers are Complete!
Aren’t they just the cutest? These make such a memorable and cherished handmade gift. Imagine those tiny feet wiggling in them!
If you make these baby sneakers, I would absolutely love to see your creations! Share your photos on social media and tag me if you have an associated platform. Don’t forget to mention the colors you used!
Happy hooking!