 by
by 
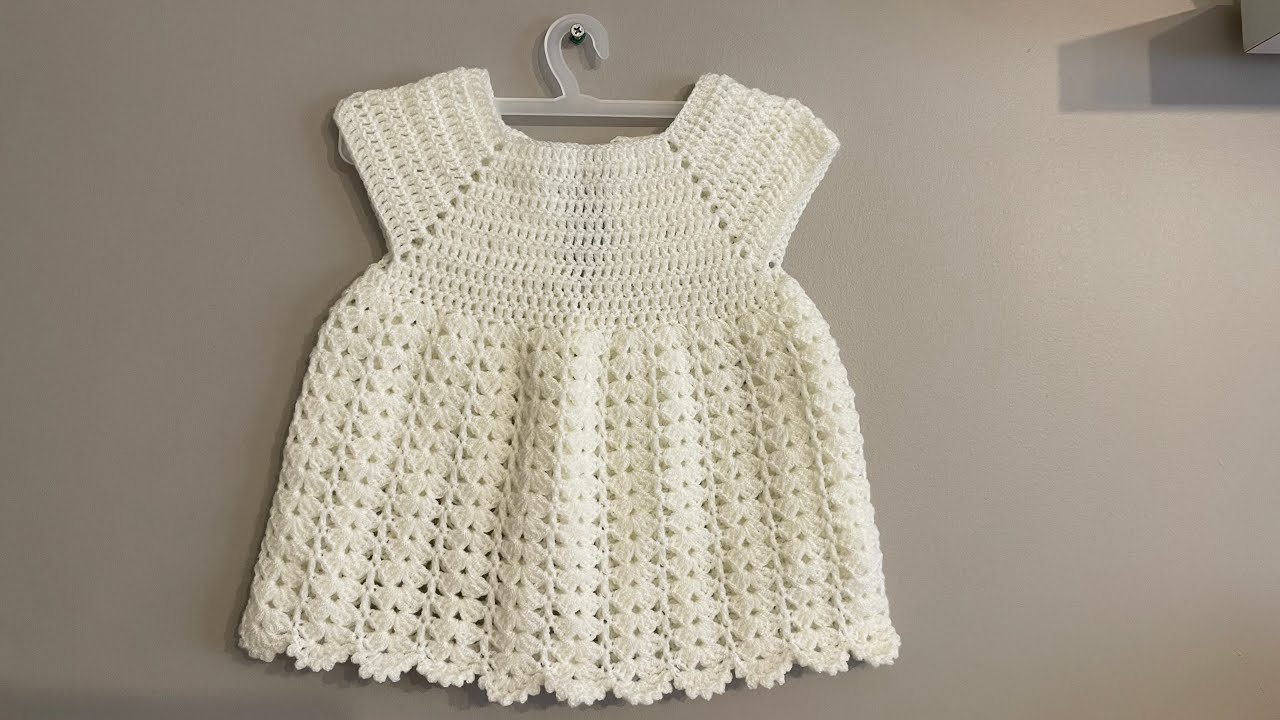
Looking for a beautiful and timeless project to crochet for a baby? This sweet little dress is perfect for a baby shower gift, a photo shoot, or just for a special little one to wear. The simple yoke is crocheted in double crochet stitches, and the skirt features a lovely, lacy shell stitch pattern that is both elegant and fun to make.
This pattern is written for a 0-3 month size, but can be easily adjusted to fit a larger baby. Let’s get started!
Skill Level:
Easy to Intermediate
Materials:
- Yarn: DK weight yarn in a light color (I used a soft acrylic/cotton blend in white)
- Hook: 4.0 mm (G/6) crochet hook
- Scissors
- Yarn needle
- Stitch markers (optional)
Abbreviations (US Terms):
- ch: chain
- sl st: slip stitch
- st(s): stitch(es)
- sc: single crochet
- dc: double crochet
- hdc: half double crochet
- sk: skip
- sp: space
- rep: repeat
- FO: fasten off
Gauge:
4 rows of 16 dc = 4 inches (10 cm)
(Check your gauge before you start! It is important for the dress to fit correctly.)
Pattern Notes:
- The dress is worked from the top down, starting with the yoke.
- The ch 2 at the beginning of each dc row counts as a dc.
- The dress is joined at the end of each round with a sl st to the top of the beginning ch 2.
- You will increase the stitches in the yoke to create a flat, circular shape before joining the front and back to create the armholes.
Pattern Instructions
Part 1: The Yoke
Row 1: Ch 62. Join with a sl st to the first ch to form a circle. Ch 2 (counts as a dc), dc in the next 61 ch. Join with a sl st to the top of the beginning ch 2. (62 sts)
Row 2: Ch 2, dc in the same st. Dc in the next 3 sts, 2 dc in the next st. Rep from * to * around. (77 sts)
Row 3: Ch 2, dc in the same st. Dc in the next 4 sts, 2 dc in the next st. Rep from * to * around. (92 sts)
Row 4: Ch 2, dc in the same st. Dc in the next 5 sts, 2 dc in the next st. Rep from * to * around. (107 sts)
Row 5: Ch 2, dc in the same st. Dc in the next 6 sts, 2 dc in the next st. Rep from * to * around. (122 sts)
Row 6: Ch 2, dc in the same st. Dc in the next 7 sts, 2 dc in the next st. Rep from * to * around. (137 sts)
Row 7: Ch 2, dc in the same st. Dc in the next 8 sts, 2 dc in the next st. Rep from * to * around. (152 sts)
Note: If you want a smaller yoke, you can stop at an earlier round. For a larger size, continue to increase for a few more rounds.

Part 2: Separating for the Sleeves
Now we will create the armholes by joining the front and back sections.
Round 8 (Divide for Armholes): Ch 2, dc in the next 20 sts (front panel). Ch 5, sk 35 sts (first armhole). Dc in the next 42 sts (back panel). Ch 5, sk 35 sts (second armhole). Join with a sl st to the top of the beginning ch 2.
Note: You should have 42 stitches for the back panel and 21 stitches for each of the two front panels, making a total of 42 stitches for the front. The ch 5 will create the underarm.
Part 3: The Skirt
Now we will begin the beautiful shell stitch pattern for the skirt.
Round 9: Ch 2, dc in each st around, including the ch 5 sps. Join with a sl st to the top of the beginning ch 2. (Total stitches will be your back panel stitches + front panel stitches + chain stitches from the underarms. In this case: 42 + 42 + 5 + 5 = 94 stitches)
Round 10 (Shell Stitch): Ch 2, sk 1 st, (dc, ch 1, dc) in the next st, sk 2 sts. Rep from * to * around, ending with sk 1 st. Sl st to join in the first dc of the round.
Round 11: Sl st into the first ch-1 sp. Ch 2, (dc, ch 1, dc) in the next ch-1 sp. Rep from * to * around. Join with a sl st to the first dc of the round.

Rounds 12 – 25: Rep Round 11 until the skirt reaches your desired length.
Note: You can continue adding rounds to make the dress longer.
Part 4: The Scalloped Edging
To finish the hem, we will add a pretty scalloped border.
Round 26 (Edging): Ch 1, sc in the first st. Sk 2 sts, (5 dc) in the next st, sk 2 sts, sc in the next st. Rep from * to * around. Sl st to join and FO.
Video tutorial
Finishing:
- Weave in all loose ends with your yarn needle.
- Block the dress gently to shape the stitches and make the skirt lay flat.
Enjoy your beautiful new handmade crochet baby dress! It’s a wonderful heirloom to cherish for years to come.
Feel free to share your finished project on social media and tag me! I’d love to see it. Happy crocheting!