 by
by 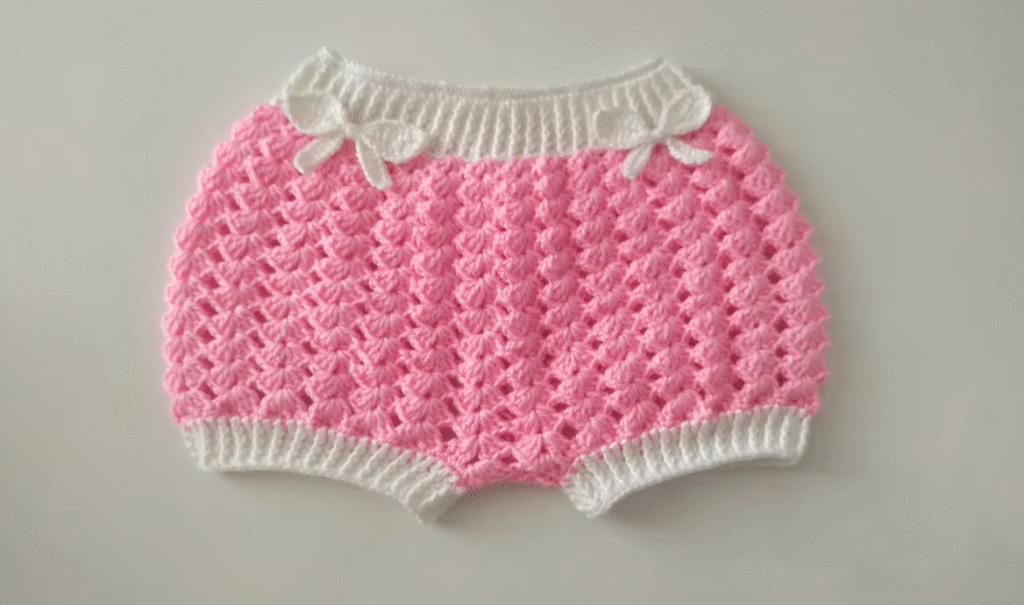
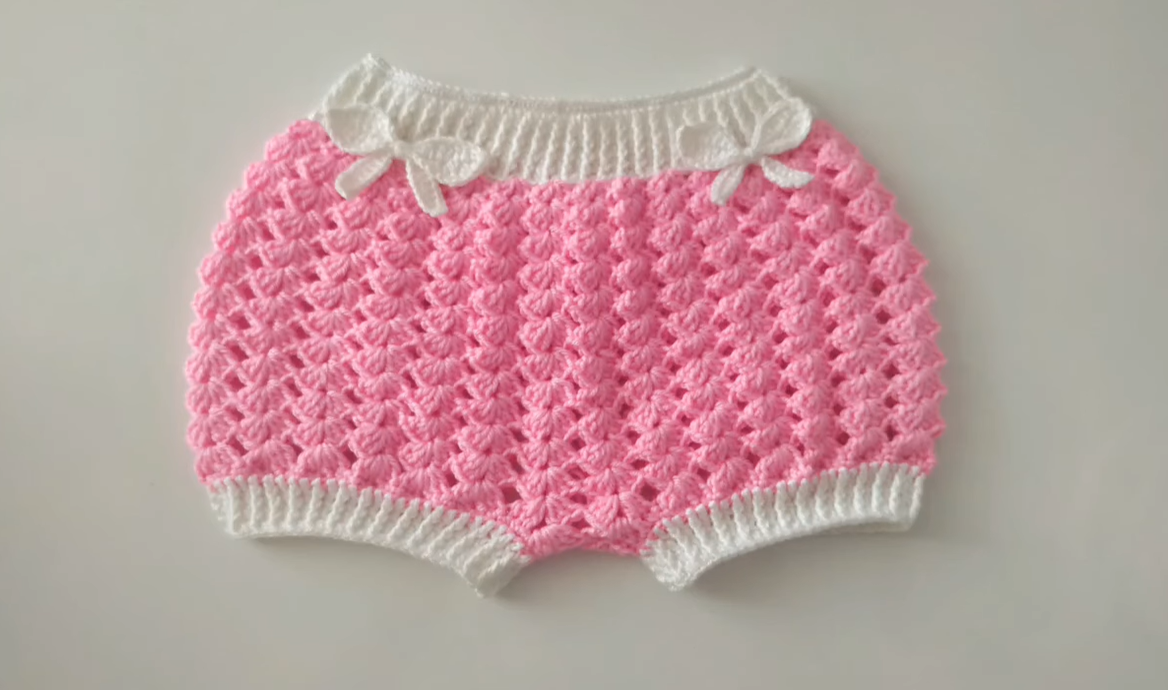
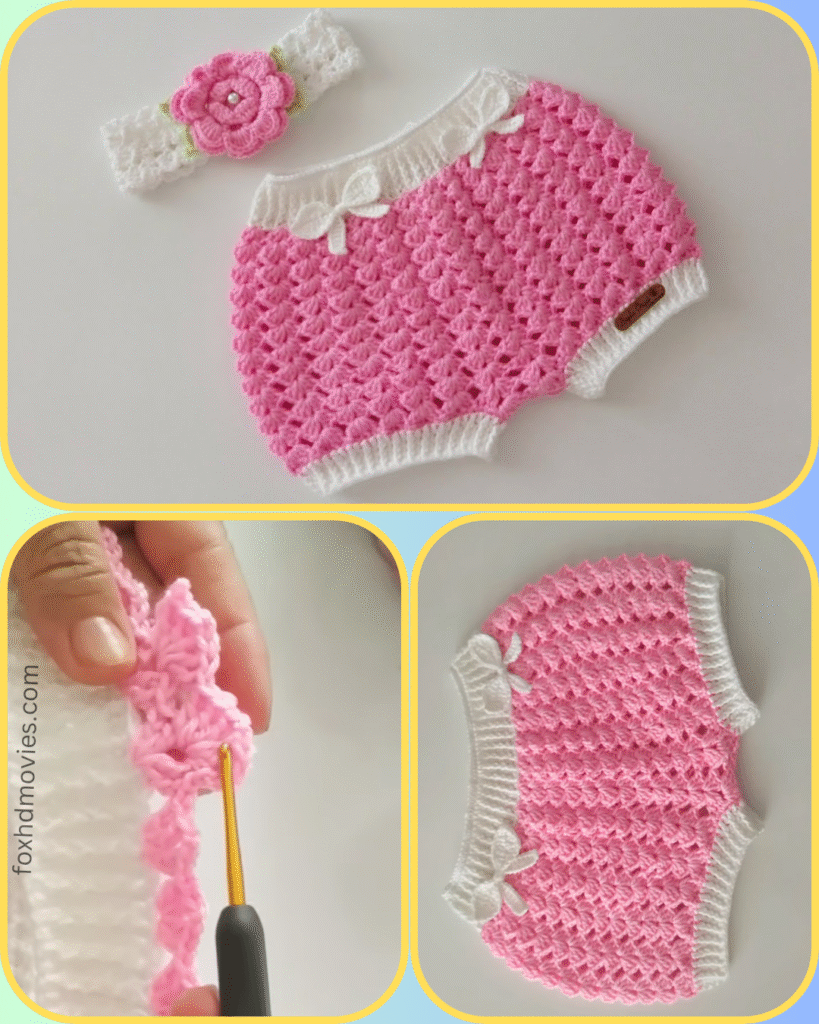
How absolutely irresistible are these “Little Bubblegum Bloomers”?! With their sweet textured stitch, comfy ribbed waistband and leg cuffs, and adorable little bows, they’re perfect for any baby or toddler. These bloomers make a wonderful addition to a handmade baby set or a thoughtful gift!
This pattern is designed for confident beginners or intermediate crocheters. If you’re comfortable with basic stitches and working in the round, you’ll find this a super fun and quick project!
Let’s get started on crocheting some sweetness!
Skill Level: Easy-Intermediate Yarn Weight: DK (light worsted) yarn in two colors: Main Color (Pink) and Contrasting Color (White). Hook Size: 4.0mm (G/6) crochet hook (or size needed to obtain gauge) Other Materials:
- Yarn needle for weaving in ends
- Stitch markers (helpful for marking the start of rounds and leg splits)
Gauge: 5 hdc and 3 rows = 1 inch (2.5 cm) in half double crochet (for the waistband). It’s important to check your gauge to ensure the bloomers will be the correct size. Adjust your hook size if necessary.
Finished Size (approximate): 0-3 months (with notes for adjustments) For larger or smaller sizes, you’ll need to adjust your starting chain for the waistband and the number of stitches/rows for both the body and legs.
Stitches Used:
- ch: chain
- sl st: slip stitch
- sc: single crochet
- hdc: half double crochet
- dc: double crochet
- Puff Stitch (Puff St): Yarn over, insert hook into stitch, yarn over, pull up a loop (3 loops on hook). Repeat from * to * 3 more times in the same stitch (9 loops on hook). Yarn over, pull through all 9 loops on hook. Ch 1 to secure. (The ch 1 does not count as a stitch unless specified).
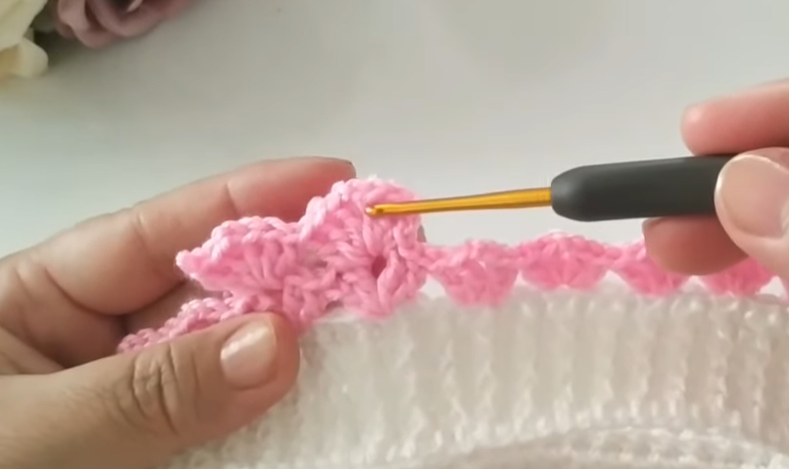
- Shell Stitch (Shell): (2 dc, ch 1, 2 dc) in the same stitch/space (for the bottom border)
Pattern Notes:
- The bloomers are worked from the top down, in the round, until the crotch, then split for the leg openings.
- Ch 1 at the beginning of an hdc round does NOT count as a stitch unless specified.
- Ch 2 at the beginning of a dc round counts as a dc.
- Always join rounds with a sl st to the first stitch of the round.
- The main body features a lovely textured stitch that looks like a modified shell or puff stitch pattern, creating the “bubblegum” effect.
Let’s Begin! The Waistband (Contrasting Color: White)
We’ll start by creating the ribbed waistband.
Starting Chain: Ch 60 (Adjust as needed for desired waist circumference. This measurement should be snug but comfortable around the waist. Ensure your chain is a multiple of 2.) Join with a sl st to the first ch, being careful not to twist the chain.
Round 1: Ch 1, hdc in each ch around. Join with a sl st to the first hdc. (60 hdc)
Round 2 (Ribbing): Ch 1, hdc in the back loop only of the next hdc. Repeat from * to * around. Join with a sl st. Working in the back loop only creates a subtle ribbed effect as seen in the image.
Repeat Round 2 for a total of 5-6 rounds, or until your waistband is approximately 1.5 – 2 inches wide and has a good ribbed appearance.
The Body – Upper Section (Main Color: Pink)
Now we’ll work the main body of the bloomers with the textured stitch.
Attach Main Color (Pink): Join Pink yarn to the last stitch of the waistband.
Round 1 (Textured Pattern Set Up): Ch 2 (counts as dc). Dc in the next st. Skip 2 sts, (Puff St, ch 1, Puff St) in the next st. Repeat from * to * around. Join with a sl st to the top of the beginning ch-2. Adjust your spacing slightly on this first round to get an even repeat. You want to end the round with a shell-like grouping or a half-group to balance. A common setup for a dense puff/shell pattern is to have a stitch count divisible by 3 or 4. Let’s assume your initial 60 stitches can be adapted. For a pattern like this, you’ll be working into the spaces created by the previous round.
Let’s try a common textured pattern that resembles the image: Attach Main Color (Pink): Join Pink yarn to the last stitch of the waistband.

Round 1 (Puff/Shell Pattern): Ch 1. Sc in the first st. Skip 2 sts, (Puff St, ch 1, Puff St) in the next st, skip 2 sts, sc in the next st. Repeat from * to * around. Join with a sl st to the first sc. You might need to adjust your starting chain to be a multiple of 6 for this repeat. If you started with 60 stitches (multiple of 6), you’d have 10 repeats of the (sc, skip 2, (Puff, ch1, Puff), skip 2) sequence.
Round 2: Ch 1, sc in the first sc. Work (Puff St, ch 1, Puff St) in the ch-1 space between the two Puff Sts from the previous round, sc in the next sc. Repeat from * to * around. Join with a sl st to the first sc.
Repeat Round 2 for approximately 8-10 more rounds, or until the bloomers measure about 4.5-5.5 inches from the top of the waistband down, (or desired length before the crotch shaping begins).
Crotch Shaping
Now we’ll start increasing to create room for the diaper/nappy. We’ll transition to dc stitches for easier shaping.
Transition Round: Ch 2 (counts as dc). Dc in each sc and into each Puff St and ch-1 space around. Join with a sl st to the top of the beginning ch-2. Count your stitches here. You should be back to roughly your starting stitch count (e.g., 60-65 dc).
Round 1 (Increase Round): Ch 2, 2 dc in the first st. Dc in each dc around, placing 2 dc in one additional stitch evenly spaced on the opposite side of the round. Join with a sl st. (2 stitches increased)
Repeat Round 1 for approximately 2-3 more rounds, or until you have enough stitches to divide comfortably for the legs (e.g., around 66-70 stitches total).

Dividing for the Legs
Now we’ll create the two leg openings.
Count: Count your total stitches. Divide by 2 to get the stitch count for each leg. (e.g., 68 stitches total, so 34 stitches per leg).
First Leg: Next Round: Ch 2, dc in the first stitch. Dc in each dc across for half of your total stitches (e.g., 34 dc if your count is 68). Ch 4 (for crotch space): Ch 4 (this creates the crotch seam. Adjust number of chains for a looser or tighter fit in the crotch. For 0-3 months, 4 chains is usually sufficient). Join: Join with a sl st to the first dc of this round, skipping the remaining stitches for the second leg.
You have now formed one leg opening. You will work in the round for this leg.
Continue working in the round for the first leg: Round 1: Ch 2, dc in each dc around, working into the chains of the crotch space as well. Join with a sl st to the top of the beginning ch-2. Repeat Round 1 for approximately 1-2 more rounds, or until the leg opening is the desired length before the ribbed cuff.

Leg Cuff (Ribbed – Contrasting Color: White)
Attach Contrasting Color (White): Join White yarn.
Round 1 (Ribbing): Ch 1, hdc in each dc around. Join with a sl st to the first hdc.
Round 2 (Ribbing): Ch 1, hdc in the back loop only of the next hdc. Repeat from * to * around. Join with a sl st.
Repeat Round 2 for 2-3 more rounds, or until the cuff is desired width. Fasten off.
Second Leg
Re-attach yarn to the unworked stitches at the crotch. Work the second leg and its cuff exactly as you did the first.
Video tutorial
Finishing and Embellishments
- Weave in all remaining loose ends securely.
Little Bows (Make 2 – Contrasting Color: White):
- Ch 10. Sl st into the 2nd ch from hook and in each ch across. (9 sl sts)
- Ch 10 again. Sl st into the 2nd ch from hook and in each ch across.
- Fasten off, leaving a long tail.
- Use the long tail to wrap tightly around the center of the two chains, cinching them to form a bow. Secure with a knot.
- Sew one bow onto the front of the waistband, above each leg opening, as pictured.
And there you have it – a pair of adorable and comfy Little Bubblegum Bloomers, perfect for your little one! Don’t forget to share your finished bloomers with me on social media – I love to see your beautiful creations!
Happy crocheting!