by
by 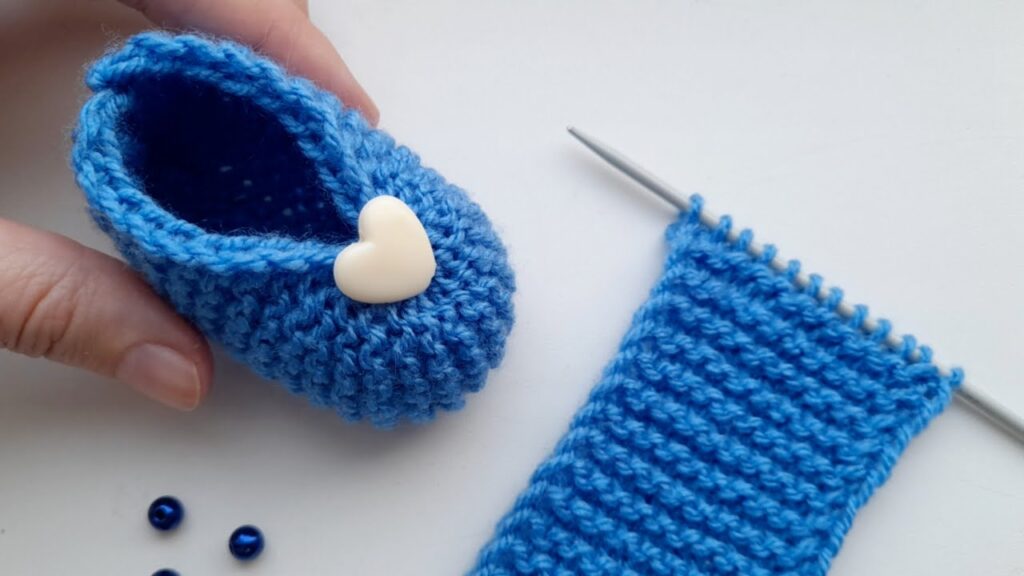
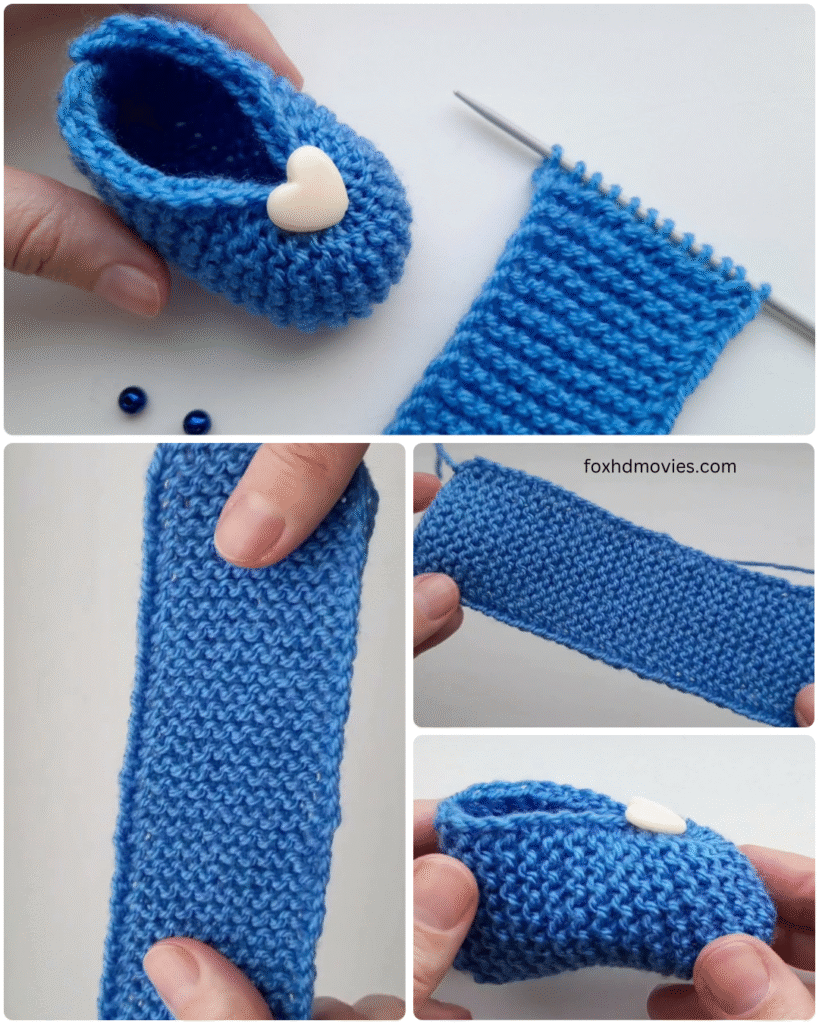
There’s something incredibly sweet about tiny baby shoes, and even more so when they’re handmade with love! These simple knitted baby slippers are perfect for keeping little feet warm and cozy. Featuring a classic garter stitch texture and an easy construction, they’re a quick and rewarding project for knitters of all skill levels, even beginners!
The slipper in the image appears to be knit flat and then seamed, which is a fantastic approach for those who are new to knitting in the round. The heart button adds a charming touch, but you can customize it with any embellishment you like!
Yarn:
- DK (Double Knit) or Light Worsted Weight yarn (e.g., in a lovely blue, as pictured). Choose a soft, machine-washable baby yarn like acrylic or a cotton blend for comfort and easy care.
Needles:
- 3.5 mm (US 4) straight knitting needles (or whatever size gives you the correct gauge with your chosen yarn).
Notions:
- Tapestry needle for seaming and weaving in ends
- Scissors
- 1 decorative button (like the heart button shown) or other embellishment
- Stitch marker (optional, for marking rows if desired)
Gauge:
- 20 stitches and 40 rows (20 garter ridges) = 4 inches (10 cm) in Garter Stitch. (Adjust needle size if necessary to achieve gauge – accurate gauge is important for sizing!)
Size:
- Newborn to 3 months (approximately 3.5 – 4 inches / 9-10 cm sole length when finished).
- To adjust for larger sizes, you will need to cast on more stitches (in multiples of 2 usually for a symmetrical design) and knit more rows for both the sole and the upper sections. Always check measurements against a baby’s foot or a sizing chart.
Abbreviations:
- CO: Cast On
- K: Knit
- SSK: Slip, slip, knit (decrease)
- K2tog: Knit two stitches together (decrease)
- St(s): Stitch(es)
- RS: Right Side
- WS: Wrong Side
- BO: Bind Off
Pattern Instructions:
These slippers are knit flat in one piece, then folded and seamed.
Starting the Sole (Flat Section)
- CO 36 stitches.
- Knit every row (Garter Stitch) for 24 rows (or until piece measures approximately 2.5 inches / 6.5 cm from cast-on edge).
- You will have 12 garter ridges on each side.
- This forms the base/sole of the slipper and the start of the upper foot.

Shaping the Toe and Instep
Now we will begin shaping the front of the slipper by decreasing stitches.
- Row 25 (RS): K14, SSK, K2tog, K14. (34 stitches)
- Row 26 (WS): Knit all stitches.
- Row 27 (RS): K13, SSK, K2tog, K13. (32 stitches)
- Row 28 (WS): Knit all stitches.
- Row 29 (RS): K12, SSK, K2tog, K12. (30 stitches)
- Row 30 (WS): Knit all stitches.
- Row 31 (RS): K11, SSK, K2tog, K11. (28 stitches)
- Row 32 (WS): Knit all stitches.
You should now have 28 stitches on your needle. This completes the shaping for the toe.

Knitting the Ankle/Heel Section
- Knit every row (Garter Stitch) for 16 more rows (or until piece measures approximately 2 inches / 5 cm from where you started the toe decreases).
- You will have 8 garter ridges in this section.
- This forms the back and ankle opening of the slipper.
- BO all stitches loosely.

Finishing Your Slipper:
- Weave in all initial loose ends from your cast-on and working yarn.
- Seaming:
- Lay your knitted piece flat. The section with the decreases (the narrower end) is the toe. The wider section is the sole and the ankle/heel.
- Fold the piece in half lengthwise, bringing the cast-on edge (sole) up to meet the bind-off edge (back/ankle).
- Toe Seam: Starting from the toe end, whip stitch or mattress stitch the edges together for about 1.5 – 2 inches (4-5 cm). This forms the front of the slipper.
- Heel Seam: Now, looking at the back/ankle opening, bring the two raw edges of the bind-off together. Seam these two edges together to form the back heel seam.
- Sole Seam: Finally, you’ll have a seam running along the bottom of the foot where the cast-on edge (sole) meets the side of the worked fabric. Carefully seam this section closed.
- Attach Embellishment: Sew your decorative heart button onto the top of the slipper, just above the toe, as shown in the image. Ensure it’s securely attached.
- Make a Second Slipper: Repeat all steps to create a matching pair!
Video tutorial
And there you have it! A sweet, cozy, and perfectly sized pair of knitted baby slippers. These make wonderful gifts and are a joy to knit. Experiment with different yarn colors and button styles to make each pair unique!
Happy knitting!