by
by 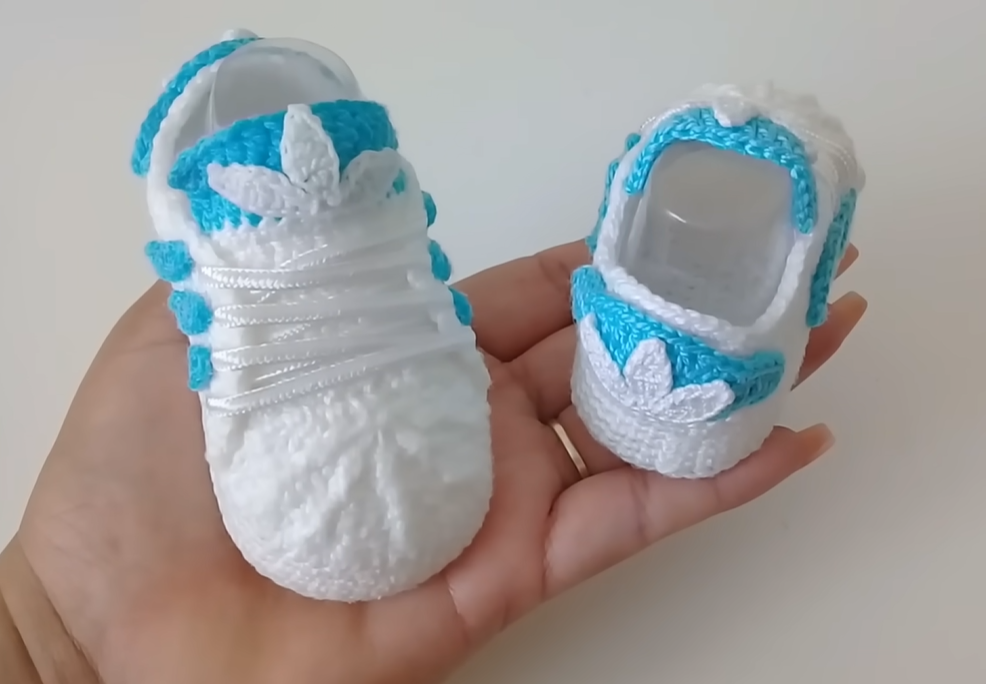

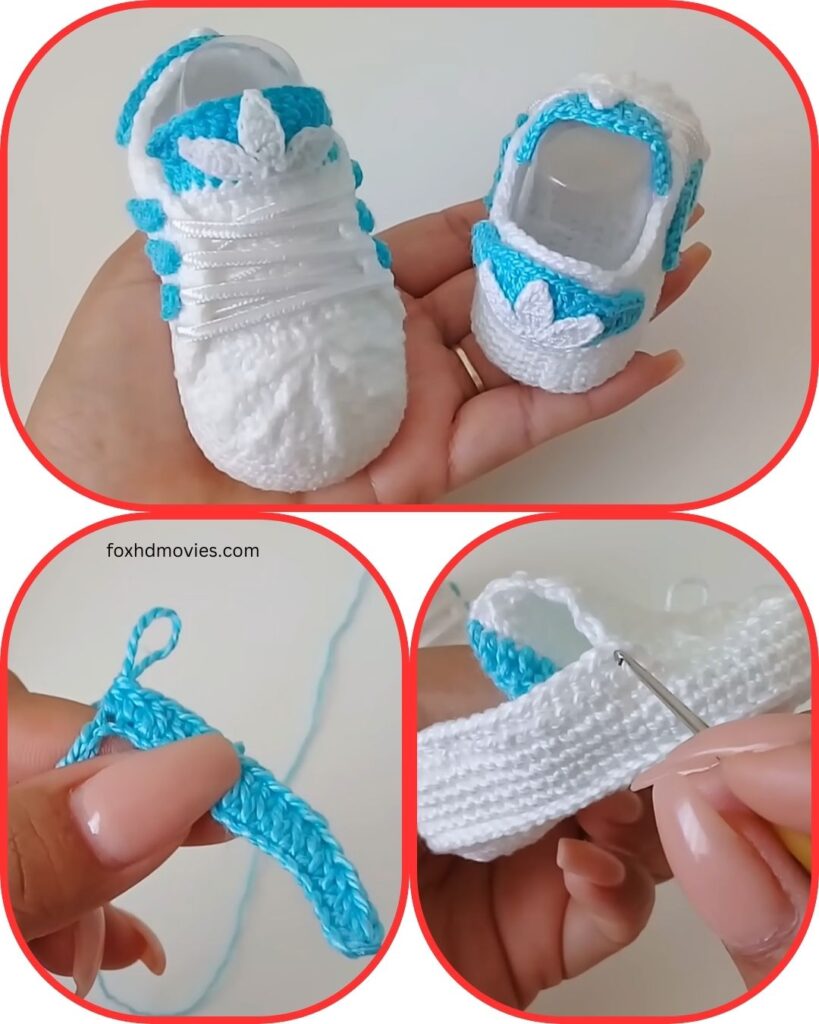
Get ready to melt hearts with these super cute crochet baby sneakers, inspired by the classic Adidas Superstar design! Perfect for baby shower gifts, photography props, or just to add a touch of cool to your little one’s outfit. This pattern focuses on creating a realistic sneaker look with clear, step-by-step instructions.
Skill Level: Intermediate (familiarity with basic stitches, increasing, decreasing, and working in rounds is helpful)
Materials:
- Yarn: DK (Light Worsted) or Sport weight yarn.
- Main Color (MC): White (or your chosen primary shoe color) – approx. 50-70 yards.
- Contrast Color (CC): Black (or your chosen accent color) – small amount for stripes, logo, and trim.
- Crochet Hook: Size C/2 (2.75 mm) or D/3 (3.25 mm), or size needed to obtain gauge. (A smaller hook creates a denser fabric, ideal for baby shoes).
- Yarn Needle: For weaving in ends and embroidering details.
- Scissors
- Stitch Markers: Essential for marking rounds and specific stitches.
Gauge (Crucial for Sizing!):
It is very important to achieve the correct sole length for your desired size. The stitch gauge for the upper isn’t as critical as the sole.
- Sole Gauge: After completing the sole section, measure its length. Adjust your hook size to meet the desired length from the sizing chart below.
- Example: For 0-3 months, your sole should be approx. 3.5 inches.
Sizing Chart (Approximate Finished Sole Length):
| Size | Approx. Sole Length (inches) | Approx. Sole Length (cm) | Initial Chain (suggested) |
|---|---|---|---|
| 0-3 Months | 3.5 | 9 | Ch 10 |
| 3-6 Months | 4 | 10.5 | Ch 12 |
| 6-9 Months | 4.5 | 11.5 | Ch 14 |
Export to Sheets
- Note: If you want a larger size, increase your initial chain length by 2 stitches per size increment, and you may need to add an extra round to the sole and/or upper sections.
Abbreviations (US Crochet Terms):
- ch: chain
- sl st: slip stitch
- sc: single crochet
- hdc: half double crochet
- dc: double crochet
- BLO: back loop only
- FLO: front loop only
- st(s): stitch(es)
- sp: space
- inc: increase (work 2 sts in the same st)
- dec: decrease (work 2 sts together – usually sc2tog or hdc2tog for neatness)
- ( ): repeat instructions in parentheses a specified number of times
- [ ]: total stitches in a round/row
- MC: Main Color
- CC: Contrast Color
Pattern for Crochet Sneaker Baby Booties (Make 2)
Part 1: The Sole (Make 2 per pair)
Work in continuous rounds, using a stitch marker to mark the first stitch of each round.
Using Main Color (MC):
Round 1: Ch (refer to Sizing Chart for initial chain). Sc in 2nd ch from hook. Sc in next (initial chain – 3) stitches. In the last ch, work 3 sc (this turns the corner). Now working down the other side of the chain, sc in next (initial chain – 3) stitches. In the very last ch (where you worked your first sc), work 2 sc. [Total stitches will vary based on initial chain]. Place stitch marker in the first sc of the next round.
Round 2: 2 sc in the first st (inc). Sc in each st along the side of the sole until you reach the 3 sc you worked in the last chain. (2 sc in next st) 3 times (inc for the toe end). Sc in each st along the other side until you reach the 2 sc at the heel end. (2 sc in next st) 2 times (inc for the heel end). Move stitch marker to the first st of the current round.
Round 3: (2 sc in next st) 2 times (inc). Sc in each st along the side. (2 sc in next st, sc in next st) 3 times (inc for the toe end). Sc in each st along the other side. (2 sc in next st, sc in next st) 2 times (inc for the heel end). Move stitch marker to the first st of the current round.
Check your sole length against the Sizing Chart. If it’s too small, you may need an additional increase round, similar to Round 3, but with more stitches between increases. If too large, consider a smaller hook or fewer initial chains.
Sl st to the first sc of your last sole round to join. Fasten off and weave in ends for one sole. For the second sole, do not fasten off; you’ll continue with the upper.
Part 2: Building the Upper (Working from the Sole)
Using Main Color (MC), continuing from the second sole:
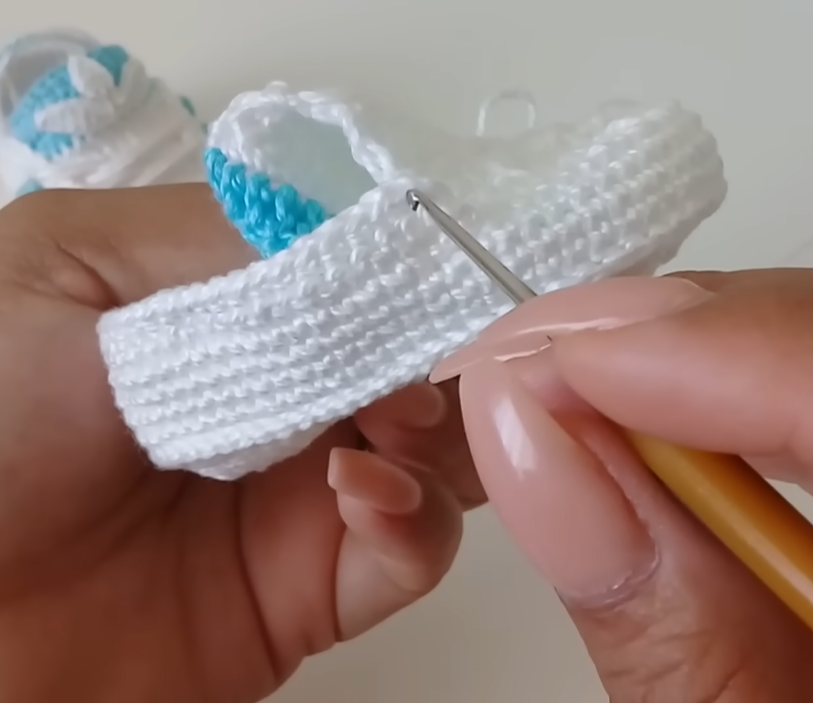
Round 1 (Creating the “Wall”): Ch 1. Sc in the BLO of each st around. Sl st to the first sc to join. This round creates a nice, defined edge that makes the slipper stand up.
Round 2: Ch 1. Sc in each st around. Sl st to the first sc to join.

Part 3: Shaping the Toe and Tongue
Now we’ll start shaping the distinct toe and creating the opening for the foot.
Round 3 (Toe Shaping – Front Loops Only for the toe ribbing): Ch 1. Sc in the first 8-10 stitches (this will be roughly the instep/heel area; adjust based on your sole size). Now, working only in the FLO for the next stitches (this creates the ribbed toe effect): Hdc in the next 10-12 stitches (this covers the main toe area, count carefully to center it). Sc in the remaining stitches around the heel/instep. Sl st to the first sc to join. The number of stitches for the toe area will depend on your sole size. Ensure it’s centered.
Round 4 (Continuing Toe Shaping & Starting Opening): Ch 1. Sc in the first 8-10 stitches (same number as previous round for the instep/heel). Now, for the toe decreases (these will be regular hdc or dc stitches over both loops): (Hdc2tog) 5-6 times across the front of the toe (the hdc section from previous round). Sc in the remaining stitches around the heel/instep. Sl st to the first sc to join. This round begins to pull the toe inwards and creates the curve.
Round 5 (Further Toe Shaping & Opening): Ch 1. Sc in the first 8-10 stitches (same number as previous rounds for the instep/heel). (Sc2tog) 2-3 times across the front of the toe. Sc in the remaining stitches around the heel/instep. Sl st to the first sc to join. This round will reduce the toe opening further.
Round 6 (Defining the Foot Opening & Tongue Base): Ch 1. Sc in each st around the entire opening of the shoe. Sl st to the first sc to join. You should now have a clear opening for the foot.
Now, we’ll create the separate tongue piece.
Tongue (Using MC): Ch 10-12 (adjust length for desired tongue width). Row 1: Sc in 2nd ch from hook and in each ch across. [9-11 sc] Row 2-4 (or until desired length): Ch 1, turn. Sc in each sc across. Fasten off, leaving a long tail for sewing.
Attaching the Tongue: Position the tongue inside the shoe opening, centered at the front. Use your yarn needle to sew the bottom edge of the tongue securely to the inside front of the shoe opening.
Part 4: Adding the Iconic Details
The Toe Cap Ribbing (Using MC): This creates the distinctive ribbed toe cap. Attach MC yarn to one side of the hdc section of the toe (Round 3, where you worked in FLO). Ch 1. Working in rows, sc into the unworked back loops of Round 3, moving across the toe area. Row 1: Sc in BLO of each of the 10-12 hdc stitches across the toe. Ch 1, turn. Row 2-3 (or until desired ribbing): Sc in each sc across. Ch 1, turn. Sl st along the edges to attach to the side of the shoe as you go, or simply sew down later. Fasten off, leave a tail if sewing later.
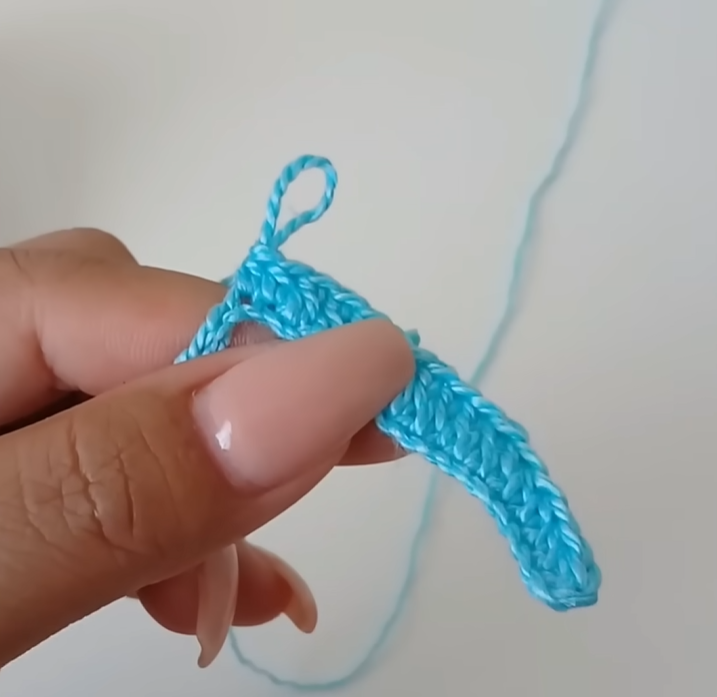
The Stripes (Using Contrast Color – CC): Cut 6 strands of CC yarn, each about 4-6 inches long. Thread your yarn needle with one strand. On each side of the shoe, embroider 3 short, parallel horizontal lines/stripes using a surface slip stitch or simply by weaving the yarn through the stitches. Position them strategically as seen in the inspiration photo. Secure ends on the inside.

The Eyelets (Using CC): Cut 6 more strands of CC yarn, similar length. For the eyelets, use your yarn needle to embroider a small vertical dash or a tiny knot on each side, above the stripes, where the laces would go. Position them in three pairs (top, middle, bottom).
The Laces (Using MC): Ch 40-60 (adjust for desired length). Thread the chain through the embroidered eyelets, mimicking real shoelaces. Tie a small bow.
The Heel Tab (Using CC – Optional for extra detail): Ch 6. Sc in 2nd ch from hook and in next 4 ch. [5 sc] Ch 1, turn. Sc in each sc across. Repeat for 1-2 more rows. Fasten off, leave a long tail. Sew this small rectangle to the back of the heel, centered.
The Trefoil/Tongue Logo (Using CC): This is the trickiest part, but adds so much!
- Method 1 (Embroidery): Using your yarn needle and CC, carefully embroider a small trefoil shape directly onto the tongue. You can draw it lightly with a fabric pencil first.
- Method 2 (Small Applique):
- Ch 4, sl st to form a ring.
- Ch 1, 6 sc in ring. Sl st to join.
- (Ch 2, dc in same st, ch 2, sl st in same st) 3 times. This creates three small “leaves.”
- Fasten off, leave a tail. Sew this small piece onto the tongue.
Part 5: Finishing
- Weave in any remaining loose ends securely.
- Make sure both shoes are as identical as possible.
- Optional: If desired, lightly stiffen the toe cap and tongue with fabric stiffener to help them hold their shape, especially for photography.
Video tutorial
Congratulations! You’ve just created an absolutely adorable pair of crochet sneaker baby booties. These tiny kicks are sure to be a hit and a treasured handmade item!