by
by 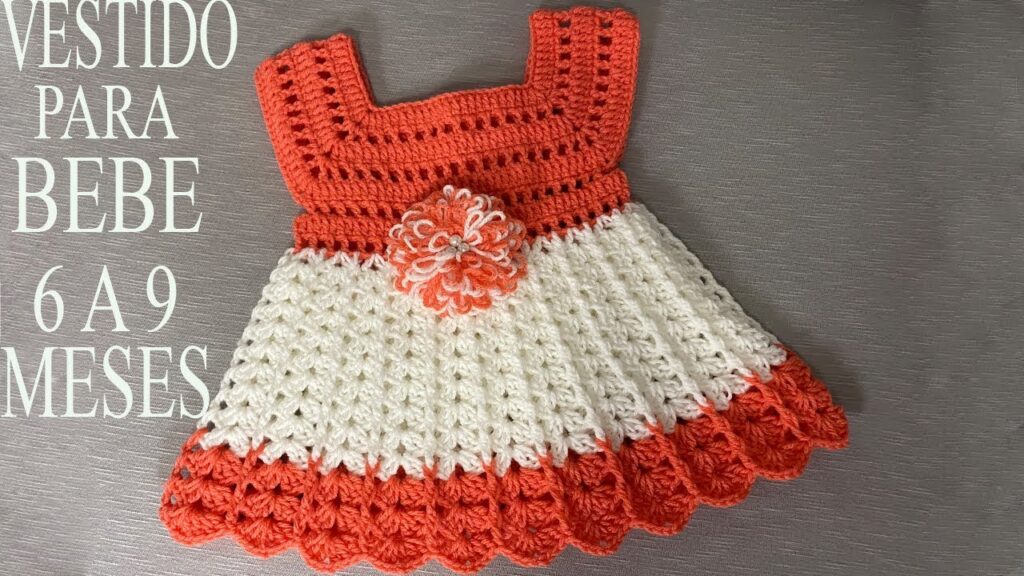
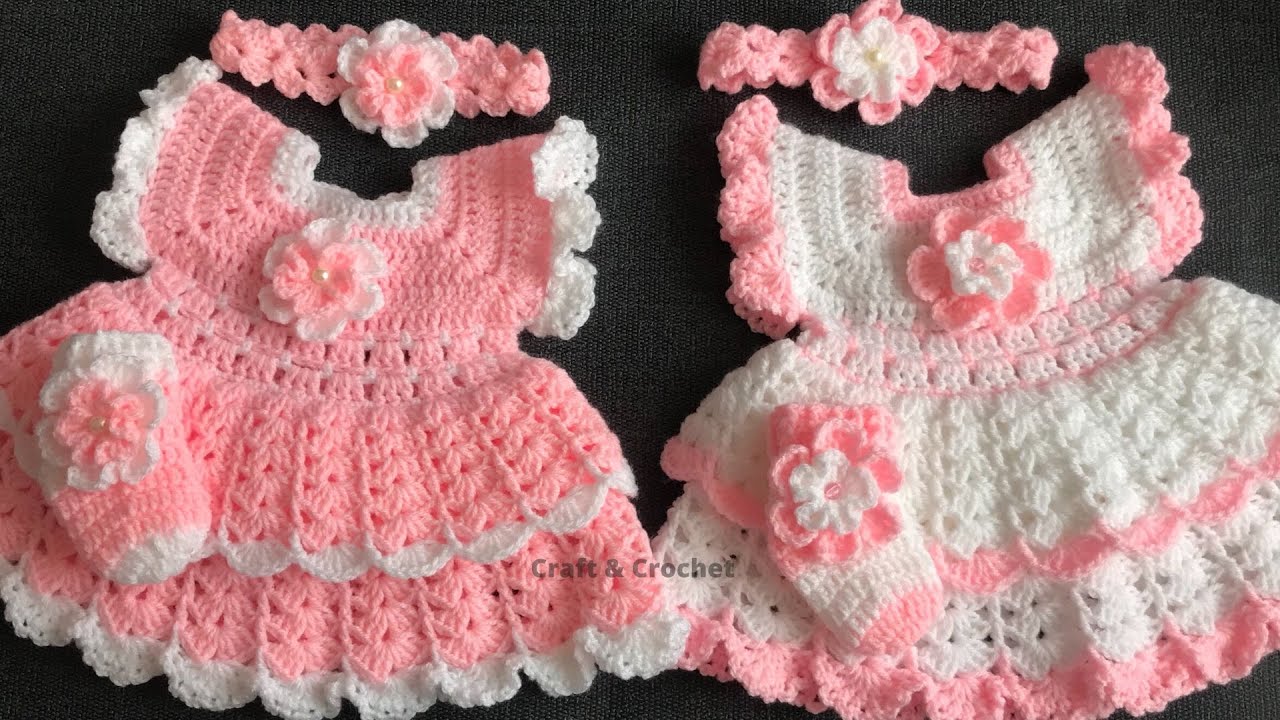
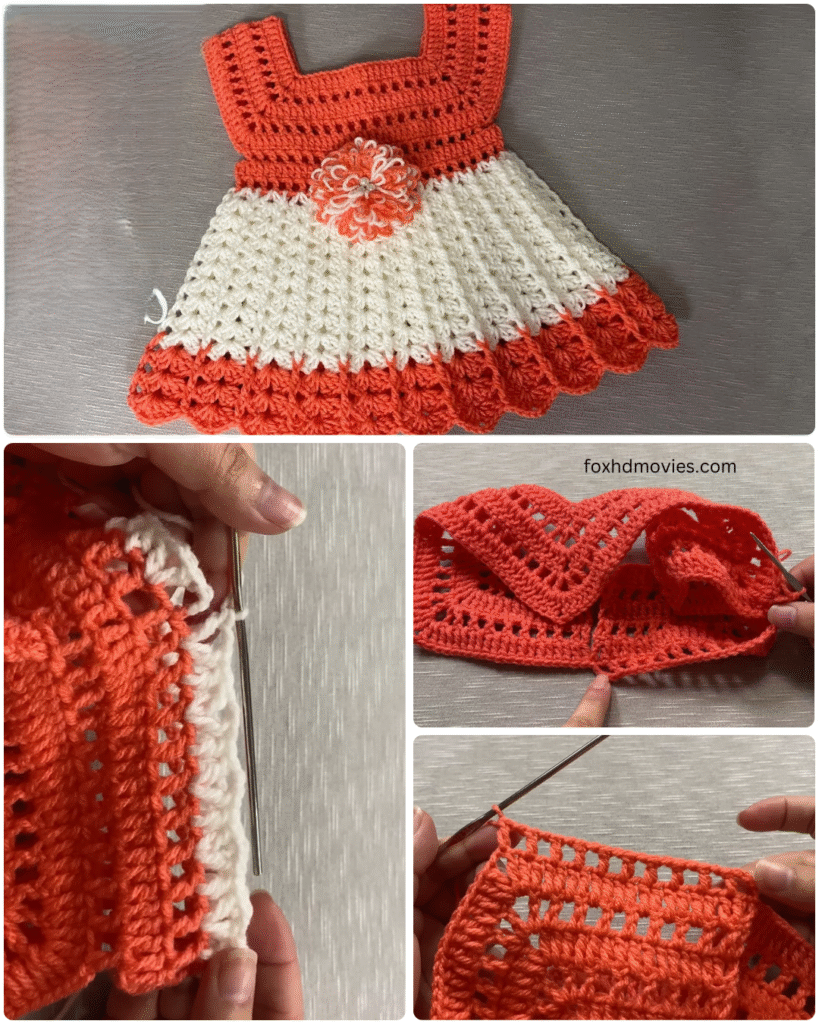
There’s nothing quite as precious as a handmade dress for a little one, and this crochet design is sure to melt hearts! Featuring a classic square yoke, a delightful shell stitch skirt in two colors, and a charming matching flower, this dress is perfect for special occasions or everyday sweetness. Designed for babies aged 6 to 9 months, it’s a rewarding project that combines beautiful textures and a lovely flow.
This pattern is suitable for intermediate crocheters, or adventurous beginners comfortable with basic stitches and shaping.
Yarn:
- DK (Double Knit) or Light Worsted Weight yarn in two contrasting colors (e.g., Orange/Coral and White as shown). Choose a soft, baby-friendly yarn like acrylic, cotton, or a cotton blend that is machine washable.
Hook:
- 3.5 mm (US E/4) crochet hook (adjust hook size if necessary to achieve gauge and desired fabric).
Notions:
- Tapestry needle for weaving in ends
- Scissors
- Small buttons (2-3 for the back opening of the yoke)
- Stitch markers (helpful for marking corners of the yoke)
Gauge (Crucial for Sizing!):
- For the Yoke (DC): 18 DC and 10 rows = 4 inches (10 cm)
- For the Skirt (Shell Stitch): A shell (5 DC) should be approximately 1.25 inches wide and 1 inch tall.
- Please check your gauge before starting. Adjust hook size if needed.
Finished Measurements (Approximate for 6-9 Months):
- Chest Circumference: 18-19 inches (46-48 cm)
- Dress Length (from shoulder to hem): 14-15 inches (35-38 cm)
Abbreviations (US Crochet Terms):
- Ch: Chain
- Sl St: Slip Stitch
- SC: Single Crochet
- HDC: Half Double Crochet
- DC: Double Crochet
- Tr: Treble Crochet (or Triple Crochet)
- St(s): Stitch(es)
- Sk: Skip
- Sp: Space
- FO: Fasten Off
- Yo: Yarn Over
- V-stitch: (DC, Ch 1, DC) in the same stitch/space
- Shell: 5 DC in the same stitch/space
Pattern Instructions:
Part 1: The Square Yoke (Main Color – Orange/Coral)
The yoke is worked in rows, from the top down, with increases at the corners to create the square shape. We will create a small opening at the back for buttons.
- Ch 68. (This chain forms the neck opening and the beginning of the yoke).
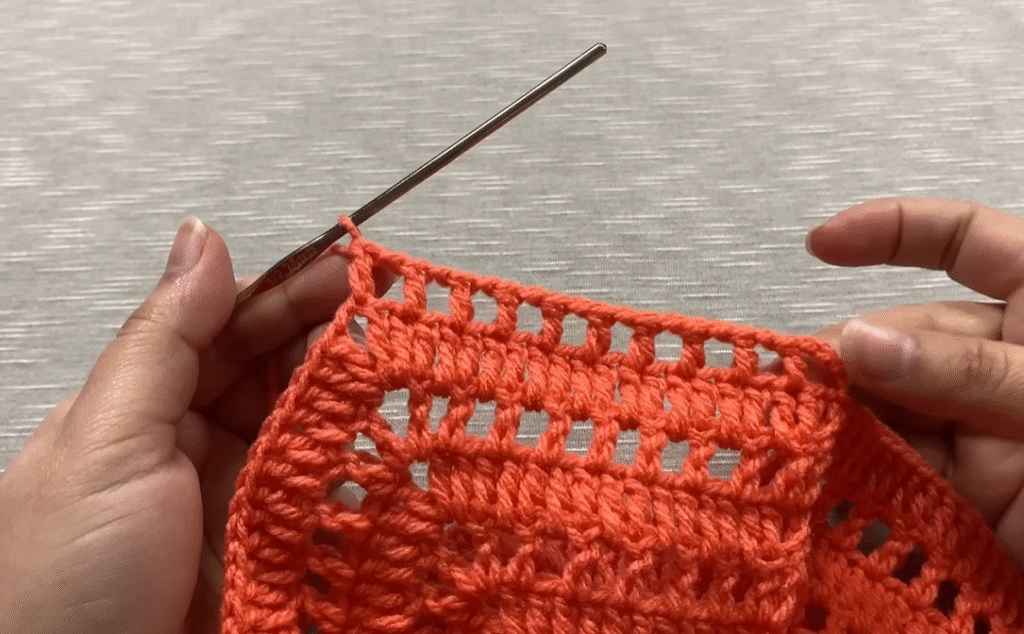
- Row 1 (RS): DC in 4th Ch from hook (counts as 1st DC). DC in next 8 Ch (front panel: 9 DC total). (Ch 2, Sk 1 Ch, DC in next 10 Ch) – this is the shoulder and first increase corner. (Ch 2, Sk 1 Ch, DC in next 18 Ch) – this is the back panel and second increase corner. (Ch 2, Sk 1 Ch, DC in next 10 Ch) – this is the second shoulder and third increase corner. (Ch 2, Sk 1 Ch, DC in next 9 Ch) – this is the second front panel and fourth increase corner. (You should have 4 corners marked by Ch 2 spaces. Total stitches excluding Ch-2 spaces: 9 + 10 + 18 + 10 + 9 = 56 DC). Ch 3 (counts as 1st DC), turn.
- Self-correction/clarification for future steps based on the image: The image shows the yoke corners are solid stitches, not open chain spaces. Let’s adjust the corner increase for a solid yoke.
Revised Yoke Instructions (Solid Corners):
- Ch 68.
- Row 1 (RS): DC in 4th Ch from hook (counts as 1st DC). DC in next 8 Ch (9 DC for first front panel). PM. (DC, Ch 1, DC) in next Ch (first corner increase). DC in next 10 Ch (shoulder: 10 DC). PM. (DC, Ch 1, DC) in next Ch (second corner increase). DC in next 18 Ch (back panel: 18 DC). PM. (DC, Ch 1, DC) in next Ch (third corner increase). DC in next 10 Ch (shoulder: 10 DC). PM. (DC, Ch 1, DC) in next Ch (fourth corner increase). DC in next 9 Ch (second front panel: 9 DC). Ch 3 (counts as 1st DC), turn.
- Total stitches: 9+1+1+10+1+1+18+1+1+10+1+1+9 = 66 DC + 4 Ch-1 spaces.
- Row 2 (WS): DC in each DC to first Ch-1 sp. (DC, Ch 1, DC) in Ch-1 sp (corner increase). DC in each DC to next Ch-1 sp. Repeat from * to * for all 4 corners. DC in remaining stitches. Ch 3, turn.
- Repeat Row 2 until you have 7 rows total (or until the yoke measures approx. 4.5-5 inches from neck to armpit). You should be on a RS row ready to join for the body.
- At the end of Row 7, you will have significantly increased the stitch count. Make sure your armhole openings are wide enough to comfortably fit around the baby’s arm.
Joining for the Body:
- Row 8 (RS – Joining Row): DC in each DC to the first corner Ch-1 sp. Skip the Ch-1 sp and the stitches of the first armhole (shoulder section). DC in the first stitch after the skipped section (this joins the first armhole). DC across the stitches of the back panel to the next Ch-1 sp. Skip the Ch-1 sp and the stitches of the second armhole. DC in the first stitch after the skipped section (this joins the second armhole). DC in remaining stitches of the front panel. Sl St to join with the first DC of the row to form a circle. Ch 3 (counts as 1st DC).
- You have now formed the armholes and joined the yoke into a round for the body of the dress.
- Count your total stitches now; this will be the stitch count for the top of your skirt. It should be approximately 96-100 stitches.
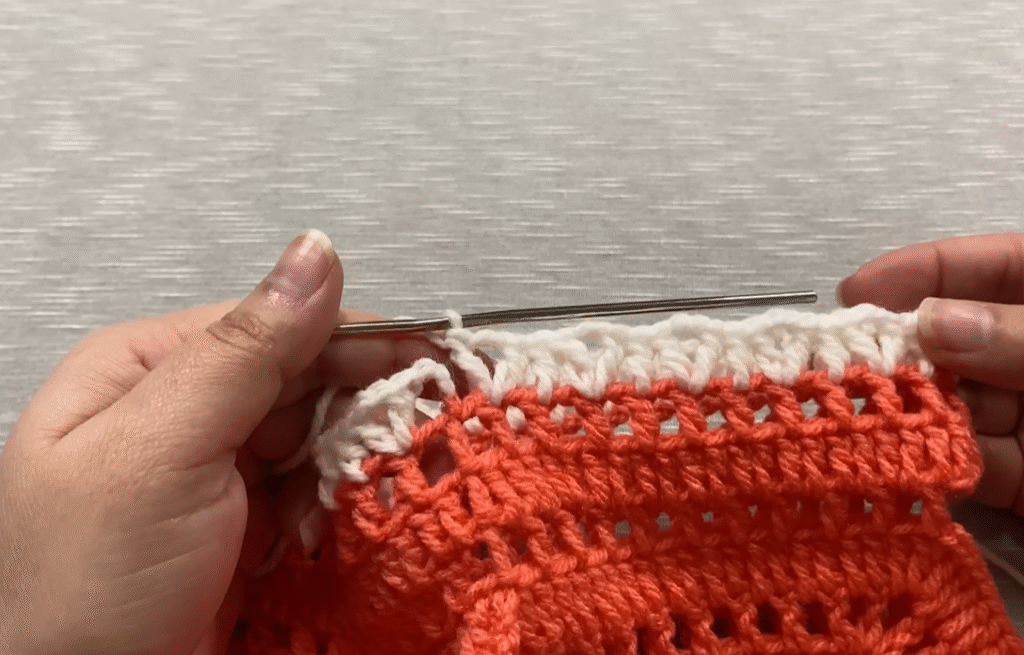
Part 2: The Skirt (Alternating Colors – White & Orange/Coral)
We’ll use a Shell Stitch pattern (5 DC in the same stitch, skip 4 stitches) for the skirt.

A. White Skirt Section:
- Round 1 (White Yarn): Join White yarn with a Sl St to any stitch. Ch 3 (counts as 1st DC). 4 DC in the same stitch as Ch 3 (first Shell made). Sk 4 stitches, Shell (5 DC) in next stitch. Repeat from * to * around. Sl St to top of beginning Ch 3.
- Ensure your total stitch count from the yoke is a multiple of 5 for even shell placement. If not, make minor adjustments by skipping 3 or 5 stitches occasionally to make it work.
- Round 2: Sl St into the center DC of the first Shell. Ch 3, 4 DC in the same center DC (first Shell made). Sk 4 DC, Shell (5 DC) in the center DC of the next Shell. Repeat from * to * around. Sl St to top of beginning Ch 3.
- Repeat Round 2 for 10-12 more rounds (or until the white section of the skirt measures approx. 6-7 inches / 15-18 cm from the join).
B. Main Color Border (Orange/Coral):
- Change to Main Color (Orange/Coral): Join yarn with Sl St in the center DC of any shell.
- Round 1: Ch 3 (counts as 1st DC). 4 DC in the same center DC (first Shell made). Sk 4 DC, Shell (5 DC) in the center DC of the next Shell. Repeat from * to * around. Sl St to top of beginning Ch 3.
- Repeat Round 1 for 2-3 more rounds. (This forms the solid orange border).
C. Ruffle Edge (Orange/Coral):
The bottom edge of the dress has a distinct ruffle.
- Round 1 (Ruffle Base): Ch 1. SC in same stitch. 2 SC in next DC, SC in next DC, 2 SC in next DC, SC in next DC, 2 SC in next DC. (You are increasing within each shell to create more stitches for the ruffle). Repeat from * to * around. Sl St to first SC.
- Round 2 (Ruffle): Ch 3 (counts as 1st DC). 2 DC in same stitch. Sk 1 SC, (3 DC in next SC). Repeat from * to * around the entire edge. Sl St to top of beginning Ch 3. FO.
Part 3: The Flower Embellishment (White & Orange/Coral)
A. Inner Swirl (Pink/Orange/Coral Yarn):
- Ch 25.
- Row 1: 3 DC in 4th Ch from hook. Sk 1 Ch, Sl St in next Ch, Ch 3, 3 DC in same Ch as Sl St. Repeat from * to * across the chain. FO, leaving a long tail for sewing.
- To form the swirl: Carefully roll the strip, starting from one end, to create a tight rose-like center. Stitch through the base to secure.
B. Outer Petals (White Yarn):
- Ch 30.
- Row 1: Sl St in 2nd Ch from hook. Ch 3, Sl St in same Ch as previous Sl St (small picot). (Repeat Ch 3, Sl St into same Ch once more for a fuller base). Sk 2 Ch, Sl St in next Ch. Repeat from * to * across the chain.
- Row 2: Ch 1 (does not count as a stitch), turn. Work 5 HDC into each Ch-3 space, Sl St into the next Sl St. Repeat from * to * across the row. FO, leaving a long tail for sewing.
Assembly of the Flower: Position the white outer petal strip around the base of your orange/coral swirl. Gather and shape the white petals to frame the center, and use the long tail to stitch them securely to the back of the swirl, forming the full flower.
Video tutorial
Finishing Your Dress:
- Weave in all loose ends with your tapestry needle. Take your time to ensure they are neatly hidden.
- Buttons: Sew 2-3 small buttons onto one side of the back opening of the yoke. Use the natural gaps in the crochet fabric on the opposite side as buttonholes.
- Attach Flower: Position the completed flower embellishment on the center front of the dress, just below the yoke seam. Securely stitch it in place.
- Block (Optional but Recommended): Gently wet the dress, reshape it to the correct measurements, and pin it to a foam board or towel. Allow it to air dry completely. This will even out your stitches and give the dress a professional finish.
Congratulations! You’ve just created a beautiful handmade crochet dress perfect for a precious little one. This dress is sure to be cherished for years to come. Enjoy the smiles it brings!
Happy crocheting!