by
by 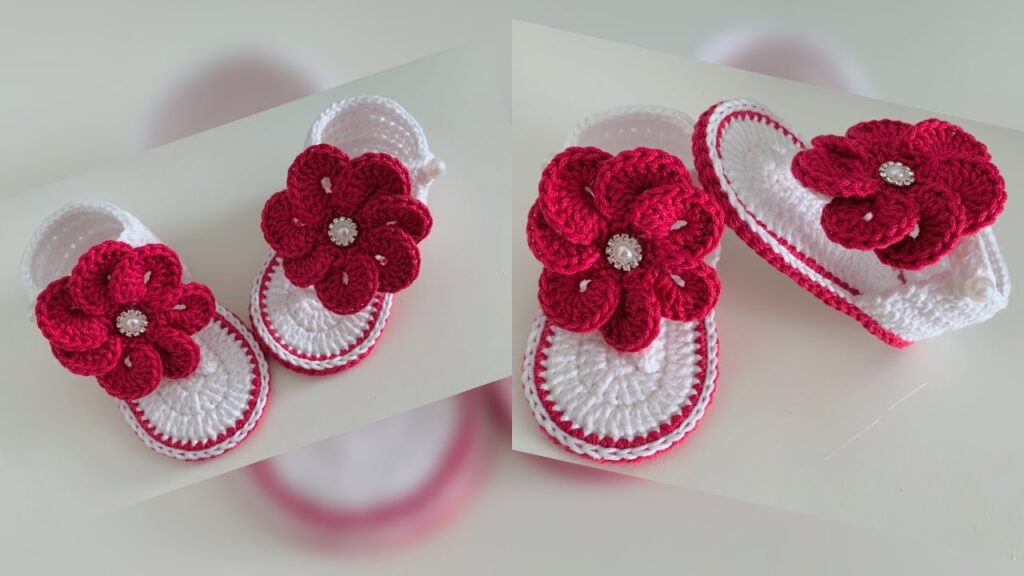
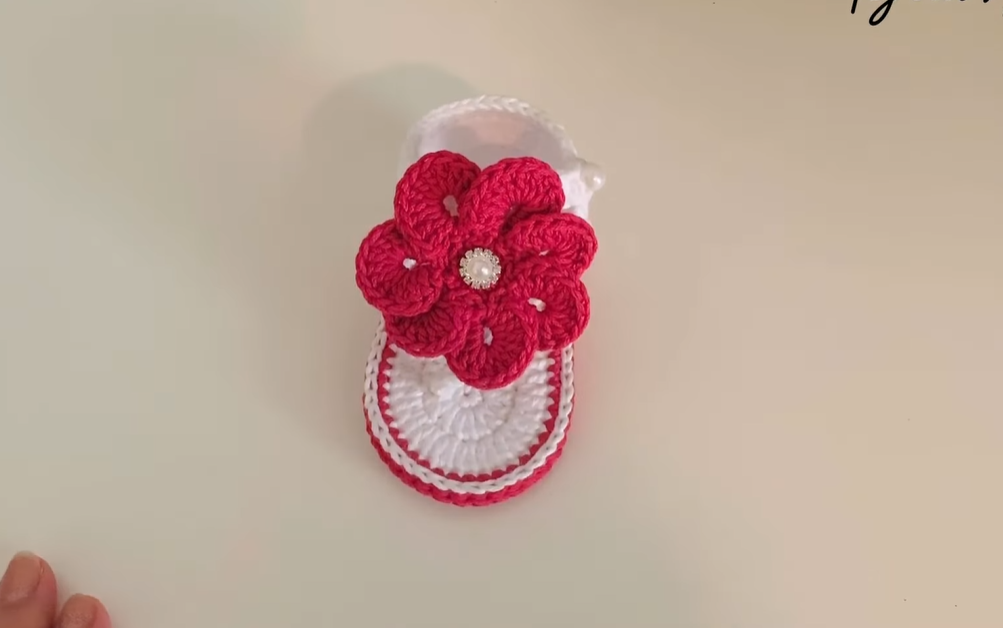
Hello, handmade lovers! Are you looking for the perfect adorable accessory for a little one in your life? These charming crochet baby sandals, adorned with a sweet flower, are just the thing! They’re not only incredibly cute but also a thoughtful and unique gift for baby showers, birthdays, or just because.
This pattern combines simple stitches to create a comfortable sole, a delicate strap, and a vibrant, layered flower. Let’s get started on these tiny treasures!
Skill Level: Easy to Intermediate (familiarity with basic crochet stitches is helpful)
Materials You’ll Need:
- Yarn:
- Sport or DK weight cotton yarn in White (or main sole color) – approximately 20-30 yards
- Sport or DK weight cotton yarn in Bright Pink/Red (for the flower and trim) – approximately 10-15 yards
- Small amount of pearl/white yarn for the strap (could also use white sole yarn)
- Crochet Hook: 2.5mm – 3.0mm (or hook size appropriate for your chosen yarn to create a tight fabric)
- Yarn Needle: For weaving in ends and sewing pieces together.
- Scissors
- Small Pearl Bead: For the center of the flower.
- Sewing Needle and Thread: For attaching the pearl bead.
Abbreviations Used:
- ch: chain
- st(s): stitch(es)
- sl st: slip stitch
- sc: single crochet
- hdc: half double crochet
- dc: double crochet
- inc: increase (2 sc in the same stitch)
- FO: fasten off
Gauge: Not critical, but aim for a firm, dense fabric so the sole holds its shape.
Pattern Notes:
- This pattern is for a baby sandal, roughly newborn to 3 months size (approx. 9-10 cm sole length). You can adjust the starting chain length and subsequent rows for different sizes.
- We’ll be working in continuous rounds for the sole, then in rows for the strap.
Part 1: The Sandal Sole (Make 2 in White Yarn)
The sole is worked in oval rounds.
Start: Ch 14
Round 1: Sc in 2nd ch from hook. Sc in next 11 ch. 3 sc in last ch. Now working on the opposite side of the starting chain: Sc in next 11 ch. 2 sc in the last ch. Join with a sl st to the first sc. (29 sc)
- Tip: Place a stitch marker in the first and last stitch of the round to help keep track.

Round 2: Ch 1. Inc in first st. Sc in next 11 sts. Inc in next 3 sts. Sc in next 11 sts. Inc in next 2 sts. Join with a sl st to the first sc. (35 sc)
Round 3: Ch 1. Sc in first st. Inc in next st. Sc in next 11 sts. (Sc in next st, inc) 3 times. Sc in next 11 sts. (Sc in next st, inc) 2 times. Join with a sl st to the first sc. (41 sc)
You can add more rounds for a larger sole, following the same increase pattern at the ends of the oval.
Edging (Optional but recommended for a neat finish): Ch 1. Sc around the entire edge of the sole, working into the top loops of the last round. This creates a slightly raised edge. Join with a sl st. FO, weave in ends.
Part 2: The Sole Trim (Make 2 in Pink/Red Yarn)
This trim adds a lovely pop of color and definition to the sole.

Ch: Chain a length that roughly matches the circumference of the sole (excluding the strap area at the heel). You’ll be sewing this on. It’s better to make it slightly longer and trim excess.
Row 1: Sc in 2nd ch from hook and in each ch across. FO, leaving a long tail for sewing.
Carefully sew this strip around the outer edge of the white sole. Refer to the image for placement – it sits just inside the edge of the sole.
Part 3: The Heel Strap (Make 2 in White/Pearl Yarn)
This strap goes around the back of the baby’s heel.
Ch 15-20 (adjust based on desired length and sole size – hold it against the sole to estimate).
Row 1: Sc in 2nd ch from hook and in each ch across. FO, leaving long tails on both ends for sewing.
Position the strap to form the back heel part of the sandal. Sew each end securely to the sides of the sole.
Part 4: The Flower (Make 2 – 1 Large Pink, 1 Small Pink)
This flower is made in two layers for a beautiful dimensional effect.
Large Flower (Pink/Red Yarn):
Start with a magic ring.
Round 1: Ch 1. Sc 6 into ring. Join with sl st. (6 sc) Round 2 (Petals): Ch 2. 3 dc into same st. Ch 2. Sl st into same st. Repeat from * into each of the 6 sc around. You will have 6 petals. FO, leave a tail for sewing.
Small Flower (Pink/Red Yarn):
Start with a magic ring.
Round 1: Ch 1. Sc 5 into ring. Join with sl st. (5 sc) Round 2 (Petals): Ch 2. 2 dc into same st. Ch 2. Sl st into same st. Repeat from * into each of the 5 sc around. You will have 5 petals. FO, leave a tail for sewing.
Video tutorial
Assembly:
- Attach Flower Layers: Place the smaller flower on top of the larger flower, slightly offsetting the petals for a fuller look. Securely sew them together at the center using the yarn tails.
- Attach Pearl Bead: Using a sewing needle and thread, sew the pearl bead firmly to the center of the stacked flowers.
- Attach Flower to Sandal: Position the assembled flower centrally on the front top part of the sole, where the toes would be. Securely sew the flower to the sole using the remaining yarn tails. Ensure it’s very firmly attached, as it will be handled by little hands!
- Weave in all remaining ends: Use your yarn needle to neatly tuck away any loose ends.
Congratulations! You’ve just created an adorable pair of handmade baby sandals! These are perfect for photoshoots, special occasions, or just to add some cuteness to a baby’s outfit.
Don’t forget to share your finished sandals with me on social media! Tag me and use the hashtag #CrochetBabySandals. I can’t wait to see your sweet creations!
Happy Crocheting!