 by
by 
Hello, passionate crocheters!
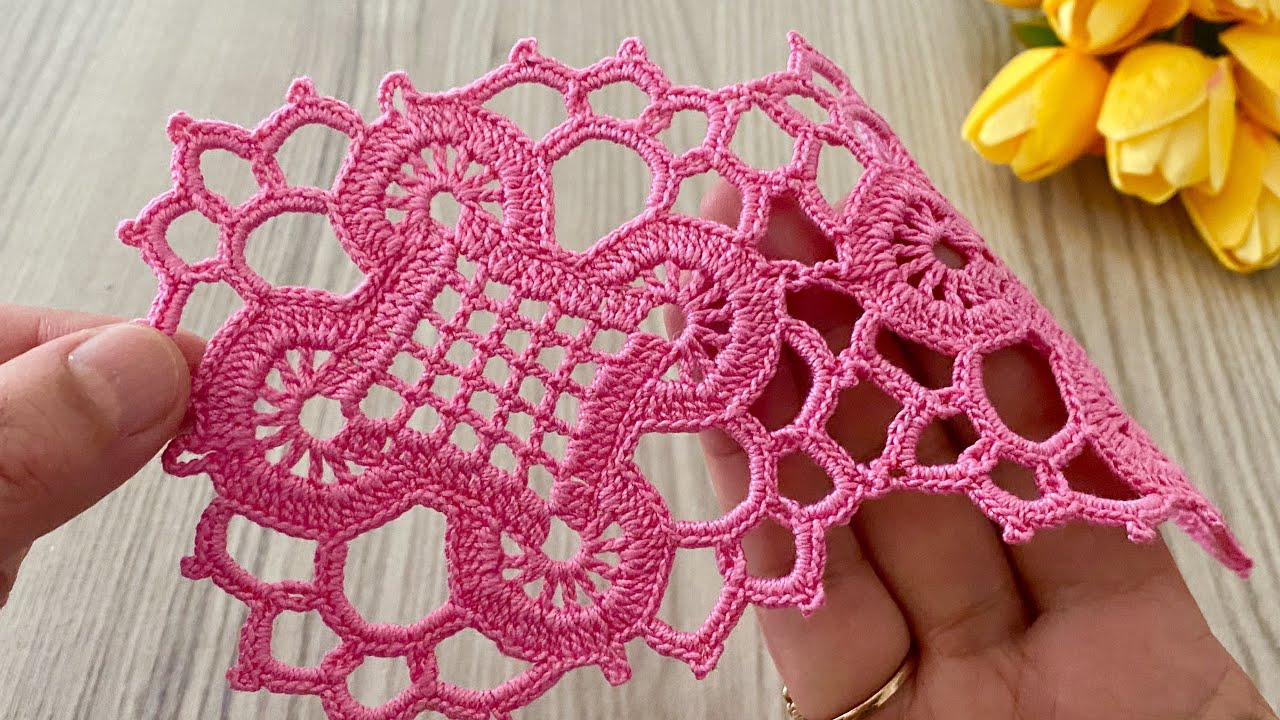
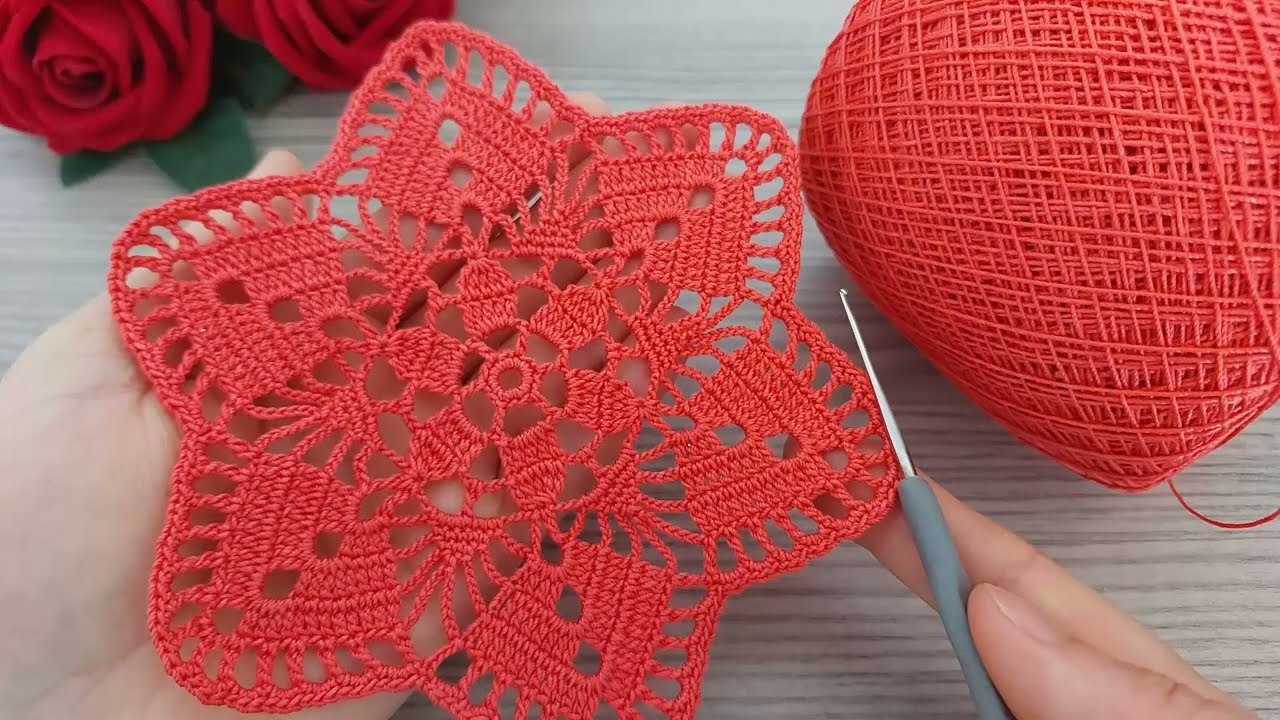
There’s something truly magical about a meticulously crafted doily, especially one with such intricate detail and a unique shape. This star-shaped doily is a testament to the beauty of crochet lace, featuring a captivating central starburst design that branches out into delicate points and a charming, scalloped edge.
The vibrant red of the sample makes it a stunning focal point, perfect for adding a touch of elegance and warmth to any table or as a special handmade gift. Prepare to immerse yourself in a rewarding project that combines precision with artistry!
This pattern is written in US crochet terms.
Skill Level: Advanced Intermediate (This pattern involves intricate lace work, specific stitch placement, and shaping. Experience with various stitches and reading complex patterns is recommended.)
Materials You’ll Need:
- Yarn: Fine (size 2) or Sport (size 3) weight cotton yarn. Cotton thread (like Size 10 or 20) could also be used for a very fine, delicate doily. The sample looks like a fine weight cotton.
- Crochet Hook: A hook size appropriate for your chosen yarn. For Fine/Sport weight yarn, a 2.0mm (B/1) to 3.0mm (C/2) hook is often suitable. Adjust as needed to achieve your desired drape and stitch density.
- Yarn Needle: For weaving in ends.
- Scissors
- Stitch Markers (highly recommended!): Especially useful for marking the start of rounds and the central point of each star arm.
Abbreviations (US Terms):
- ch: chain
- sl st: slip stitch
- sc: single crochet
- hdc: half double crochet
- dc: double crochet
- tr: treble crochet (or triple crochet)
- dtr: double treble crochet
- st(s): stitch(es)
- sp: space
- ch-sp: chain space
- rep: repeat
- sk: skip
- Picot: Ch 3, sl st into 3rd ch from hook.
- V-st: (dc, ch 1, dc) in indicated stitch/space
- Shell: (2 dc, ch 1, 2 dc) in indicated stitch/space
Let’s Get Started!
This doily is worked in the round, creating a central motif from which the six star points gracefully emerge. Pay close attention to stitch counts and chain spaces for accurate shaping.
Part 1: Central Starburst Motif
Round 1: Ch 4, sl st to first ch to form a ring. Or, make a magic ring. Ch 3 (counts as first dc), 11 dc into the ring. Join with sl st to top of beg ch-3. (12 dc)
Round 2: Ch 3 (counts as first dc), dc in same st. 2 dc in each st around. Join with sl st to top of beg ch-3. (24 dc)
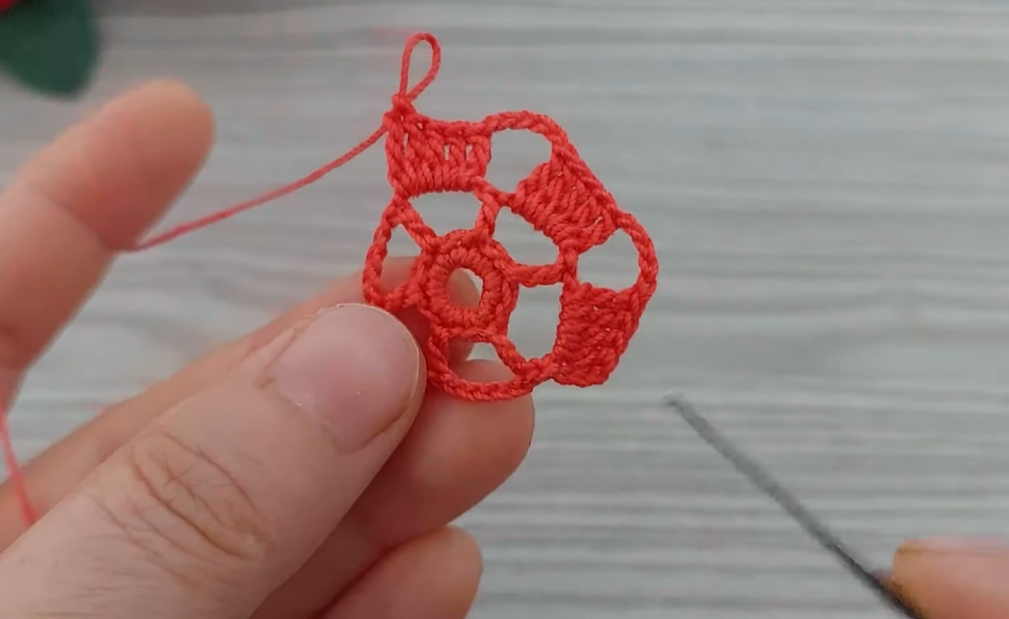
Round 3: Ch 1, sc in same st. Ch 3, sk 3 sts, sc in next st. Rep from * to * around, ending with ch 3, sl st to first sc. (6 sc, 6 ch-3 sps)
Round 4 (Forming Star Base): Sl st into first ch-3 sp. Ch 3 (counts as first dc), (2 dc, ch 3, 3 dc) in same ch-3 sp (this is your first star point shell). Sc in next sc. (3 dc, ch 3, 3 dc) in next ch-3 sp. Rep from * to * around, ending with sc in last sc. Join with sl st to top of beg ch-3. (6 shells, 6 sc)
Round 5: Sl st into next 2 dc to reach the first ch-3 sp of a shell. Ch 3 (counts as first dc), (2 dc, ch 3, 3 dc) in same ch-3 sp. Ch 3, sk next 3 dc, dc in next sc, ch 3, sk next 3 dc. (3 dc, ch 3, 3 dc) in next ch-3 sp. Rep from * to * around. Join with sl st to top of beg ch-3. (6 shells, 12 ch-3 sps, 6 dc)
Round 6: Sl st into next 2 dc to reach the first ch-3 sp of a shell. Ch 3 (counts as first dc), (2 dc, ch 3, 3 dc) in same ch-3 sp. [Ch 3, sc in next ch-3 sp] twice. Ch 3, (3 dc, ch 3, 3 dc) in next ch-3 sp. Rep from * to * around. Join with sl st to top of beg ch-3. (6 shells, 18 ch-3 sps, 12 sc)
Part 2: Expanding Lace and Shaping
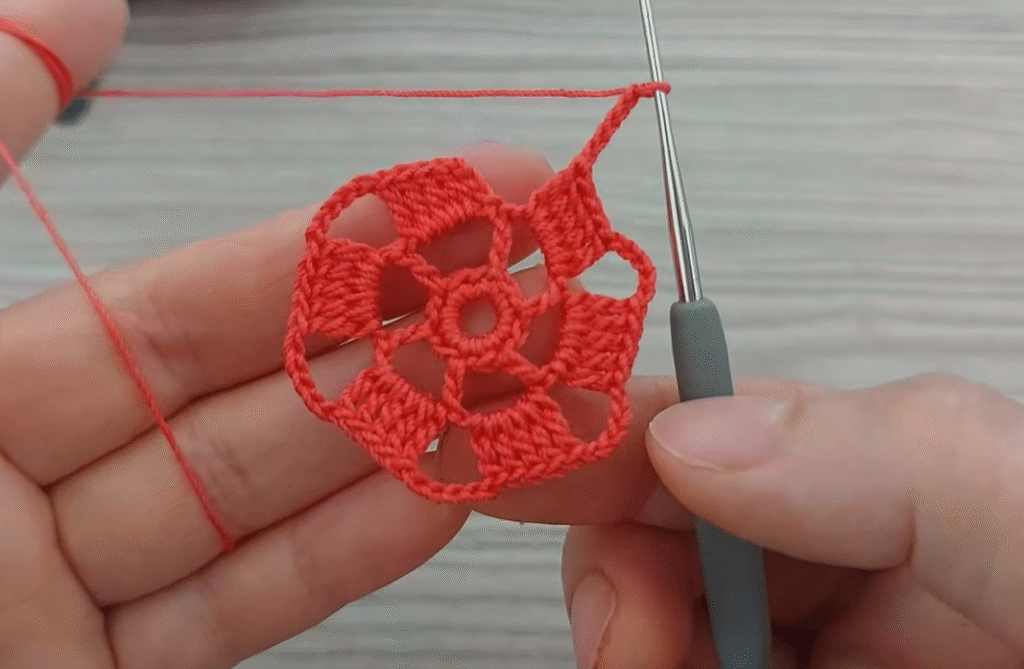
Round 7: Sl st into next 2 dc to reach the first ch-3 sp of a shell. Ch 1, (sc, ch 3, sc) in same ch-3 sp. [Ch 5, sc in next ch-3 sp] three times. Ch 5, (sc, ch 3, sc) in next ch-3 sp. Rep from * to * around. Join with sl st to first sc. (12 sc, 24 ch-sps: 6 ch-3 on points, 18 ch-5 between)
Round 8: Sl st into first ch-3 sp. Ch 1, (sc, Picot, sc) in same ch-3 sp (this forms a picot point). [Ch 5, sc in next ch-5 sp] four times. Ch 5, (sc, Picot, sc) in next ch-3 sp. Rep from * to * around. Join with sl st to first sc. (12 sc, 6 Picots, 30 ch-sps: 6 ch-3 on points, 24 ch-5 between)
Round 9: Sl st into first ch-3 sp. Ch 1, (sc, ch 3, sc) in same ch-3 sp (over the Picot). [Ch 5, sc in next ch-5 sp] five times. Ch 5, (sc, ch 3, sc) in next ch-3 sp. Rep from * to * around. Join with sl st to first sc.
Part 3: Final Lace Edge
Round 10: Sl st into first ch-3 sp. Ch 3 (counts as first dc), 4 dc in same ch-3 sp (first 5-dc group). [Ch 1, sc in next ch-5 sp] six times. Ch 1, 5 dc in next ch-3 sp. Rep from * to * around. Join with sl st to top of beg ch-3. (6 groups of 5 dc, 36 ch-1 sps, 30 sc)

Round 11: Ch 1, sc in same st. Sc in next 4 dc. Ch 2, sk next ch-1 sp. Sc in next sc. [Ch 2, sk next ch-1 sp, sc in next sc] four times. Ch 2, sk next ch-1 sp. Sc in first dc of next 5-dc group. Rep from * to * around. Join with sl st to first sc.
Round 12 (Outer Scallop Detail): Sl st into next 2 sc. Ch 1, (sc, Picot, sc) in next sc (center of a 5-sc group from previous round). [Ch 5, sc in next sc (over ch-2 sp)] five times. Ch 5, (sc, Picot, sc) in next sc (center of 5-sc group). Rep from * to * around. Join with sl st to first sc. This creates the lovely final scalloped edge with picot points.
Video tutorial
Finishing:
- Fasten off and weave in all loose ends securely. With a project this intricate, neat finishing is key!
- Blocking is absolutely crucial for this design! To properly showcase the star points and open up the delicate lace work, wet your doily thoroughly (you can gently wash it or spray it with water). Gently squeeze out excess water.
- Carefully pin the doily to a foam blocking mat or a clean towel, stretching out each of the 6 star points evenly. Ensure the doily lays flat and the internal lace patterns are opened up.
- Let it dry completely.
Your exquisite starburst doily is now complete! This is a truly stunning piece that highlights the beauty of crochet lace.
Don’t forget to share your finished creations with me in the comments or by tagging me on social media! Happy hooking!