 by
by 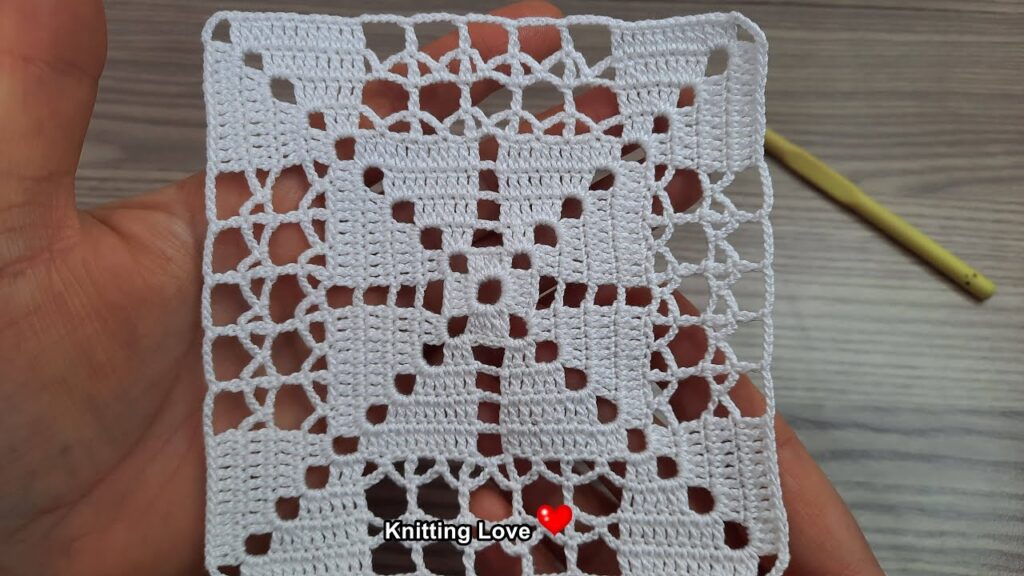
Hello, creative hands!
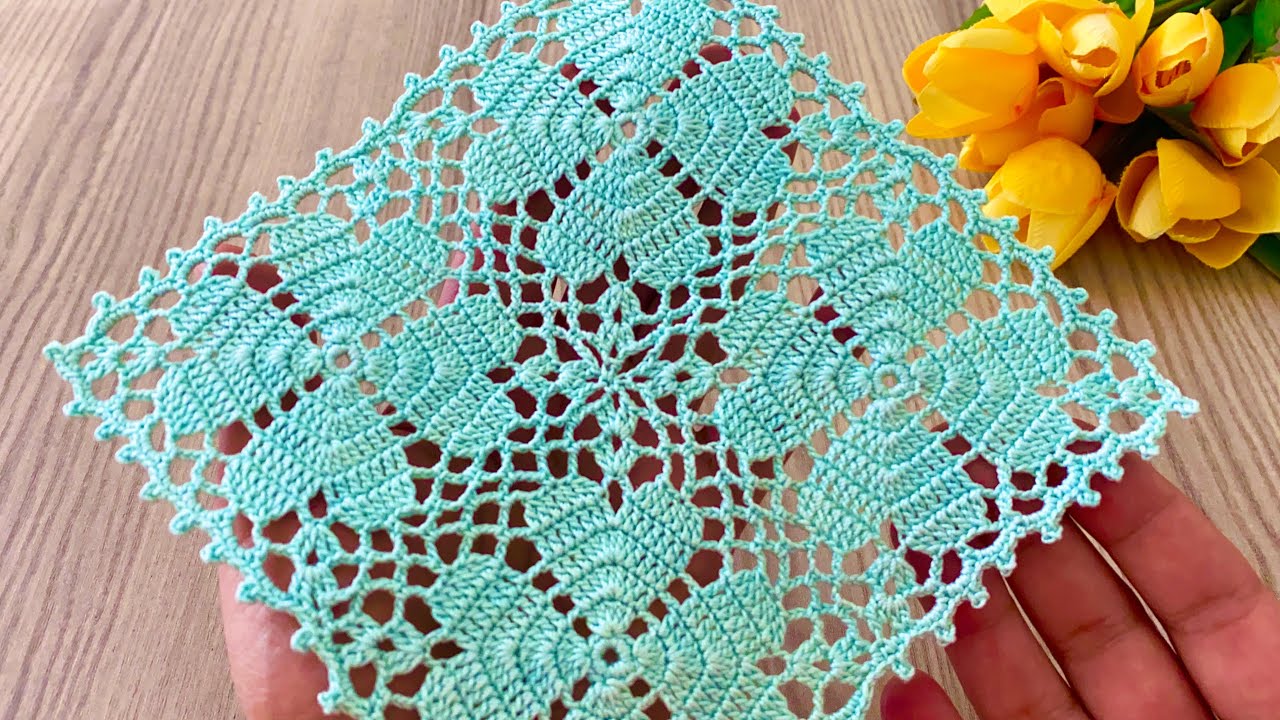
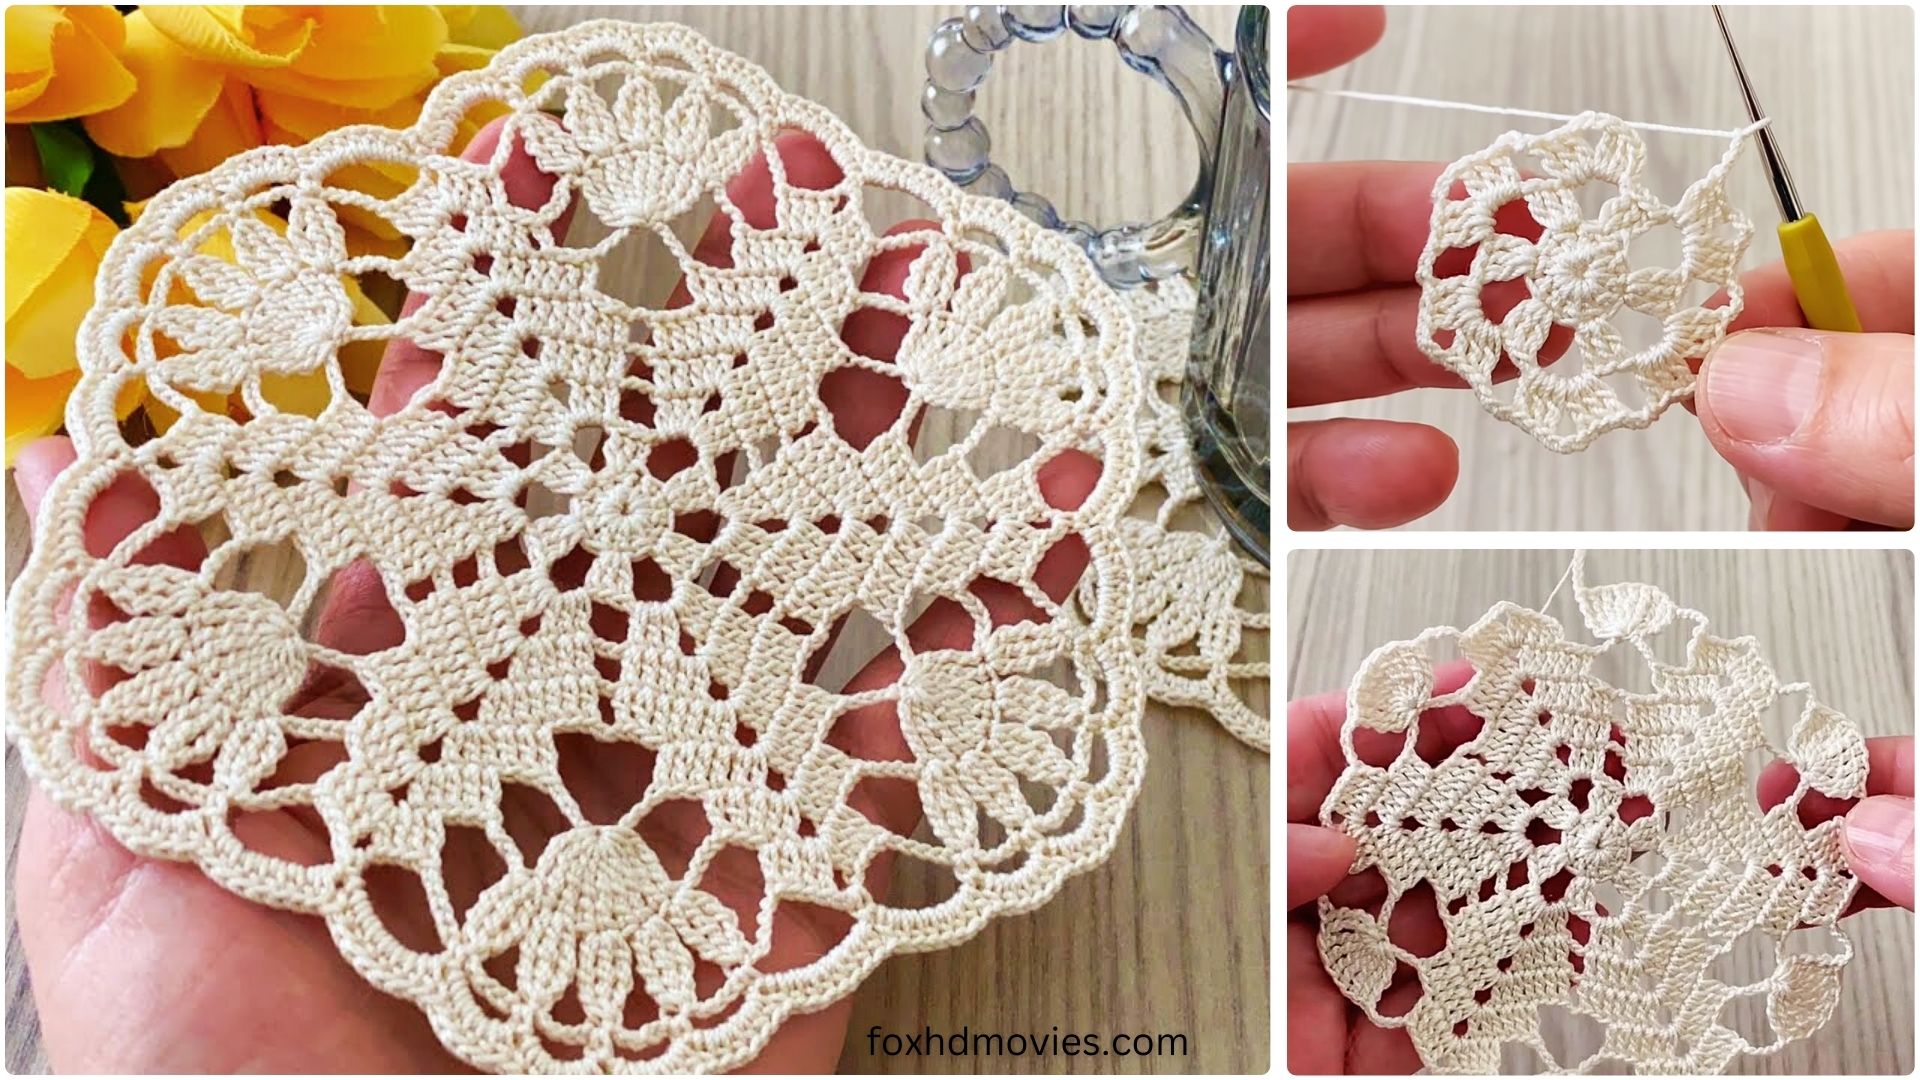
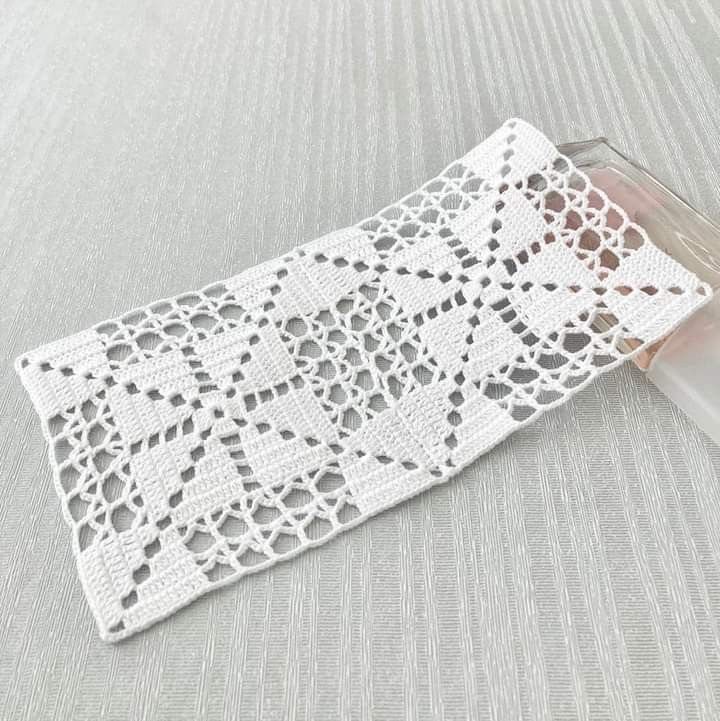
There’s something incredibly versatile and satisfying about crocheting a square motif. This particular design, with its delicate openwork and structured pattern, is a true gem! Whether you’re looking to make a single elegant coaster, a set of charming placemats, or plan to join multiple squares to form a larger heirloom project like a blanket or tablecloth, this pattern is perfect.
The timeless white lace makes it adaptable to any decor style, but imagine it in a vibrant color or a soft pastel!
This pattern is written in US crochet terms.
Skill Level: Intermediate (familiarity with basic crochet stitches and working in the round to create square shapes is helpful. Precision with stitch counts is key!)
Materials You’ll Need:
- Yarn: Fine (Size 2) or Sport (Size 3) weight cotton yarn. For a very delicate lace, you could use a crochet thread (e.g., Size 10). The sample appears to be a finer weight cotton or thread.
- Crochet Hook: A hook size appropriate for your chosen yarn. For fine/sport weight, a 2.0mm (B/1) to 3.0mm (C/2) hook is often suitable. For thread, a 1.5mm to 2.0mm hook. Adjust as needed for your tension.
- Yarn Needle: For weaving in ends.
- Scissors
- (Optional) Stitch Markers: Useful for marking the corners of each round.
Abbreviations (US Terms):
- ch: chain
- sl st: slip stitch
- sc: single crochet
- dc: double crochet
- st(s):: stitch(es)
- sp: space
- ch-sp: chain space
- rep: repeat
- sk: skip
- Block: 3 dc (or 1 dc per stitch/ch-sp for open blocks)
- Mesh: dc, ch 1, sk 1 (or dc, ch 1, sk ch-1 sp)
Let’s Get Started!
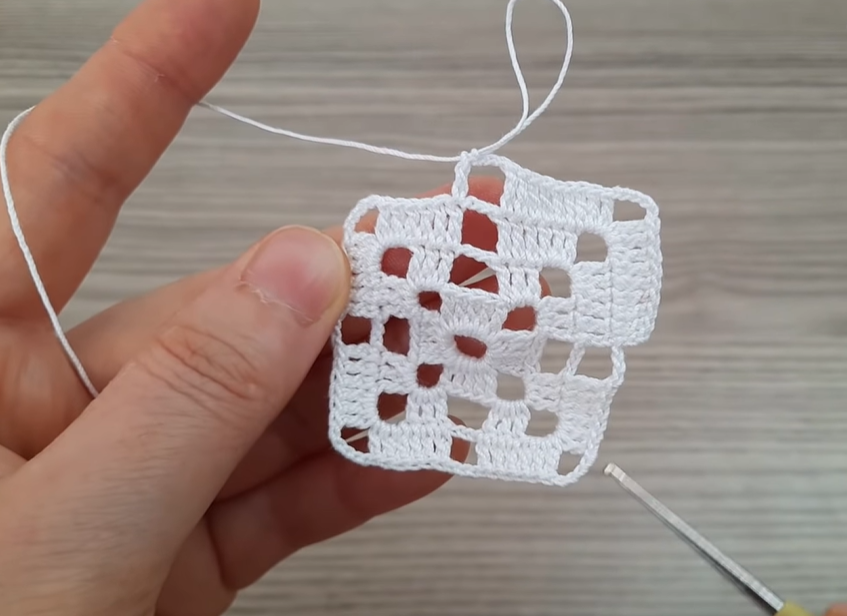
This square motif is worked in rounds, from the center outwards. Each round will build upon the previous one to create the intricate lace pattern and define the corners of the square.
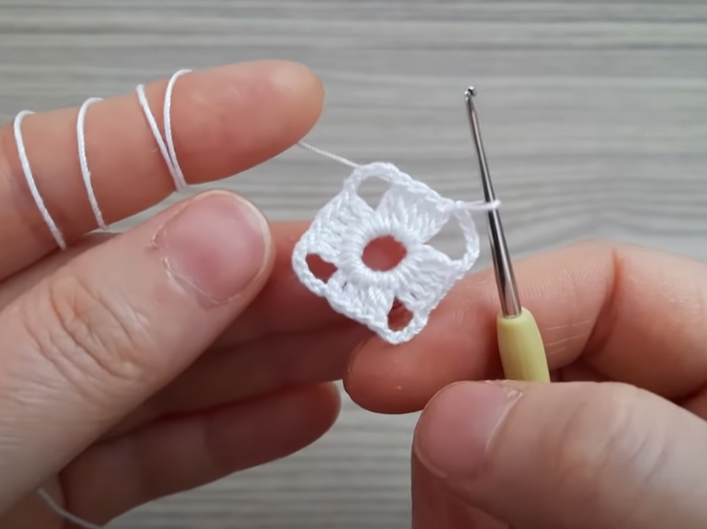
Foundation: Ch 4, sl st into first ch to form a ring. (Alternatively, use a magic ring).
Round 1: Ch 3 (counts as first dc), 2 dc into ring. (Ch 2, 3 dc into ring) 3 times. Ch 2, join with sl st to top of beg ch-3. (12 dc, 4 ch-2 sps)
Round 2: Ch 3 (counts as first dc), dc in next 2 dc. (2 dc, ch 2, 2 dc) in corner ch-2 sp. Dc in next 3 dc. Rep from * to * 2 more times. (2 dc, ch 2, 2 dc) in last corner ch-2 sp. Join with sl st to top of beg ch-3. (28 dc, 4 ch-2 sps)
Round 3: Ch 3 (counts as first dc), dc in next 4 dc. (2 dc, ch 2, 2 dc) in corner ch-2 sp. Dc in next 7 dc. Rep from * to * 2 more times. (2 dc, ch 2, 2 dc) in last corner ch-2 sp. Dc in last 2 dc. Join with sl st to top of beg ch-3. (44 dc, 4 ch-2 sps)
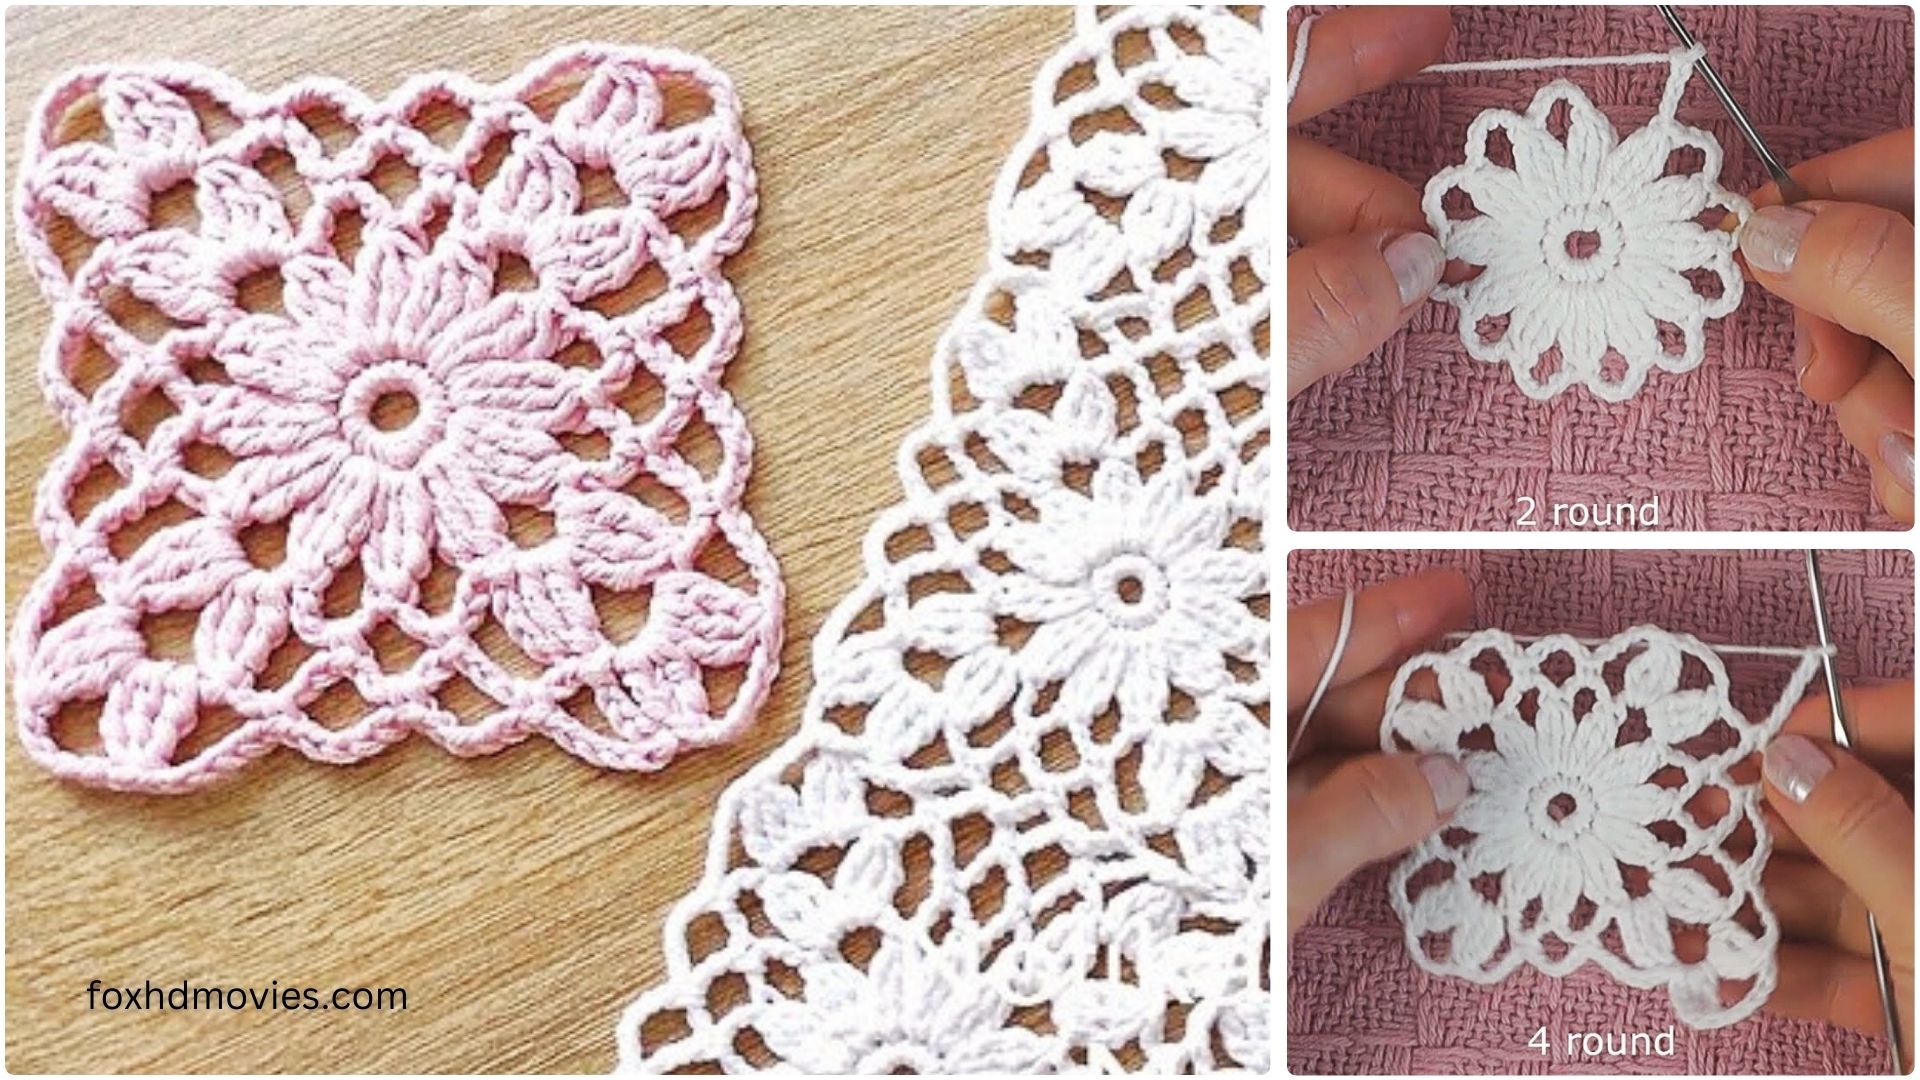
Round 4 (Beginning Filet Pattern): Ch 3 (counts as first dc), dc in next 2 dc (this is your first “Block”). Ch 1, sk 1 st, dc in next st (this is your first “Mesh”). Ch 1, sk 1 st, dc in next st. Ch 1, sk 1 st, dc in next st. Dc in next dc. (2 dc, ch 2, 2 dc) in corner ch-2 sp. Dc in next 2 dc. [Ch 1, sk 1 st, dc in next st] 4 times. Dc in next dc. Rep from * to * 2 more times. *(2 dc, ch 2, 2 dc) in last corner ch-2 sp. Dc in next 2 dc. [Ch 1, sk 1 st, dc in next st] once. Join with sl st to top of beg ch-3.
Round 5: Ch 3 (counts as first dc). [Ch 1, dc in next ch-1 sp] 3 times. Ch 1, dc in next dc. Ch 1, dc in next dc. (This creates 5 mesh spaces over previous blocks/meshes). (2 dc, ch 2, 2 dc) in corner ch-2 sp. Dc in next dc. [Ch 1, dc in next ch-1 sp] 5 times. Ch 1, dc in next dc. Rep from * to * 2 more times. *(2 dc, ch 2, 2 dc) in last corner ch-2 sp. Dc in last dc. [Ch 1, dc in next ch-1 sp] once. Join with sl st to top of beg ch-3.
Round 6: Ch 3 (counts as first dc). [Dc in next ch-1 sp, dc in next dc] twice. Dc in next ch-1 sp, dc in next dc. Dc in next ch-1 sp, dc in next dc. (This fills in 4 mesh spaces). (2 dc, ch 2, 2 dc) in corner ch-2 sp. Dc in next 2 dc. [Dc in next ch-1 sp, dc in next dc] 5 times. Dc in next ch-1 sp, dc in next dc. Rep from * to * 2 more times. *(2 dc, ch 2, 2 dc) in last corner ch-2 sp. Dc in last 2 dc. [Dc in next ch-1 sp, dc in next dc] once. Join with sl st to top of beg ch-3.

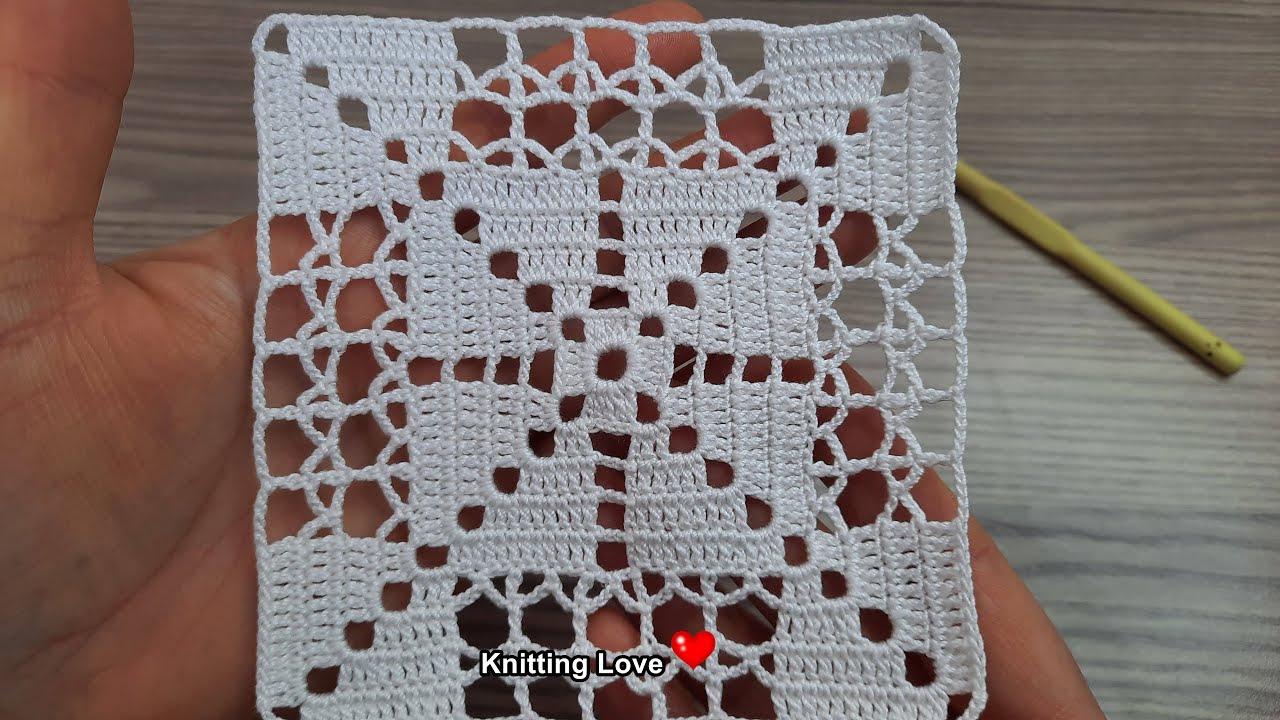
Round 7 (Outer Mesh): Ch 3 (counts as first dc). Ch 1, sk 1 st. [Dc in next st, ch 1, sk 1 st] until you reach 2 sts before corner ch-2 sp. Dc in last 2 sts before corner. (2 dc, ch 2, 2 dc) in corner ch-2 sp. Dc in next 2 sts. [Ch 1, sk 1 st, dc in next st] until you reach 2 sts before the next corner. Rep from * to * 2 more times. *(2 dc, ch 2, 2 dc) in last corner ch-2 sp. Dc in last 2 sts. [Ch 1, sk 1 st, dc in next st] to end of round. Join with sl st to top of beg ch-3.
Round 8 (Solid Border): Ch 1, sc in same st. Sc in each dc and each ch-1 sp around. (2 sc, ch 2, 2 sc) in each corner ch-2 sp. Join with sl st to first sc.
Video tutorial
Finishing:
- Fasten off and weave in all loose ends securely.
- Blocking is essential for square motifs! To open up the lace pattern and ensure your square is perfectly square, wet your motif thoroughly (you can gently wash it or spray it with water). Gently squeeze out excess water.
- Carefully pin the square to a foam blocking mat or a clean towel, stretching each corner evenly to a 90-degree angle and making sure all sides are straight. Pin through the center of the mesh stitches to really open them up.
- Let it dry completely.
Your beautiful lacy square is now ready! You can use it as a standalone piece or crochet more to join them together for larger projects.
Don’t forget to share your finished motifs with me in the comments or by tagging me on social media! Happy crocheting!