by
by 
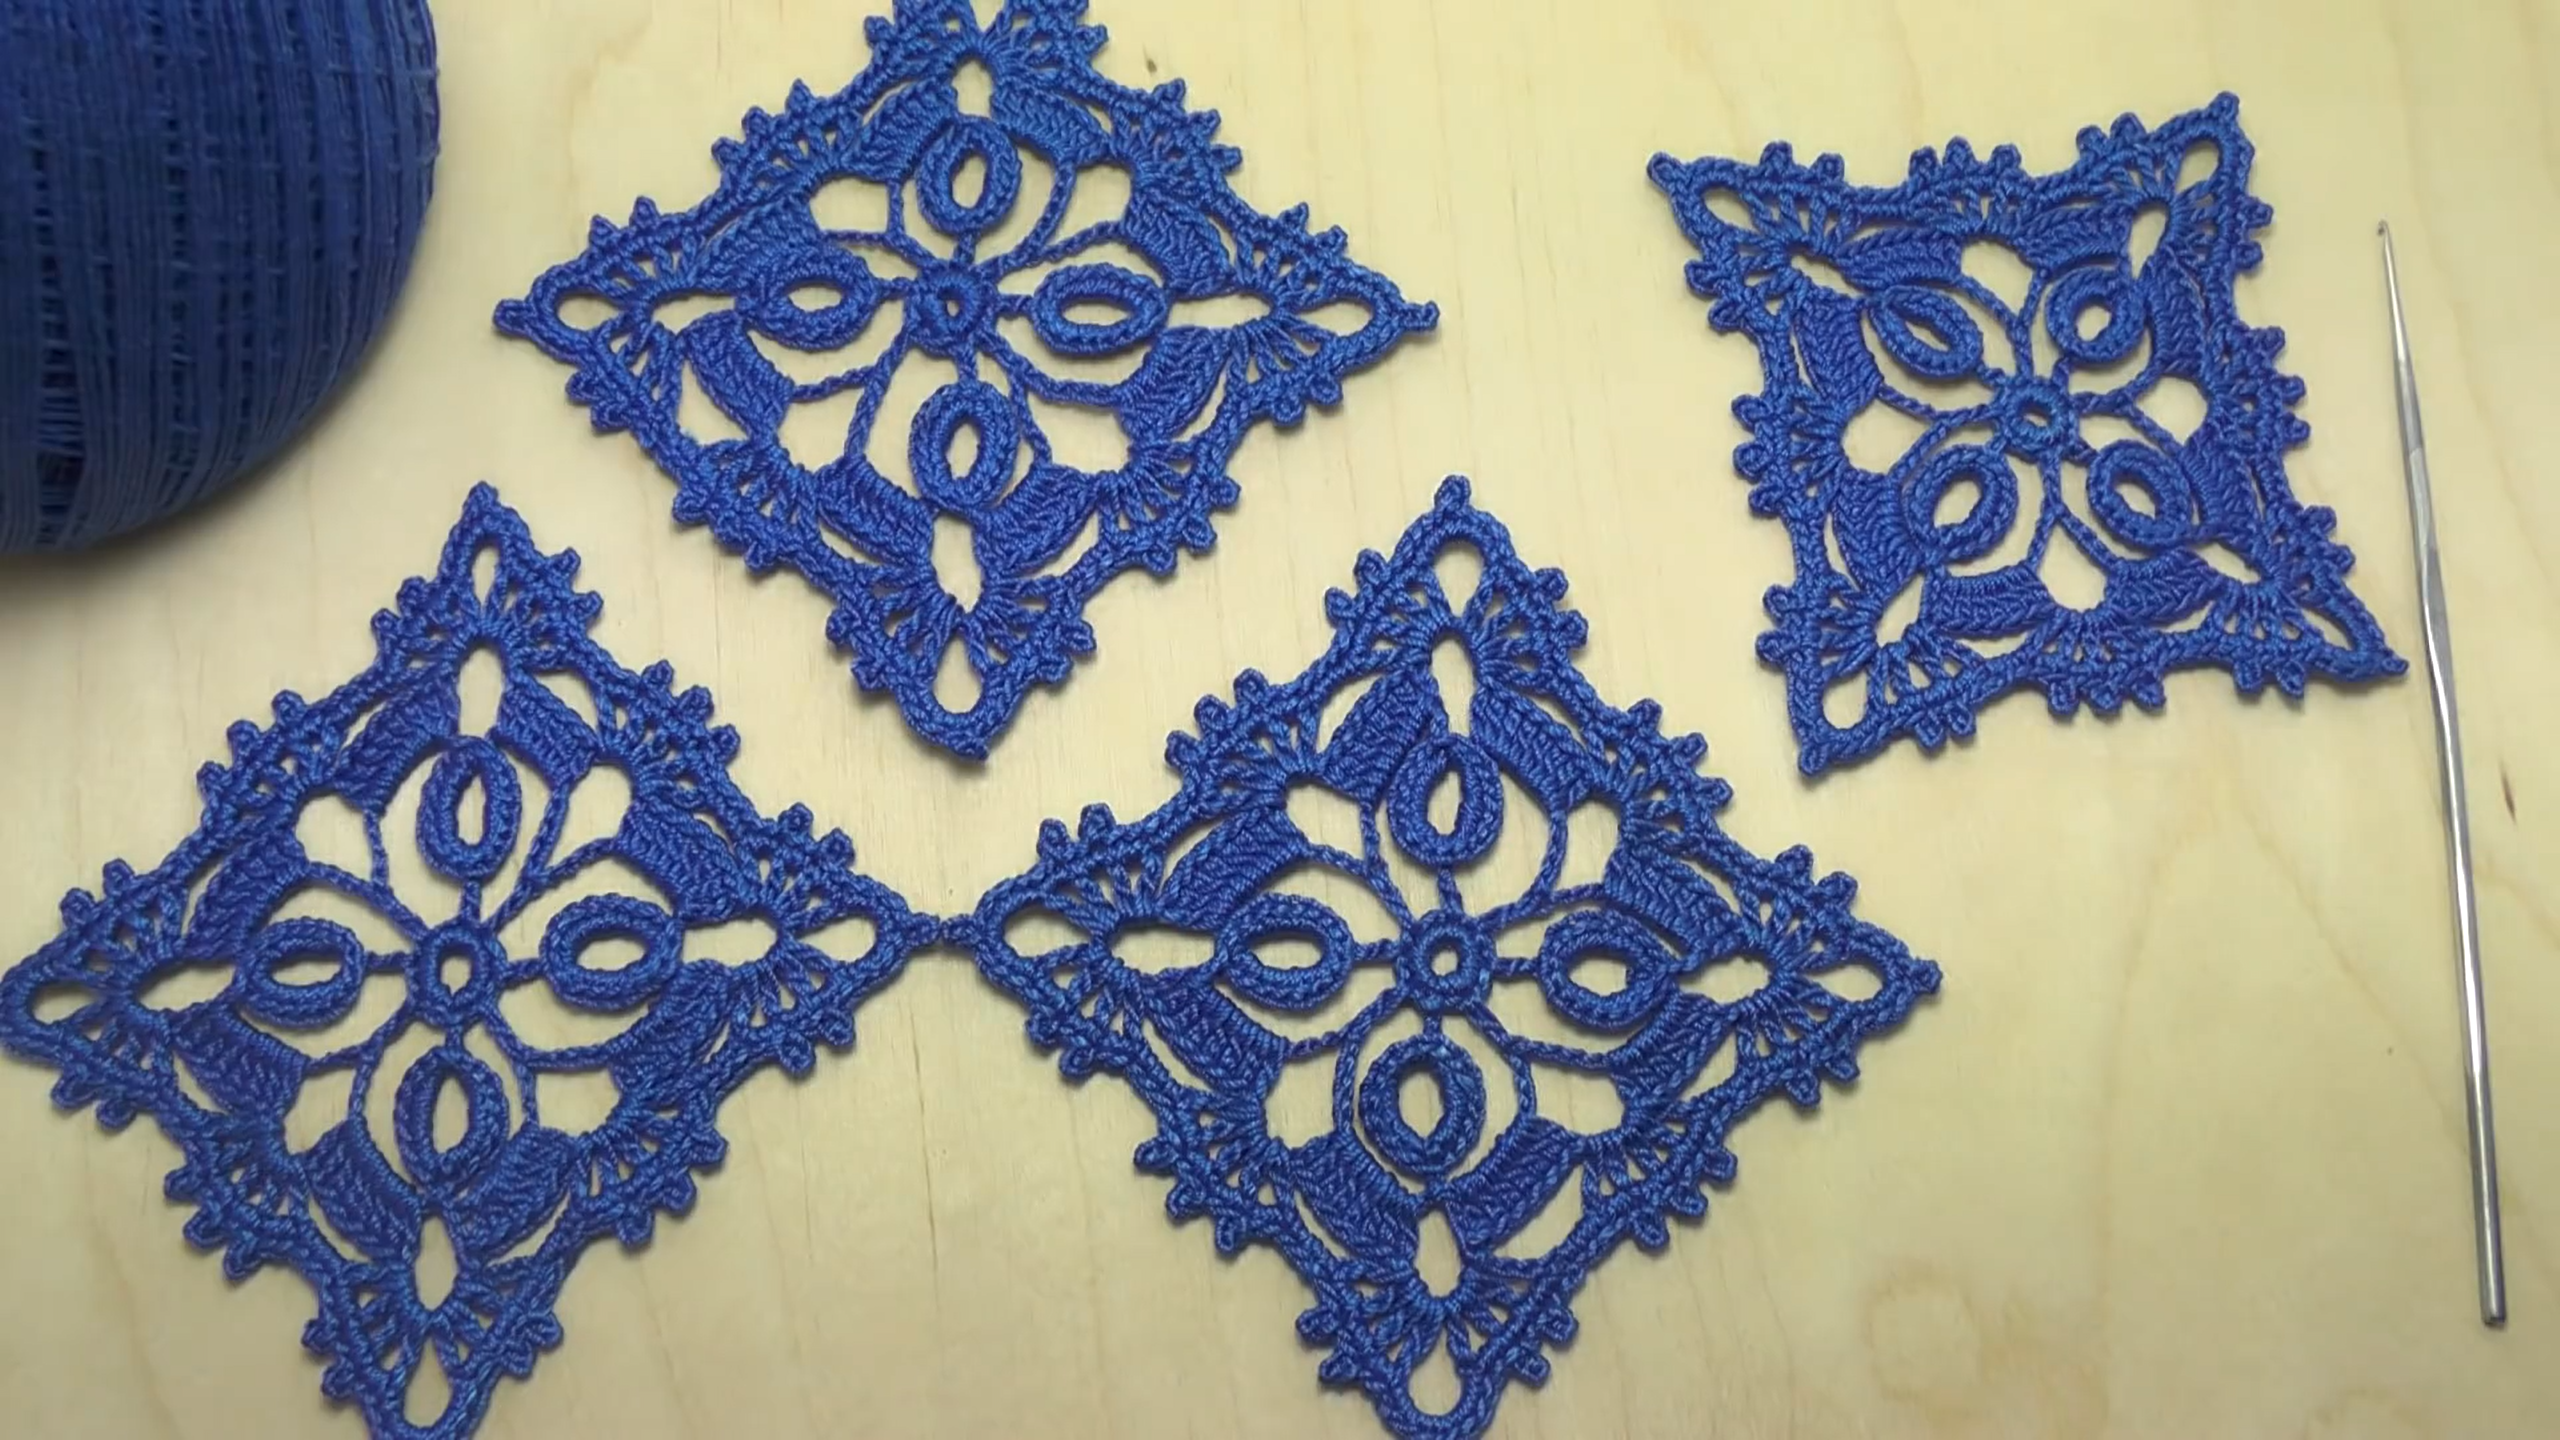
There’s something truly captivating about projects built from individual crochet squares. Each motif is a mini masterpiece, and when joined together, they create a fabric rich in texture and visual interest. This pattern focuses on an Easy & Versatile Open Square Motif – perfect for starting your motif-based journey. Once you master this square, you’ll learn how to arrange and join them to craft a beautiful table runner, a unique blouse, a flowy tunic, or an elegant shawl!
Skill Level: Easy
Materials You’ll Need:
- Yarn: DK (Light Worsted) or Worsted Weight yarn in your desired colors. Motif projects are excellent for using up stash yarn! (For the example, having at least two contrasting colors is recommended: one for the center, one for the outer rounds.)
- Crochet Hook: G/6 (4.0 mm) or H/8 (5.0 mm), or the size recommended for your chosen yarn to achieve a nice drape.
- Yarn Needle: For weaving in ends and joining squares.
- Scissors
- Stitch Markers: (Optional, but helpful for marking corners or beginnings of rounds).
Gauge (for a 4-round motif):
After completing Round 4, your motif should measure approximately 4 x 4 inches (10 x 10 cm) if using worsted weight yarn and an H/8 (5.0 mm) hook. Adjust your hook size if necessary to achieve your desired square size and fabric drape. Consistency in gauge is key for joining multiple squares!
Abbreviations (US Crochet Terms):
- ch: chain
- sl st: slip stitch
- sc: single crochet
- dc: double crochet
- sp: space
- st(s): stitch(es)
- beg: beginning
- rep: repeat
- sk: skip
Video Tutorial
Part 1: The Versatile Open Square Motif Pattern
This motif is a variation of the classic granny square, offering a slightly more open and airy feel.
Round 1 (Center – Color A): Ch 4, sl st to join into a ring. (Alternatively, use a magic ring). Ch 3 (counts as first dc), 2 dc in the ring, ch 2. *3 dc in the ring, ch 2.* Rep from * to * twice more. Sl st to the top of the beg ch-3 to join. You should have 4 sets of (3 dc, ch 2 sp).
Round 2 (Color B – or continue with Color A): Join new color (if changing) with a sl st in any ch-2 sp. Ch 3 (counts as first dc), (2 dc, ch 2, 3 dc) in the same ch-2 sp (this forms your first corner). *Ch 1, (3 dc, ch 2, 3 dc) in the next ch-2 sp.* Rep from * to * twice more. Ch 1. Sl st to the top of the beg ch-3 to join. You should have 4 corners and 4 ch-1 spaces between corners.
Round 3 (Color A – or continue with Color B): Join new color (if changing) with a sl st in any ch-2 sp (corner). Ch 3 (counts as first dc), (2 dc, ch 2, 3 dc) in the same ch-2 sp (corner). *Ch 1, 3 dc in the next ch-1 sp. Ch 1, (3 dc, ch 2, 3 dc) in the next ch-2 sp (corner).* Rep from * to * twice more. Ch 1, 3 dc in the next ch-1 sp. Ch 1. Sl st to the top of the beg ch-3 to join. You should have 4 corners and 8 ch-1 spaces (2 on each side, flanking a 3dc cluster).
Round 4 (Color B – or your main project color): Join new color (if changing) with a sl st in any ch-2 sp (corner). Ch 3 (counts as first dc), (2 dc, ch 2, 3 dc) in the same ch-2 sp (corner). *Ch 1, 3 dc in the next ch-1 sp. Ch 1, 3 dc in the next ch-1 sp. Ch 1, (3 dc, ch 2, 3 dc) in the next ch-2 sp (corner).* Rep from * to * twice more. Ch 1, 3 dc in the next ch-1 sp. Ch 1, 3 dc in the next ch-1 sp. Ch 1. Sl st to the top of the beg ch-3 to join. Fasten off and weave in all ends.

Congratulations! You’ve made your first Easy Open Square Motif. Make as many as you need for your chosen project!
Part 2: Joining Your Motifs
There are several ways to join crochet motifs. Here are two popular, easy methods:
- Slip Stitch Join (Invisible/Flat Join):
- Place two squares right sides facing each other.
- Insert your hook through the corresponding outer loops (the loop furthest from you on one square, and the loop closest to you on the other square) of both stitches from each square.
- Yarn over and pull through all loops on your hook (sl st).
- Continue slip stitching through corresponding stitches along the edge until squares are joined. This creates a very subtle, flat seam.
- Single Crochet Join (Raised/Decorative Join):
- Place two squares wrong sides facing each other.
- Insert your hook through both loops of the corresponding stitches on both squares.
- Yarn over and pull up a loop, yarn over and pull through both loops on hook (sc).
- Continue single crocheting through corresponding stitches along the edge. This creates a slightly raised, defined seam, often used in a contrasting color.
- Pro Tip: Block your motifs before joining them. This ensures they are all the same size and makes joining much easier and neater!
Part 3: Project Ideas & Layouts
Here are some general guidelines for creating different items using your beautiful motifs. Remember that the exact number of squares will depend on your chosen yarn, hook size, and desired finished dimensions.
1. Crochet Square Motif Table Runner
A lovely way to add a handmade touch to your dining or coffee table.
- Concept: A simple rectangular arrangement of squares.
- Number of Squares: Decide on your desired length and width. For a typical runner, you might use 2 squares wide and 5-8 squares long.
- Example (approx. 8×20 inches): Use 2 squares wide x 5 squares long = 10 squares.
- Arrangement: Lay out your desired number of squares in rows and columns.
- Joining: Join all squares securely using your preferred method (slip stitch or single crochet join).
- Finishing: Once all squares are joined, you can add an optional border around the entire runner for a polished look. A simple round of sc, followed by a round of (sc, ch 3, sc) in corners and sc along sides, works well.

2. Crochet Square Motif Shawl
An elegant and cozy accessory perfect for cooler evenings.
- Concept: A larger rectangular piece or a triangular shape.
- Number of Squares: Varies greatly based on desired size. For a generous rectangular shawl, you might need 3-4 squares wide by 15-20 squares long.
- Example (approx. 12×60 inches): Use 3 squares wide x 15 squares long = 45 squares.
- Arrangement (Rectangular): Arrange squares in a long rectangle.
- Joining: Join all squares.
- Finishing: Add a decorative border around the entire shawl. A shell stitch, picot border, or simple dc border would be beautiful. You could also add fringe for extra flair.
- Triangular Shawl (Advanced): This would involve making full squares and half squares, or joining full squares and then building outwards in a triangle. This is more complex and might be a good project for after you’ve mastered the rectangular pieces.
3. Crochet Square Motif Blouse / Tunic
Create a unique and stylish garment that’s sure to turn heads!
- Concept: Essentially two large panels (front and back) joined at the shoulders and sides, leaving openings for the neck and arms. A tunic is just a longer version of the blouse.
- Sizing: This is highly flexible. The best way to determine the number of squares is to measure a well-fitting blouse or tunic you own.
- Measure: Lay your existing garment flat. Measure the width across the chest and the length from shoulder to hem.
- Calculate: Divide your desired width by the width of one motif (e.g., if your motif is 4 inches and you want a 20-inch wide blouse, you’ll need 5 squares across). Do the same for length.
- Number of Squares (Example for a Small/Medium Blouse):
- Front Panel: Maybe 4 squares wide x 5 squares long (20 squares total).
- Back Panel: Same as front (20 squares total).
- Sleeves: If desired, 2 squares wide x 3-4 squares long for each sleeve (6-8 squares per sleeve).
- Arrangement:
- Lay out your chosen number of squares for the front and back panels.
- Shoulders: For the neckline, you’ll leave a gap in the top row of squares on both the front and back panels. You might join 1-2 squares on each side for the shoulder seam.
- Armholes: When joining the front and back panels, leave openings on the sides for the armholes. The size of the armhole will depend on how many squares you leave unjoined along the side seam.
- Sleeves (Optional): If adding sleeves, create separate rectangular panels for the sleeves and join them to the armhole openings.
- Joining: Join the squares for the front panel, then the back panel. Join front and back panels at the shoulders (leaving a neck opening) and down the sides (leaving armhole openings). If making sleeves, join them to themselves to form a tube, then attach to armholes.
- Finishing:
- Neckline: Work a simple border of sc or hdc around the entire neckline.
- Armholes: Work a border around the armholes (and sleeve cuffs if applicable).
- Bottom Hem: Work a border around the bottom hem of the blouse/tunic.

Important Considerations for Garments:
- Drape: Choose a yarn that drapes well. Cotton or cotton blends are great for spring/summer, while wool or acrylics are good for warmth.
- Fit: Crochet garments often have a relaxed fit. Consider making a slightly larger panel if you prefer a looser style.
- Try On: If you’re ambitious, you can pin your joined panels together and try them on as you go to ensure a good fit before final joining.
General Tips for Motif Projects:
- Weave in Ends as You Go: This is a golden rule for motif projects! Weaving in hundreds of ends at the very end is soul-crushing. Do a few after each square.
- Blocking is Your Best Friend: Seriously. Blocking each motif ensures uniform size and opens up the stitch pattern, making joining much easier and giving your final project a professional finish.
- Consistent Tension: Try to maintain the same tension throughout your crocheting, especially if using different colors, to keep all squares uniform.
- Plan Your Layout: Before joining, lay out all your finished squares on a flat surface in your desired arrangement. Take a picture so you can refer back to it!
You now have all the tools to embark on a beautiful crochet journey with these versatile motifs. From a charming table runner to a personalized garment, the possibilities are endless. Happy crocheting!