 by
by 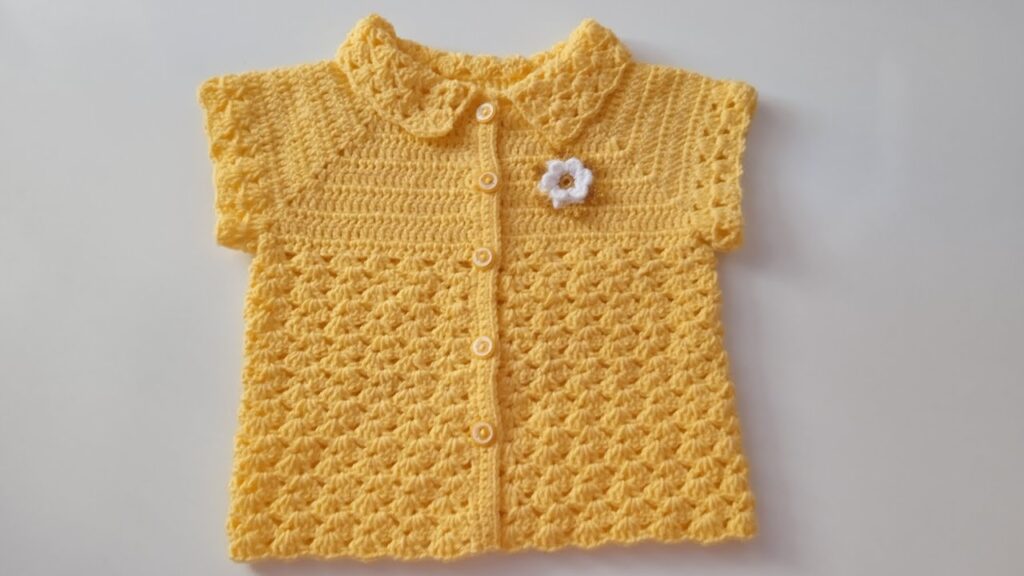
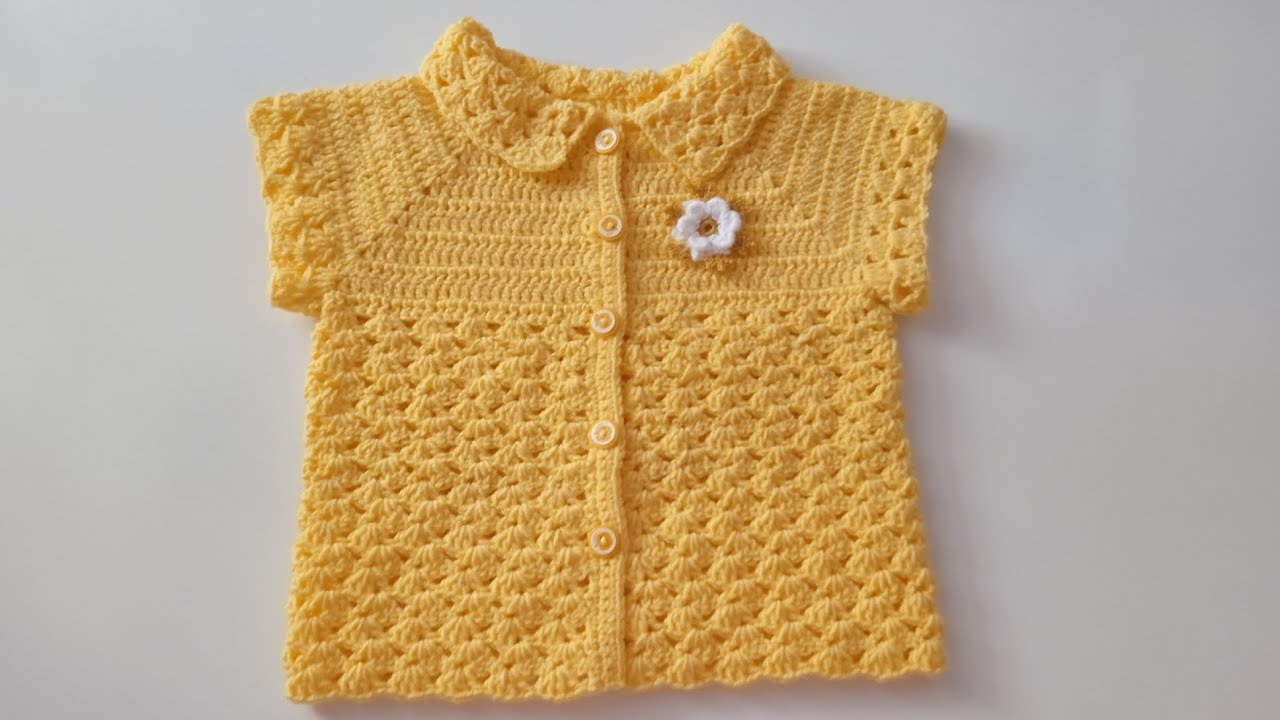
Isn’t this little yellow cardigan just the sweetest? Perfect for a baby boy or girl, this charming crochet cardigan features a delicate lacy stitch, a classic Peter Pan collar, and sweet button-up front. It’s an ideal project for a baby shower gift or to welcome your own little one!
This pattern is designed to be relatively easy, making it suitable for confident beginners or intermediate crocheters.
Let’s get started on creating some sunshine for your little one!
Skill Level: Easy-Intermediate Yarn Weight: DK (light worsted) yarn Hook Size: 4.0mm (G/6) crochet hook (or size needed to obtain gauge) Other Materials:
- 3-5 small buttons (approx. 1-1.5 cm diameter)
- Yarn needle for weaving in ends
- Small amount of white yarn for the flower embellishment (optional)
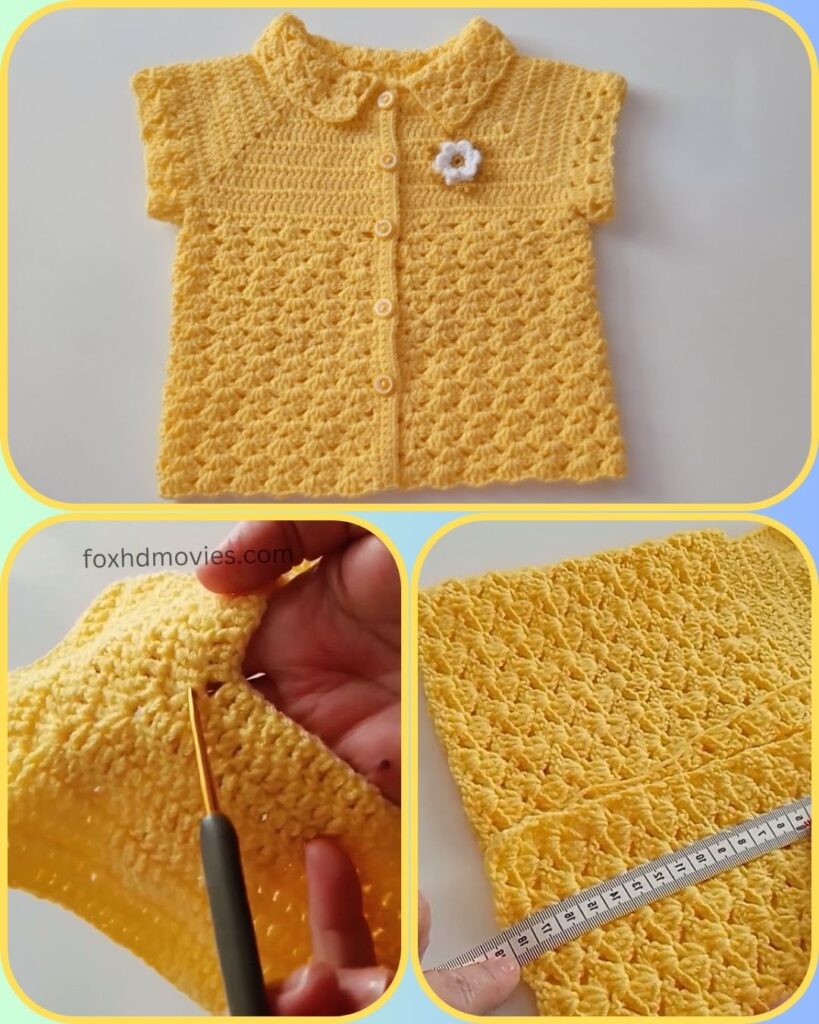
Gauge: 5 V-stitches and 8 rows = 4 inches (10 cm) in pattern stitch. It’s important to check your gauge to ensure the cardigan will be the correct size. Adjust your hook size if necessary.
Finished Size (approximate): 0-3 months (with notes for adjustments) For larger sizes, you’ll need to adjust your starting chain and subsequent increases. I’ll provide some general guidance for this.
Stitches Used:
- ch: chain
- sl st: slip stitch
- sc: single crochet
- dc: double crochet
- hdc: half double crochet
- V-stitch (V-st): (dc, ch 1, dc) in the same stitch/space
- Shell Stitch: (2 dc, ch 1, 2 dc) in the same stitch/space (for the collar)
Pattern Notes:
- This cardigan is worked in one piece from the top down to the armholes, then split for the body and sleeves.
- Ch 2 at the beginning of a row counts as a dc. Ch 1 does NOT count as a stitch unless specified.
- When working V-stitches into a V-stitch from the previous row, always work into the ch-1 space.
- Instructions are for size 0-3 months.
Let’s Begin! The Yoke
Starting Chain: Ch 58
Row 1 (RS): Dc in the 3rd ch from hook (counts as 2 dc), dc in next 6 ch, (dc, ch 2, dc) in next ch (first corner), dc in next 9 ch, (dc, ch 2, dc) in next ch (second corner), dc in next 16 ch, (dc, ch 2, dc) in next ch (third corner), dc in next 9 ch, (dc, ch 2, dc) in next ch (fourth corner), dc in last 8 ch. Turn. (56 dc, 4 ch-2 spaces)
Row 2: Ch 2 (counts as dc), dc in next dc. Dc in each dc to ch-2 space, (dc, ch 2, dc) in ch-2 space. Repeat from * to * 3 more times. Dc in each dc to end of row. Turn. You are essentially increasing 2 dc at each of the 4 corners in every row.
Repeat Row 2 until you have approximately 10-12 rows for the yoke, or until the yoke measures about 4.5-5 inches from the neckline down, and it is wide enough to comfortably fit around the baby’s chest and armholes. Make sure the piece lies flat. For a 0-3 month size, this usually means around 60-70 stitches between the front and back sections before splitting.

Separating for Body and Sleeves
Once your yoke is the desired size, it’s time to create the armholes.
Next Row: Ch 2, dc in each dc across the first front section. Skip all stitches for the first sleeve (you’ll be skipping the stitches between the first and second ch-2 spaces). Dc in each dc across the back section (stitches between the second and third ch-2 spaces). Skip all stitches for the second sleeve (stitches between the third and fourth ch-2 spaces). Dc in each dc across the second front section. Turn.
You have now joined the front and back sections, creating the armholes. Count your stitches to ensure an even number for the body section.
The Body (Lacy Pattern)
Now we’ll work the beautiful V-stitch pattern for the body of the cardigan.

Row 1 (RS): Ch 2, dc in the first st. Skip 1 st, V-st in next st. Skip 2 sts, V-st in next st. Repeat from * to * across to the last 2 sts. Skip 1 st, dc in the last st. Turn.
Row 2: Ch 2, dc in the first st. V-st in each ch-1 space of the V-stitches from the previous row across. Dc in the top of the turning chain. Turn.
Repeat Row 2 until the cardigan reaches your desired length (typically around 9-10 inches from the shoulder for 0-3 months), ending on a wrong side row.
Last Row (Edging): Ch 1, sc in each dc and into each ch-1 space across. Fasten off.
The Sleeves
Join yarn in the armhole.
Round 1: Ch 2, dc around the armhole opening, making sure to evenly space your stitches. Join with a sl st to the top of the beginning ch 2.
Round 2: Ch 2, dc in each dc around. Join with a sl st.
Repeat Round 2 until the sleeve reaches your desired length (typically 4-5 inches from the armpit for short sleeves, or longer for long sleeves).
Last Round (Edging): Ch 1, sc in each dc around. Join with a sl st. Fasten off.

Repeat for the second sleeve.
The Collar
This classic Peter Pan collar is worked separately and then sewn on.
Row 1: Ch 38 (adjust as needed for your cardigan’s neckline width). Hdc in the 2nd ch from hook and in each ch across. Turn. (37 hdc)
Row 2: Ch 1, sc in each hdc across. Turn. (37 sc)
Row 3: Ch 2 (counts as dc), dc in first st. Shell stitch in next st. Skip 2 sts, Shell stitch in next st. Repeat from * to * across to the last st. Dc in the last st. Turn.
Row 4: Ch 2, dc in first st. Work (2 dc, ch 1, 2 dc) into each ch-1 space of the shell stitches from the previous row across. Dc in the top of the turning chain. Turn.
Row 5: Ch 1, sc in each dc and into each ch-1 space across. Fasten off, leaving a long tail for sewing.
Sew the collar to the neckline of the cardigan using your yarn needle.

Finishing
- Button Band: Attach yarn to the bottom right front corner (if looking at the cardigan from the front). Ch 1, work sc evenly up the front edge of the cardigan, around the collar, and down the other front edge. Fasten off.
- Buttonholes: On the opposite front band, create buttonholes. You can either work them into the existing stitches by chaining over a skipped stitch for each buttonhole, or by carefully cutting and reinforcing after the fact. For a simpler method, you can also just use the gaps between stitches as buttonholes.
- Buttons: Sew your buttons onto the button band, aligning them with your buttonholes.
- Weave in all ends: Use your yarn needle to neatly weave in all loose ends.
Video tutorial
Optional Flower Embellishment:
- With white yarn and a smaller hook (e.g., 3.0mm):
- Ch 2. 5 sc in the 2nd ch from hook. Join with a sl st to first sc.
- (Ch 2, 2 dc in same st, ch 2, sl st in same st) Repeat 5 times around the circle, working into each sc. You’ll form 5 small petals.
- Fasten off, leaving a tail for sewing. Sew to the cardigan as desired.
Enjoy your beautiful handmade Sweet Sunshine Baby Cardigan! Don’t forget to share your creations with me on social media – I love to see them!
Happy crocheting!