by
by 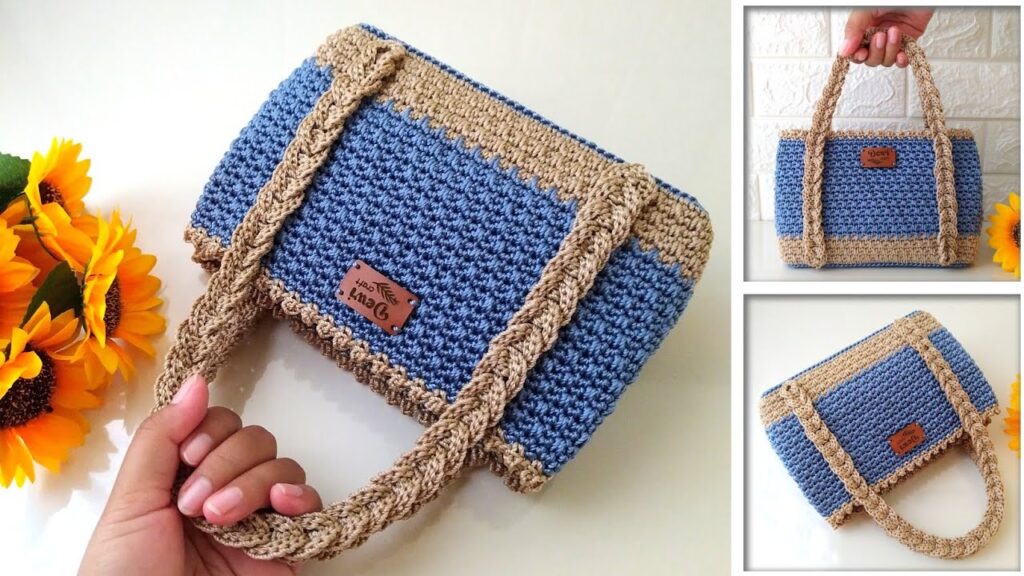
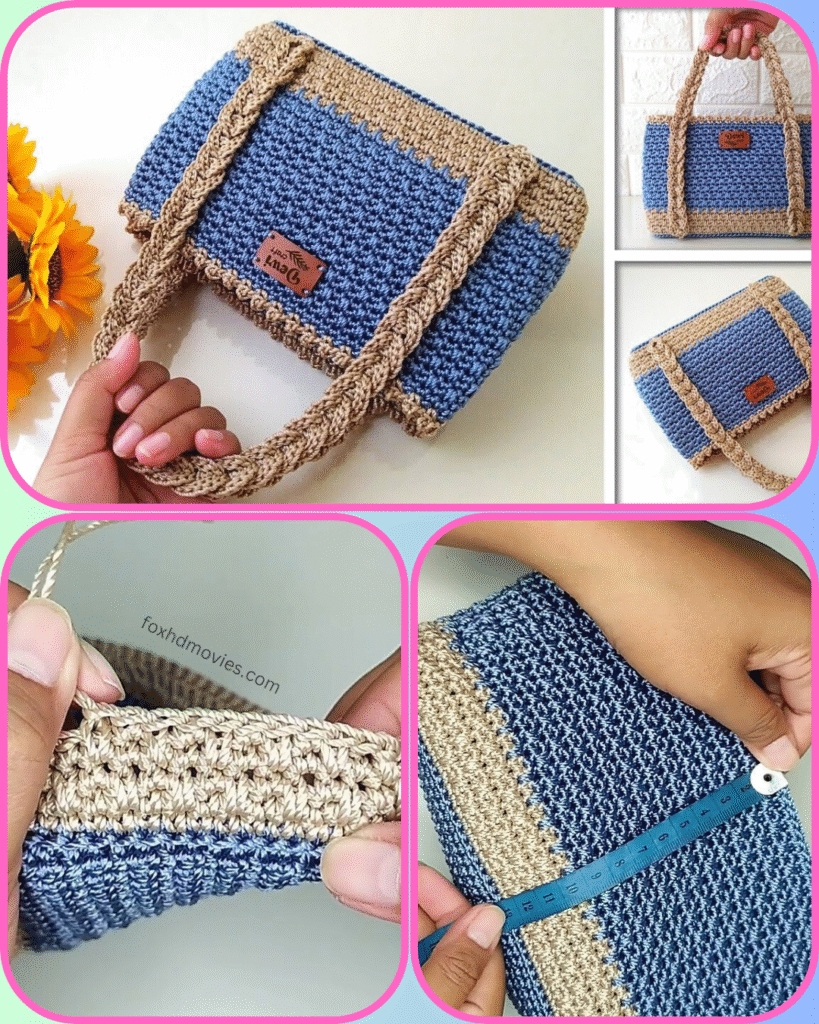
Looking for your next crochet project? This elegant two-toned handbag is not only stylish but also incredibly practical. Featuring a classic rectangular shape, sturdy handles, and a lovely border detail, it’s perfect for everyday use or a special outing. Let’s get crocheting!
This pattern is designed to create a structured bag, and while the exact creator isn’t specified, it’s a popular and beautiful style often found in “bolsos elegantes a crochet” (elegant crochet bags).
What You’ll Need:
- Yarn:
- Main Color (MC): Approx. 200-250 yards of a sturdy worsted weight (Aran) or bulky weight cotton or cotton blend yarn. (The blue in the picture).
- Accent Color (AC): Approx. 100-150 yards of a contrasting worsted weight (Aran) or bulky weight cotton or cotton blend yarn. (The beige/tan in the picture).
- Consider using T-shirt yarn or macrame cord for extra sturdiness if you prefer a very rigid bag.
- Hook: 4.0mm (G) or 5.0mm (H) crochet hook (or size needed to obtain a tight gauge, especially for bags)
- Stitch Markers
- Yarn Needle
- Scissors
- Optional:
- Fabric lining for the inside (recommended for durability and to prevent stretching)
- Magnetic snap closure or zipper
- Bag feet (hardware)
- Leather or faux leather tag for embellishment (as seen in the image)
Gauge:
- For main body (sc): 16 sc = 4 inches (10 cm) and 18 rows = 4 inches (10 cm) using worsted weight yarn and a 4.0mm hook.
- It’s crucial for bag projects to have a tight gauge to ensure your bag holds its shape and doesn’t stretch out over time.
Finished Size (Approximate):
- Width: 10-12 inches (25-30 cm)
- Height: 6-7 inches (15-18 cm)
- Depth: 4-5 inches (10-12 cm)
- You can easily adjust the starting chain for width and the number of rows for height and depth.
Abbreviations:
- ch: chain
- sl st: slip stitch
- sc: single crochet
- hdc: half double crochet
- dc: double crochet
- FO: fasten off
- st(s): stitch(es)
- rep: repeat
- MC: Main Color
- AC: Accent Color
- BLO: back loop only
Pattern Instructions
We will start by creating the base of the bag, then work up the sides in continuous rounds.
Base of the Bag (MC)
Ch 39 (or desired length for your bag).
Round 1: Sc in 2nd ch from hook. Sc in next 36 chs. 3 sc in last ch. Now working along the other side of the starting chain: Sc in next 36 chs. 2 sc in the last ch (same as first sc of the round). Sl st to first sc to join. (78 sc) This creates an oval base.
Round 2: Ch 1 (does not count as st). 2 sc in first st. Sc in next 36 sts. 2 sc in next 3 sts. Sc in next 36 sts. 2 sc in next 2 sts. Sl st to first sc to join. (84 sc)
Round 3: Ch 1. Sc in each st around. Sl st to first sc to join. (84 sc)
Round 4: Ch 1. Sc in BLO of each st around. Sl st to first sc to join. (84 sc) Working in BLO for this round creates a nice defined edge for the base.

Body of the Bag (MC)
Continue with MC. From this point, you will be working in continuous rounds, not joining at the end of each round unless specified for color changes. Use a stitch marker to keep track of the beginning of your rounds.
Rounds 5 – 20 (or desired height for the blue section): Sc in each st around. The image shows a fairly tall blue section. Adjust the number of rounds to your preference.
Accent Color Band (AC)
Change to AC.
Rounds 21 – 24 (or desired height for the accent band): Sc in each st around. The image shows a relatively short accent band. Adjust the number of rounds to your preference.
Top Edge (MC)
Change to MC.
Round 25: Sc in each st around. Sl st to first sc to join. FO. This creates the neat top edge of the bag before the handles.

Bag Handles (AC)
The handles in the image are braided-looking. This can be achieved with a crochet braid, or by making long chains and sc’ing into them. Here’s a method for a sturdy crocheted strap that mimics a braid. Make two.
Method 1: Sturdy Single Crochet Strap
Ch 60 (or desired length for handle). Row 1: Sc in 2nd ch from hook and in each ch across. Turn. (59 sc) Row 2: Ch 1. Sc in BLO of each sc across. Turn. (59 sc) Row 3: Ch 1. Sc in each sc across. FO, leaving a long tail for sewing. (59 sc) Repeat for second handle.
Method 2: Flat Braid (more complex, but matches image well)
This method involves working stitches sideways to create the braided look. There are many tutorials for “crochet braids” or “flat braided cords”. Search online for “crochet flat braid strap tutorial” for visual guidance if this is your first time. Generally, you will ch 3, sl st back into the first ch, then rotate to work into the side loops created, repeating. This creates a thick, round braid. Make two braids of your desired length (approx. 18-24 inches for a handbag handle).
Attaching the Handles
Position your handles evenly on the top sides of the bag. The image shows the handles starting and ending at the edges of the accent color band. Using your yarn needle and the long tails, securely sew the ends of the handles to the inside of the bag, making sure they are firmly attached. Reinforce with extra stitches.

Side Embellishments / Accent Strips (AC)
The bag in the picture has vertical accent strips that run from the top edge, down the front, under the base, and up the back. These look like crocheted tubes or flat strips sewn on.
Make 4 strips (2 for front, 2 for back): Ch 40 (or length that covers the height of your bag + desired wrap under the bottom). Row 1: Sc in 2nd ch from hook and in each ch across. Turn. (39 sc) Row 2: Ch 1. Sc in each sc across. FO, leaving a long tail for sewing. (39 sc) You can make these thicker by doing more rows, or thinner by starting with fewer chains.
Attaching the Side Strips: Position these strips on the front and back of the bag, aligning with the handles. Sew them securely using your yarn needle, wrapping them neatly under the base of the bag to create a continuous look as seen in the image. This detail really adds to the structure and elegance.
Final Touches
- Weave in all remaining ends neatly and securely.
- Add a Lining: If you wish for a more professional finish and added durability, cut and sew a fabric lining for your bag. Insert it into the bag and hand-sew it around the top edge.
- Add a Closure: Sew in a magnetic snap or zipper if desired.
- Attach Embellishments: Sew on your faux leather tag (if using) and any other charms or keychains you like!
Video tutorial
And there you have it! A beautiful, durable, and stylish crochet handbag. This is a project that looks fantastic and is incredibly satisfying to complete.
Happy Crocheting! We’d love to see your finished bags – share them with us in the comments or on social media!
And there you have it! A beautiful, durable, and stylish crochet handbag. This is a project that looks fantastic and is incredibly satisfying to complete.
Happy Crocheting! We’d love to see your finished bags – share them with us in the comments or on social media!