by
by Hey there, crochet enthusiasts!
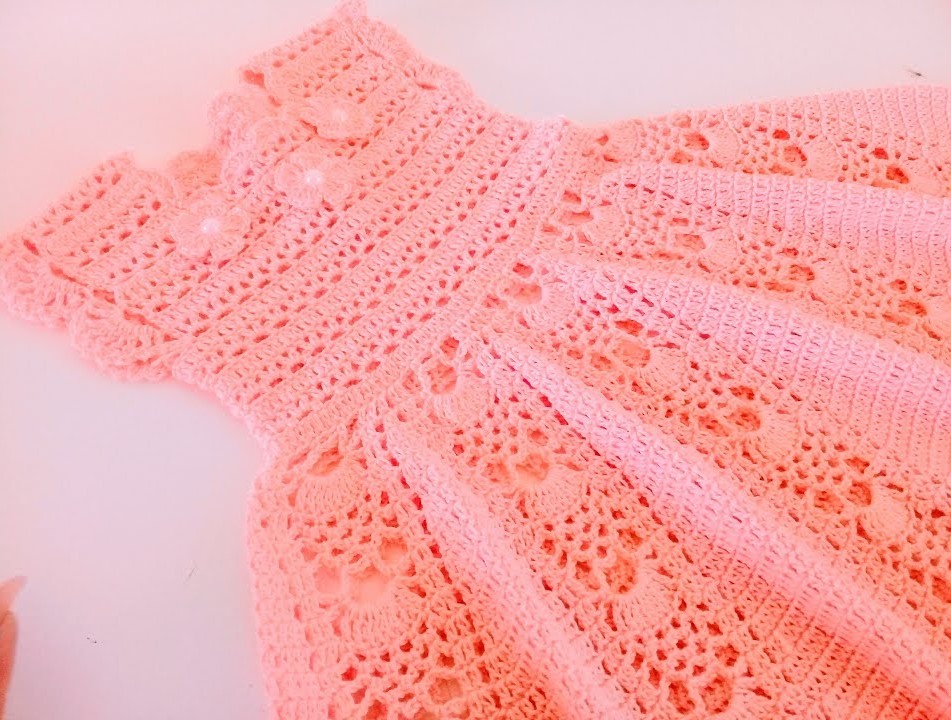
Is there anything more heartwarming than dressing a little one in something handmade with love? Today, we’re diving into a pattern that will create the most adorable and airy baby dress, featuring a beautiful diamond-lace pattern, just like the sweet pink one in the picture!
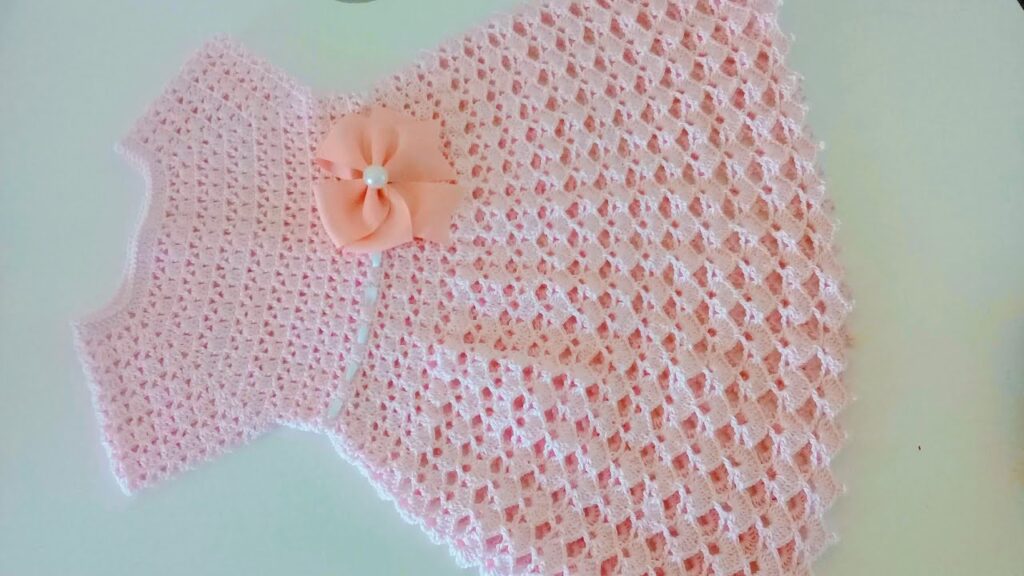
This dress is designed for comfort and charm, perfect for warm weather, photo shoots, or special occasions. Its light, open stitch makes it breathable, and the delicate drape is simply enchanting. Plus, adding a little fabric flower is the perfect finishing touch!
Before we grab our hooks, let’s get ready:
- Skill Level: Intermediate. The yoke shaping and working an open lace pattern require careful counting and attention to detail.
- Yarn Choice: For a baby’s delicate skin, choose a soft, lightweight yarn. Baby-weight acrylic (DK or Sport weight), cotton, or a cotton blend yarn would be ideal. Look for something that drapes beautifully.
- Hook Size: This will depend on your yarn and desired fabric. For an open lace, you might go up half a size from your yarn’s recommendation. Aim for a hook that creates a light, airy fabric with clear stitch definition. (e.g., 3.0mm – 4.0mm).
- Gauge is Key! Especially for baby garments, achieving the correct gauge is crucial for ensuring the dress fits the intended size. Make a swatch!
Let’s Gather Our Supplies!
Materials You’ll Need:
- Approx. 150-250 grams of baby-weight yarn (DK or Sport weight) in your chosen color (the pink is so lovely!).
- Crochet hook (e.g., 3.5mm or 3.75mm, adjust as needed for gauge)
- Stitch markers (very helpful for yoke shaping!)
- Yarn needle
- Scissors
- 1-2 small buttons (for the back neck closure)
- 1 small fabric flower with a pearl or bead center (for embellishment)
- Sewing needle and thread (to attach the flower)
Crochet Language Decoder (Abbreviations):
- ch: chain
- st(s): stitch(es)
- sl st: slip stitch
- sc: single crochet
- hdc: half double crochet
- dc: double crochet
- sk: skip
- sp: space
- [ ]: repeat instructions within brackets
- ( ): number of stitches at the end of the row/round
Gauge:
- Work a swatch of the main lace pattern (after the yoke) to measure.
- Example Gauge: 4
(dc, ch 1)repeats and 5 rows = 2 inches (5 cm) in the lace pattern. Adjust hook size to match gauge.
Key Stitch Patterns:
A. Diamond Lace Stitch (for Body & Sleeves): This creates the beautiful open mesh pattern. It builds on dc stitches with ch-1 spaces.
- Row 1 (Foundation):
dcin first st,[ch 1, sk 1 st, dc in next st]repeat across. - Row 2 (Subsequent Rows/Rounds):
dcin first dc,[ch 1, dc in next ch-1 space]repeat across.
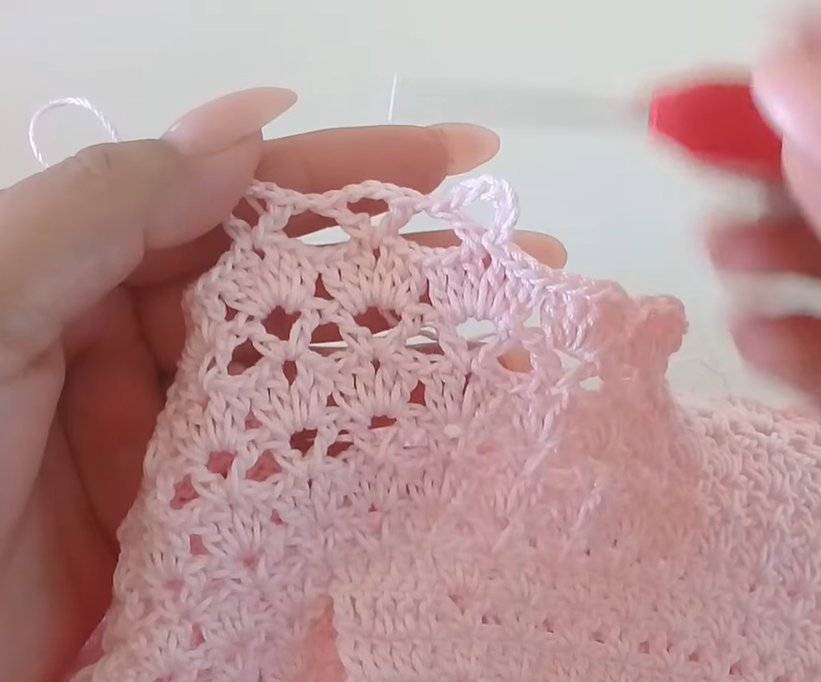
B. Bottom Hem Edging (Scalloped Effect): This looks like a simple shell pattern that complements the lace.
Shell (dc, ch 1, dc): Work 1 double crochet, chain 1, then 1 more double crochet all into the same stitch or chain space.
Pattern Instructions (Top-Down Construction):
This pattern starts from the neckline and works downwards. We’ll work the yoke flat initially to create a back opening for easy dressing, then join to work the body in the round.
Suggested Sizes (Newborn / 3-6 Months / 6-12 Months) This pattern is a general guide; adjust chain counts and increase rates for different sizes and to match your gauge and yarn.
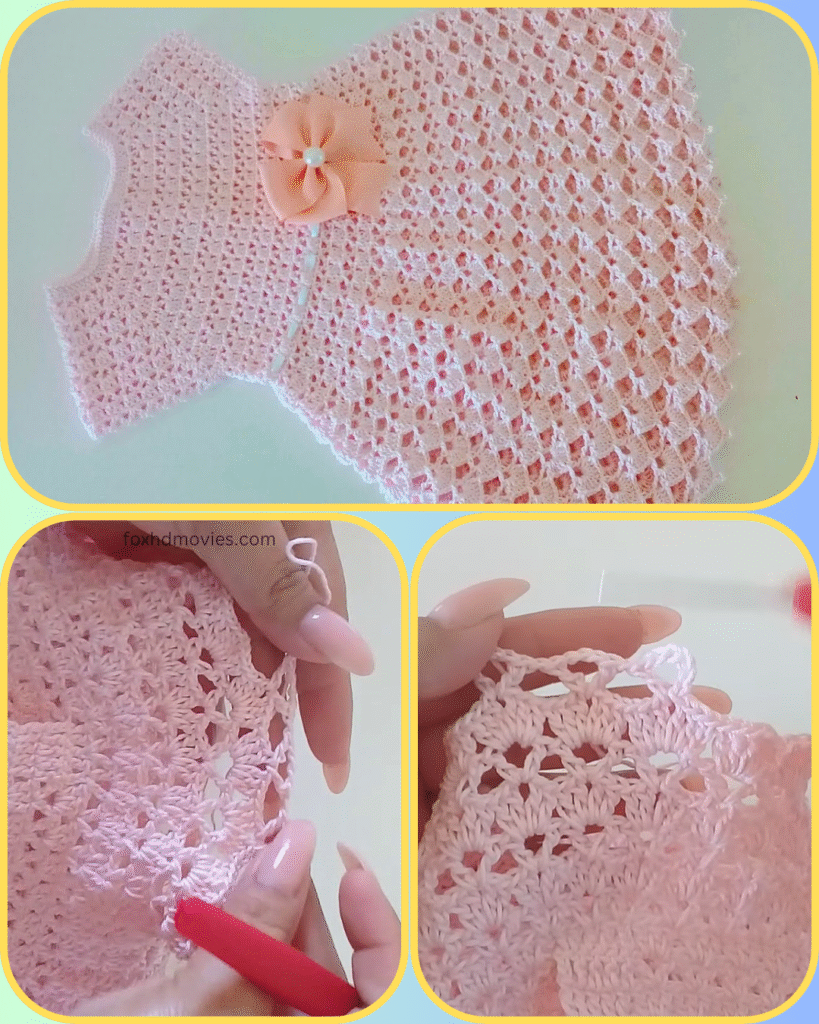
1. The Yoke (Worked Flat)
- Starting Chain: Ch 52 (60 / 68).
- Row 1 (RS): Hdc in 2nd ch from hook, hdc in each ch across. Ch 2 (counts as first hdc), turn. (51 / 59 / 67 sts)
- Row 2: Hdc in each st across. Ch 2, turn.
- Row 3 (Increase Row): Hdc in first st, [2 hdc in next st, hdc in next 3 sts] repeat until 2 sts remain, 2 hdc in next st, hdc in last st. Ch 2, turn. (Approx. 64 / 74 / 84 sts).
- Alternatively, for more precise shaping, divide your stitches into 4 sections (front, back, sleeves) and place increases at these 4 corner points in specific rows.
- Continue working hdc rows, with increases on specific rows to shape the yoke. The image suggests a relatively solid yoke with even increases. Work until the yoke measures approx. 3.5 (4 / 4.5) inches from the neckline, or until it can comfortably wrap around the baby’s chest and shoulders, with armholes open. Ensure your final stitch count is suitable for the lace pattern division (divisible by 2, for the
dc, ch 1pattern).- Commonly, increases are done on every 2nd or 3rd row, distributing them evenly.
2. Dividing for Body and Sleeves
This creates the armholes.
- Next Row (Joining): Ch 1 (does not count as st).
- Work hdc across the stitches for the first back panel.
- Skip stitches for armhole: Ch 3 (4 / 5) (this is the underarm chain). Sk the next X stitches (these are for the first sleeve).
- Work hdc across the stitches for the front panel.
- Skip stitches for armhole: Ch 3 (4 / 5). Sk the next X stitches (for the second sleeve).
- Work hdc across the stitches for the second back panel.
- Join with a sl st to the first st of the row to form a circle.
- Place a stitch marker at the beginning of this joined round.

3. The Body of the Dress (Diamond Lace Pattern)
Now we work in rounds to create the lacy skirt.
- Rnd 1 (Lace Set-up): Ch 3 (counts as first dc). [Ch 1, sk 1 st, dc in next st]. Repeat [ ] around, making sure to work into the underarm chains as well to incorporate them into the pattern. Join with a sl st to top of beg ch 3.
- Make sure your final stitch count (dc + ch-1 spaces) for this round is suitable for the pattern repetition.
- Rnd 2: Ch 3 (counts as first dc). [Ch 1, dc in next ch-1 sp]. Repeat [ ] around. Join with a sl st to top of beg ch 3.
- Rnd 3 (Increase for Flare): Ch 3. [Ch 1, dc in next ch-1 sp]. Repeat [ ] across the front and back of the dress. At the side sections (where armholes connect, or every X stitches), add an increase: work
(dc, ch 1, dc)into one ch-1 space instead of(ch 1, dc). Continue in pattern. Join with a sl st.- These increases will make the skirt gradually flare out. You can add increase rounds every 3-5 rounds, or as desired for the flare.
- Rnds 4-X: Continue repeating Rnd 2 (and adding increase rounds periodically as per Rnd 3) until the dress reaches your desired length (measure from shoulder to hem), leaving room for the final edging.
- Fasten off.
4. The Sleeves (Diamond Lace Pattern)
Go back to each armhole.
- Attach yarn: Attach yarn with a sl st in the center of the underarm chain.
- Rnd 1 (Lace Set-up): Ch 3 (counts as first dc). [Ch 1, sk 1 st, dc in next st]. Repeat [ ] around the armhole, working into the stitches of the yoke and the underarm chain. Join with a sl st to top of beg ch 3.
- Rnd 2: Ch 3. [Ch 1, dc in next ch-1 sp]. Repeat [ ] around. Join with a sl st to top of beg ch 3.
- Fasten off.
- Repeat for the second sleeve.

5. Edging (Neckline, Sleeves, Bottom Hem)
This adds a lovely polished finish.
- Neckline: Attach yarn at the back opening of the neckline. Ch 1, sc evenly around the entire neckline, working 3 sc in the corners of the opening. Join with sl st. Fasten off.
- Sleeves: Attach yarn at the underarm of each sleeve. Ch 1, sc evenly around. Join with sl st. Fasten off.
- Bottom Hem: Attach yarn anywhere on the bottom hem.
- Rnd 1: Ch 1, sc evenly around. Join with sl st.
- Rnd 2 (Scalloped Edging): Ch 1, [sk 1 st, (dc, ch 1, dc) in next st, sk 1 st, sl st in next st] repeat around. Join with a sl st to beginning. Fasten off.
6. Finishing Touches
- Weave in all loose ends neatly using your yarn needle.
- Back Opening: Create a simple button loop with a ch 3-5 at the top corner of one back opening panel. Sew 1-2 small buttons onto the opposite back panel to align with the loop(s).
- Attach Embellishment: Carefully hand-sew the fabric flower with its pearl center onto the yoke of the dress, as seen in the picture. Ensure it’s securely attached.
Video tutorial
Your Dreamy Pink Dress is Ready!
Congratulations! You’ve just crocheted a truly beautiful and delicate baby dress that’s sure to be adored. Its lightweight feel and charming lace pattern make it perfect for any little one.
Feel free to customize your dress with different colored flowers, ribbons, or even by adding a delicate picot edging to the yoke or sleeves.
Don’t forget to share your finished dress! I’d love to see your unique creation. Tag me on social media or send a picture!
Happy crocheting!