 by
by 
Imagine a single, simple crochet square motif that can transform into three distinct and beautiful items: a stylish table runner, a cozy shawl, or even a chic summer blouse! This pattern is designed for ease and adaptability, making it perfect for crocheters of all levels. Master one motif, and unlock a world of creative possibilities.
Skill Level: Easy
Materials:
- For all projects:
- DK (Light Worsted) or Sport weight yarn (cotton or cotton blend is recommended for drape and breathability, especially for the blouse). Choose your favorite color(s)!
- Crochet hook size G/6 (4.0 mm) or size needed to obtain gauge.
- Yarn needle for weaving in ends.
- Scissors.
- Stitch markers (optional, but helpful for larger projects).
Gauge:
Achieving consistent gauge is important, especially when joining multiple squares.
- One finished motif should measure approximately 4.5 inches x 4.5 inches.
- Adjust your hook size if necessary to meet this gauge.
Abbreviations (US Crochet Terms):
- ch: chain
- sl st: slip stitch
- sc: single crochet
- hdc: half double crochet
- dc: double crochet
- tr: treble crochet (or triple crochet)
- sp: space
- st(s): stitch(es)
- beg: beginning
- rep: repeat
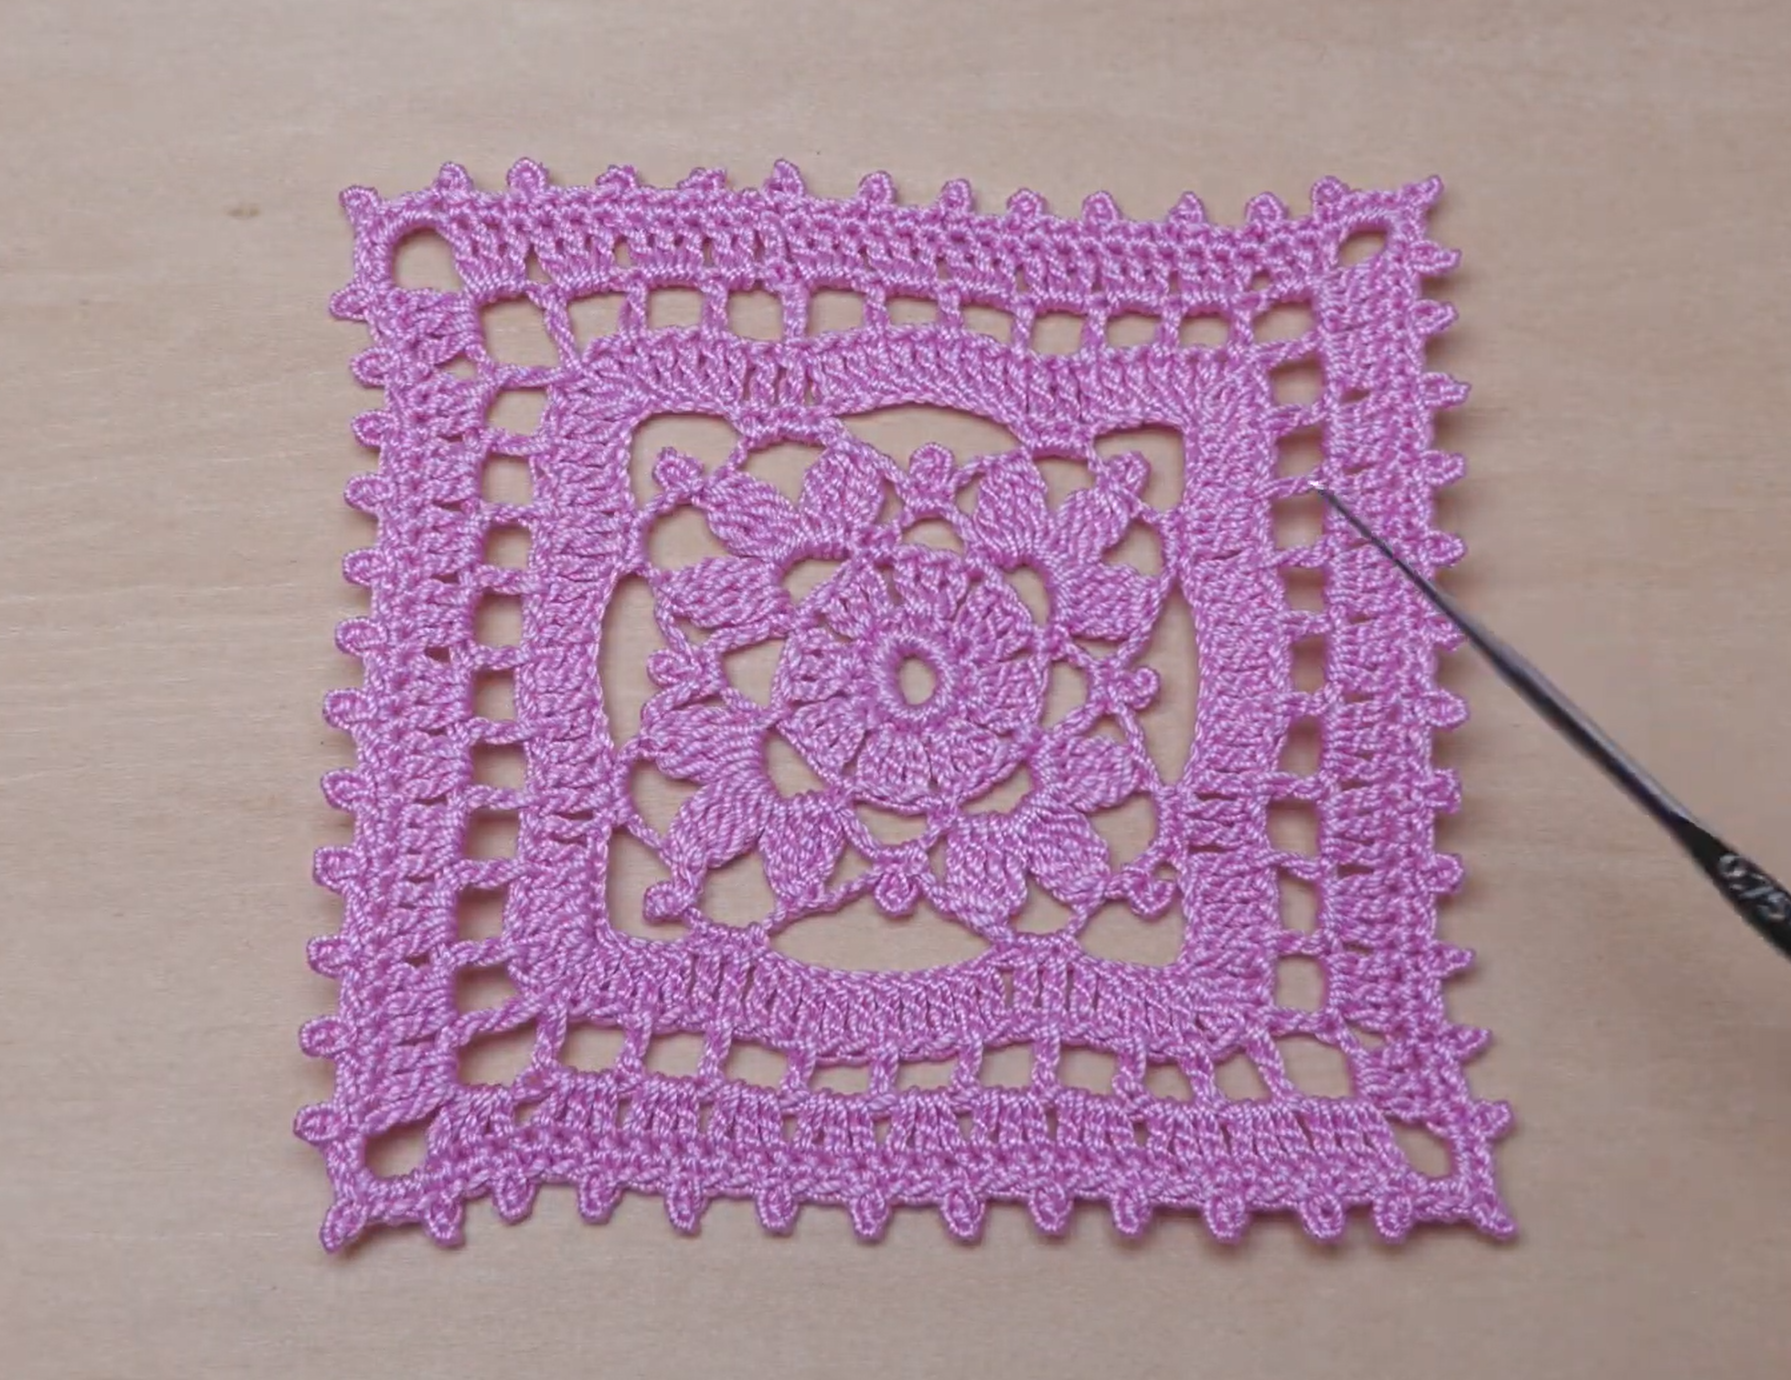
The Versatile Square Motif Pattern (Make as many as needed for your project!)
This motif features a solid center and a delicate lacy border, making it perfect for a variety of uses.
Round 1: The Center (Solid) Ch 4, sl st to join into a ring. (Alternatively, use a magic ring for a tighter center.) Ch 2 (does NOT count as a st), 12 hdc in the ring. Sl st to the first hdc to join.
- (12 hdc)
Round 2: First Square Layer Ch 3 (counts as first dc). In the same st, dc 2. (This forms half of your first corner group). *Sk 2 sts, (3 dc, ch 2, 3 dc) in the next st (this is a corner!).* Repeat from * to * 2 more times. Sk 2 sts, 3 dc in the next st (completing the first corner). Ch 2. Sl st to the top of the beg ch-3 to join.
- (4 corners, 4 sides of 3 dc clusters)
Round 3: Expanding the Square Sl st into the next 2 dc and into the first ch-2 sp (corner). Ch 3 (counts as first dc). In the same ch-2 sp, (2 dc, ch 2, 3 dc). (First corner complete) *Ch 1, 3 dc in the next sp (between dc clusters of previous round). Ch 1, (3 dc, ch 2, 3 dc) in the next ch-2 sp (corner).* Repeat from * to * 2 more times. Ch 1, 3 dc in the next sp. Ch 1. Sl st to the top of the beg ch-3 to join.
- (4 corners, 8 sides of 3 dc clusters, with ch-1 spaces between them)
Round 4: Lacy Border Sl st into the next 2 dc and into the first ch-2 sp (corner). Ch 1. (Sc 1, ch 3, sc 1) in the same ch-2 sp. (First corner point) *Ch 3, sc 1 in the next ch-1 sp. Ch 3, sc 1 in the next ch-1 sp. Ch 3, (sc 1, ch 3, sc 1) in the next ch-2 sp (corner point).* Repeat from * to * 2 more times. Ch 3, sc 1 in the next ch-1 sp. Ch 3, sc 1 in the next ch-1 sp. Ch 3. Sl st to the first sc to join.
- (4 corner points, 12 ch-3 loops along sides) Fasten off and weave in all ends.
Project Adaptations: Bringing Your Motifs to Life!
The beauty of this motif lies in its versatility. Make as many as you need, and then decide what you want to create!
Project 1: The Elegant Table Runner
A beautiful way to add a handmade touch to your dining or coffee table.
How Many Motifs? This depends on your desired length and table size. For a standard dining table (approx. 60-72 inches long), you might need 12-16 squares arranged in a 2×6 or 2×8 grid. For a coffee table, a 1×3 or 1×4 grid would be lovely.

Assembly:
- Layout: Arrange your finished motifs in the desired pattern. The most common for a runner is a rectangular grid.
- Joining: Use your favorite joining method:
- Whip Stitch: Simple and creates a clean seam. Thread your yarn needle and whip stitch through the corresponding loops/stitches of adjacent motifs.
- Slip Stitch Join: Creates a nearly invisible seam. Work sl sts through both loops of adjacent motifs.
- Single Crochet Join: Creates a more defined, slightly raised seam. Work sc stitches through both loops of adjacent motifs.
- Border (Optional): Once all squares are joined, you can add an elegant border around the entire runner.
- Simple Border: Work 2 rounds of single crochet around the entire edge.
- Shell Stitch Border: Work (sc 1, sk 2 sts, 5 dc in next st, sk 2 sts) around for a pretty scalloped edge. Adjust stitch counts to fit your specific edge.
Project 2: The Chic Shawl
A lightweight, lacy shawl perfect for cooler evenings or as a stylish accessory.
How Many Motifs? For a good-sized shawl (approx. 60-70 inches long, 18-24 inches wide), you’ll likely need between 30-48 squares, arranged in a rectangle (e.g., 6 motifs wide x 5-8 motifs long).
Assembly:
- Layout: Lay out your squares in a rectangular shape that feels comfortable for a shawl. A common dimension is around 20-24 inches wide by 60-70 inches long.
- Joining: Join your squares using one of the methods described for the table runner (whip stitch, slip stitch, or single crochet join).
- Border (Optional but Recommended): A lovely border enhances the drape and finish of a shawl.
- Repeat Round 4 (Lacy Border) Around Edges: Instead of fastening off, continue the Round 4 pattern directly onto the joined edges of your shawl for a consistent look.
- Picot Border: Work a final round of sc, adding picots (ch 3, sl st in 3rd ch from hook) every few stitches for a delicate edge.

Project 3: The Summer Blouse (Front & Back Panels)
A unique, breathable top for warm weather. This project requires a bit more planning but is incredibly rewarding!
How Many Motifs? This will depend heavily on your size. Measure the desired width of your front and back panels (bust measurement divided by 2).
- Example (Size Small/Medium): A 4×4 or 4×5 grid for the front panel, and a similar grid for the back panel. This could be 16-20 squares per panel, totaling 32-40 squares.
- Armholes & Neckline: You’ll create these by leaving specific squares unjoined or by folding and sewing the panels.

Assembly:
- Layout & Planning:
- Measure your bust and desired length.
- Lay out your motifs to form the front and back panels. Decide where your neckline and armholes will be. You might leave some squares unjoined to create the armhole/neckline shape, or you might partially join squares.
- Tip: Draw a simple schematic of your blouse design on paper and mark where each square will go.
- Joining Panels:
- Join the motifs for the front panel first, then for the back panel.
- Consider a “Join-as-You-Go (JAYG)” method for the last round of your motifs for seamless integration, especially around the armholes and neckline. This avoids bulky seams.
- Seaming:
- Once your panels are complete, join the shoulder seams and side seams using a whip stitch or sl st. Leave openings for armholes and the neckline.
- Finishing Edges (Crucial for a garment!):
- Neckline: Work a few rounds of sc or hdc around the neckline for a neat finish. You can also add a small picot or crab stitch (reverse sc) border.
- Armholes: Work 1-2 rounds of sc around each armhole for a clean edge.
- Bottom Hem: Work 1-2 rounds of sc or a simple shell border around the bottom hem of the blouse.
Video tutorial
Caring for Your Crochet Items:
- Always refer to your yarn’s care label for specific washing instructions.
- Most cotton items can be machine washed gently and laid flat to dry to maintain their shape.
There you have it! A single, versatile crochet square motif ready to become a beautiful table runner, a cozy shawl, or a chic summer blouse. Get creative with your colors and enjoy the process of turning simple squares into stunning finished pieces! Happy crocheting!