 by
by 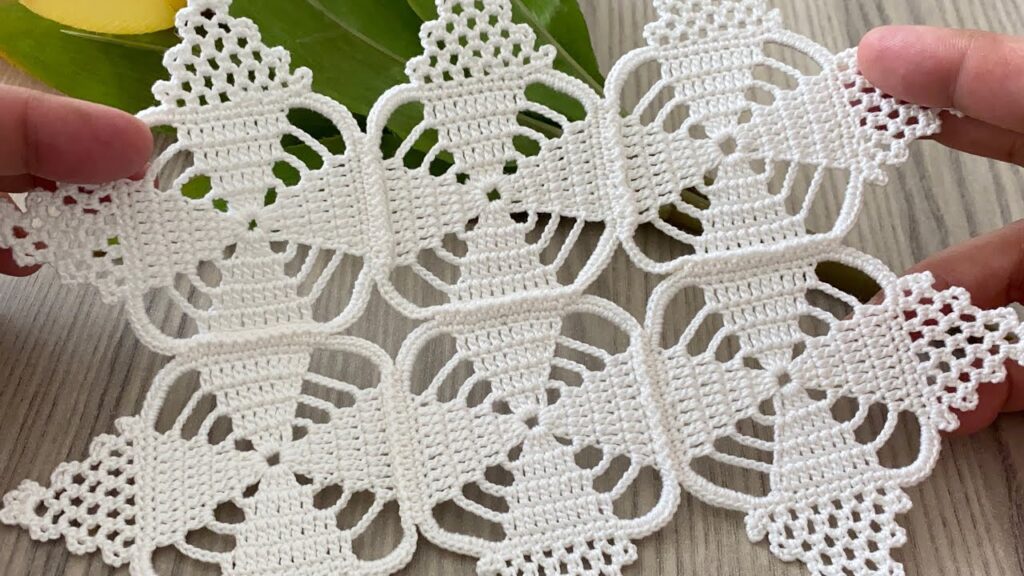
Imagine creating a beautiful, cohesive collection of crochet items, all stemming from one simple yet elegant square motif. This blog post will guide you through making an “Easy Crochet Square Motif” that’s perfect for beginners, then show you exactly how to join and adapt it to create a stunning table runner, a cozy shawl, or a stylish blouse. Get ready to unlock a world of creative possibilities with just one pattern!
Skill Level: Easy
Materials:
- For all projects:
- DK weight yarn (or worsted weight for a denser fabric and larger motif) in your desired color(s). The amount needed will vary significantly per project.
- Crochet hook size G/6 (4.0 mm) (or H/8 (5.0 mm) for worsted weight yarn) or size needed to obtain gauge.
- Yarn needle for weaving in ends and joining.
- Scissors.
- Stitch markers (optional, but helpful for larger projects).
Gauge:
For consistent results across multiple squares and projects, achieving gauge is important.
- With DK weight yarn and 4.0 mm hook: One completed square motif should measure approximately 4.5 inches x 4.5 inches.
- With Worsted weight yarn and 5.0 mm hook: One completed square motif should measure approximately 5.5 inches x 5.5 inches.
Adjust your hook size if necessary to meet the gauge.
Abbreviations (US Crochet Terms):
- ch: chain
- sl st: slip stitch
- sc: single crochet
- hdc: half double crochet
- dc: double crochet
- tr: treble crochet (or triple crochet)
- sp: space
- st(s): stitch(es)
- beg: beginning
- rep: repeat
- YO: yarn over
- sk: skip
Video tutorial
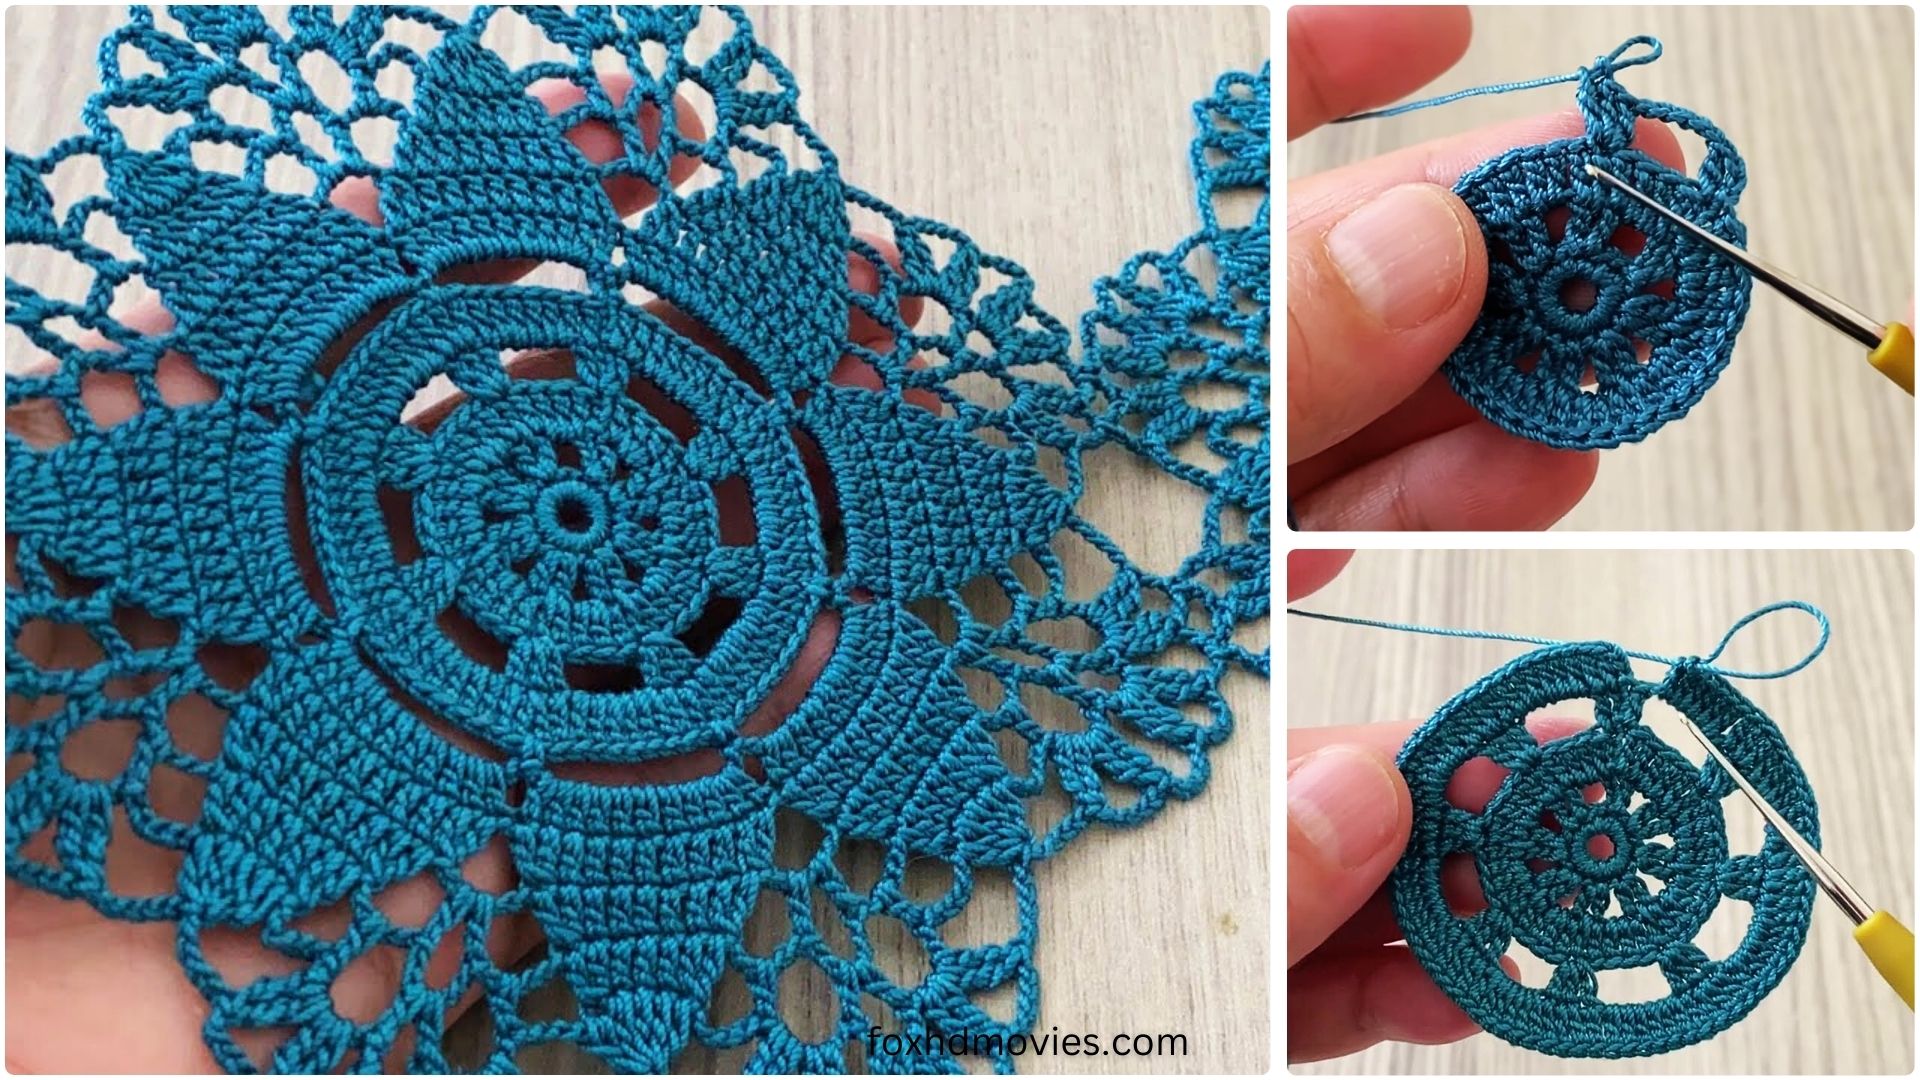
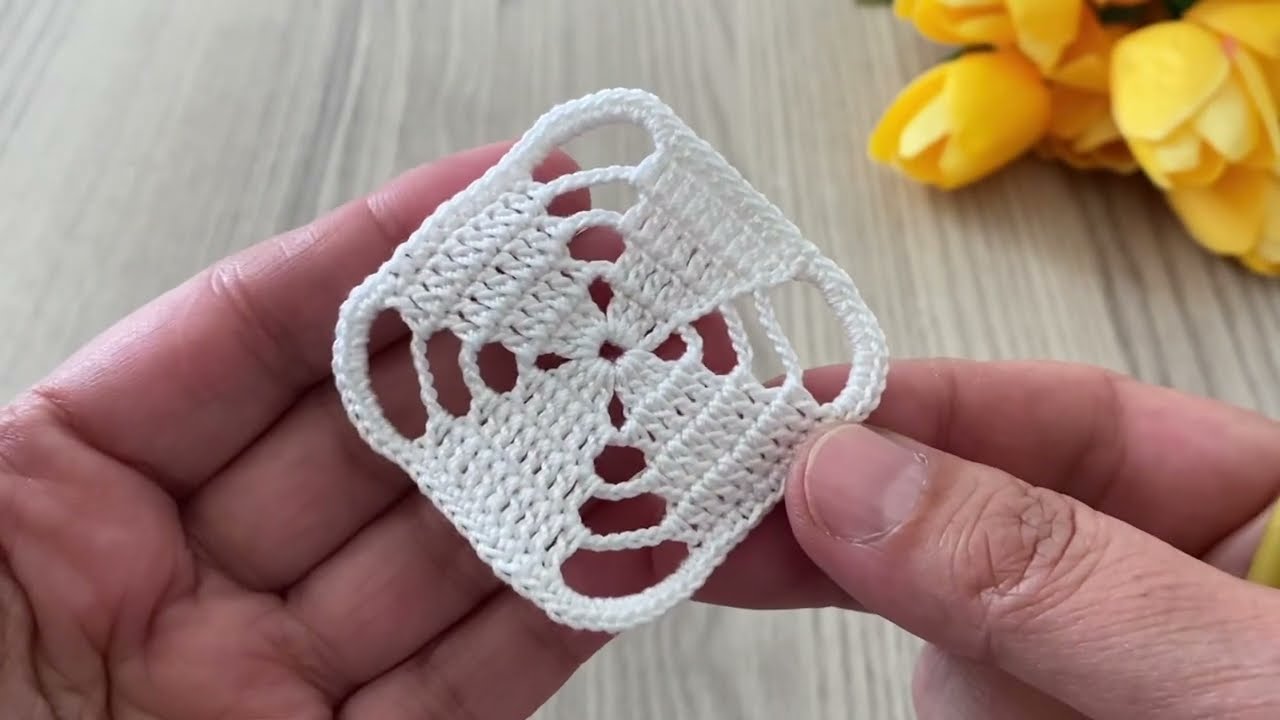
Part 1: The Easy Crochet Square Motif (Make as Many as Needed!)
This motif uses simple stitches and creates a lovely textured square perfect for joining.
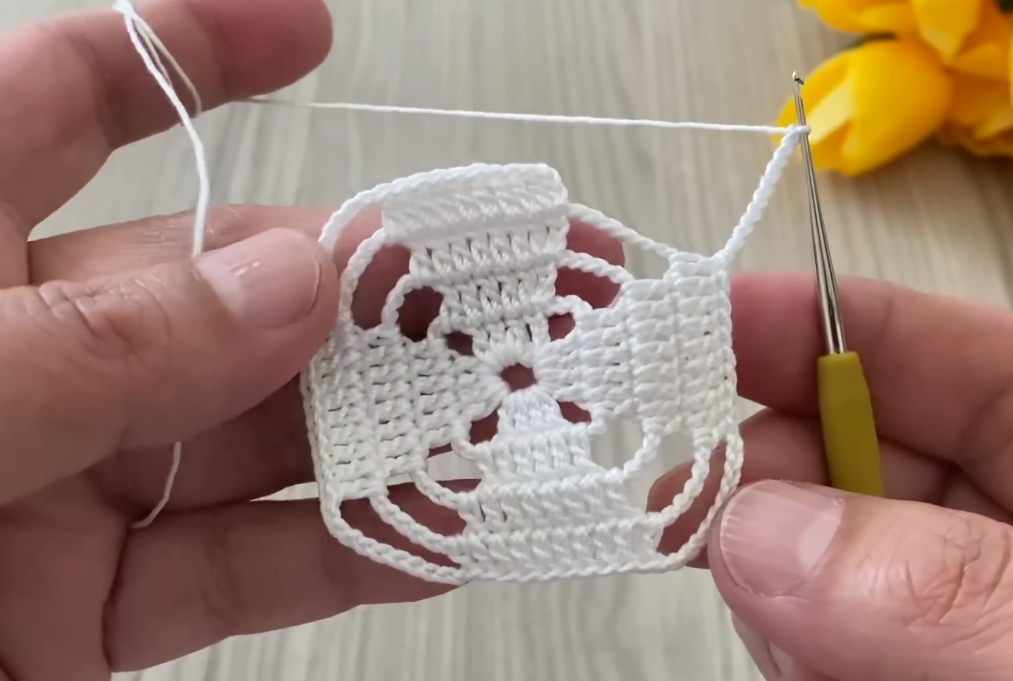
Instructions for One Square Motif:
Round 1: Ch 4, sl st to join into a ring. (Alternatively, use a magic ring). Ch 3 (counts as first dc), 2 dc in the ring, ch 2, *3 dc in the ring, ch 2; rep from * twice more. Sl st to the top of the beg ch-3. (4 clusters of 3 dc, 4 ch-2 spaces)
Round 2: Sl st into the next 2 dc and into the first ch-2 sp. Ch 3 (counts as first dc), (2 dc, ch 2, 3 dc) in the same ch-2 sp (first corner made). *Ch 1, (3 dc, ch 2, 3 dc) in the next ch-2 sp (corner made); rep from * twice more, ch 1. Sl st to the top of the beg ch-3.
Round 3: Sl st into the next 2 dc and into the first ch-2 sp. Ch 3 (counts as first dc), (2 dc, ch 2, 3 dc) in the same ch-2 sp (first corner made). *Ch 1, 3 dc in the next ch-1 sp, ch 1, (3 dc, ch 2, 3 dc) in the next ch-2 sp (corner made); rep from * twice more, ch 1, 3 dc in the last ch-1 sp, ch 1. Sl st to the top of the beg ch-3.
Round 4: Sl st into the next 2 dc and into the first ch-2 sp. Ch 3 (counts as first dc), (2 dc, ch 2, 3 dc) in the same ch-2 sp (first corner made). *Ch 1, 3 dc in each ch-1 sp across to the next corner (you’ll have two sets of 3dc along the side), ch 1, (3 dc, ch 2, 3 dc) in the next ch-2 sp (corner made); rep from * twice more, ch 1, 3 dc in each ch-1 sp across to the last corner, ch 1. Sl st to the top of the beg ch-3. Fasten off and weave in all ends securely.

Repeat this process to create as many square motifs as needed for your chosen project.
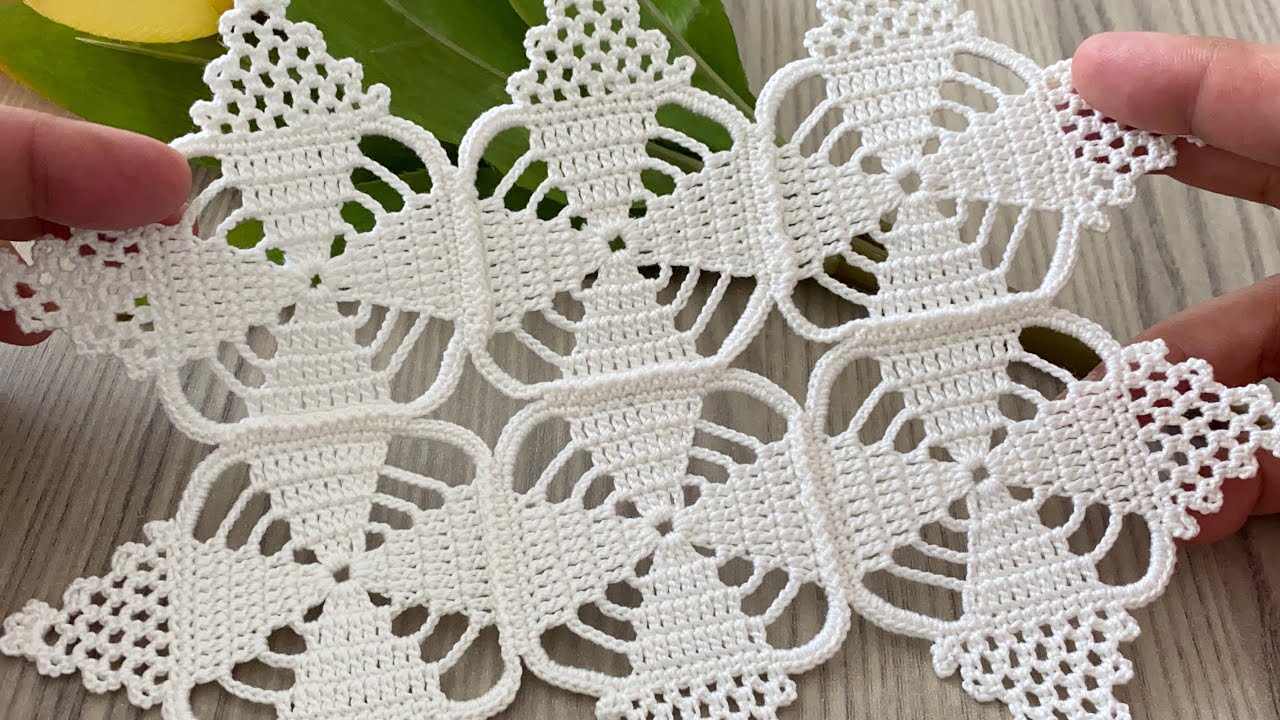
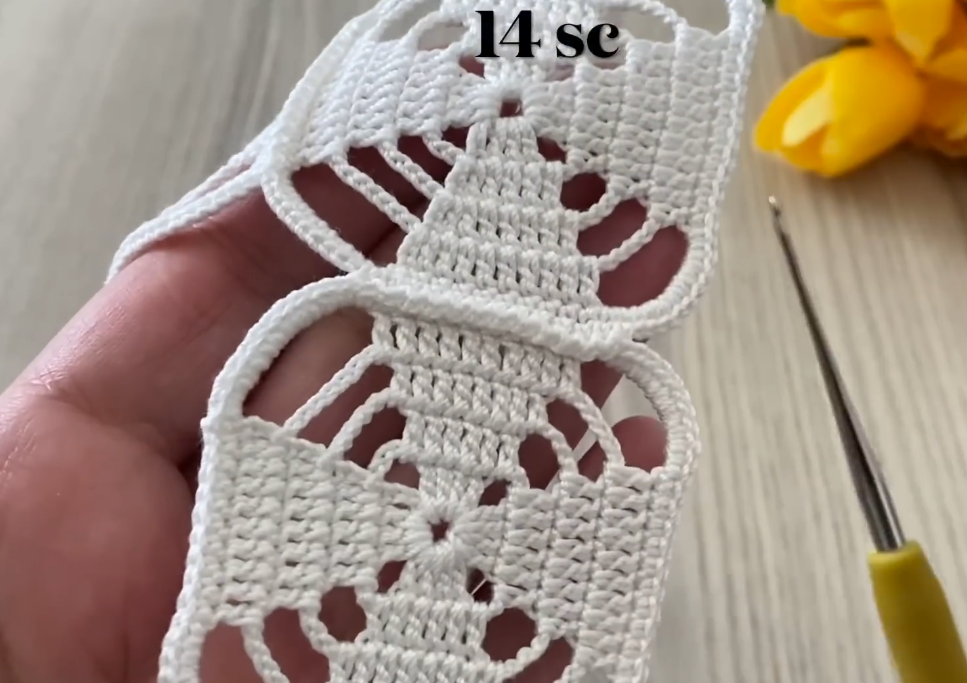
Part 2: Joining Your Squares
There are several ways to join crochet squares. For these projects, we recommend a simple slip stitch join or single crochet join for a neat finish, or the join-as-you-go (JAYG) method for efficiency.
- Slip Stitch Join (Flat & Invisible):
- Place two squares together with wrong sides facing.
- Insert hook through the back loop of a stitch on the first square and the front loop of the corresponding stitch on the second square.
- Sl st through both loops. Continue across the edge.
- Single Crochet Join (Slightly Raised Seam):
- Place two squares together with wrong sides facing.
- Insert hook through both loops of a stitch on the first square and both loops of the corresponding stitch on the second square.
- Work a sc through both squares. Continue across the edge.
- Join-As-You-Go (JAYG): This method is worked on the last round of your square.
- When you reach a corner space or ch-1 space where you’ll join, work half of your corner/cluster (e.g., 3 dc), ch 1, then sl st into the corresponding corner/ch-1 space of the already completed square. Ch 1, then finish the rest of your corner/cluster (e.g., 3 dc). This eliminates the need for separate seaming later. There are many JAYG tutorials online if you’re new to it!
Part 3: Project 1 – The Easy Crochet Square Motif Table Runner
This will create a beautiful, textured runner for your table, customizable to any length.
Approximate Finished Size: Varies depending on table size and square count.
- Example for a 60-inch table with 4.5-inch squares: A runner might be 5 squares long (approx. 22.5 inches) and 2 squares wide (approx. 9 inches).
Quantity of Squares Needed:
- Determine the desired length of your runner.
- Divide the desired length by your square’s finished width (e.g., 60 inches / 4.5 inches/square = 13.3 squares). Round up or down to a whole number that fits your preference (e.g., 13 or 14 squares long).
- Decide on the desired width (usually 1 or 2 squares wide for a runner).
- Example for 13 squares long x 2 squares wide = 26 squares.
Construction:
- Arrange: Lay out your squares in the desired pattern (e.g., a long rectangle, or a staggered pattern).
- Join: Join the squares together using your preferred joining method (slip stitch, single crochet, or JAYG). Work in rows first, then join the rows together.
- Border (Optional but Recommended): Once all squares are joined, work an even border around the entire perimeter of the runner.
- Round 1: Join yarn to any corner. Ch 1, work (sc, ch 2, sc) in the corner. Work sc evenly around the entire runner, working (sc, ch 2, sc) in each remaining corner. When you reach the joins between squares, try to work 1-2 sc over the seam to secure it. Sl st to first sc.
- Round 2 (Optional): Ch 1, work (sc, ch 2, sc) in each corner ch-2 sp. Work sc in each sc around. Sl st to first sc.
- You can repeat Round 2 for a wider border, or try a different stitch like hdc or dc for a more substantial edge.
Part 4: Project 2 – The Easy Crochet Square Motif Shawl
Create a beautiful, drapey shawl perfect for layering or keeping cozy.
Approximate Finished Size: Varies greatly based on desired drape and size.
- Example for a medium shawl (approx. 60 inches long by 20 inches wide):
- Using 4.5-inch squares: Approx. 13 squares long x 4-5 squares wide.
- Total squares: 13 x 4 = 52 squares, or 13 x 5 = 65 squares.
Quantity of Squares Needed:
- Decide on your desired shawl dimensions.
- Calculate the number of squares needed for the length and width. A common shawl layout is a large rectangle, but you could also arrange them in a triangular shape if you prefer a different style.
Construction:
- Arrange: Lay out your squares in your desired shawl shape. A simple rectangle is easiest for a first-time square shawl.
- Join: Join the squares together using your preferred joining method. Work in rows first, then join the rows.
- Border (Highly Recommended): A beautiful border can elevate a simple square shawl.
- Round 1: Join yarn to any corner. Ch 1, work (sc, ch 2, sc) in the corner. Work sc evenly around the entire shawl, working (sc, ch 2, sc) in each remaining corner. When you reach the joins between squares, try to work 1-2 sc over the seam to secure it. Sl st to first sc.
- Subsequent Rounds: You can repeat Round 1 for a simple border. For a more decorative border, consider adding:
- Shell Stitch Border: Ch 1, *sc in next st, sk 2 sts, (dc 5) in next st, sk 2 sts*; rep around. Adjust skips and dc count to fit your stitch count.
- Picot Edge: After a few rounds of sc border, on the last round, work (sc, ch 3, sl st into first ch (picot made)) periodically along the edge.
Part 5: Project 3 – The Easy Crochet Square Motif Blouse
This project allows for a custom-fit, stylish top using your beautiful motifs. This will be more complex and may require some shaping adjustments.
Approximate Finished Size: Custom to your measurements.
- Front/Back Panels: You’ll need enough squares to cover the width of your chest/back.
- Sleeves (Optional): Enough squares to create your desired sleeve length and width.
Quantity of Squares Needed:
- Measure the desired width of your front and back panels (e.g., measure across your chest from armpit to armpit).
- Divide this measurement by the width of your finished square. This tells you how many squares wide your panels will be.
- Measure the desired length of your panels (from shoulder to hip/waist). Divide by square length.
- Example: If your chest width is 20 inches and your squares are 4.5 inches wide, you’ll need 20 / 4.5 = approx. 4-5 squares wide for each panel. If your desired length is 22 inches, you’ll need 22 / 4.5 = approx. 5 squares long.
- Total for front and back: (4-5 squares wide) x (5 squares long) x 2 panels = 40-50 squares.
- Consider additional squares for sleeves if desired.

Construction Steps:
- Measure and Plan:
- Measure your bust/chest circumference.
- Measure your desired length from shoulder to waist/hip.
- Determine the number of squares needed for your front and back panels. Remember to account for seam allowance if not using JAYG.
- Decide if you want sleeves and how long/wide they should be.
- Draw a simple schematic of your blouse lay out, arranging the squares.
- Create Panels:
- Join squares together to form your rectangular front panel.
- Join squares together to form your rectangular back panel.
- Shoulder Seams:
- Place the front and back panels right sides together.
- Join the top squares along the shoulder lines, leaving a gap for the neck opening. Use slip stitch or single crochet join.
- Side Seams:
- Join the side edges of the front and back panels, leaving openings for armholes. The size of the armhole opening will depend on your preference and the number of squares you used.
- Sleeves (Optional):
- If adding sleeves, create tube-like structures of joined squares.
- Attach the sleeve tubes to the armhole openings.
- Neckline and Edging:
- Work a simple border around the neckline (e.g., 2-3 rounds of sc).
- Work a border around the bottom hem and sleeve cuffs (e.g., 2-3 rounds of sc or hdc).
- Finishing: Weave in all ends. Block your blouse to help it drape beautifully and achieve its final shape.
Important Considerations for a Blouse:
- Fit: Crochet fabric has stretch. Consider making a slightly smaller size than your exact measurements as it will stretch with wear.
- Drape: DK or lighter weight yarns will create a softer, more drapey blouse. Worsted weight will be stiffer and heavier.
- Seaming: Pay extra attention to your seams for a neat and comfortable garment.
- Armholes: Test the armhole size before fully committing. You might need to add a few rows of single crochet around the opening to adjust if it’s too small or large.
General Tips for All Projects:
- Weave in ends as you go: This saves a lot of time and frustration at the end!
- Block your finished project: Blocking helps to even out your stitches, flatten your seams, and give your project a professional, polished look. For acrylics, steam blocking works well. For natural fibers, wet blocking is often best.
- Don’t be afraid to experiment! Change up your colors, add different border stitches, or alter the size of your squares to create truly unique pieces.