by
by 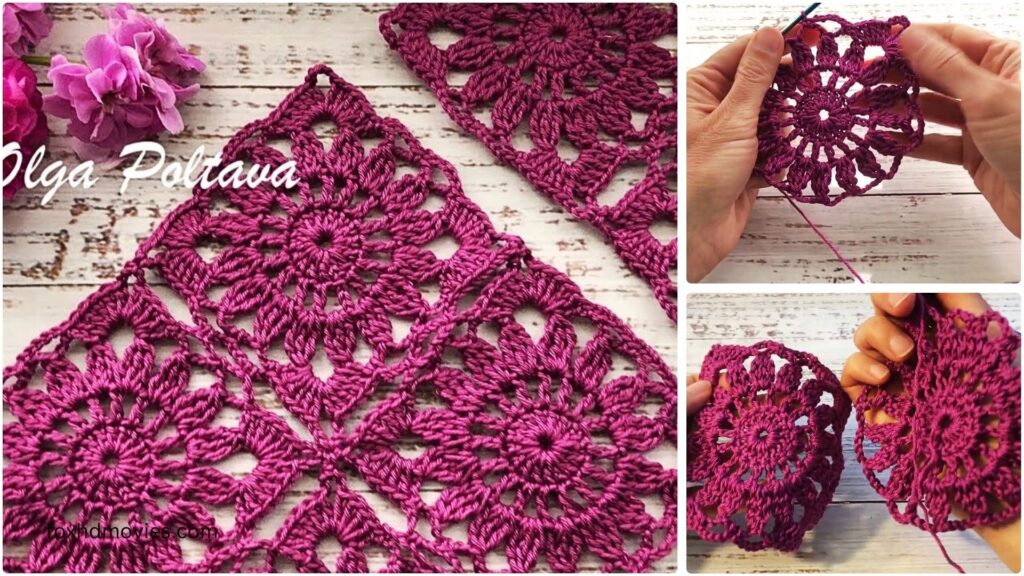
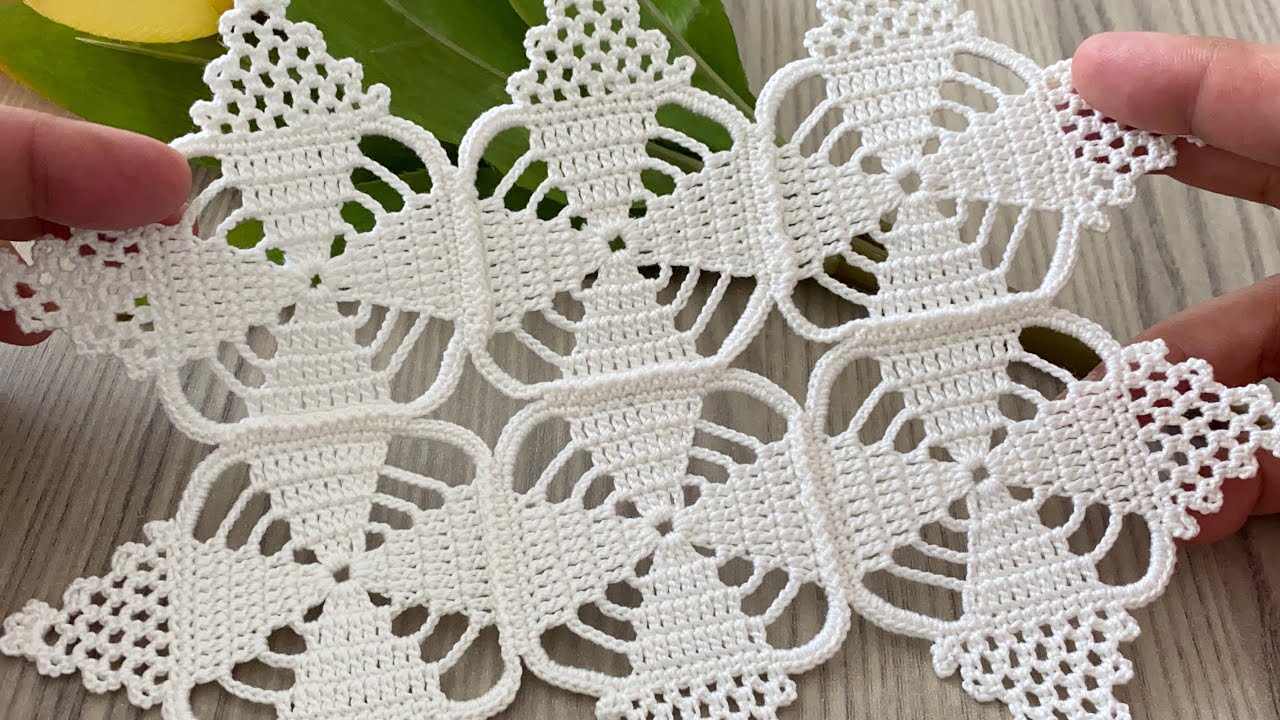
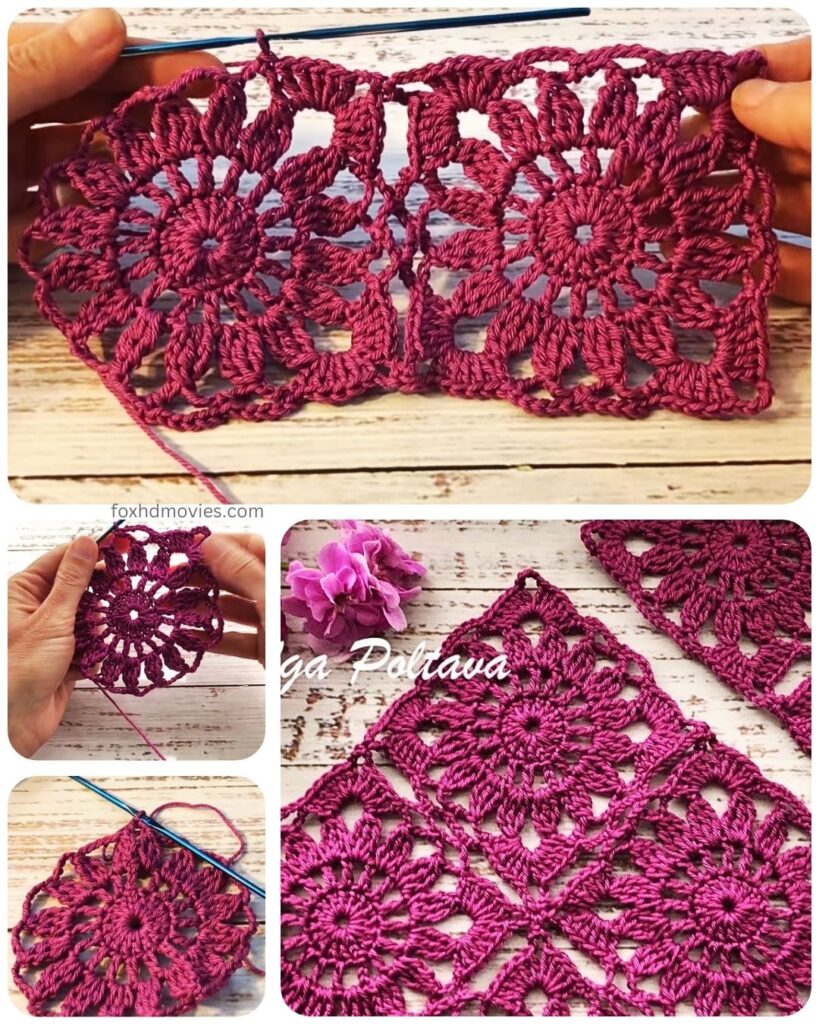
Imagine a light, airy blouse perfect for a warm summer day, crafted from delicate crochet motifs. This pattern blog will guide you through creating beautiful lacy motifs and then seamlessly joining them to form a stunning, custom-fit garment. Get ready to embrace the art of crochet and wear your creativity!
Skill Level: Intermediate (familiarity with basic crochet stitches and working in the round is helpful)
Materials:
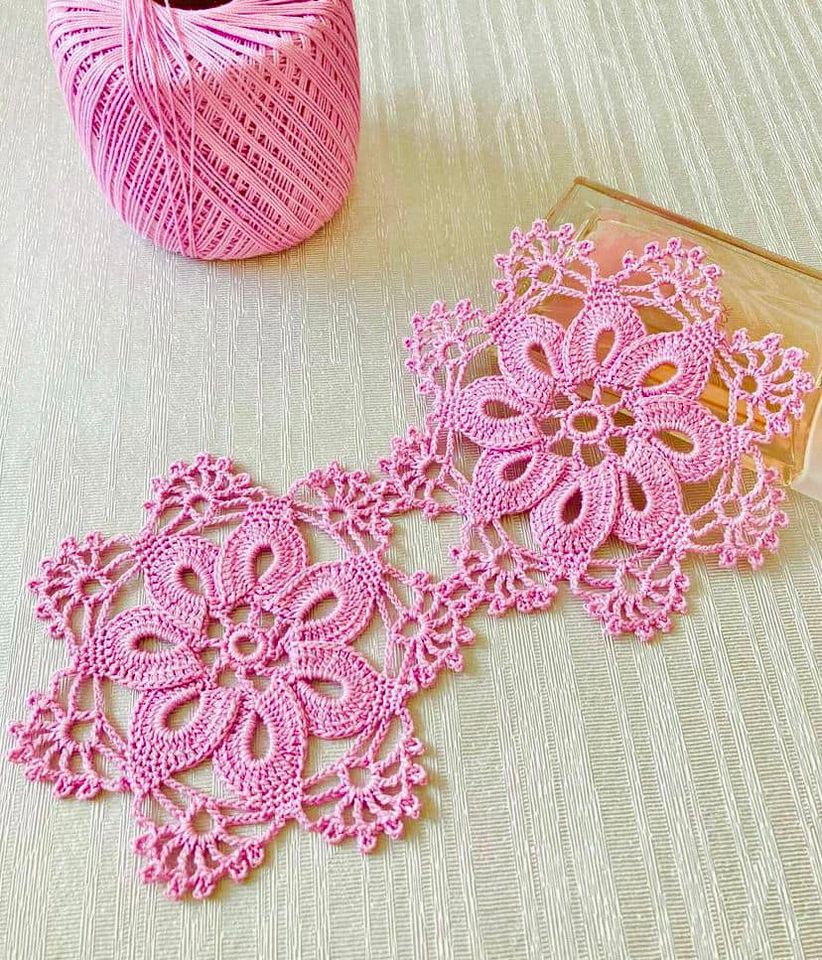
- Lightweight yarn, such as cotton, cotton blend, or linen (DK or Sport weight recommended for a light, airy feel). Choose a color that will highlight the lace work.
- Crochet hook appropriate for your chosen yarn (e.g., C/2 (2.75mm) to E/4 (3.5mm) depending on yarn weight and desired drape). Check your yarn label for recommendations.
- Yarn needle for weaving in ends and joining
- Scissors
- Stitch markers (optional, but helpful for marking corners or specific stitches)
- Dressmaker’s pins and blocking mats (highly recommended for shaping and neatness)
- Measuring tape
Gauge:
Gauge is crucial for motif-based garments to ensure your finished blouse fits correctly. The gauge will be measured across one finished motif.
- For a square motif (approx. 2.5-3 inches across): Your motif should measure consistently.
- For a circular motif (approx. 2.5-3 inches in diameter): Your motif should measure consistently.
Abbreviations (US Crochet Terms):
- ch: chain
- sl st: slip stitch
- sc: single crochet
- hdc: half double crochet
- dc: double crochet
- tr: treble crochet (yarn over twice)
- dtr: double treble crochet (yarn over three times)
- picot: ch 3, sl st in the 3rd ch from hook
- sp: space
- st(s): stitch(es)
- rep: repeat
- sk: skip
- FO: fasten off
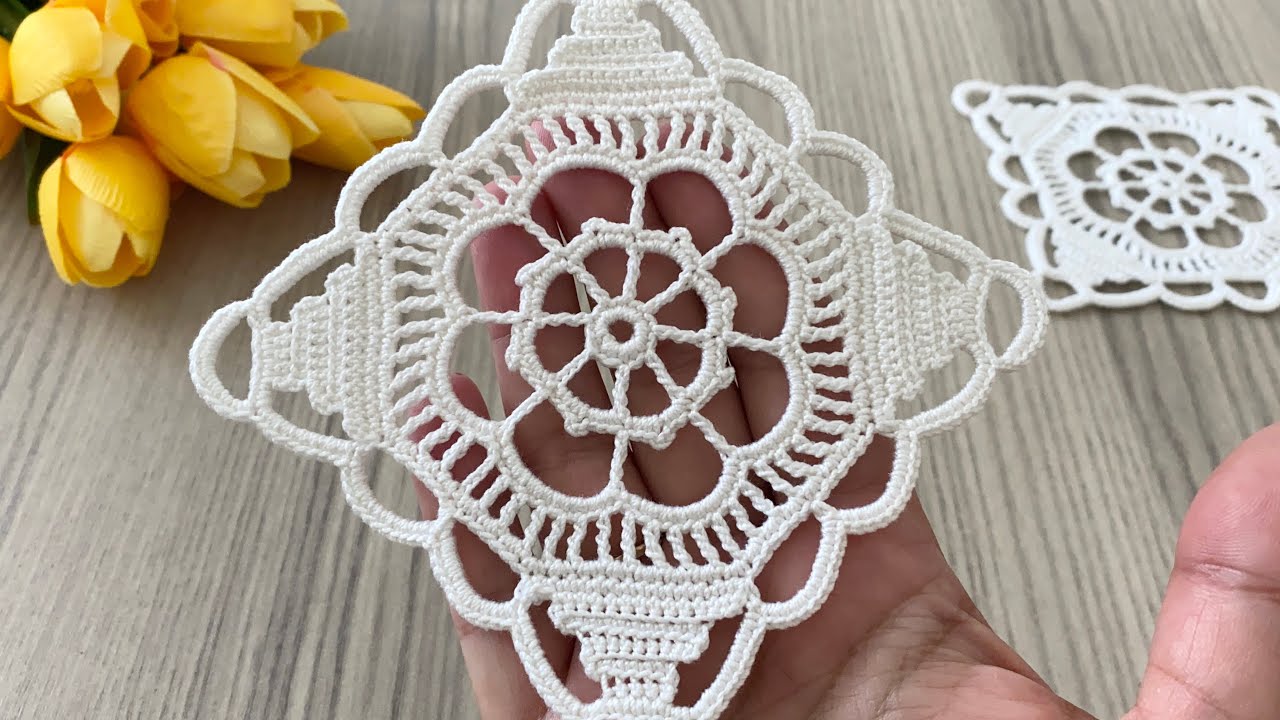
Part 1: The Lacy Motif Pattern (Square Motif Example)
This pattern will create a beautiful, versatile square motif that can be easily joined. You can adjust the number of rounds to make larger or smaller motifs for different sections of your blouse or for different sizes.
Motif Size: Approx. 2.5 inches square (using Sport weight yarn and a 3.0mm hook)
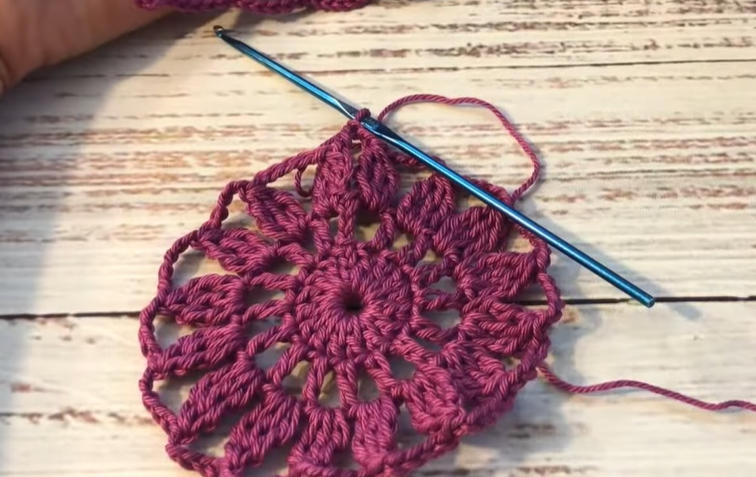
Round 1: Ch 4, sl st to first ch to form a ring. Ch 3 (counts as 1 dc), 2 dc in ring, ch 3, (3 dc in ring, ch 3) 3 times. Sl st to top of beg ch-3. (4 dc clusters, 4 ch-3 sps)
Round 2: Sl st into next 2 dc, sl st into first ch-3 sp. Ch 3 (counts as 1 dc), (2 dc, ch 3, 3 dc) in same ch-3 sp (first corner made). *Ch 1, (3 dc, ch 3, 3 dc) in next ch-3 sp (corner made)*; rep from * 2 more times. Ch 1. Sl st to top of beg ch-3.
Round 3: Sl st into next 2 dc, sl st into first ch-3 sp. Ch 3 (counts as 1 dc), (2 dc, ch 3, 3 dc) in same ch-3 sp (corner made). *Ch 1, 3 dc in next ch-1 sp, ch 1, (3 dc, ch 3, 3 dc) in next ch-3 sp (corner made)*; rep from * 2 more times. Ch 1, 3 dc in last ch-1 sp, ch 1. Sl st to top of beg ch-3.
Round 4 (Lacy Border): Sl st into next 2 dc, sl st into first ch-3 sp. Ch 1, (sc, ch 3, sc) in same ch-3 sp (corner picot made). *Ch 3, sk next 3 dc, sc in next ch-1 sp, ch 3, sk next 3 dc, sc in next ch-1 sp, ch 3, sk next 3 dc, (sc, ch 3, sc) in next ch-3 sp (corner picot made)*; rep from * 2 more times. Ch 3, sk next 3 dc, sc in next ch-1 sp, ch 3, sk next 3 dc, sc in next ch-1 sp, ch 3, sk next 3 dc. Sl st to first sc. FO.
Make Many Motifs: You will need to make a large number of these motifs. The exact quantity depends on your size and desired blouse dimensions. It’s highly recommended to block your motifs as you go or after making a batch. This will ensure uniform size and shape, which is essential for seamless joining.
Part 2: Planning Your Blouse Layout
Before you start joining, lay out your motifs on a flat surface or a dress form to visualize the shape of your blouse.
- Determine Your Size: Measure your bust circumference and desired length.
- Create a Schematic: Draw a rough sketch of your blouse shape. This will help you decide how many motifs wide and how many motifs long you need.
- Front/Back Panels: Most simple blouses are made by creating a front panel and a back panel, then seaming them at the shoulders and sides.
- Sleeves: You can add sleeves by extending the motif pattern, or by working directly onto the joined panels.
- Neckline: Plan for a comfortable neckline opening. This will likely involve leaving some motifs unjoined or shaping with partial motifs.
Example Layout Idea:
A simple rectangular body for a relaxed fit might be 8 motifs wide by 10 motifs long for the front panel, and the same for the back. This is just an example; adjust as needed.

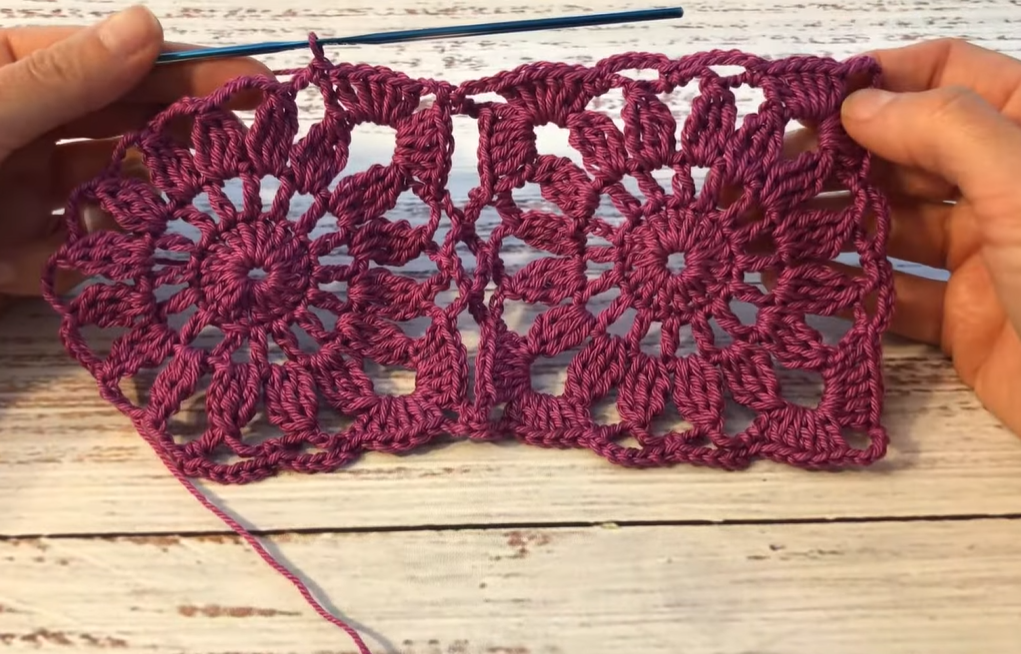
Part 3: Joining the Motifs – The “Join-As-You-Go” (JAYG) Method
The JAYG method creates a seamless and beautiful join, avoiding bulky seams from sewing. You’ll join on the final round of the second (and subsequent) motif you’re working on.
Preparation: Have one complete motif ready (Motif A). Begin working the final round of your second motif (Motif B).
Joining Corners:
When you reach a corner on Motif B where you want to join to Motif A’s corner:
Instead of (sc, ch 3, sc) for the corner picot on Motif B, you’ll do: sc in Motif B's corner ch-3 sp, ch 1, sl st into Motif A's corner ch-3 sp (or a specific picot if it has one), ch 1, sc back into Motif B's corner ch-3 sp.
Joining Sides (across ch-3 spaces):
When you reach a ch-3 sp on Motif B that needs to join to a ch-3 sp on Motif A:
Instead of ch 3, you’ll do: ch 1, sl st into corresponding ch-3 sp on Motif A, ch 1.

Step-by-Step JAYG (Joining Motif B to Motif A):
- Work Round 1-3 of Motif B as normal.
- Begin Round 4 of Motif B.
- Work the first corner of Motif B as normal:
(sc, ch 3, sc)in the ch-3 sp. - Work along the first side of Motif B:
ch 3, sk next 3 dc, sc in next ch-1 sp, ch 3, sk next 3 dc, sc in next ch-1 sp, ch 3, sk next 3 dc. - Reach the second corner of Motif B (the first joining corner):
sc in Motif B's corner ch-3 sp, ch 1, sl st into Motif A's adjacent corner ch-3 sp, ch 1, sc back into Motif B's corner ch-3 sp. - Work along the first joining side:
ch 1, sl st into corresponding ch-3 sp on Motif A, ch 1, sk next 3 dc, sc in next ch-1 sp. ch 1, sl st into corresponding ch-3 sp on Motif A, ch 1, sk next 3 dc, sc in next ch-1 sp.ch 1, sl st into corresponding ch-3 sp on Motif A, ch 1, sk next 3 dc.- Reach the third corner of Motif B (the second joining corner if joining along two sides):
sc in Motif B's corner ch-3 sp, ch 1, sl st into Motif A's next adjacent corner ch-3 sp, ch 1, sc back into Motif B's corner ch-3 sp. - Continue working the remaining sides of Motif B as normal until you complete the round. Sl st to the first sc. FO.
Key JAYG Principle: You essentially replace half of the chain stitches that would normally form a chain space or picot with a slip stitch into the corresponding space/picot of the motif you are joining to.
Joining Multiple Motifs:
- Rows: Work in rows. Join the second motif to the first, the third to the second, and so on.
- Columns: Once a row is complete, start a new row. When joining a motif in a new row, you might need to join it to motifs in the current row and the row above it simultaneously at a corner. This is where the
sc, ch 1, sl st, ch 1, scin the corner method is very versatile.
Part 4: Assembling Your Blouse
- Block All Motifs: Even if you JAYG, blocking individual motifs or rows of motifs before final assembly will ensure an even and professional finish.
- Join Front Panel: Join all the motifs needed for your front panel.
- Join Back Panel: Join all the motifs needed for your back panel.
- Join Shoulders: Pin the front and back panels together at the shoulders. Use a yarn needle and whip stitch (or your preferred seaming method) to join. You can also JAYG the shoulder seams if you’re making a continuous piece.
- Join Side Seams: Pin the front and back panels together along the side seams. Seam them up, leaving armholes as desired.
- Neckline and Armholes:
- Edging: You can add a simple single crochet or half double crochet border around the neckline and armholes for a clean finish.
- Shaping: If your initial layout creates a very square neckline/armhole, you can gently shape it with a few rounds of decreasing single crochet.
- Lace Edging: For extra flair, consider adding a lacy border to the neckline and armholes.
Part 5: Finishing and Care
- Weave in all ends: Take your time with this! Neatly woven ends make all the difference in a professional-looking garment.
- Final Blocking: Once your blouse is fully assembled, wet block the entire garment. Pin it to your blocking mats, gently shape it to your desired dimensions, and let it dry completely. This will open up the lace pattern beautifully and ensure an even drape.
- Care: Follow the care instructions for your chosen yarn. Most cotton and linen garments can be hand washed and laid flat to dry.
Video tutorial
Customization and Design Tips:
- Motif Variety: Don’t be afraid to experiment with different lacy square or even circular motifs. Just ensure their joining points (corners and side spaces) are compatible.
- Size Adjustments: For a larger blouse, make larger motifs, or simply use more motifs. For a smaller blouse, use fewer motifs or a smaller hook/thinner yarn.
- Sleeve Styles:
- Cap Sleeves: Add a few rows of motifs around the armhole.
- Longer Sleeves: Continue joining motifs to form full sleeves.
- Flared Sleeves: Gradually increase the number of motifs in each row of the sleeve.
- Neckline Shaping: For a deeper V-neck or scoop neck, you can use half motifs or fill in gaps with strategically placed chains and single crochet stitches.
- Color Blocking: Create a striped effect by using different colored motifs, or a gradient by using different shades of the same color.
Creating a crochet lace motif blouse is a rewarding project that allows for immense creativity. Take your time, enjoy the process, and soon you’ll have a stunning, unique summer garment to cherish! Happy crocheting!