 by
by 
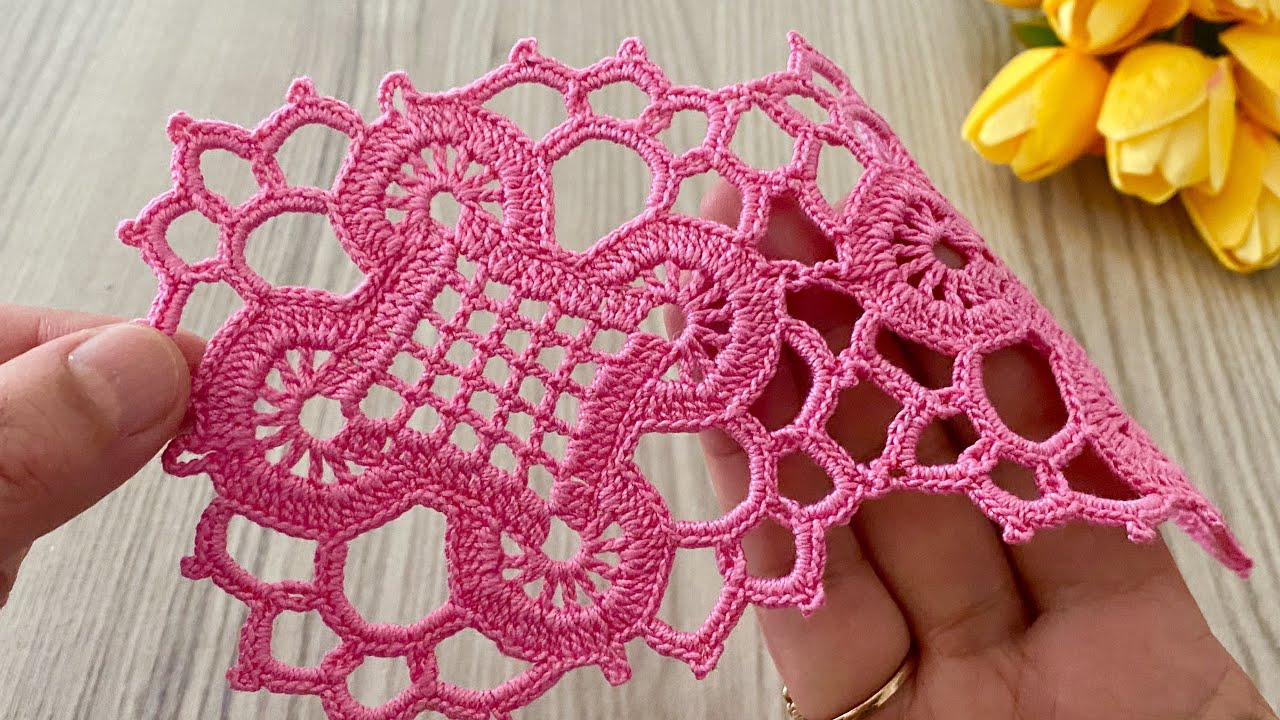
Are you looking to expand your crochet skills beyond the traditional? Square motifs offer an exciting world of possibilities! With just one simple motif pattern, you can design and create stunning home decor and wearable art. This guide will walk you through making a beautiful, solid square and then provide a framework for assembling it into three different projects.
Skill Level: Intermediate Beginner (Requires knowledge of basic stitches and joining)
Materials You’ll Need:
- Yarn: DK or Worsted weight yarn is ideal. Choose 2-3 colors for contrast as shown in the examples, or a single color for a cohesive look. (Approximate yardage will vary greatly by project size, but have a few skeins on hand.)
- For the square centers/main color.
- For the square borders/joining color.
- Crochet Hook: Size G/6 (4.0 mm) or H/8 (5.0 mm), or the size recommended on your yarn label to achieve desired gauge.
- Yarn Needle: For weaving in ends and joining motifs.
- Scissors
- Stitch Markers: Very helpful for marking corners and aligning pieces.
- Measuring Tape: Crucial for garment sizing.
- Blocking Mats & Pins (Optional but Recommended): For professional-looking finished projects.
Gauge (Crucial for Garments!):
It’s vital to make a gauge swatch if you’re planning a garment. Crochet one completed square. Measure it across its widest point. For example, with a G/6 (4.0 mm) hook and DK yarn, a 4-round solid square might measure approximately 4.5 – 5 inches (11-12.5 cm) per side. Adjust your hook size to achieve a square size that works for your desired garment dimensions. If your square is too large, use a smaller hook. If it’s too small, use a larger hook.
Abbreviations (US Crochet Terms):
- ch: chain
- sl st: slip stitch
- sc: single crochet
- hdc: half double crochet
- dc: double crochet
- sp: space
- st(s): stitch(es)
- beg: beginning
- rep: repeat
- YO: yarn over
- BLO: back loop only
- FLO: front loop only
Video Tutorial
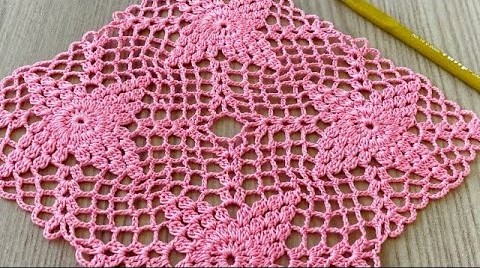
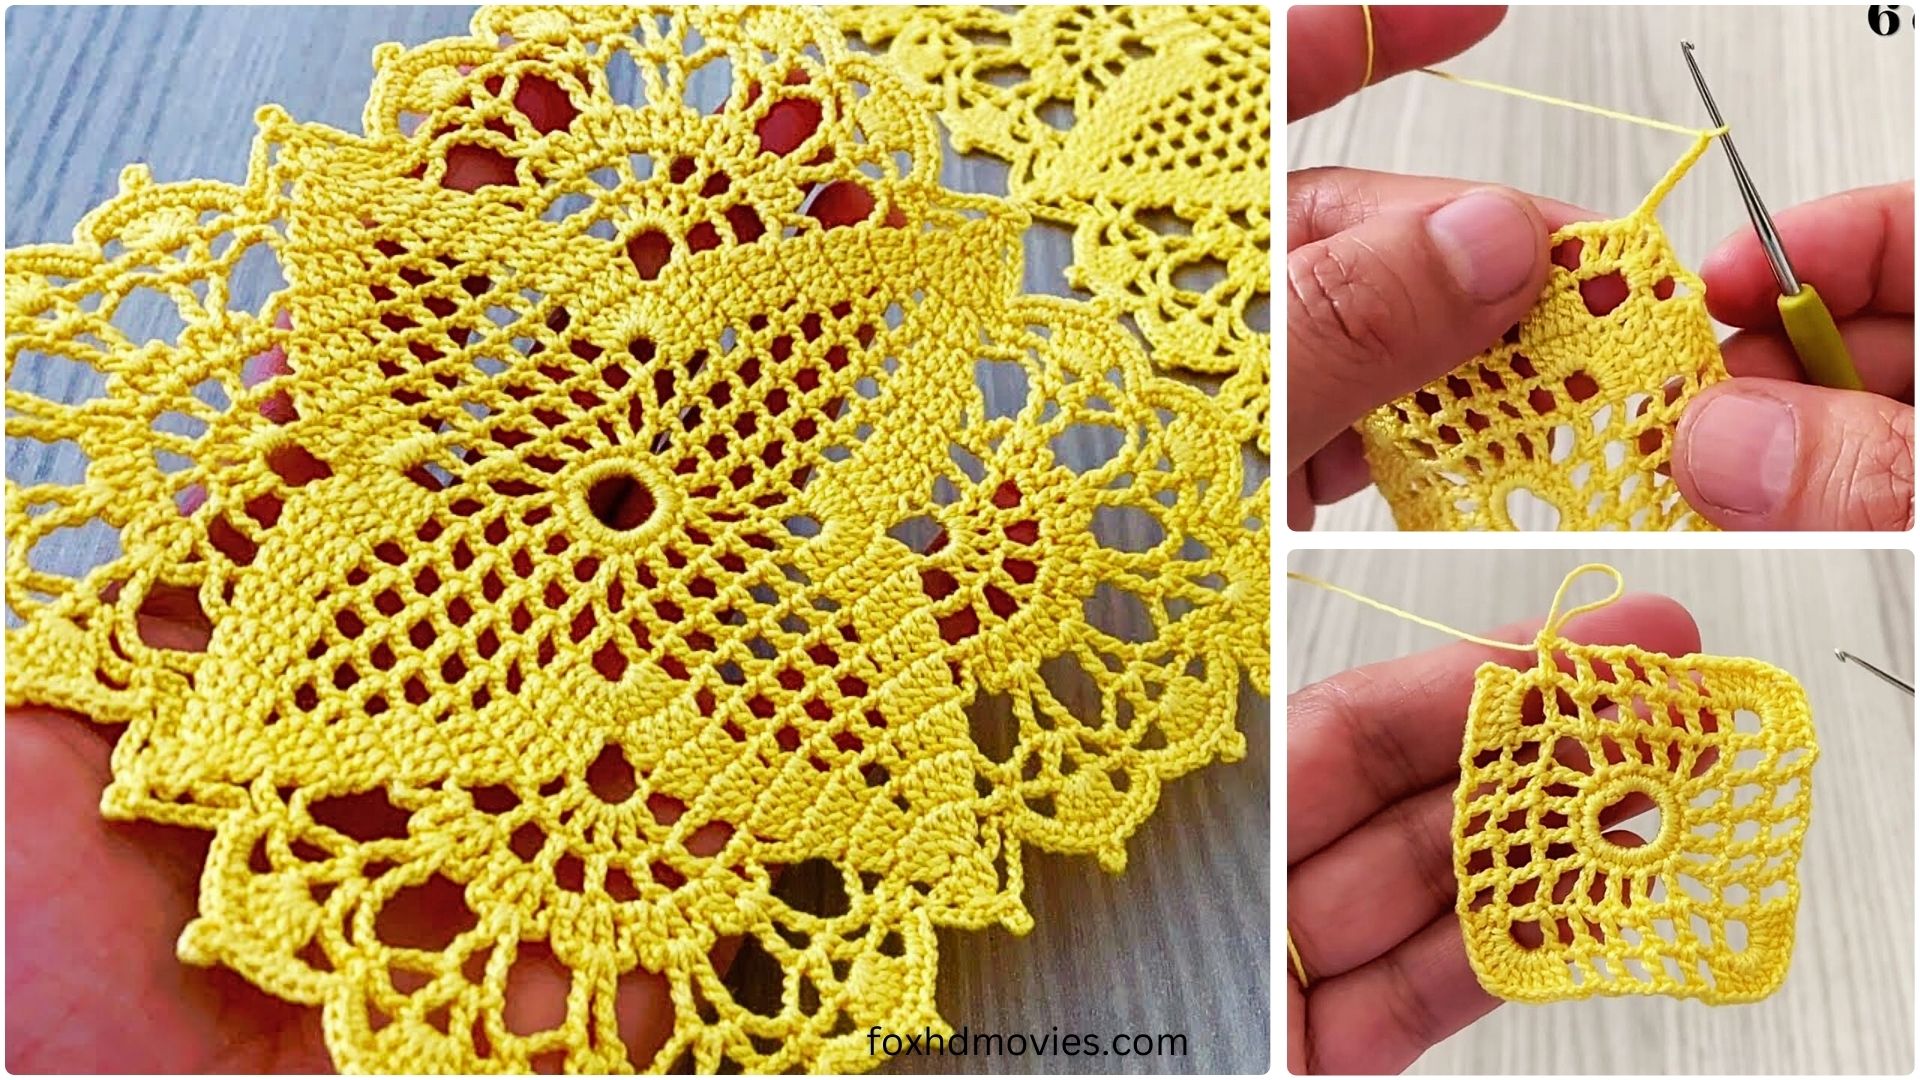
The Perfect Solid Square Motif Pattern
This solid square motif is sturdy, versatile, and provides excellent coverage, making it ideal for both home decor and wearable items. We’ll use a classic granny square style for the corners, filling in the sides for a solid look.
Finished Size: Approx. 4.5 – 5 inches (11-12.5 cm) per side (adjust based on your yarn and hook).
Round 1: (Center – Color A)
- Create a magic ring OR ch 4 and sl st to first ch to form a ring.
- Ch 3 (counts as first dc), 2 dc in the ring, ch 2.
- *3 dc in the ring, ch 2.* Repeat from * to * 2 more times.
- Sl st to the top of the beg ch-3 to join. (You should have 4 clusters of 3 dc, separated by 4 ch-2 spaces. Total 12 dc.)
- Fasten off Color A.
Round 2: (First Square Shaping – Color B or A)
- Join Color B (or continue with A) with a sl st into any ch-2 sp.
- Ch 3 (counts as first dc), (2 dc, ch 2, 3 dc) in the same ch-2 sp. This is your first corner!
- *3 dc in the next ch-2 sp. (3 dc, ch 2, 3 dc) in the next ch-2 sp.* Repeat from * to * 2 more times.
- 3 dc in the last ch-2 sp.
- Sl st to the top of the beg ch-3 to join. (You should have 4 corners (each 3dc, ch 2, 3dc) and 4 sides of 3dc. Total 24 dc, 4 ch-2 sps.)
Round 3: (Building the Square – Color A or B)
- Sl st into the next 2 dc and into the first ch-2 sp (corner).
- Ch 3 (counts as first dc), (2 dc, ch 2, 3 dc) in the same ch-2 sp. This is your new corner!
- *3 dc in each of the next two spaces between the previous 3-dc clusters (these are the spaces along the sides, not corners).
- (3 dc, ch 2, 3 dc) in the next ch-2 sp (corner).* Repeat from * to * 2 more times.
- 3 dc in each of the last two spaces between 3-dc clusters.
- Sl st to the top of the beg ch-3 to join. (You should have 4 corners and 8 sets of 3dc along the sides. Total 36 dc, 4 ch-2 sps.)
Round 4: (Finishing the Square – Color B or A, or new color for border)
- Sl st into the next 2 dc and into the first ch-2 sp (corner).
- Ch 3 (counts as first dc), (2 dc, ch 2, 3 dc) in the same ch-2 sp. This is your final corner!
- *3 dc in each of the next three spaces between the previous 3-dc clusters (these are the spaces along the sides, not corners).
- (3 dc, ch 2, 3 dc) in the next ch-2 sp (corner).* Repeat from * to * 2 more times.
- 3 dc in each of the last three spaces between 3-dc clusters.
- Sl st to the top of the beg ch-3 to join. (You should have 4 corners and 12 sets of 3dc along the sides. Total 48 dc, 4 ch-2 sps.)
- Fasten off and weave in all ends securely.

Make as many squares as you need for your chosen project!
Joining Your Motifs: The Secret to a Seamless Project
There are many ways to join motifs, but for a neat and relatively invisible seam for garments, I recommend the Whip Stitch or the Single Crochet Join.
- Whip Stitch:
- Place two squares together with wrong sides facing.
- Using your yarn needle and matching yarn, insert the needle through both loops of the first stitch on both squares.
- Loop the yarn over and bring the needle through both loops of the next stitch on both squares.
- Continue across the edge, pulling snug but not too tight, creating a tight “lacing” effect.
- Single Crochet Join:
- Place two squares together with wrong sides facing.
- Join yarn with a sl st in the corresponding corner ch-2 sps of both squares.
- Ch 1, then sc through both loops of the corresponding stitches on both squares across the edge.
- In the next corner ch-2 sps, work a sc to secure. This creates a slightly raised, visible seam which can be a nice design element.
Important for all joining: Ensure your joining tension is consistent with your square tension.
Project 1: The Elegant Square Motif Runner
A motif runner is a fantastic way to showcase your squares and add a touch of handmade elegance to your home.
Design Idea: A simple rectangle of joined squares. You can vary the colors to create stripes or a checkerboard effect.
Number of Squares: This depends on your desired runner length and width.
- Measure: Determine the length and width you want your runner to be.
- Calculate: Divide your desired length by the side length of one square. Do the same for the width.
- Example: If your square is 5 inches and you want a runner that’s 30 inches long by 10 inches wide:
- Length: 30 inches / 5 inches/square = 6 squares
- Width: 10 inches / 5 inches/square = 2 squares
- You would need 6 rows of 2 squares = 12 squares total.
- Example: If your square is 5 inches and you want a runner that’s 30 inches long by 10 inches wide:

Assembly Steps:
- Layout: Arrange your squares on a flat surface in your desired pattern to form the rectangle.
- Join Rows: Join the squares in each row together (e.g., join the 6 squares in the first row, then the 6 squares in the second row).
- Join Rows Together: Once all rows are assembled, join the completed rows to each other.
- Edging (Optional but Recommended): Once all squares are joined, you can add a simple border around the entire runner.
- Round 1: Join yarn to any corner ch-2 sp. Ch 1, work (sc, ch 2, sc) in corner sp. *Sc evenly across the side (work 1 sc per dc and 1 sc in each joining stitch/space). In next corner ch-2 sp, work (sc, ch 2, sc).* Repeat from * to * around. Sl st to first sc.
- Round 2: Ch 1, sc in each sc around, working (sc, ch 2, sc) in each corner ch-2 sp. Sl st to first sc.
- Repeat Round 2 for a thicker border, or try a different stitch like hdc or dc.
Project 2: The Chic Square Motif Blouse
Creating a garment from motifs requires a bit more planning but is incredibly rewarding. This pattern provides a basic framework.
Design Idea: A relaxed-fit, boxy blouse. You can adjust the fit by adding more squares for a looser fit or removing squares for a more tailored look.
Sizing Guidance (Crucial!):
- Measure the Wearer:
- Bust/Chest Circumference: Measure around the fullest part.
- Desired Length: From shoulder to desired hem.
- Armhole Depth: From shoulder seam to armpit (you’ll want this to be comfortable).
- Sleeve Length (if adding sleeves): From shoulder to desired cuff.
- Create a Schematic: On graph paper or a digital drawing tool, sketch out the front, back, and (optional) sleeves of the blouse. Use your motif’s dimensions (e.g., 5 inches per square) to determine how many squares you’ll need for each section.
- Body Width: Aim for the bust/chest circumference divided by 2 (for front and back panels). Then divide that by your square width. Example: 36-inch bust -> 18 inches per panel. If squares are 5 inches, you’ll need 3-4 squares across (3×5=15 inches, 4×5=20 inches). Choose based on desired ease.
- Body Length: Divide desired length by your square height.
- Armholes: You’ll typically leave some squares unjoined at the top sides for armholes.
- Neckline: This will be shaped by omitting central squares at the top of the front and back panels.
General Assembly Steps:
- Front Panel:
- Arrange squares according to your schematic. Join them to form the front panel. Leave squares unjoined for the armholes on the sides and shape the neckline by omitting or joining partial squares at the top.
- Back Panel:
- Repeat for the back panel. The back neckline is usually shallower than the front.
- Shoulder Seams:
- Place front and back panels right sides facing (or wrong sides facing for visible seam). Join the top edges of the shoulders, leaving a gap for the neck opening.
- Side Seams:
- Join the side edges of the front and back panels, leaving the armholes open.
- Sleeves (Optional):
- If adding sleeves, create a rectangular or tapered panel of squares for each sleeve. Join the long edges to form a tube.
- Sew the sleeve tube into the armhole opening.
- Finishing Edges:
- Neckline: Work a few rounds of sc or hdc around the entire neckline opening for a neat finish. You can decrease stitches in corners to help it lay flat.
- Armholes: Work a few rounds of sc or hdc around the armhole openings.
- Bottom Hem: Work a few rounds of sc or hdc around the bottom hem of the blouse.

Project 3: The Flowing Square Motif Tunic
A tunic is essentially a longer blouse, offering more coverage and a relaxed, bohemian style.
Design Idea: Similar to the blouse, but extending further down the body. This often requires more squares for the length.
Sizing Guidance:
- Follow the same measuring and schematic creation steps as for the blouse.
- Length: The main difference will be the number of squares used for the length of the front and back panels. Aim for the desired length (e.g., mid-thigh, knee-length).
Assembly Steps:
- The assembly process is identical to the blouse, just with more squares for the added length.
- Ensure the fit around the bust and shoulders is comfortable, and then simply add more rows of squares to achieve your desired tunic length.
- Consider adding side slits at the bottom hem for ease of movement and style. Simply stop joining squares a few inches before the bottom of the garment.
- Finish all edges (neckline, armholes, bottom hem, and side slits if applicable) with rounds of sc or hdc.
General Tips for Motif Projects:
- Blocking: After you’ve crocheted all your squares but before joining, block them! Wet blocking is ideal for acrylic and natural fibers. This will ensure uniform size and shape, making joining much easier and giving your finished project a polished look.
- Weave in Ends as You Go: Seriously, save yourself the headache later! Weave in ends after each square or every few rounds.
- Yarn Choice: Cotton or cotton blends are excellent for garments as they breathe well. Acrylic is budget-friendly and durable. Wool can be cozy but might require more careful blocking and care.
- Color Play: Don’t be afraid to experiment with different color combinations for your squares. You can make each square unique or follow a repeating color scheme.
- Care: Always check your yarn label for specific care instructions. Handwashing and laying flat to dry are generally recommended for crochet garments.
With these detailed instructions and a little creativity, you’re well on your way to crocheting stunning square motif projects! Enjoy the process of watching your fabric grow, stitch by stitch. Happy crocheting!