 by
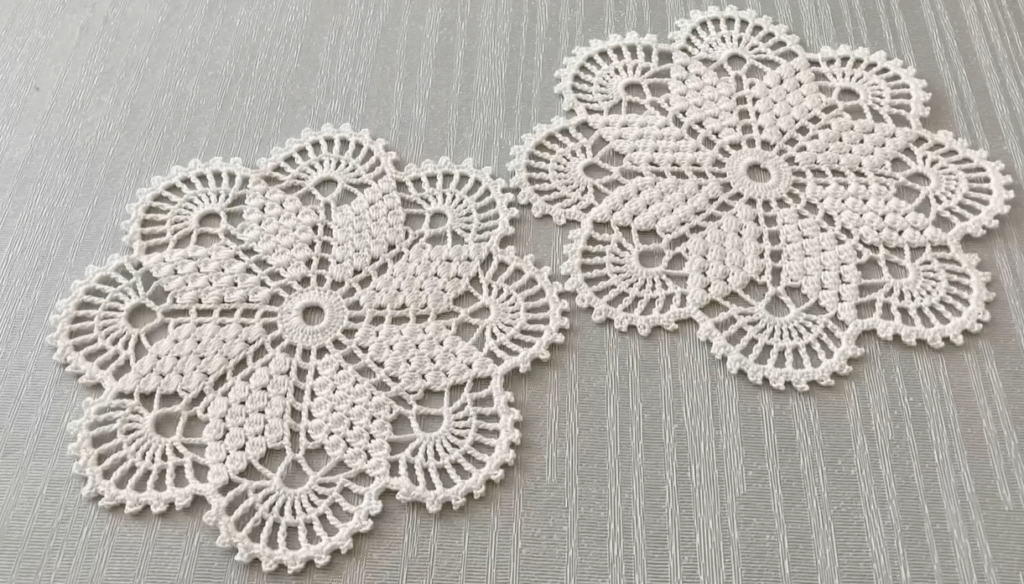
by This motif is ideal for creating:
- Elegant Tablecloths and Runners: Gather several motifs for a custom-sized masterpiece.
- Luxurious Bedspreads: Combine many for a truly grand and unique heirloom.
- Decorative Throws: A smaller number of motifs can make a beautiful accent piece.
- Pillow Covers: Two motifs joined back-to-back make a charming pillow.
Skill Level: Intermediate (familiarity with basic stitches, cluster stitches, and working into spaces/chains is helpful)
Materials:
- Yarn: For a delicate, classic look, choose a Size 10 Crochet Thread (often labeled “bedspread weight” or “lace weight”) in White, Ecru, or a soft pastel.
- Alternatively: For a quicker, slightly larger, but still elegant motif, use a DK (Light Worsted) weight yarn in cotton or a cotton blend. Adjust hook size accordingly.
- Crochet Hook:
- For Size 10 Thread: Steel hook size 7 (1.65 mm) or 8 (1.50 mm)
- For DK Weight Yarn: Hook size E/4 (3.5 mm) or F/5 (3.75 mm)
- Always check your gauge!
- Yarn needle for weaving in ends
- Scissors
- Stitch markers (optional, but helpful for corners)
Gauge (Crucial for Joining!):
Using Size 10 Thread and a 1.65 mm hook, your finished motif (after Round 8) should measure approximately 4.5 – 5 inches square. Adjust your hook size to achieve this. Consistent gauge ensures your finished spread lays flat and beautifully.
Abbreviations (US Crochet Terms):
- ch: chain
- sl st: slip stitch
- sc: single crochet
- hdc: half double crochet
- dc: double crochet
- tr: treble crochet
- dtr: double treble crochet (YO 3 times, insert hook, YO, pull up loop, [YO, pull through 2 loops] 4 times)
- tr-cl: treble cluster (YO twice, insert hook, YO, pull up loop, [YO, pull through 2 loops] twice, leaving last loop on hook; rep 2 more times in same st/sp; YO, pull through all 4 loops on hook)
- sp: space
- st(s): stitch(es)
- beg: beginning
- rep: repeat
- *…*: Repeat instructions between asterisks
- (…) : Work instructions within parentheses into the same stitch or space
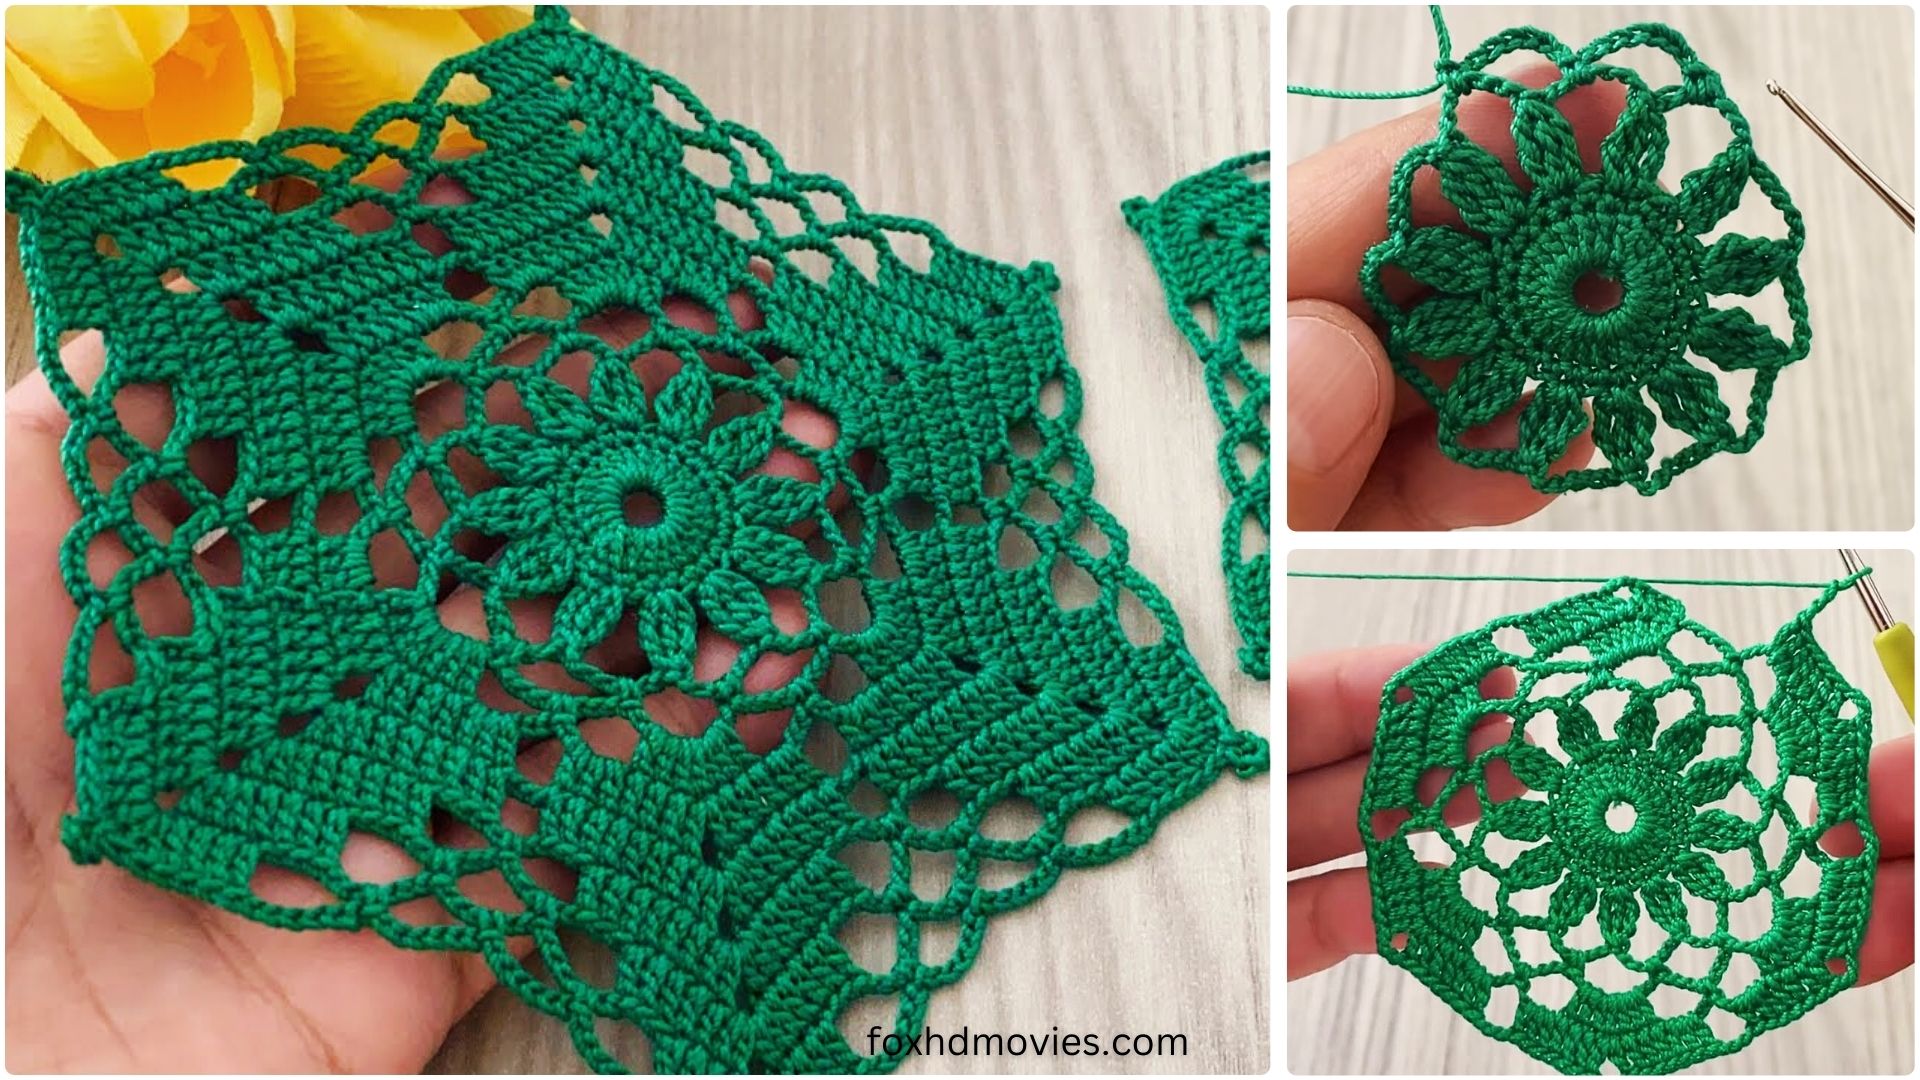
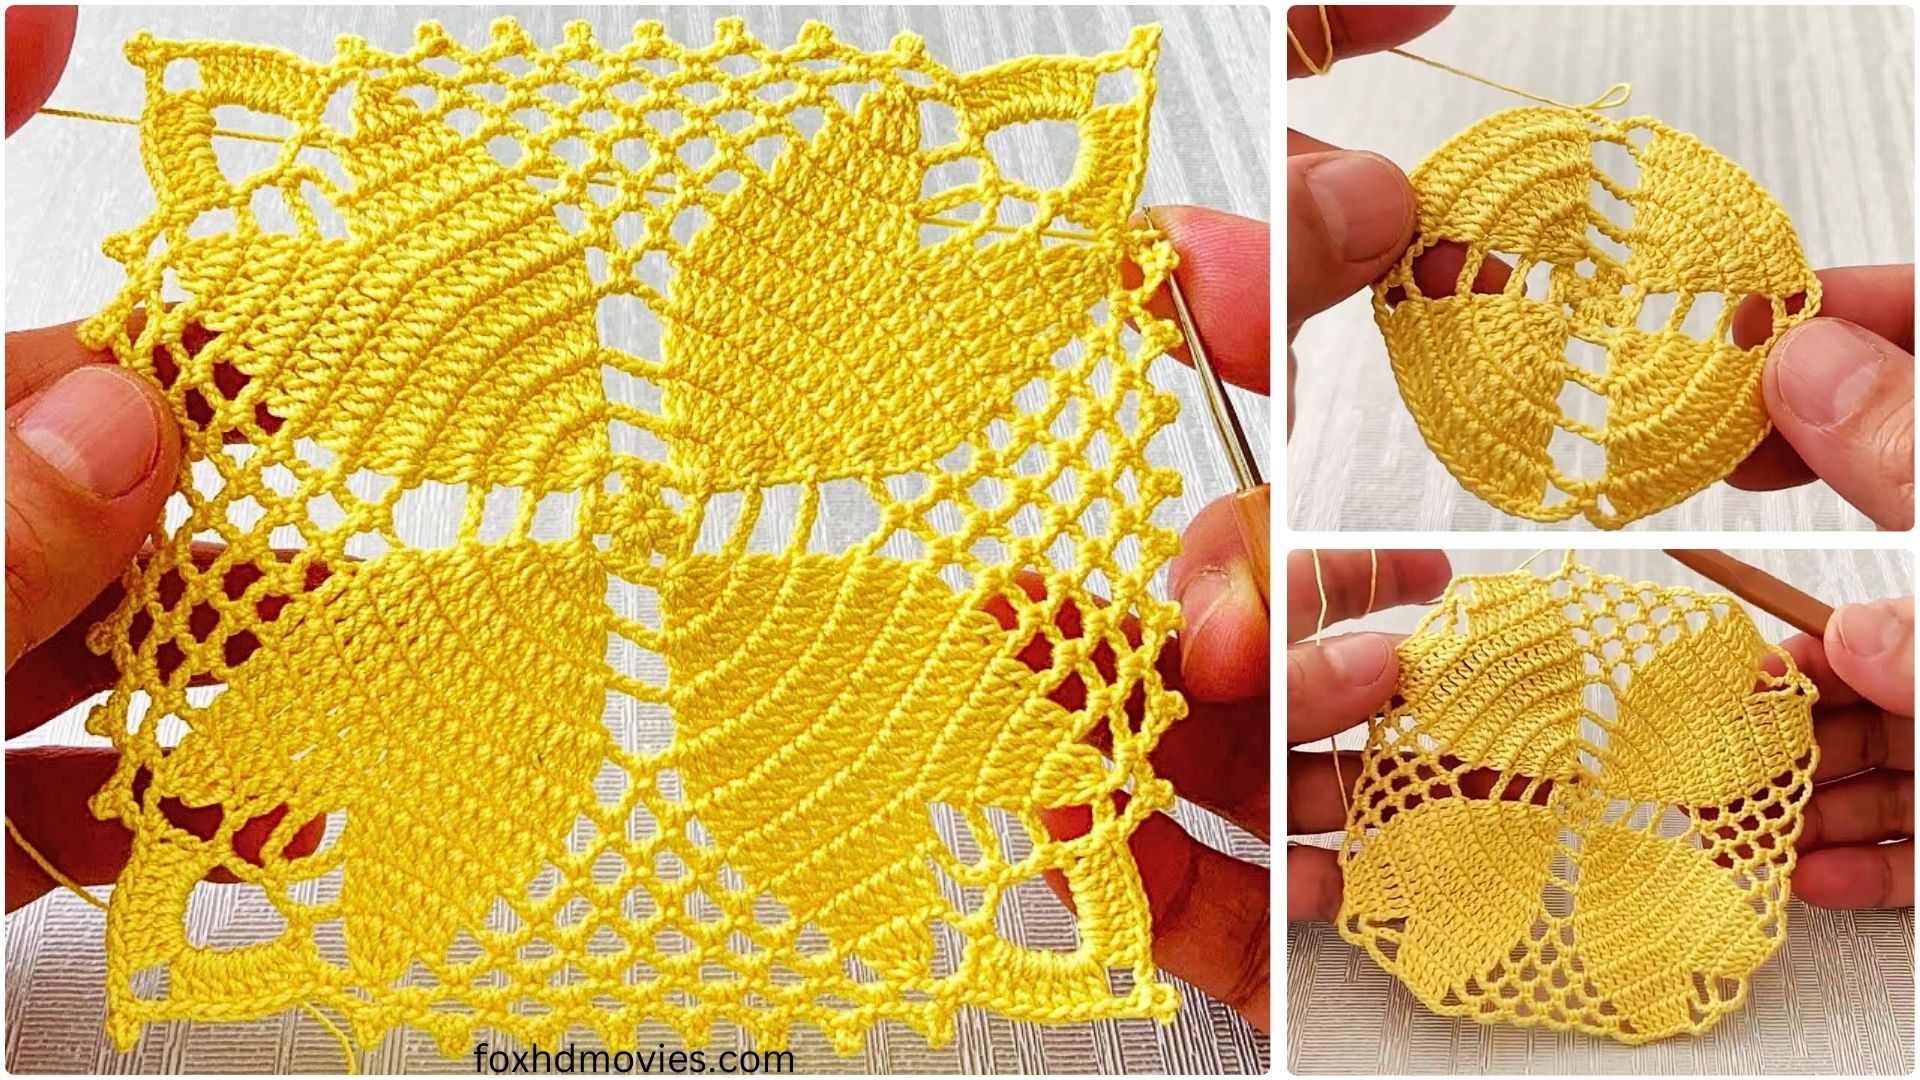
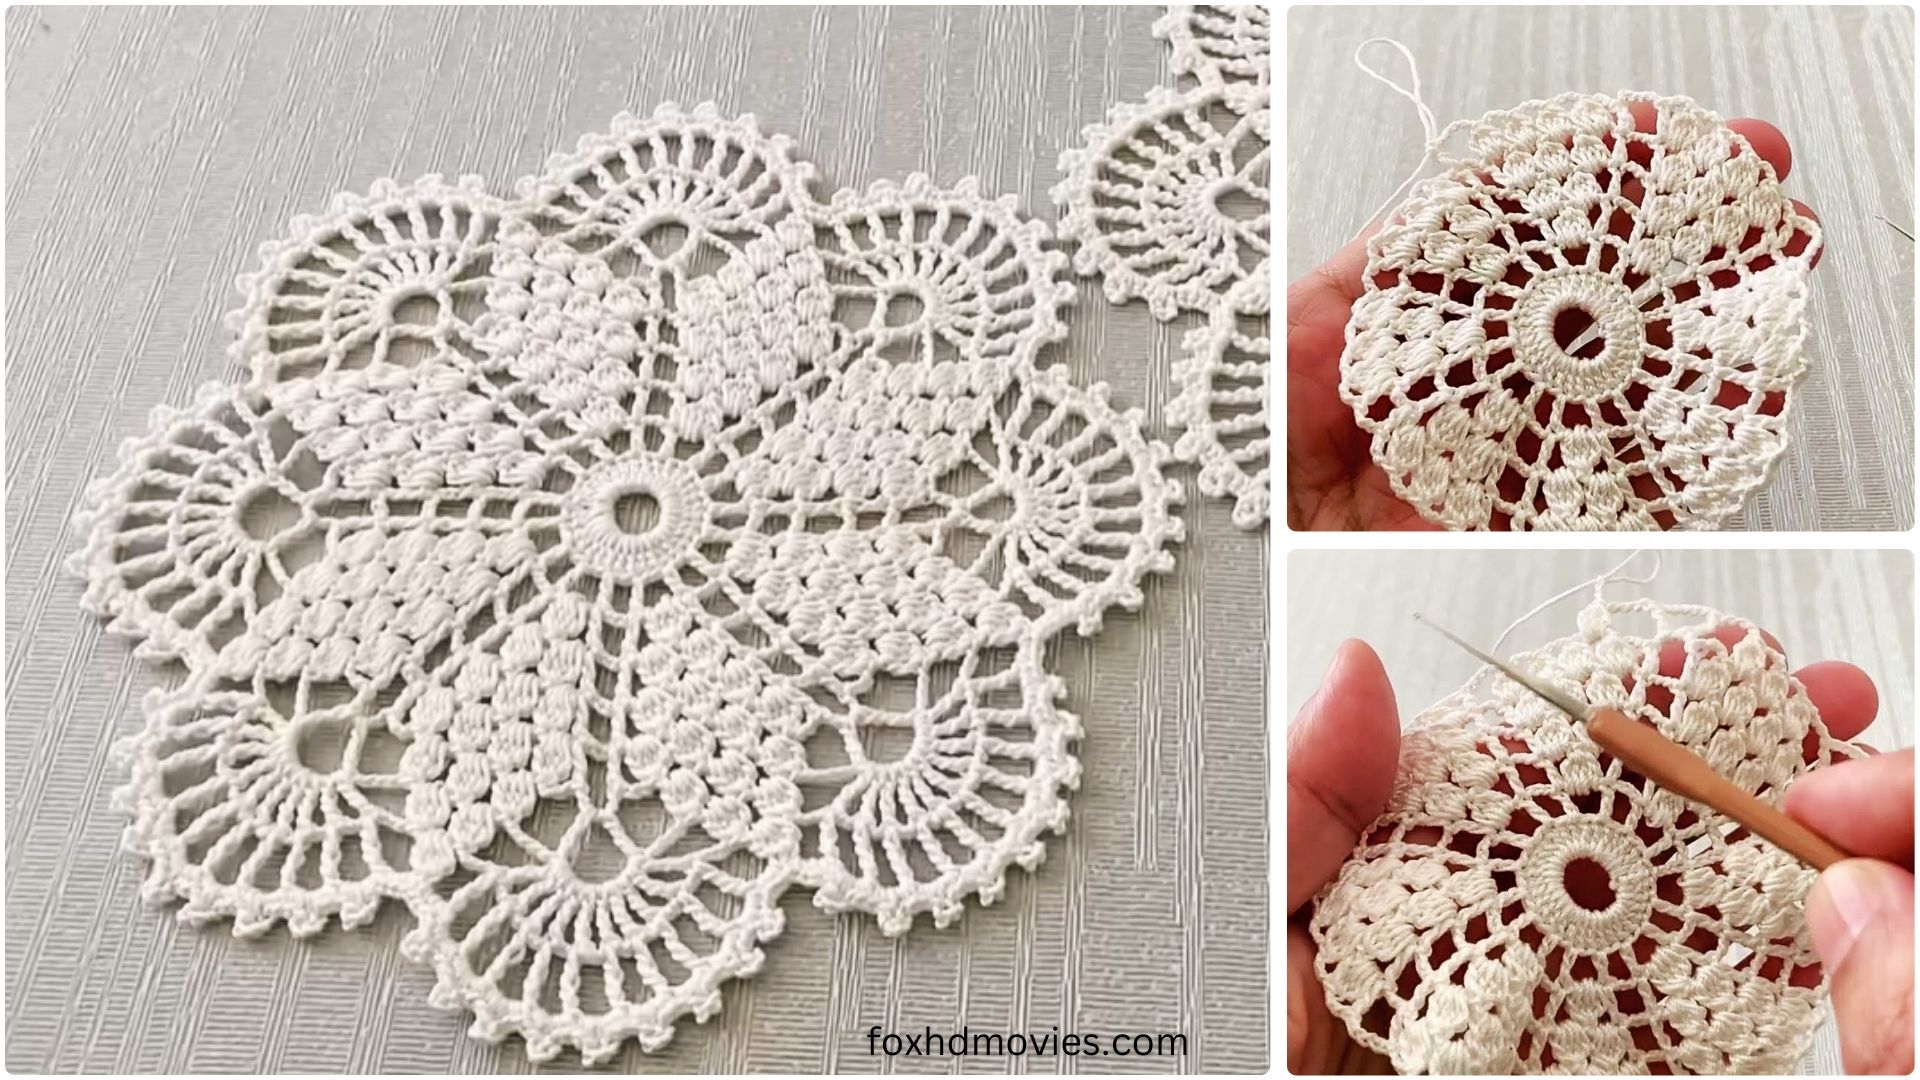
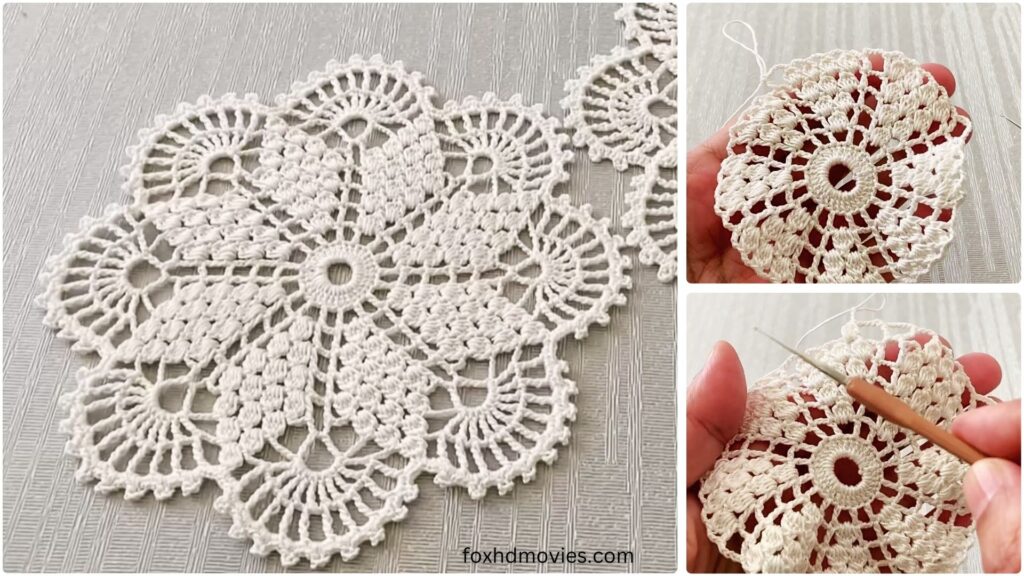
The “Heirloom Bloom” Motif Pattern
Start with a Magic Ring OR Ch 4, sl st to first ch to form a ring.
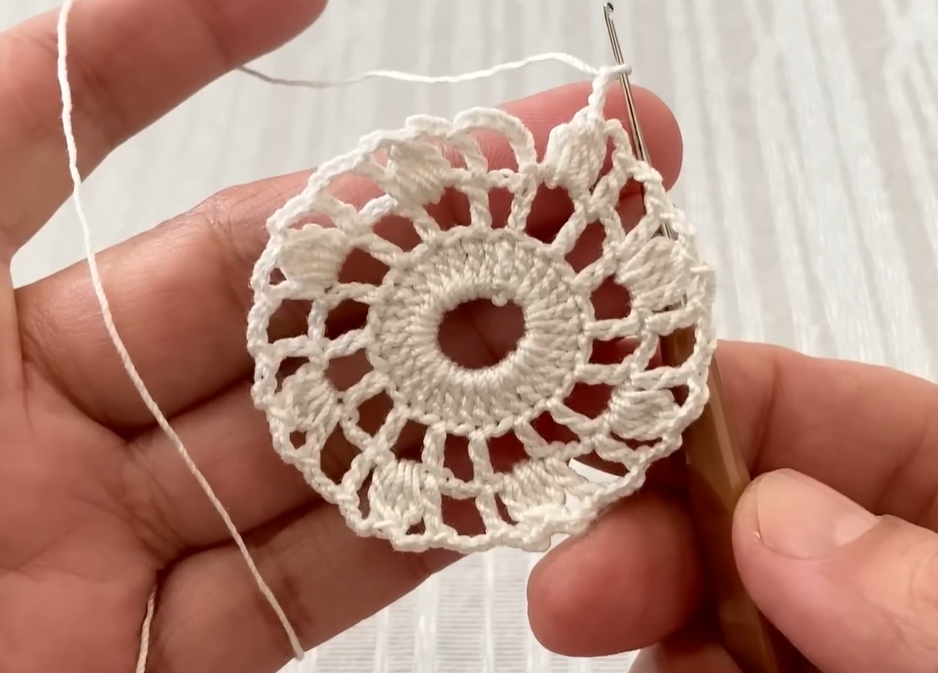
Round 1 (Flower Center): Ch 3 (counts as first dc), 11 dc into the ring. Sl st to the top of beg ch-3 to join. (12 dc)
Round 2 (Petals – puff/cluster effect): Ch 1. Sc in the same st. *Ch 3, skip 1 dc, sc in next dc.* Repeat from * to * 5 more times. Ch 3. Sl st to first sc to join. (6 sc, 6 ch-3 loops)
Round 3 (Building Petals): Sl st into first ch-3 loop. Ch 3 (counts as first dc). Work (2 dc, ch 3, 3 dc) into the same ch-3 loop. (This forms your first “petal” corner). *Ch 1. Work (3 dc, ch 3, 3 dc) into the next ch-3 loop.* Repeat from * to * 4 more times. Ch 1. Sl st to the top of beg ch-3 to join. (6 petal groups with ch-3 sps, 6 ch-1 sps between)
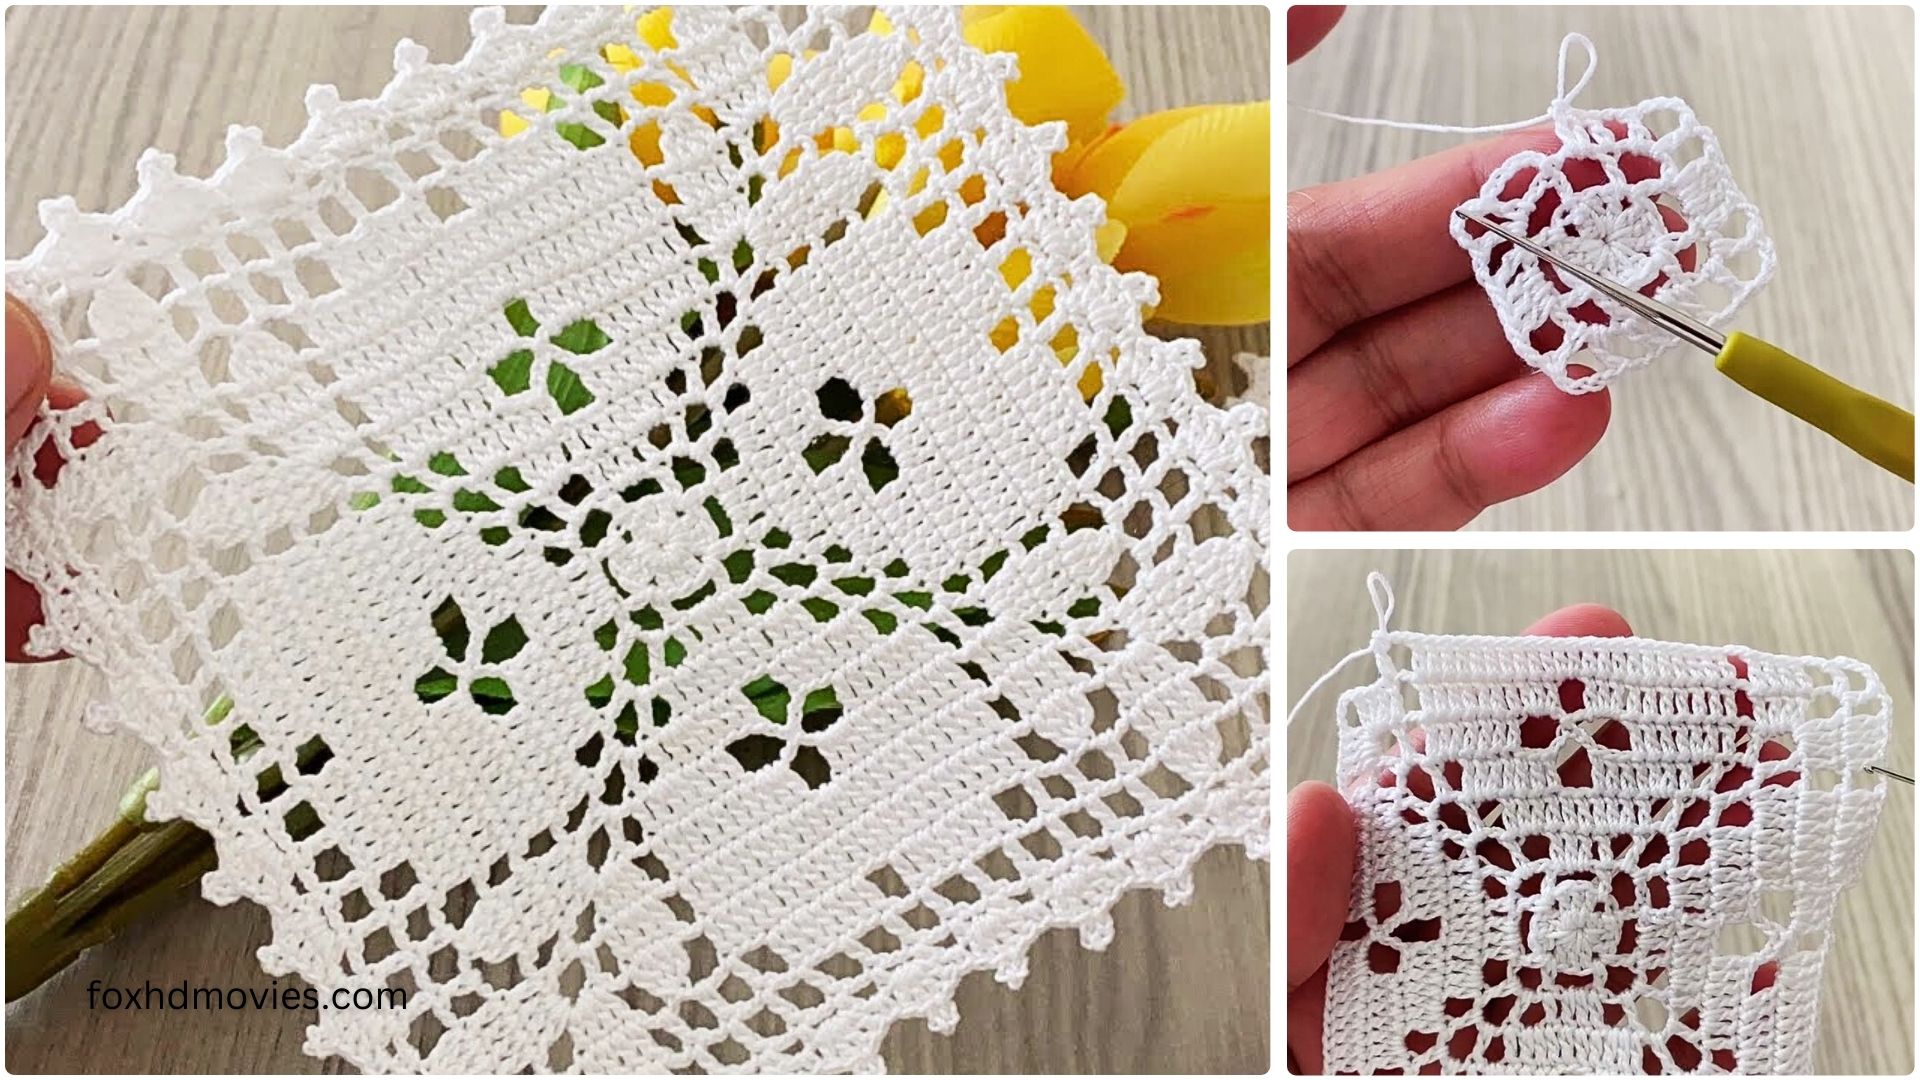
Round 4 (Square Foundation): Sl st into the next 2 dc and into the ch-3 sp (corner). Ch 5 (counts as 1 dc + ch 2). (3 dc, ch 2, 3 dc) in the same ch-3 sp. This is your first corner. *Ch 1. Skip 3 dc, 1 dc in next ch-1 sp. Ch 1. Skip 3 dc, (3 dc, ch 2, 3 dc) in next ch-3 sp.* Repeat from * to * 4 more times. Ch 1. Skip 3 dc, 1 dc in next ch-1 sp. Ch 1. Sl st to the 3rd ch of beg ch-5 to join. (4 corners, 4 dc “side” stitches, 8 ch-1 sps)
Round 5 (Lace Detail 1): Sl st into next ch-2 sp. Ch 3 (counts as first dc). (2 dc, ch 2, 3 dc) in the same ch-2 sp (corner). *Ch 1. 1 dc in next ch-1 sp. Ch 1. Skip dc. 1 dc in next ch-1 sp. Ch 1. (3 dc, ch 2, 3 dc) in next ch-2 sp (corner).* Repeat from * to * 3 more times. Ch 1. 1 dc in next ch-1 sp. Ch 1. Skip dc. 1 dc in next ch-1 sp. Ch 1. Sl st to top of beg ch-3 to join. (4 corners, 8 dc “side” stitches, 12 ch-1 sps)
Round 6 (Lace Detail 2): Sl st into next 2 dc and into ch-2 sp. Ch 3 (counts as first dc). (2 dc, ch 2, 3 dc) in same ch-2 sp (corner). *Ch 1. 1 dc in next ch-1 sp. Ch 1. 1 dc in next ch-1 sp. Ch 1. 1 dc in next ch-1 sp. Ch 1. (3 dc, ch 2, 3 dc) in next ch-2 sp (corner).* Repeat from * to * 3 more times. Ch 1. 1 dc in next ch-1 sp. Ch 1. 1 dc in next ch-1 sp. Ch 1. 1 dc in next ch-1 sp. Ch 1. Sl st to top of beg ch-3 to join. (4 corners, 12 dc “side” stitches, 16 ch-1 sps)
Round 7 (Final Shaping – Treble Clusters): Sl st into next 2 dc and into ch-2 sp. Ch 4 (counts as first tr). (2 tr, ch 3, 3 tr) in same ch-2 sp (corner). *Ch 2. [tr-cl in next ch-1 sp, ch 2] repeat 3 times across the side. (3 tr, ch 3, 3 tr) in next ch-2 sp (corner).* Repeat from * to * 3 more times. Ch 2. [tr-cl in next ch-1 sp, ch 2] repeat 3 times. Sl st to top of beg ch-4 to join. (4 corners, 12 tr-cl, 20 ch-2 sps)
Round 8 (Outer Edge – Joining Round): Sl st into next 2 tr and into ch-3 sp. Ch 3 (counts as first dc). (2 dc, ch 3, 3 dc) in same ch-3 sp (corner). *Ch 1. [3 dc in next ch-2 sp, ch 1] repeat 3 times across the side. (3 dc, ch 3, 3 dc) in next ch-3 sp (corner).* Repeat from * to * 3 more times. Ch 1. [3 dc in next ch-2 sp, ch 1] repeat 3 times. Sl st to top of beg ch-3 to join.
Fasten off and weave in all ends securely. Block your motif gently to enhance its shape and open up the lacework.

Joining Your Motifs (The Grand Assembly!)
There are several popular methods for joining crochet motifs, each creating a slightly different effect. For an intricate piece like a bedspread or tablecloth, a flat, almost invisible join is often preferred.
- Slip Stitch Join (Invisible/Flat):
- Place two finished motifs right sides facing each other.
- Working through the back loop of the stitches on one motif and the front loop of the stitches on the other, slip stitch along the edge. This creates a very flat seam.
- For the corners, align the ch-3 spaces. You can sc or sl st into the chain spaces to secure them.
- Single Crochet Join (Slightly Raised/Textured):
- Place two motifs with wrong sides facing each other (or right sides if you want the seam on the right side).
- Single crochet through both loops of the corresponding stitches on both motifs. This creates a more defined ridge.
- Join-As-You-Go (JAYG):
- This is an advanced technique but highly recommended for large projects as it eliminates much of the tedious seaming at the end.
- Instead of fastening off after Round 8, you’ll join the current motif to already completed motifs during this final round.
- Basic JAYG for this motif: When you reach a corner where you’ll join, work (3 dc, ch 1, sl st into corresponding ch-3 corner of adjacent motif, ch 1, 3 dc) instead of (3 dc, ch 3, 3 dc). Along the sides, replace some ch-1 spaces with sl sts into the corresponding ch-1 sps of the adjacent motif. Look up a specific JAYG tutorial for granny squares or motifs for a detailed visual guide.

Blocking is Key!
After you’ve crocheted each motif, and especially after you’ve joined a section, gently block your work. This will:
- Even out your stitches.
- Square up your motifs perfectly.
- Open up the beautiful lacework.
- Give your finished piece a professional, polished look.
To Block:
- Dampen your motif (or section) thoroughly with water.
- Gently shape it to its intended dimensions on a blocking mat or a flat, clean surface. Use rust-proof pins to hold it in place.
- Allow it to dry completely.
Video Tutorial
Project Considerations & Tips:
- Yarn Choice: Cotton thread or yarn is highly recommended for bedspreads and tablecloths as it drapes beautifully, is durable, and washes well.
- Counting: Accurate stitch counting is crucial, especially in the early rounds and around the corners. Use stitch markers if needed!
- Planning: Draw out a simple diagram of how you want to arrange your motifs for your specific project (e.g., a simple grid for a bedspread).
- Border: Once all your motifs are joined, consider adding a beautiful, continuous border around the entire piece. Simple rows of dc/sc, or a more elaborate shell or picot border, can truly finish the project.
- Heirloom Quality: This project takes time and dedication. Take breaks, enjoy the process, and know that you are creating a cherished heirloom that will be admired for generations!