by
by 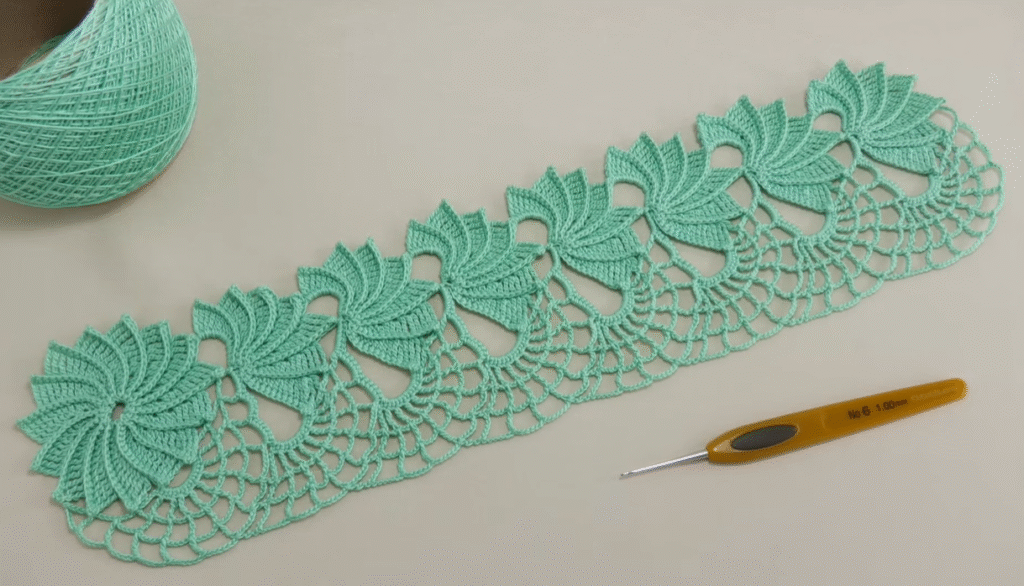
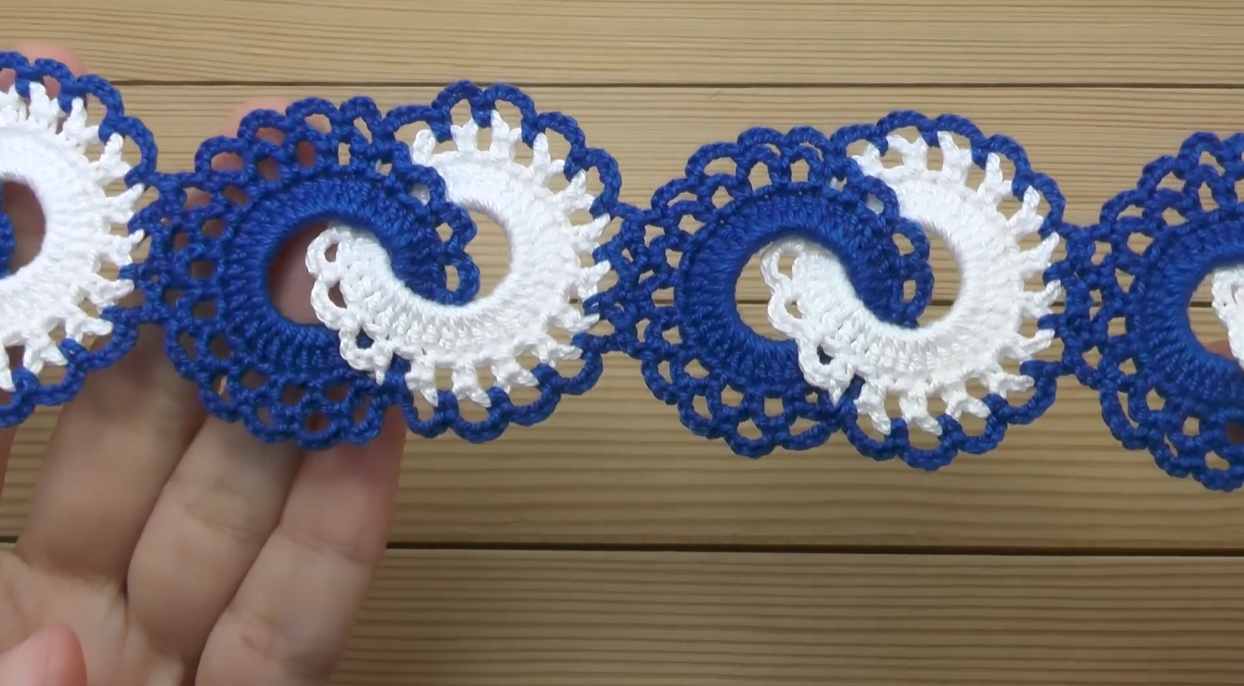
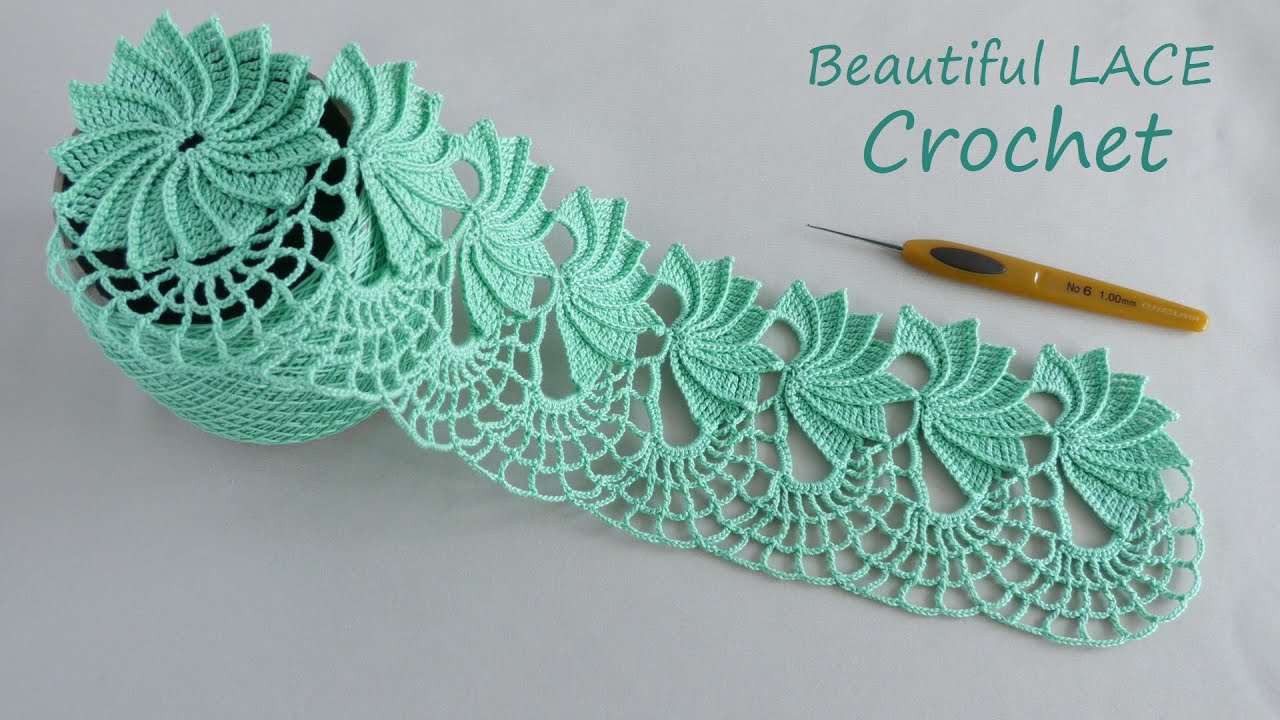
Hello, creative crocheters! Feast your eyes on this absolutely exquisite piece of crochet lace. Our inspiration photo features a beautiful, continuous lace ribbon in a refreshing mint green, perfect for edging, embellishment, or even creating unique wearables. This type of lace often incorporates elements of Irish crochet or tape lace, combining individual motifs with delicate connecting sections.
The design boasts a captivating spiral-like motif that transitions into a more open, fanned lace, creating a dynamic and elegant strip. While it looks intricate, it’s built from repeating sections, making it achievable for those with some intermediate crochet skills.
What You’ll Need:
- Yarn: Fine weight (fingering or lace weight) cotton yarn is ideal for achieving the crisp stitch definition and delicate drape of this lace. The mint green in the photo is lovely, but choose any color that inspires you!
- Crochet Hook: A small hook size (e.g., 0.75 mm, 1.00 mm, or 1.25 mm) will be necessary for fine yarn to create a dense, refined fabric. The hook in the picture is 1.00mm, which is a good starting point.
- Scissors
- Yarn Needle (for weaving in ends)
Abbreviations (US Terms):
- ch: chain
- sl st: slip stitch
- sc: single crochet
- hdc: half double crochet
- dc: double crochet
- tr: treble crochet
- dtr: double treble crochet
- sk: skip
- sp: space
- rep: repeat
- picot: ch 3, sl st into 3rd ch from hook
- beg: beginning
Let’s Get Started! (Pattern for One Repeat Section)
This lace is worked in repeats, creating a continuous strip. The key is in understanding the two main elements: the Spiral Motif and the Fan Lace Edge. We’ll work them concurrently.

Important Note: This pattern is a close interpretation of the visual details in the image. As with all crochet, tension can vary, so adjust hook size or stitch count as needed. Precision is key for lace!
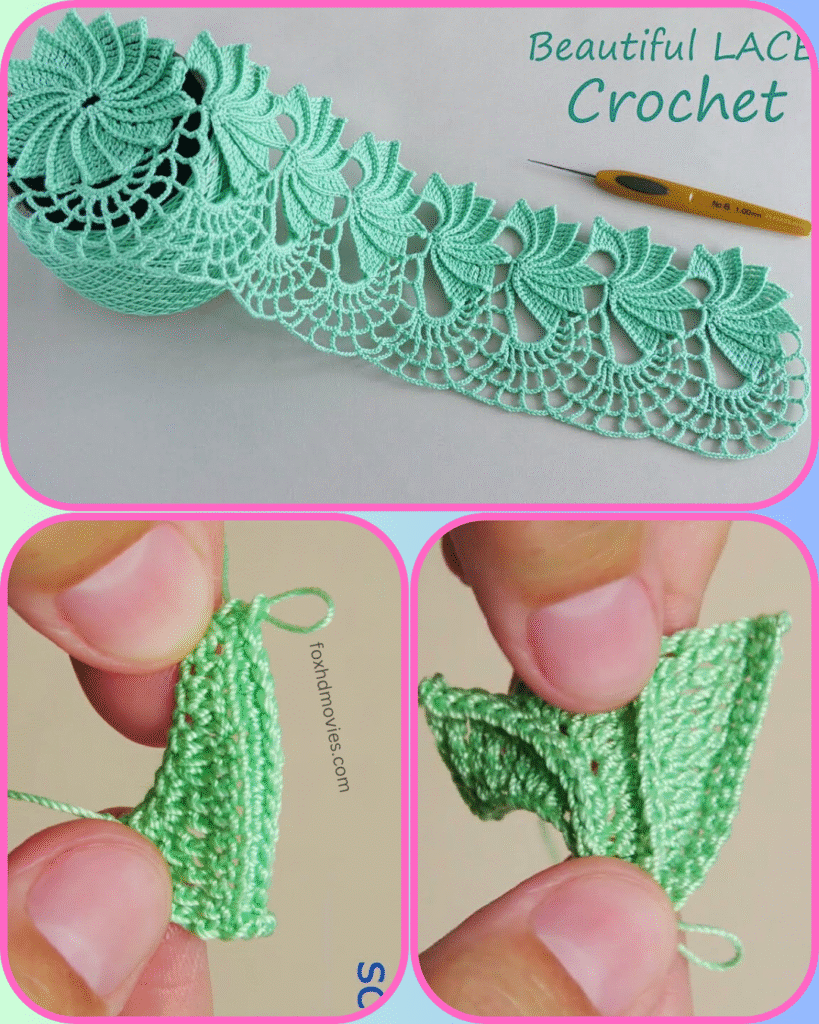
Spiral Motif (Top Section)
The spiral motif is created by working stitches into a central ring and then building up layers, often with slip stitches or single crochet into previous rounds to create the compact, swirled texture.
Start with a Central Ring:
- Round 1: Make a magic ring. Ch 1 (does not count as st). Sc into the ring until it’s very firm and dense (approx. 12-16 sc, depending on your yarn/tension). Join with sl st to first sc.
- Round 2: Ch 1, sc in each sc around. Join with sl st.
- Round 3: (This round might start building the spiral effect by working into back loops or creating raised ridges, often using sl sts or sc for texture.)
- Ch 1. Sc into the back loop only of each sc around. Join with sl st.
- (Continue for a few more rounds, always working into specific parts of previous stitches or using sl sts to create the tightly coiled spiral. It often involves a combination of sc and sl st to build height in a spiral.)

Fan Lace Edge (Bottom Section)
This section is formed by chains and groups of taller stitches (dc, tr) that create the open, fanned texture.
Let’s combine them into a repeating “block” based on the image. You’ll be working back and forth, connecting the Fan Lace to the Spiral Motif.
Repeating Section Pattern (Approximate):
(Start by having one Spiral Motif already completed, as described above. You will join the Fan Lace to its edge.)
Step 1: Establishing the first “petal” of the fan from the Spiral Motif
- Attach yarn to an edge point of your completed Spiral Motif (perhaps a sl st or sc from its final round). Ch 3 (counts as 1st dc).
- Work a series of dc/tr stitches into the spiral’s edge, forming the first curve. (e.g., 2 dc, ch 2, 2 dc – or similar group to create a small “petal” shape).
- Ch a small number (e.g., ch 5) for the connecting arch.
Step 2: Creating the Lower Fan Arches
- Sc into the chain space (or stitch) from the previous row of your lace (if continuing a strip) or make a new foundation chain (if starting the strip).
- Ch 5, sk 3-4 stitches/chain space, sc into next stitch/chain space. Repeat this for 2-3 arches. These form the base of your lacy fans.
Step 3: Building the First Fan
- Into the center ch-5 loop from Step 2, work: (3 dc, picot, 3 dc). (This forms the first small fan).
- Ch 3, sc into the next ch-5 loop.
- Ch 3.
Step 4: Connecting back to the Spiral Motif / Preparing for Next Spiral
- Make a series of taller stitches (e.g., 3-4 tr or dtr) into the next ch-5 loop. This forms the larger “petal” that will eventually curve up and connect to the next spiral motif.
- Ch 5-7 (this will be the foundation for the next spiral motif).
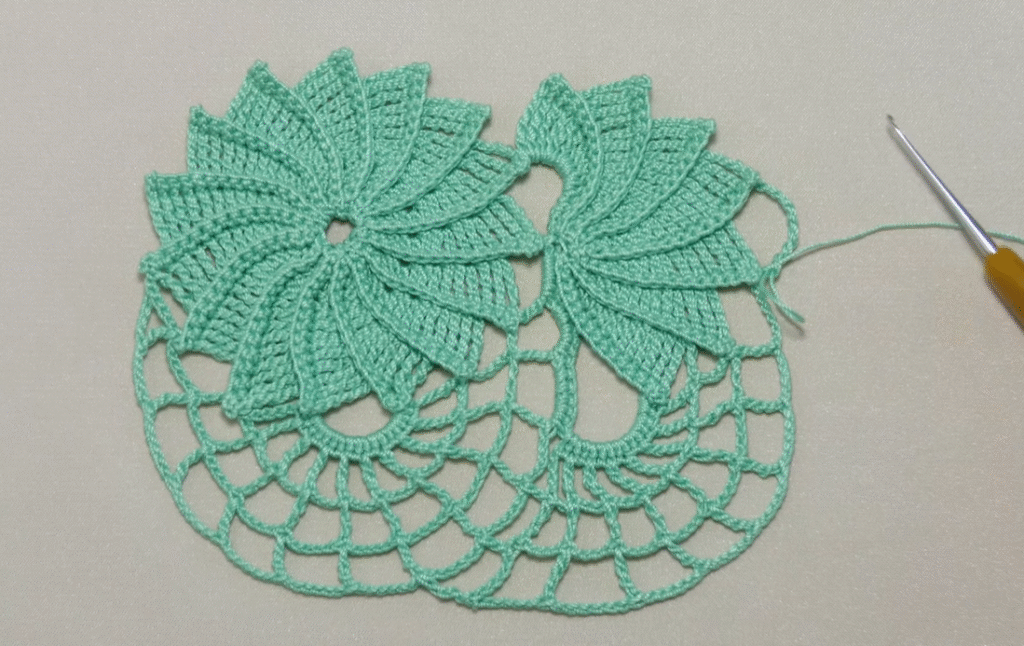
Step 5: Beginning the Next Spiral Motif
- Make a magic ring (or ch 4 and sl st to form a ring). Work Round 1 and 2 of the Spiral Motif into this ring.
- Attach the new Spiral Motif to the previous work: As you work Round 3 (or an outer round) of the new spiral, you will sl st or sc into the “petal” from Step 4, creating the connection. This is the “join as you go” method.
Continue Repeating:
You will essentially alternate between:
- Finishing a Spiral Motif.
- Working the Fan Lace edging from it.
- Creating a foundation for the next Spiral.
- Starting the new Spiral and joining it to the previous Fan Lace section.
The “Spiked” Edge: The lowest edge of the lace features small picots. These are typically added on the final pass along that edge, usually with a combination of sc, ch, and picot stitches to create the delicate points.
Finishing:
- Fasten off, leaving a tail long enough to weave in securely.
- Weave in all ends neatly.
- Blocking is ESSENTIAL for lace projects like this! Gently wet your lace (you can use spray starch or a light stiffener if you want it very crisp), then carefully pin it out to its desired shape on a blocking mat or soft surface. Stretch the lace to open up the pattern and define all the points and curves. Let it air dry completely.
Video tutorial
Ideas for Your Lace Ribbon:
- Edging: Perfect for garments (sleeves, hemlines), scarves, blankets, or linens.
- Bookmarks: A short strip would make an elegant bookmark.
- Jewelry: Create unique chokers, bracelets, or earrings.
- Home Decor: Use it as a decorative trim on curtains, cushions, or table runners.
- Fashion Accessories: Embellish hats, bags, or even shoes!
This pattern offers a challenge but the results are incredibly rewarding. Take your time, enjoy the process, and watch this beautiful lace come to life! Happy crocheting! Don’t forget to share your creations using #BeautifulLaceCrochet – I’d love to see them!