 by
by 
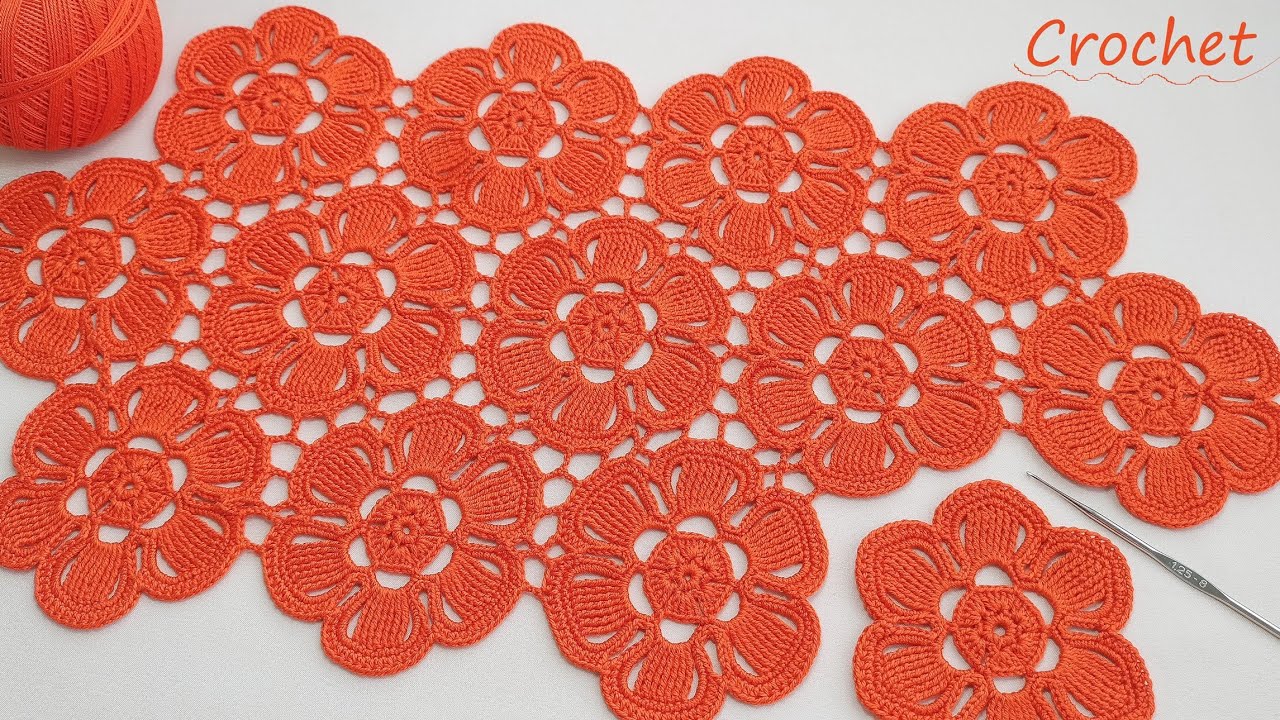
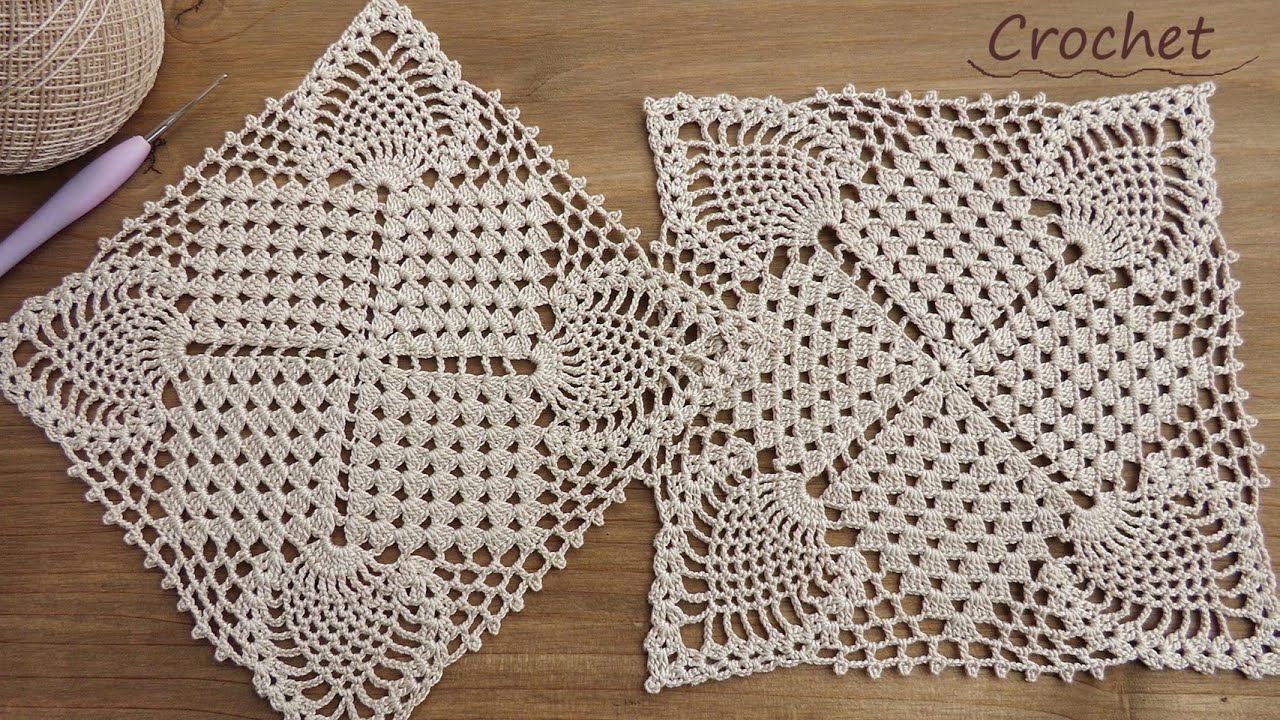
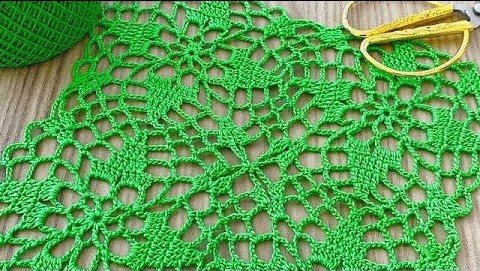
Imagine a delicate pattern unfurling across your dining table or cascading over your bed – a testament to your crochet artistry. This “Elegance Bloom” motif is designed to be just that: perfect. It’s a versatile square that combines open lacework with textured stitches, creating a stunning visual appeal and a lovely drape, ideal for heirloom-quality table runners, placemats, or full bedspreads.
We’ll focus on achieving crisp lines, balanced design, and a pattern that’s enjoyable to repeat.
Skill Level: Intermediate (familiarity with basic stitches and reading patterns is helpful)
Materials:
- Yarn: For a bedspread or fine table runner, Sport weight (2) or Light Worsted (3) cotton or cotton blend yarn is recommended for drape and washability. For a more substantial, quicker project, a Worsted weight (4) can be used, but the motif will be larger.
- Color Recommendation: A solid, elegant color like white, off-white, ecru, or a soft pastel will best highlight the stitch definition.
- Crochet Hook:
- For Sport/Light Worsted: Size D/3 (3.25 mm) or E/4 (3.5 mm)
- For Worsted: Size G/6 (4.0 mm) or H/8 (5.0 mm)
- Always use the hook size that achieves the best drape for your chosen yarn and desired gauge.
- Yarn Needle: For weaving in ends.
- Scissors
- Stitch Markers (optional but helpful): To mark corners or beginning stitches.
Gauge (Crucial for Joining!):
It is critical to check your gauge, especially if you plan to join multiple motifs. After completing Round 5, your motif should measure approximately 4.5 inches (for Sport/Light Worsted yarn with recommended hook). Adjust your hook size as needed to match this gauge. If your motif is too large, go down a hook size; if too small, go up.
Abbreviations (US Crochet Terms):
- ch: chain
- sl st: slip stitch
- sc: single crochet
- hdc: half double crochet
- dc: double crochet
- tr: treble crochet (yarn over twice, insert hook, pull up loop, [yarn over, pull through 2 loops] 3 times)
- dtr: double treble crochet (yarn over three times, insert hook, pull up loop, [yarn over, pull through 2 loops] 4 times)
- sk: skip
- sp: space
- st(s): stitch(es)
- beg: beginning
- rep: repeat
- *…*: Repeat instructions between asterisks.
- […] : Work instructions in brackets into the same stitch or space.

The “Elegance Bloom” Motif Pattern
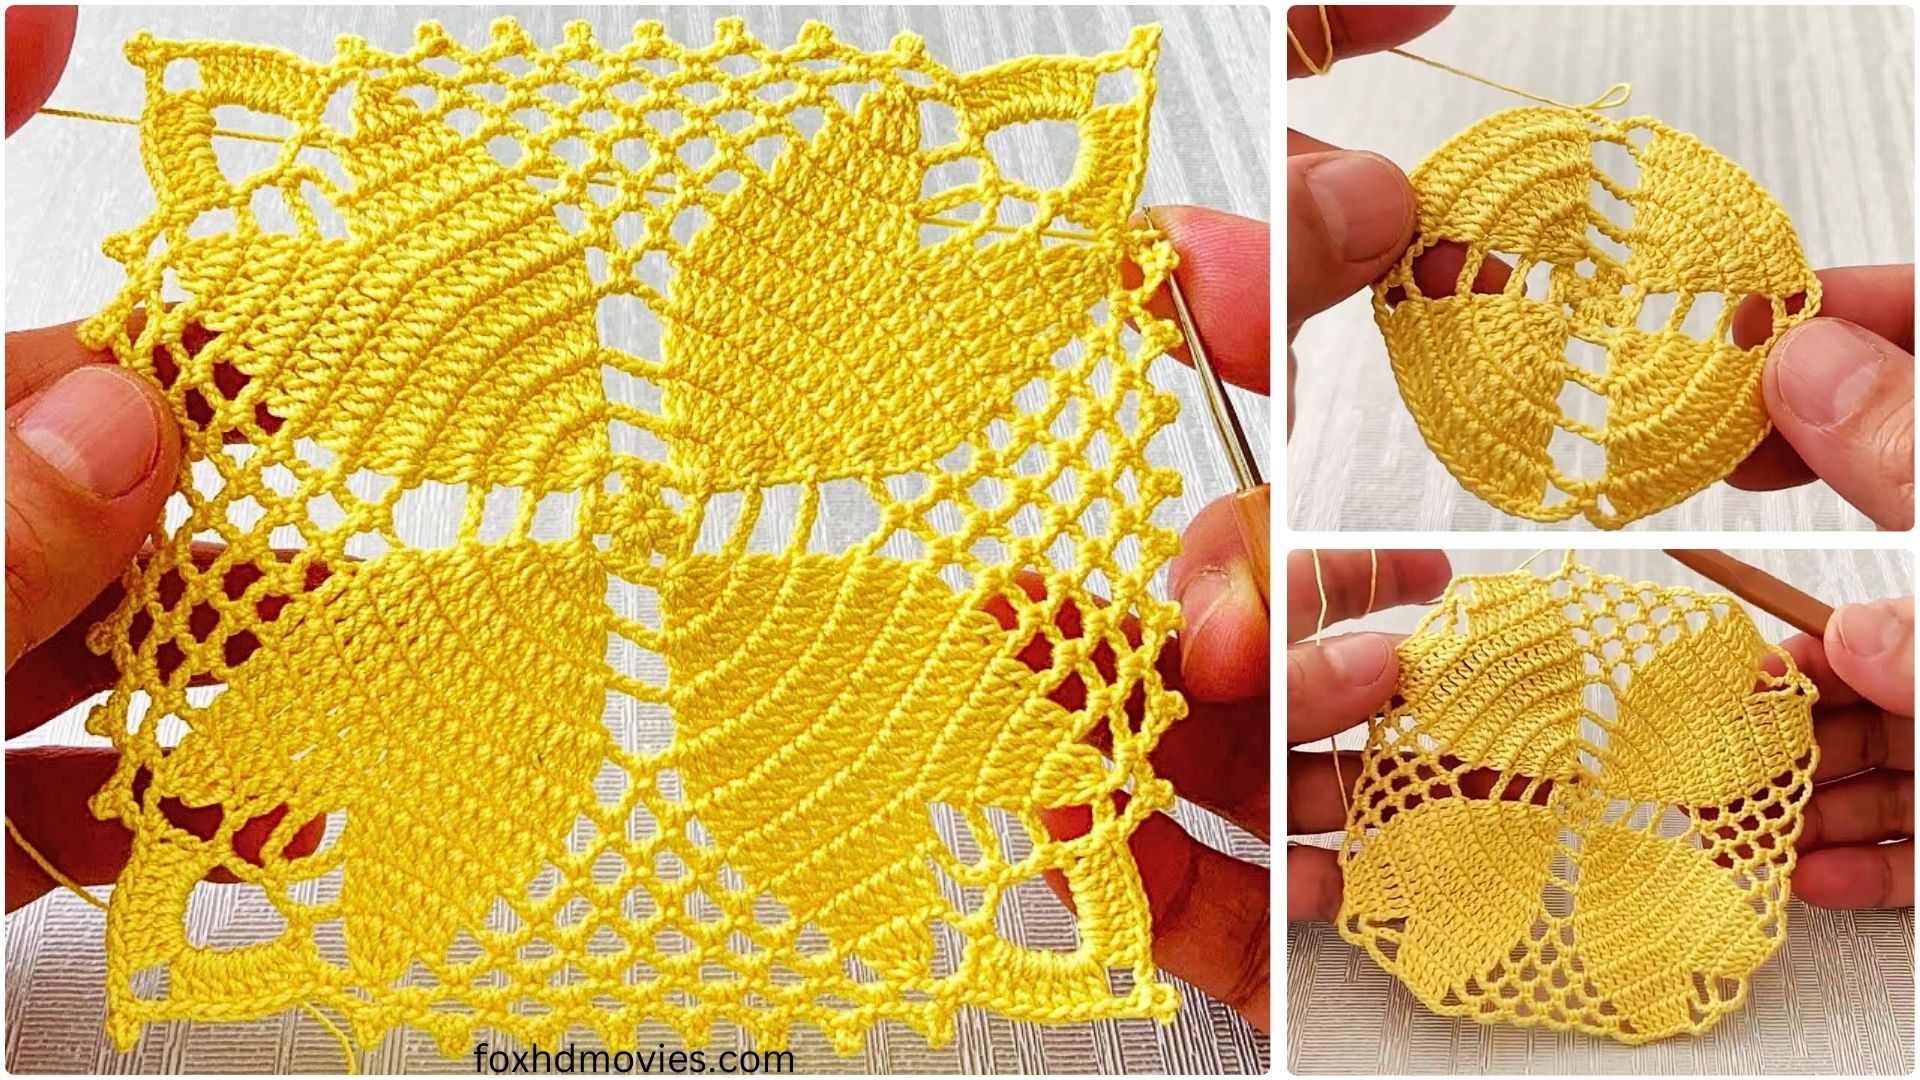
We will build this motif from the center out, creating a textured “flower” that transitions into a delicate square.
Foundation (Center of the Bloom):
Round 1: Ch 4, sl st to join into a ring. (Alternatively, use a magic ring for a tighter center.) Ch 3 (counts as first dc), 11 dc in the ring. Sl st to top of beg ch-3 to join. (12 dc)
Round 2 (Petal Bases): Ch 1, sc in the same st. *Ch 3, sk next st, sc in next st.* Rep from * to * 5 more times. Ch 3, sl st to first sc to join. (6 sc, 6 ch-3 sps)
Round 3 (Petals – puff stitch like): Sl st into first ch-3 sp. Ch 3 (does NOT count as a st). Work 5 dc in the same ch-3 sp. Remove hook from loop, insert hook into top of first dc (the first of the 5 dc you just made), then insert hook into the dropped loop and pull through. (This creates a “popcorn” or “puff” stitch.) *Ch 3. In next ch-3 sp, work 6 dc. Remove hook, insert into top of first dc of the 6 dc, then into dropped loop and pull through.* Rep from * to * 4 more times. Ch 3, sl st into the top of the first popcorn stitch to join. (6 popcorn stitches, 6 ch-3 sps)
Round 4 (Corner Transition – First Square Shaping): Sl st into first ch-3 sp. Ch 4 (counts as first tr). In the same ch-3 sp, work (2 tr, ch 3, 3 tr). This forms your first corner. *Ch 1. In next ch-3 sp, work 3 dc. Ch 1. In next ch-3 sp, work (3 tr, ch 3, 3 tr). This forms your next corner.* Rep from * to * 2 more times. Ch 1. In next ch-3 sp, work 3 dc. Ch 1. Sl st to top of beg ch-4 to join. You should now have 4 corners (3 tr, ch 3, 3 tr) and 4 sides (3 dc separated by ch-1).
Round 5 (Defining the Square): Sl st into next 2 tr and into first ch-3 sp (corner). Ch 3 (counts as first dc). In the same ch-3 sp, work (2 dc, ch 3, 3 dc). This is your new corner. *Ch 1. [3 dc] in next ch-1 sp. Ch 1. [3 dc] in next ch-1 sp. Ch 1. In next ch-3 sp (corner), work (3 dc, ch 3, 3 dc). This is your next corner.* Rep from * to * 2 more times. Ch 1. [3 dc] in next ch-1 sp. Ch 1. [3 dc] in next ch-1 sp. Ch 1. Sl st to top of beg ch-3 to join. This round solidifies the square shape and should be used for your gauge check.

Round 6 (Lacy Edge): Sl st into next 2 dc and into first ch-3 sp (corner). Ch 1, sc in same ch-3 sp. *Ch 5, sc in same ch-3 sp. (This creates a large corner loop). Ch 3, sk next 3 dc, sc in next ch-1 sp. Ch 3, sk next 3 dc, sc in next ch-1 sp. Ch 3, sk next 3 dc, sc in next ch-1 sp. Ch 3, sc in next ch-3 sp (corner).* Rep from * to * 3 more times, omitting the last sc on the final repeat. Sl st to first sc to join. You should have 4 large ch-5 corner loops and 3 ch-3 loops along each side.
Round 7 (Final Border): Sl st into first ch-5 sp. Ch 3 (counts as first dc). In the same ch-5 sp, work (4 dc, ch 3, 5 dc). This is your beautiful final corner. *Ch 1. Sc into first ch-3 sp. Ch 3, sc into next ch-3 sp. Ch 3, sc into next ch-3 sp. Ch 1. In the next ch-5 sp (corner), work (5 dc, ch 3, 5 dc).* Rep from * to * 3 more times, omitting the last corner on the final repeat. Sl st to top of beg ch-3 to join.

Fasten off and weave in all ends securely. Block your motif if desired for a crisp, even finish.
Making it “Perfect” & Tips for Your Project:
- Consistent Tension: This is the most crucial factor for a perfect-looking motif. Work evenly throughout, especially on the dc and tr stitches that define the shape.
- Blocking: For table and bedspreads, blocking is essential! It evens out your stitches, opens up the lacework, and ensures all your motifs are the exact same size and shape, making joining a breeze. Wet block (pin out to shape while damp, let dry) or steam block.
- Joining Methods:
- Sewn Seam (Whip Stitch/Mattress Stitch): For an invisible or nearly invisible seam, whip stitch or mattress stitch through the back loops or both loops of the edges. This gives a very flat finish.
- Join-as-you-go (JAYG): This is highly recommended for large projects to avoid endless seaming! On the final round (Round 7), when you reach a ch-3 corner space or a ch-1/ch-3 side space where it meets another motif, replace the chain with a slip stitch into the corresponding space on the already completed motif.
- JAYG Corner: Instead of
ch 3, doch 1, sl st into corner ch-3 sp of joined motif, ch 1. - JAYG Side Ch-1: Instead of
ch 1, dosl st into corresponding ch-1 sp of joined motif. - JAYG Side Ch-3: Instead of
ch 3, doch 1, sl st into corresponding ch-3 sp of joined motif, ch 1.
- JAYG Corner: Instead of
- Slip Stitch Join: A slightly raised but neat join: sl st across the edges of two motifs, working into both loops of each corresponding stitch.
- Border: Once all your motifs are joined, add a beautiful border to complete your table or bedspread. Simple rows of sc, hdc, or dc, or a more elaborate shell or picot border will frame your work perfectly.
- Yarn Choice: Cotton yarn offers excellent drape and is easy to wash, which is perfect for items that will see regular use. Avoid overly stretchy or fuzzy yarns if you want crisp stitch definition.
Video Tutorial
Enjoy creating your “Elegance Bloom” motifs! This pattern, when repeated and meticulously joined, will result in a truly perfect and cherished crochet table or bedspread.