by
by 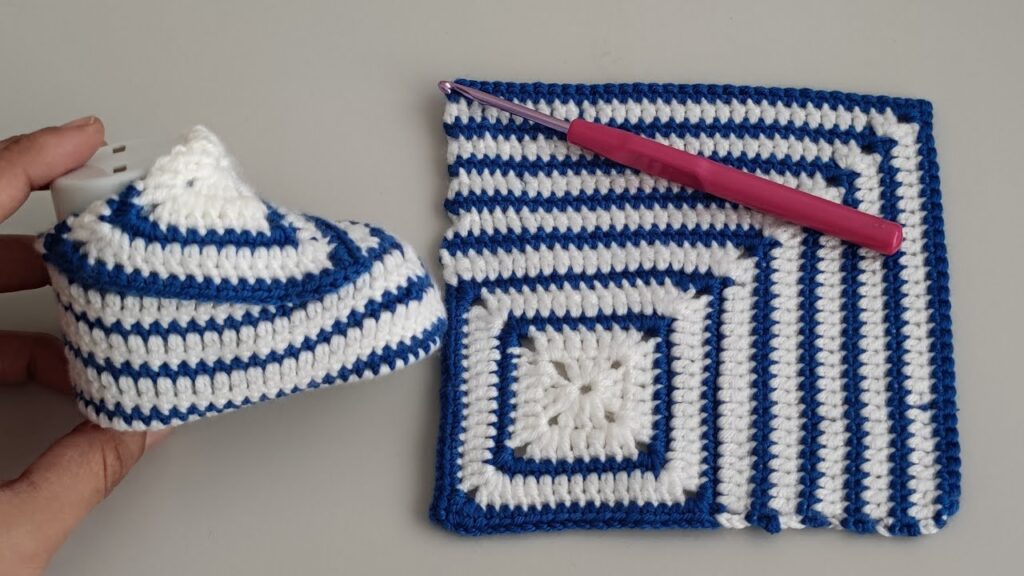
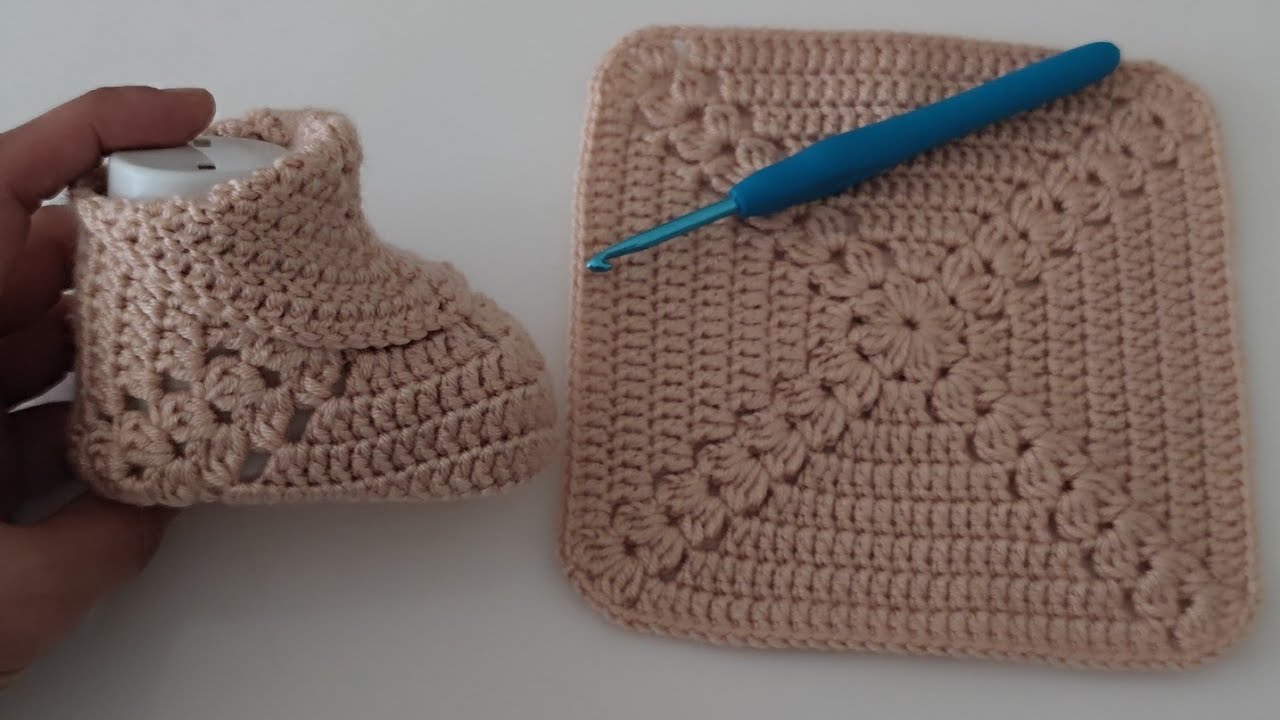
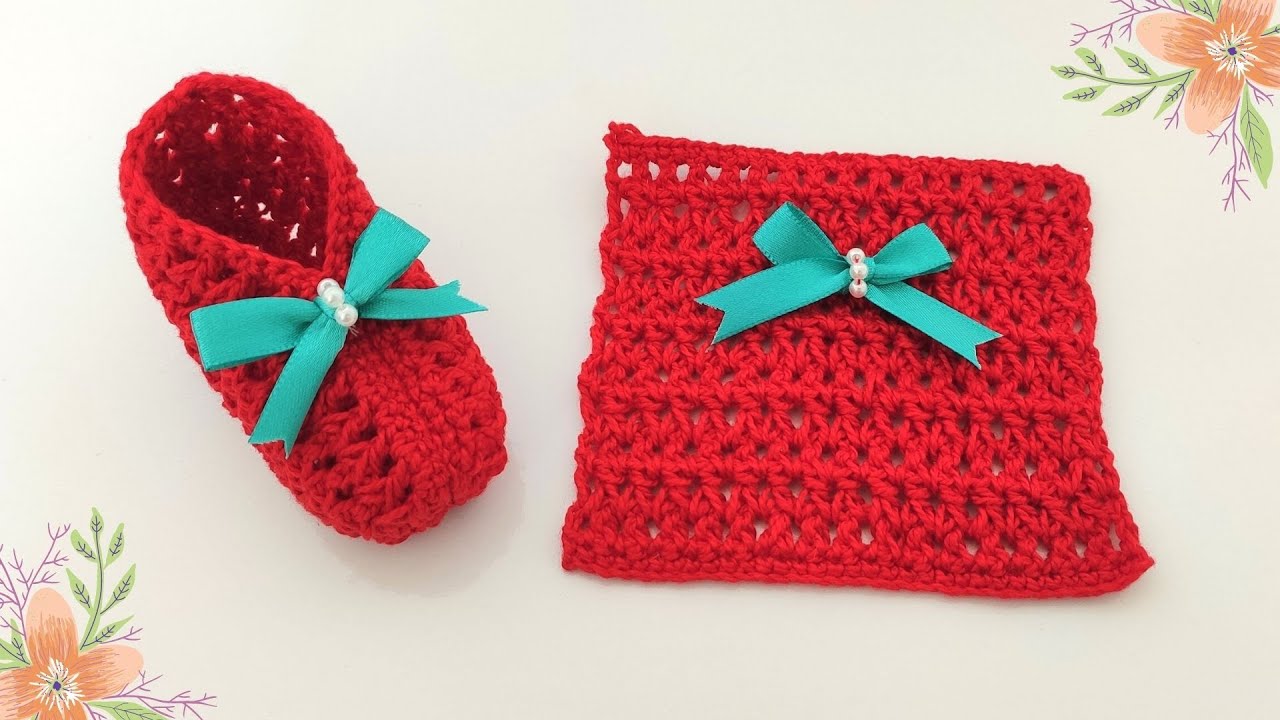
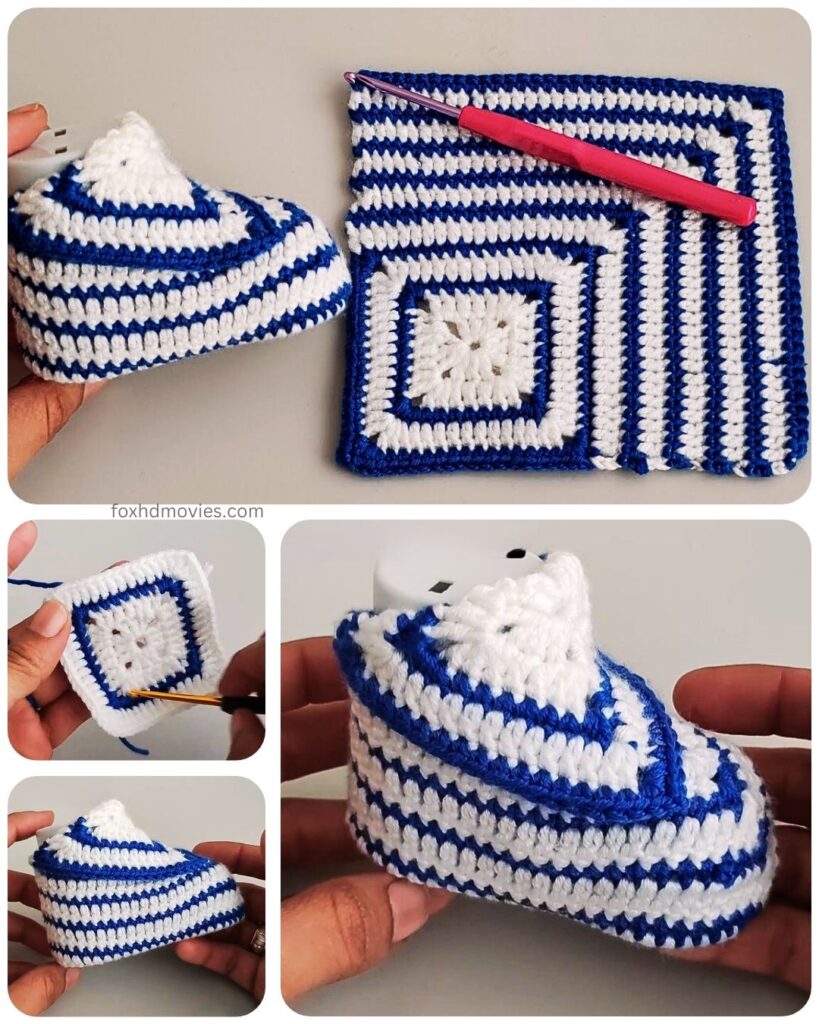
There’s something truly special about handmade items for babies, and these crochet granny square baby shoes are no exception. Combining the iconic granny square motif with a comfortable shoe shape, this pattern allows you to create a unique and heartwarming gift or a treasured item for your own little bundle of joy.
Skill Level: Intermediate Beginner (basic granny square knowledge is helpful)
Materials:
- DK or light worsted weight yarn in your desired colors (you’ll need small amounts of several colors for the granny squares)
- Crochet hook size G/6 (4.0 mm) or size needed to obtain gauge
- Yarn needle for weaving in ends
- Scissors
- Stitch markers (optional, but recommended for joining)
Gauge:
Aim for a finished granny square of approximately 2.5 – 3 inches square after 3-4 rounds. Adjust your hook size if needed.
Finished Size:
This pattern is written for approximately 0-3 months (sole length around 3 inches). Instructions for slight adjustments will be included.
Abbreviations (US Crochet Terms):
- ch: chain
- sl st: slip stitch
- sc: single crochet
- hdc: half double crochet
- dc: double crochet
- tr: treble crochet (optional, for a taller first round)
- sp: space
- st(s): stitch(es)
- beg: beginning
- rep: repeat

Let’s Get Started!
Part 1: Making the Granny Squares (Make 6)
We’ll create small, classic granny squares that will form the main parts of the shoes. Feel free to get creative with your color combinations for each square!
Round 1: With your first color, ch 4, sl st to join into a ring. (Alternatively, you can use a magic ring). Ch 3 (counts as first dc), 2 dc in the ring, ch 2, *3 dc in the ring, ch 2; rep from * twice more. Sl st to the top of the beg ch-3. (4 clusters of 3 dc, 4 ch-2 spaces)
Round 2: Sl st into the next dc and into the first ch-2 sp. Change to your second color (optional). Ch 3 (counts as first dc), 2 dc in the same ch-2 sp, ch 2, 3 dc in the same ch-2 sp (corner made). *Ch 1, (3 dc, ch 2, 3 dc) in the next ch-2 sp (corner made); rep from * twice more, ch 1. Sl st to the top of the beg ch-3.
Round 3: Sl st into the next 2 dc and into the first ch-2 sp. Change to your third color (optional). Ch 3 (counts as first dc), 2 dc in the same ch-2 sp, ch 2, 3 dc in the same ch-2 sp (corner made). *Ch 1, 3 dc in the next ch-1 sp, ch 1, (3 dc, ch 2, 3 dc) in the next ch-2 sp (corner made); rep from * twice more, ch 1, 3 dc in the last ch-1 sp, ch 1. Sl st to the top of the beg ch-3.
Fasten off each granny square and weave in the ends. You will have 6 completed granny squares.
Part 2: Assembling the Shoe Sole
We’ll join two of the granny squares to form the sole of the shoe.
- Place two granny squares side by side with the wrong sides facing each other.
- Using your yarn needle and one of the colors you used, whip stitch or single crochet along one edge of each square to join them together. Aim to join through the back loops only for a neater seam.

Part 3: Creating the Sides of the Shoe
Now we’ll attach two more granny squares to the sides of the sole.
- Take one of the remaining granny squares. Align one edge of this square with one of the unjoined long edges of the sole.
- Using your yarn needle or crochet hook, attach this square to the sole using a whip stitch or single crochet. Center the granny square along the edge of the sole.
- Repeat this process with another granny square on the opposite unjoined long edge of the sole. You should now have a somewhat “T” shape.
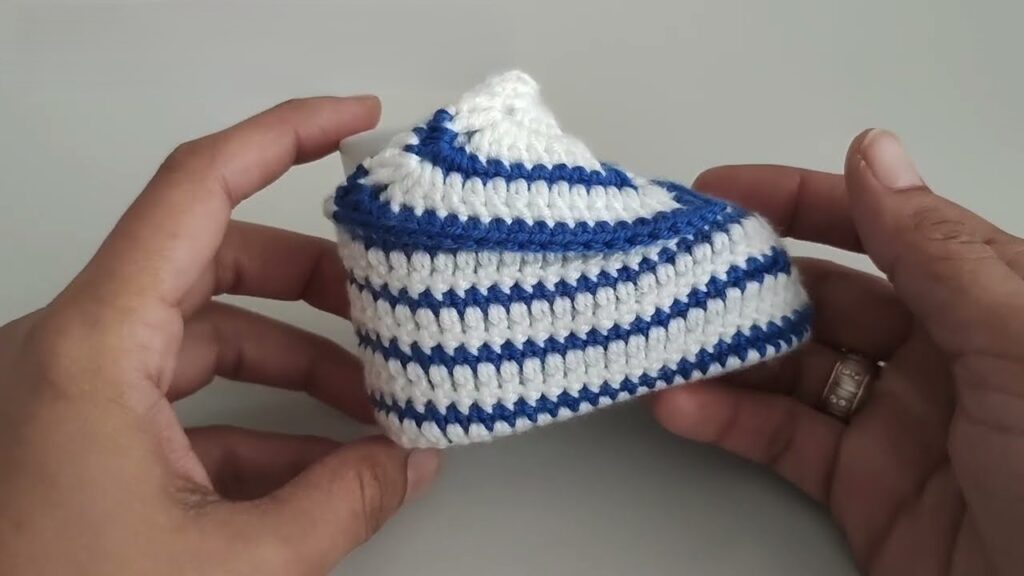
Part 4: Shaping the Heel
We’ll use the last two granny squares to create the heel of the shoe.
- Take one of the remaining granny squares. Align one edge of this square with the short, unjoined edge at the back of the sole.
- Attach this square using a whip stitch or single crochet.
- Repeat with the final granny square on the other short, unjoined edge at the back of the sole. You’ll now have a basic shoe shape.
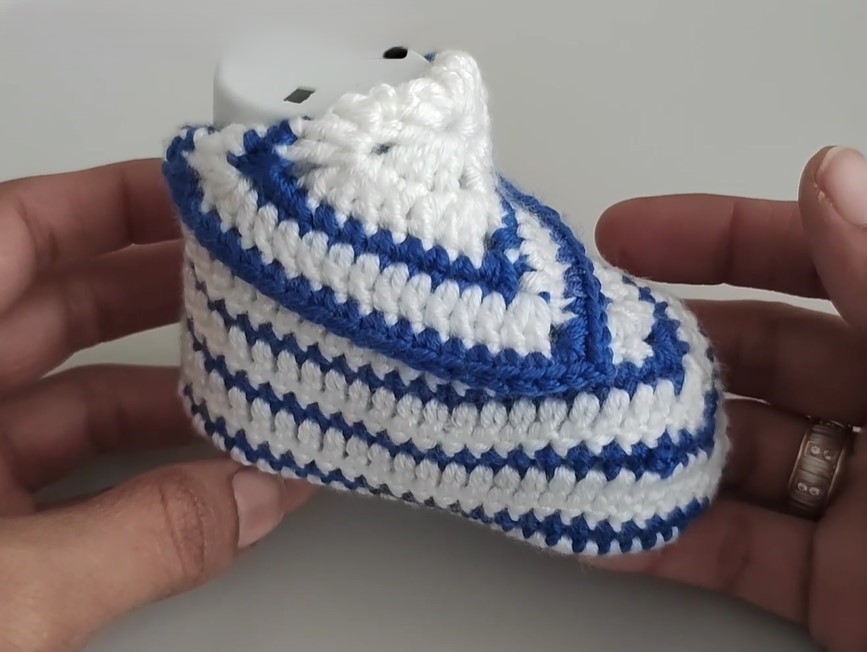
Part 5: Creating the Ankle Opening and Securing the Edges
Now we’ll work around the top edges to create a neat finish and a comfortable ankle opening.
- With the right side facing you, attach your yarn to any point along the top edge of the shoe.
- Round 1: Ch 1, sc evenly around the entire top opening of the shoe, working across the tops of the granny squares and the joined seams. Pay attention to creating a smooth edge. Place stitch markers at the front corners where the side squares meet the front of the sole. Sl st to the first sc.
- Round 2: Ch 1, sc in each st around. Sl st to the first sc.
- Optional Rounds: Repeat Round 2 for a few more rounds to create a slightly higher ankle cuff. You can change colors here if desired.
Part 6: Adding a Strap (Optional)
For added security, you can create a small strap to help keep the shoes on.
- With your chosen color, attach yarn to the side of the shoe near the heel.
- Ch 15-20 (adjust length as needed).
- Starting in the 2nd ch from the hook, sc in each ch across.
- Sl st to the same point on the shoe where you began the chain.
- Repeat on the other side of the same shoe.
- You can add small buttons to the front of the shoe for the straps to loop around, or create ties by making longer chains.
Finishing Touches:
- Weave in all remaining yarn ends securely.
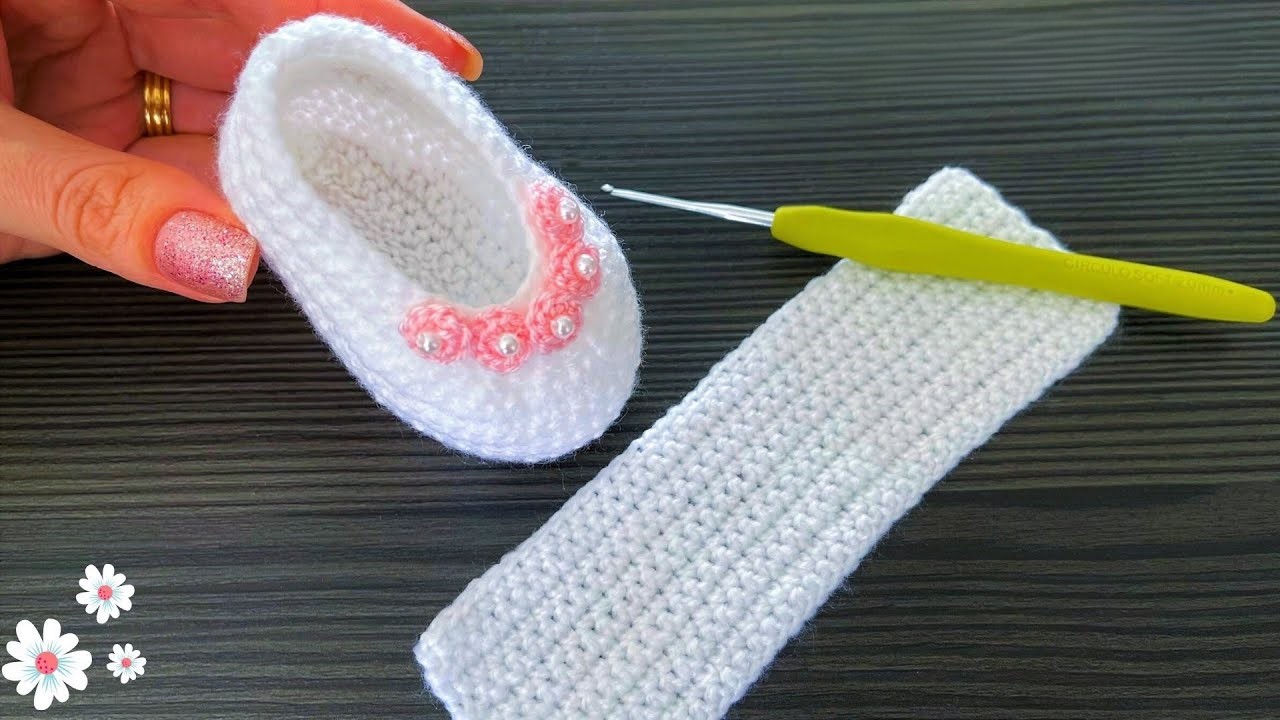
- You can add decorative elements like small crocheted flowers, buttons, or appliques to personalize your granny square baby shoes.
Adjusting the Size:
- For a smaller size: Use a thinner yarn and a smaller hook. You can also make your granny squares with fewer rounds.
- For a larger size: Use a thicker yarn and a larger hook. You can also add an extra round to your granny squares or add more rounds to the single crochet edging.
Video tutorial
Tips and Variations:
- Color Play: The beauty of granny squares lies in their versatility! Experiment with different color combinations for each square to create a vibrant and unique pair of shoes.
- Joining Methods: Explore different joining techniques for your granny squares, such as the flat braid join or a simple slip stitch join, for different visual effects.
- Edging: Get creative with the edging around the ankle opening. Try a picot edge, a crab stitch (reverse single crochet), or a simple double crochet border.
- Secure Fastenings: Ensure any buttons or embellishments are securely attached to prevent them from becoming a choking hazard.
Congratulations! You’ve now created a beautiful pair of handmade crochet granny square baby shoes. These little booties are not only adorable but also a testament to your crafting skills. Enjoy gifting or dressing your little one in these timeless treasures!