 by
by 
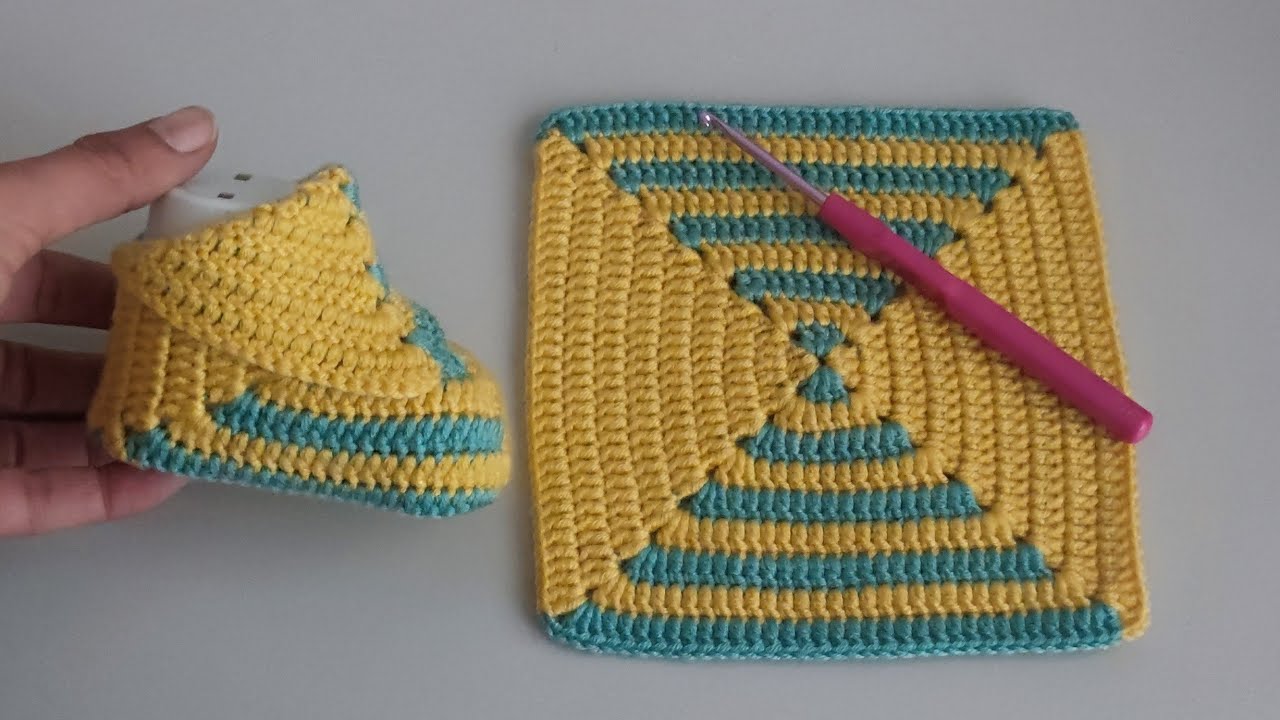
These booties combine the simplicity of granny squares with a clever folding technique to create a cozy and secure fit for tiny feet. They’re a fantastic way to use up yarn scraps and make a heartwarming handmade gift.
Skill Level: Easy Beginner
Materials:
- Worsted weight yarn in your desired colors (you’ll need small amounts of at least two colors, or one solid color)
- Crochet hook size H/8 (5.0 mm) or size needed to obtain gauge
- Yarn needle for weaving in ends
- Scissors
- Optional: Small buttons or ribbon for embellishment
Gauge:
While gauge isn’t critical for baby booties, aim for approximately 4 rounds of a granny square to measure about 3 inches square. Adjust your hook size if needed.
Finished Size:
This pattern is written for approximately 0-6 months (sole length around 3.5 inches). Instructions for slight adjustments will be included.
Abbreviations (US Crochet Terms):
- ch: chain
- sl st: slip stitch
- dc: double crochet
- sp: space
- st(s): stitch(es)
- beg: beginning
- rep: repeat
Let’s Get Started!
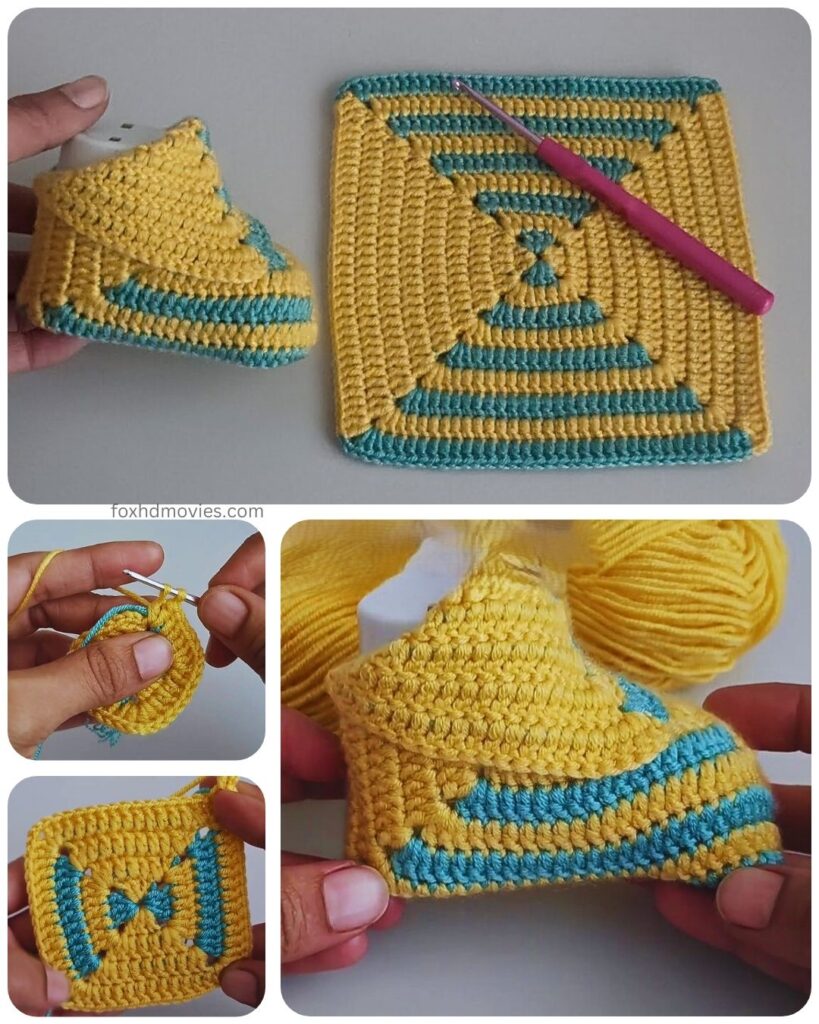
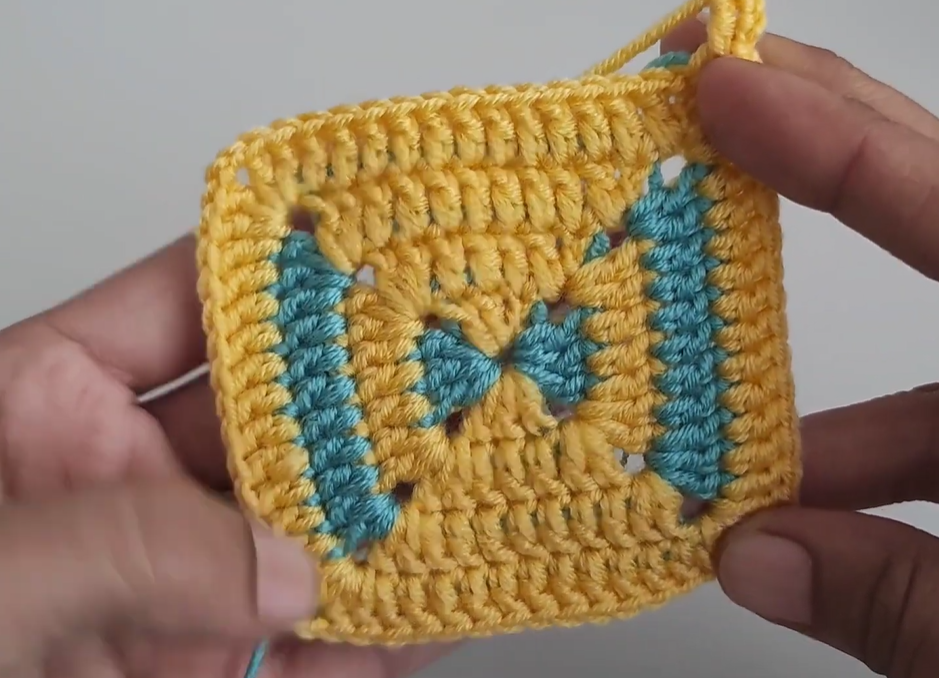
Part 1: Making the Granny Squares (Make 2)
We’ll create two simple four-round granny squares for each bootie. Feel free to get creative with your color combinations for each square!
Round 1: With your first color, ch 4, sl st to join into a ring. (Alternatively, you can use a magic ring). Ch 3 (counts as first dc), 2 dc in the ring, ch 2, *3 dc in the ring, ch 2; rep from * twice more. Sl st to the top of the beg ch-3. (4 clusters of 3 dc, 4 ch-2 spaces)
Round 2: Sl st into the next dc and into the first ch-2 sp. Ch 3 (counts as first dc), 2 dc in the same ch-2 sp, ch 2, 3 dc in the same ch-2 sp (corner made). *Ch 1, (3 dc, ch 2, 3 dc) in the next ch-2 sp (corner made); rep from * twice more, ch 1. Sl st to the top of the beg ch-3.
Round 3: Sl st into the next 2 dc and into the first ch-2 sp. Ch 3 (counts as first dc), 2 dc in the same ch-2 sp, ch 2, 3 dc in the same ch-2 sp (corner made). *Ch 1, 3 dc in the next ch-1 sp, ch 1, (3 dc, ch 2, 3 dc) in the next ch-2 sp (corner made); rep from * twice more, ch 1, 3 dc in the last ch-1 sp, ch 1. Sl st to the top of the beg ch-3.
Round 4: Sl st into the next 2 dc and into the first ch-2 sp. Change to your second color (optional). Ch 3 (counts as first dc), 2 dc in the same ch-2 sp, ch 2, 3 dc in the same ch-2 sp (corner made). *Ch 1, 3 dc in each ch-1 sp across to the next corner, ch 1, (3 dc, ch 2, 3 dc) in the next ch-2 sp (corner made); rep from * twice more, ch 1, 3 dc in each ch-1 sp across to the last corner, ch 1. Sl st to the top of the beg ch-3. Fasten off and weave in ends.

Repeat this process to make a total of 4 granny squares (2 for each bootie).
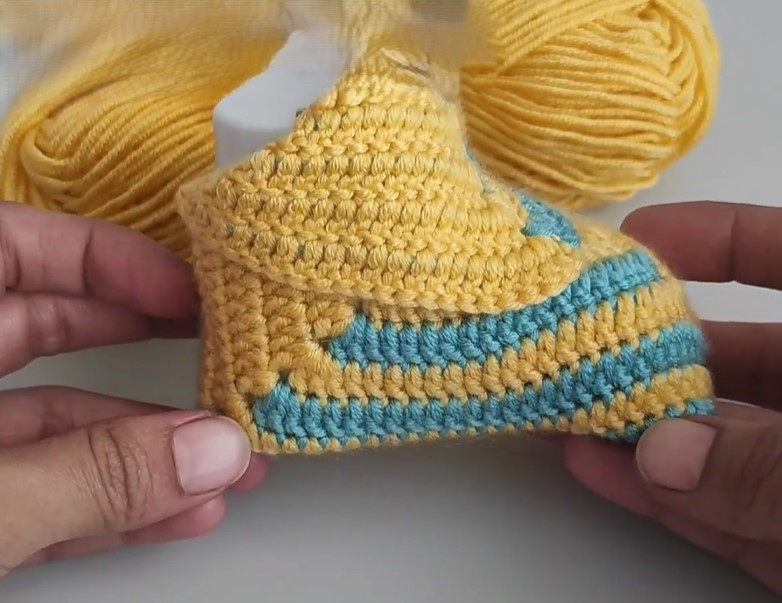
Part 2: Assembling the Bootie
Now comes the magic of folding and joining to create the bootie shape!
- Take one granny square. Orient it so that one of the corners is pointing downwards.
- Fold the two side corners inwards so that they meet in the middle of the bottom edge. You’ll essentially be creating a triangle shape at the top.
- Hold this folded shape in place. Now, take your yarn and yarn needle (or your crochet hook).
- Joining the Heel: Starting at one of the bottom corners, whip stitch or single crochet along the bottom edge and up the side of the folded flap to the point where the two folded edges meet. Repeat this on the other side, joining the other bottom corner up to the same central point. This seam will form the heel of the bootie. Make sure your stitches are snug but not too tight.
- Creating the Toe: You’ll notice an opening at the top where the two folded edges meet. This will be the toe opening. You can leave it as is, or you can slightly round it by using your yarn and needle to make a few stitches across the very tip of the opening to close it a little.
Part 3: Creating the Ankle Cuff
Now we’ll add a simple cuff to the top of the bootie for a snugger fit.
- With the right side of the bootie facing you, attach your yarn to any stitch along the top edge of the bootie opening.
- Round 1: Ch 1, sc evenly around the entire top edge of the bootie. Sl st to the first sc.
- Round 2: Ch 1, sc in each st around. Sl st to the first sc.
- You can repeat Round 2 for a few more rounds to create a wider cuff, if desired.
- Fasten off and weave in the end.
Repeat Part 2 and Part 3 to make the second bootie.
Part 4: Adding Ties or Embellishments (Optional)
To help keep the booties securely on little feet, you can add ties or other embellishments:
- Simple Ties: Cut two lengths of yarn (approximately 10-12 inches each). On the front of each bootie, thread one end of a yarn length through a stitch on one side of the opening and the other end through a stitch on the opposite side. Tie in a bow to secure the bootie.
- Crocheted Ties: Chain a desired length (e.g., ch 30) and sl st back along the chain. Attach one tie to each side of the bootie opening.
- Buttons: You can crochet a small strap on one side of the opening (a few sc rows) and attach a button to the other side.
- Ribbon: Thread a narrow ribbon through the stitches around the ankle cuff and tie it in a bow.
Adjusting the Size:
- For a smaller size: Use a smaller hook and/or DK weight yarn. You can also stop at 3 rounds for your granny squares.
- For a slightly larger size: Use a larger hook and/or bulky weight yarn. You can also add an extra round to your granny squares. For a more significant size increase, you might need to adjust the folding and joining slightly.
Video tutorial
Tips for Perfect Granny Square Booties:
- Neat Joins: When joining the heel, try to keep your stitches even and not too tight to avoid puckering.
- Symmetry: Make sure both booties are assembled in the same way for a matching pair.
- Yarn Choice: Softer yarns are generally more comfortable for baby’s delicate skin.
- Secure Ends: Weave in all yarn ends thoroughly to prevent unraveling.
Congratulations! You’ve now created a pair of the easiest granny square baby booties. These little gems are quick to make, adorable to look at, and perfect for keeping tiny toes warm. Enjoy your crafting!