by
by 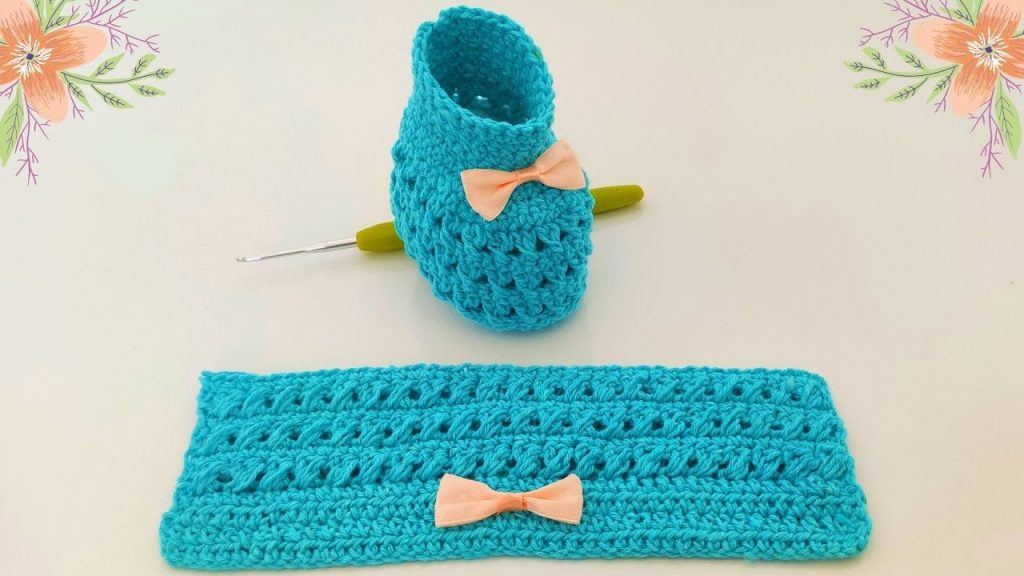
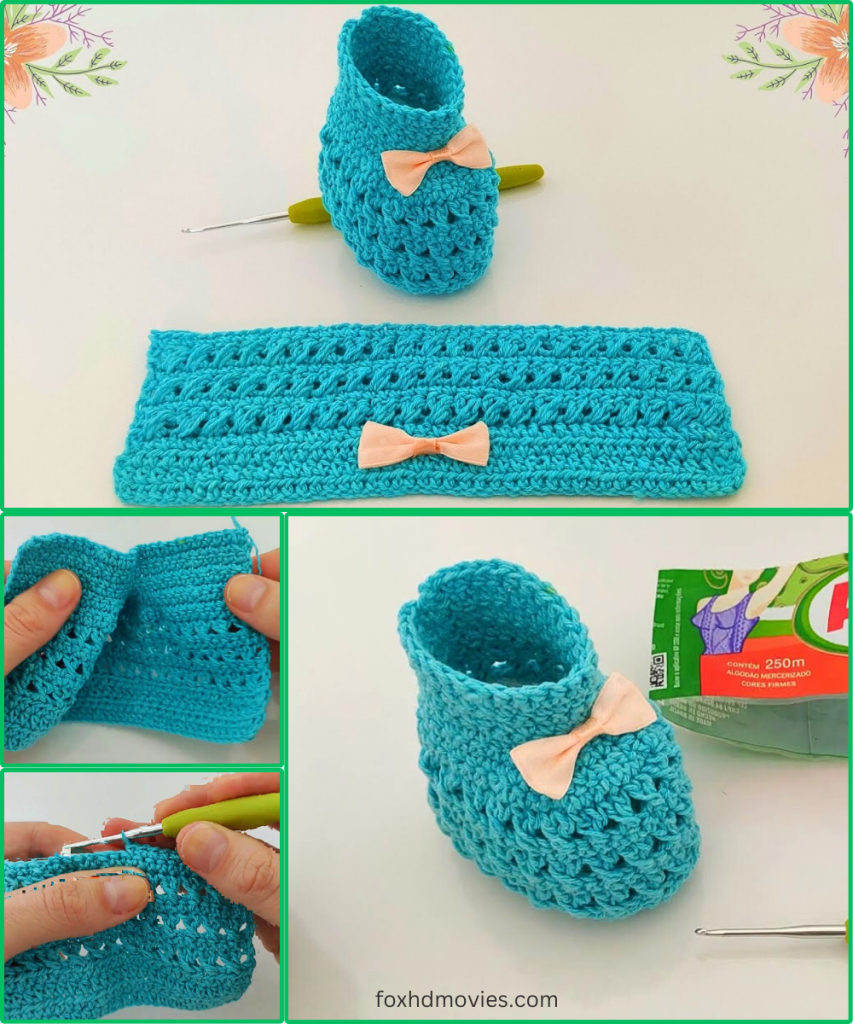
Adorn tiny feet with these exquisite handmade baby slippers! Featuring a unique openwork texture that creates a light and airy feel, and embellished with a vibrant purple and yellow flower, these slippers are perfect for adding a touch of delicate charm to any baby’s outfit. The pattern is designed with a straightforward construction, making it a delightful project for confident beginners or intermediate crocheters.
This pattern is suitable for intermediate crocheters, or adventurous beginners comfortable with basic stitches, working repeating stitch patterns, and simple seaming.
Yarn:
- DK (Double Knit) or Light Worsted Weight yarn in:
- Main Color (MC): Light Yellow/Cream, as pictured.
- Contrast Color 1 (CC1): Purple (for flower petals), as pictured.
- Contrast Color 2 (CC2): Yellow (for flower center), as pictured.
- Choose a soft, baby-friendly yarn that is machine washable for easy care.
Hook:
- 3.5 mm (US E/4) crochet hook (adjust hook size if necessary to achieve desired fabric and tension).
Notions:
- Tapestry needle for seaming and weaving in ends
- Scissors
- 1 small white pearl or bead (for the center of each flower, as pictured).
Gauge (Important for Sizing!):
- For the solid HDC sections: 16 HDC and 12 rows = 4 inches (10 cm).
- For the Openwork pattern: A 2-row repeat (V-Stitch + HDC row) should measure approximately 1.25 inches (3.2 cm) tall.
- Always make a small swatch to check your gauge, as it’s crucial for the finished size of the slippers!
Size:
- Newborn to 3 months (approximately 3.75 – 4 inches / 9.5-10 cm sole length when finished).
- To adjust for larger sizes, you will need to increase the starting chain for the sole and add more stitches/rows for the upper body (adjusting the initial chain for the upper to be longer, and increasing repeats of the openwork pattern).
Abbreviations (US Crochet Terms):
- Ch: Chain
- Sl St: Slip Stitch
- SC: Single Crochet
- HDC: Half Double Crochet
- DC: Double Crochet
- St(s): Stitch(es)
- Sk: Skip
- FO: Fasten Off
- V-Stitch (V-st): (DC, Ch 1, DC) worked into the same stitch or space.
Pattern Instructions:
These slippers are made by first creating a flat rectangular piece for the upper, then shaping and seaming it, and finally attaching a separate sole and embellishments.
Part 1: The Main Body/Upper (Flat Piece – Main Color)
This rectangular piece forms the decorative openwork texture of the slipper’s upper. The height of the piece will be the height of the slipper, and the number of rows will determine the length around the foot.

- Starting with Main Color (MC – Light Yellow/Cream). Ch 18. (This chain determines the height of the slipper. Adjust for taller/shorter. Make sure it’s a multiple of 3 + 3 for the pattern.)
- Row 1 (RS): HDC in 3rd Ch from hook (counts as 1st HDC). HDC in each Ch across. (16 HDC). Ch 2 (counts as 1st HDC), turn.
- Row 2 (WS): HDC in each HDC across. (16 HDC). Ch 2, turn.
- These first two rows form the solid bottom border.
Openwork Pattern Section:
- Row 3 (RS – V-Stitch Row): HDC in first HDC. Sk next HDC. V-Stitch in next HDC, Sk 2 HDC. Repeat from * to * until 3 HDC remain. V-Stitch in next HDC. Sk next HDC. HDC in last HDC. (4 V-Stitches, 4 HDC). Ch 2, turn.
- Row 4 (WS – Solid Row): HDC in first HDC. HDC in next HDC. HDC in each DC and Ch-1 space of each V-Stitch across. End with HDC in last 2 HDC. (16 HDC). Ch 2, turn.
- Repeat Rows 3-4 for a total of 9 more repeats (18 rows of openwork pattern total). Your piece should have 10 sets of V-stitch rows (including the first Row 3).
- This creates the main body with the beautiful openwork texture.
Top Border Section:
- Row 22 (RS): HDC in each HDC across. (16 HDC). Ch 2, turn.
- Row 23 (WS): HDC in each HDC across. (16 HDC).
- Your flat piece should now have a solid bottom border, the openwork section, and a solid top border, resembling the flat piece in the image. It should measure approximately 9-9.5 inches (23-24 cm) long and 4.5 inches (11.5 cm) high. FO, leaving a long tail for seaming.
Part 2: The Sole (Main Color)
The sole is worked in continuous rounds to create a sturdy oval base.

- Ch 14.
- Round 1: HDC in 3rd Ch from hook (counts as 1st HDC). HDC in next 10 Ch. 5 HDC in last Ch. (Work around the end of the chain). Working along the other side of the starting chain: HDC in next 10 Ch. 3 HDC in the very last Ch (this is the same ch as your very first HDC). Sl St to top of beginning Ch 3 to join. (29 HDC)
- Round 2: Ch 2 (does not count as a stitch). 2 HDC in first HDC. HDC in next 10 HDC. 2 HDC in next 5 HDC. HDC in next 10 HDC. 2 HDC in last 3 HDC. Sl St to top of beginning Ch 2 to join. (38 HDC)
- Round 3: Ch 2. 2 HDC in first HDC. HDC in next 13 HDC. 2 HDC in next 5 HDC. HDC in next 13 HDC. 2 HDC in last 4 HDC. Sl St to top of beginning Ch 2 to join. (48 HDC)
- This completes the sturdy sole. FO, leaving a long tail for sewing.
Part 3: The Flower Embellishment (CC1 & CC2)
Make 2 flowers (one for each slipper), as pictured. This is a layered flower.

A. Outer Petals (Contrast Color 1 – Purple):
- Ch 4, Sl St to first Ch to form a ring.
- Round 1: Ch 1. Work 10 SC into the ring. Sl St to first SC to join.
- Round 2 (Petals): Ch 3, 2 DC into the same SC, Ch 3, Sl St into the same SC. Repeat 4 more times into the next 4 SC around. (5 petals total). Sl St to join. FO, leaving a short tail.
B. Inner Petals (Contrast Color 2 – Yellow):
- Ch 4, Sl St to first Ch to form a ring.
- Round 1: Ch 1. Work 8 SC into the ring. Sl St to first SC to join.
- Round 2 (Petals): Ch 2, 2 HDC into the same SC, Ch 2, Sl St into the same SC. Repeat 3 more times into the next 3 SC around. (4 petals total). Sl St to join. FO, leaving a short tail.
Assemble the Flower:
- Place the smaller yellow flower on top of the larger purple flower, aligning their centers.
- Securely stitch the layers together with a few small stitches through the center.
- Stitch the 1 small white pearl/bead securely to the very center of the assembled flower.
Video tutorial
Finishing Your Slipper:
- Weave in all initial loose ends on the main body piece and the sole.
- Seaming the Main Body:
- Take your long flat textured piece. Fold it in half lengthwise (bringing the short ends together).
- Using your tapestry needle and the long tail, whip stitch or mattress stitch the short ends together to form a tube/cylinder. This seam will be the center back of the slipper.
- Shaping the Toe:
- With the cylinder seam at the back, flatten the tube so the seam is centered.
- Pinch the opposite end (the front/toe end). Using your tapestry needle and a new piece of MC yarn, weave the yarn through the top of the stitches along the front edge (where the toes will be). Pull tightly to gather and close the toe opening. Stitch securely to reinforce the toe.
- Seaming the Sole:
- Align the bottom edge of your main body cylinder with the perimeter of your crocheted sole. The seam of the body should align with the center back of the sole.
- Using your tapestry needle and the long tail from the sole, securely whip stitch or mattress stitch the main body to the sole, working all the way around the oval. Ensure even distribution and a neat seam.
- Attach Flower:
- Position the completed flower decoratively on the front top of the slipper, over the gathered toe section, as shown in the image. Securely stitch it in place.
- Make a Second Slipper: Repeat all steps to create a matching pair!
And there you have it! Beautifully textured, handmade baby slippers with a charming floral touch. They’re sure to be a treasured item for your little one or a thoughtful gift!
Happy crocheting!