 by
by 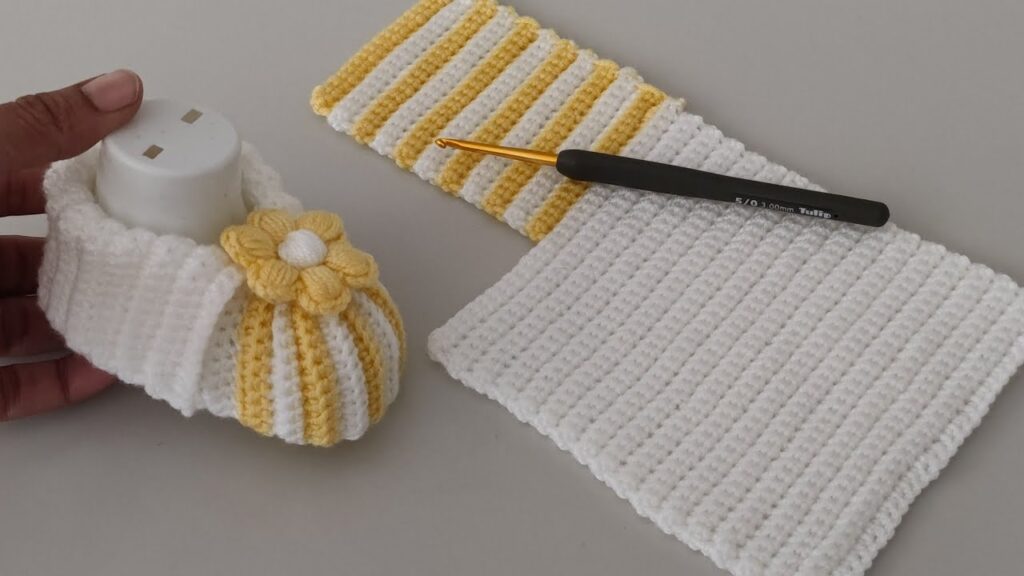
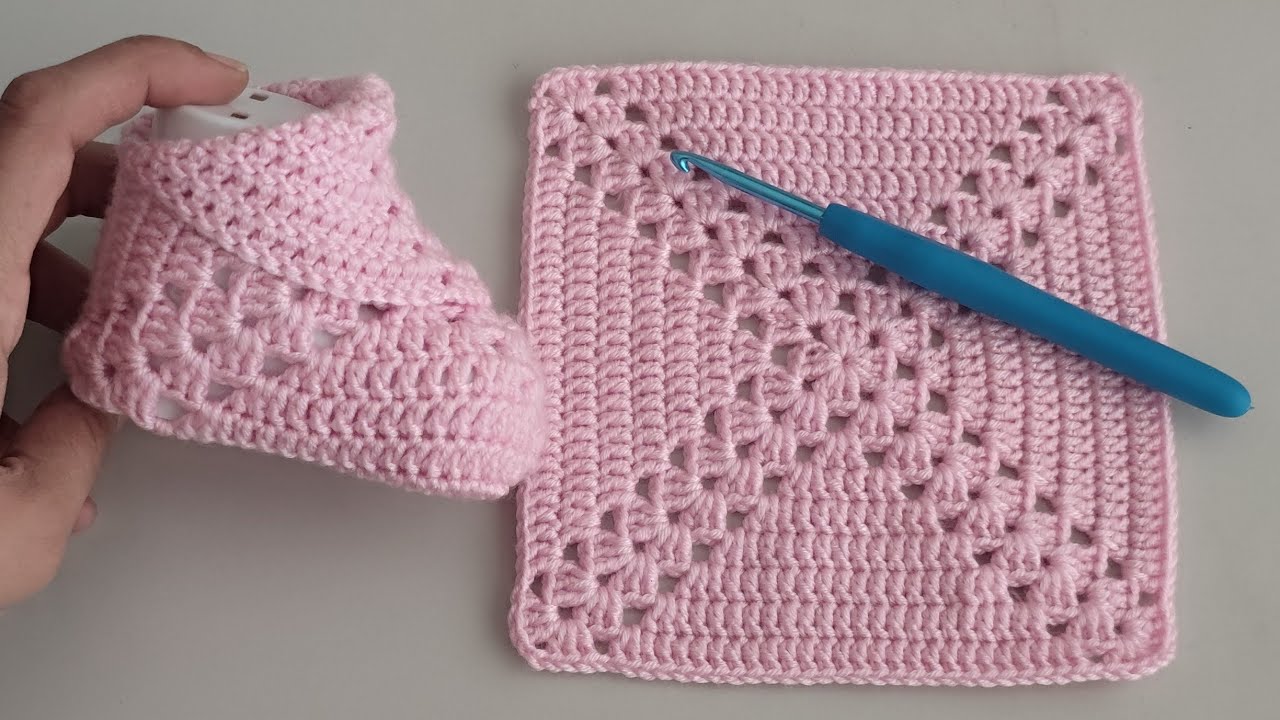
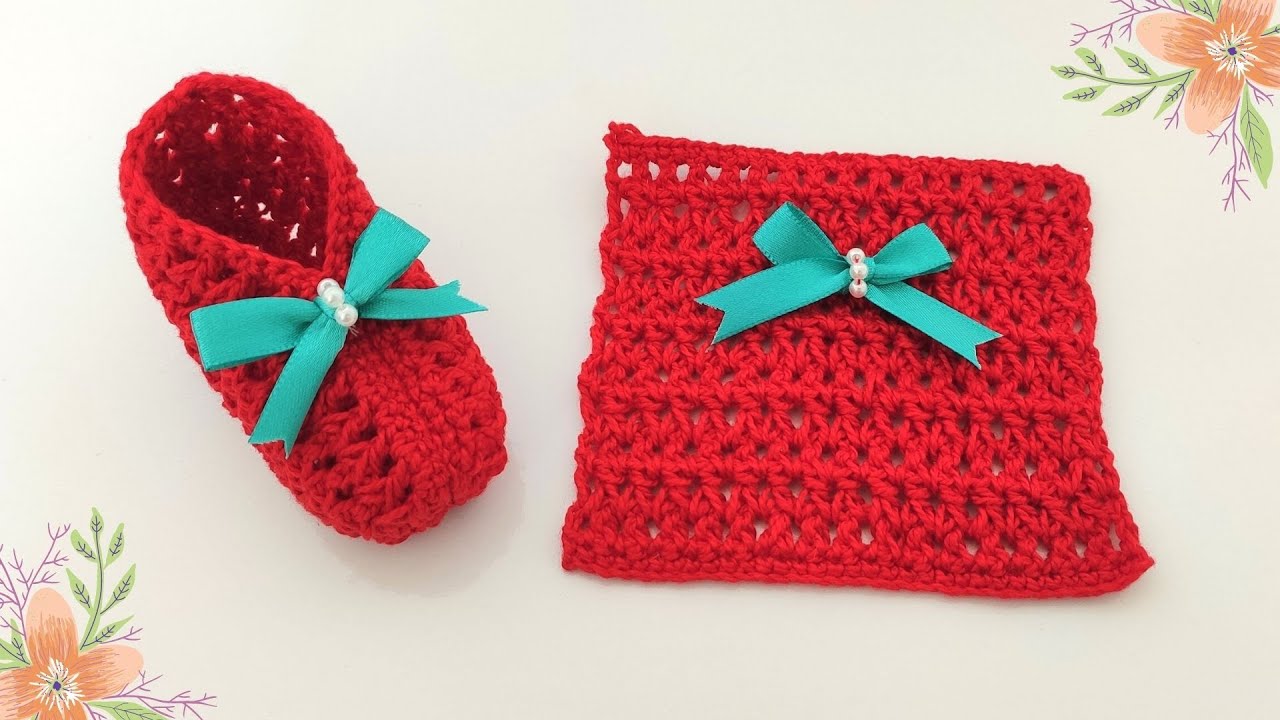
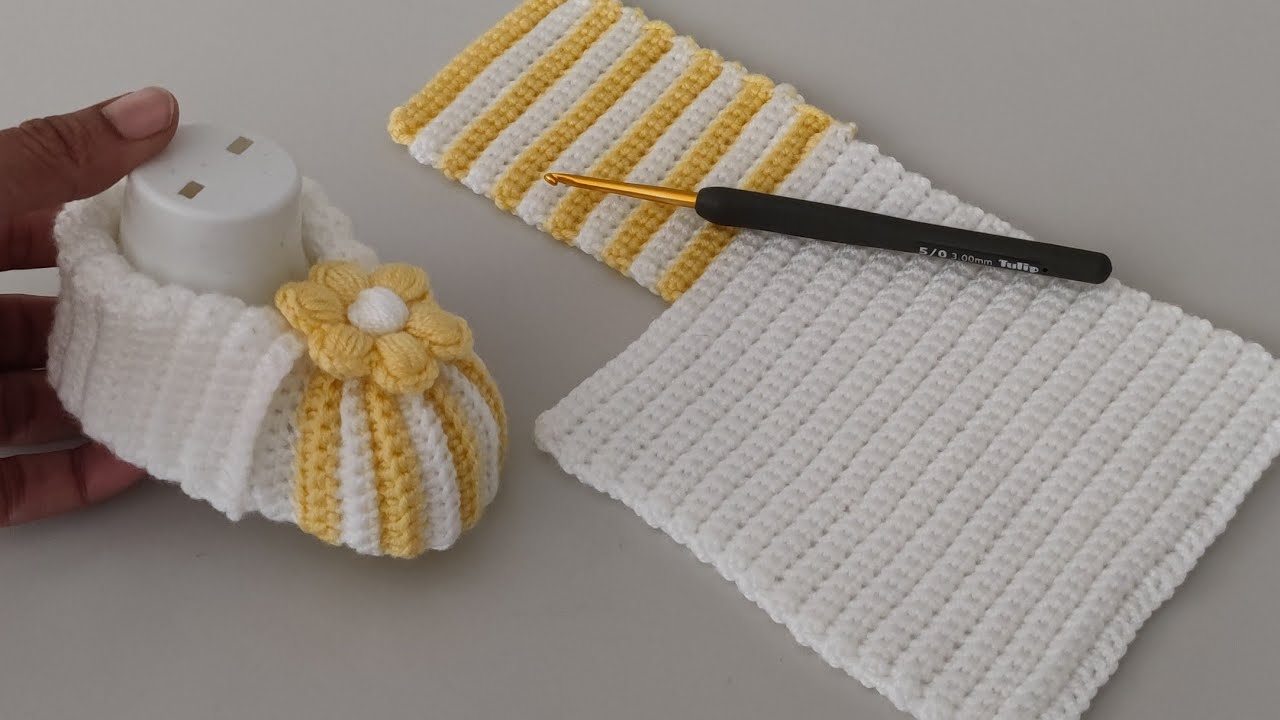
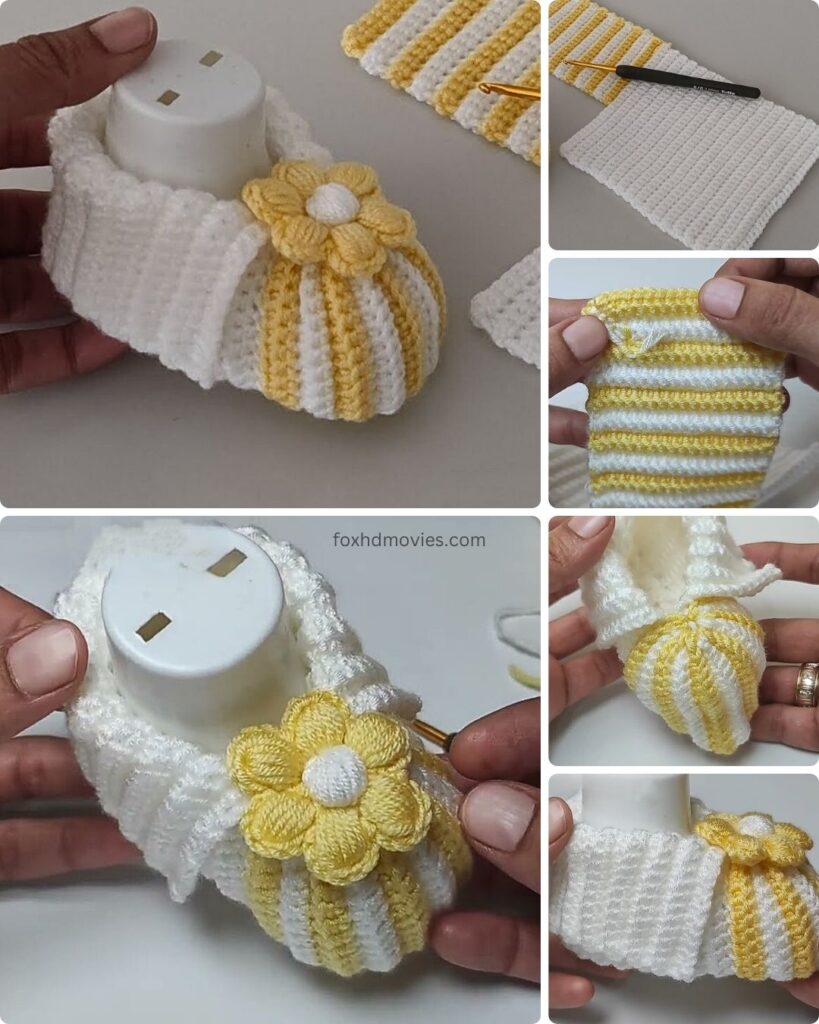
These easy crochet baby booties are a perfect project for beginners and experienced crocheters alike. Using basic crochet stitches, you’ll create a cozy and secure bootie that will keep little feet warm and snug. They make a wonderful handmade gift for baby showers or a lovely addition to your own baby’s wardrobe.
Skill Level: Easy
Materials:
- DK weight yarn in your desired color(s)
- Crochet hook size G/6 (4.0 mm) or size needed to obtain gauge
- Yarn needle for weaving in ends
- Scissors
- Stitch markers (optional, but helpful for marking rounds)
Gauge:
While gauge isn’t critical for baby booties, aim for approximately 4 rows of half double crochet (hdc) to measure about 1 inch in height. Adjust your hook size if needed.
Finished Size:
This pattern is written for approximately 0-3 months (sole length around 3 inches). Instructions for slight adjustments will be included.
Abbreviations (US Crochet Terms):
- ch: chain
- sl st: slip stitch
- sc: single crochet
- hdc: half double crochet
- dc: double crochet (used for shaping the toe)
- st(s): stitch(es)
- beg: beginning
- rep: repeat
- inc: increase (work 2 stitches in the same stitch)
- dec: decrease (work 2 stitches together)
- BLO: back loop only
Video tutorial
Let’s Get Started!
Part 1: Crocheting the Sole (Make 2)
We’ll begin by creating the oval-shaped sole of the bootie.
Round 1: Ch 9. In the 2nd ch from the hook, sc 1. Sc in the next 6 ch. In the last ch, work 3 sc. Now working on the other side of the chain, sc in the next 6 ch. Sc in the last ch (where you started the first sc). Sl st to the first sc. (18 sts)
Round 2: Ch 1, sc in the same st. Sc in the next 7 sts. Inc in the next 3 sts. Sc in the next 7 sts. Inc in the last 2 sts. Sl st to the first sc. (23 sts)
Round 3: Ch 1, sc in the same st. Sc in the next 8 sts. (Sc 1, inc) repeat 3 times. Sc in the next 8 sts. (Inc, sc 1) repeat 2 times. Sl st to the first sc. (28 sts)
Round 4: Ch 1, sc in the same st. Sc in the next 9 sts. (Sc 2, inc) repeat 3 times. Sc in the next 9 sts. (Inc, sc 2) repeat 2 times. Sl st to the first sc. (33 sts)
For a slightly larger sole (approx. 3-6 months, 3.5 inches): Add one more round, following the same increasing pattern: Ch 1, sc in the same st. Sc in the next 10 sts. (Sc 3, inc) repeat 3 times. Sc in the next 10 sts. (Inc, sc 3) repeat 2 times. Sl st to the first sc. (38 sts)
Fasten off the first sole and weave in the end. Make a second sole, but do not fasten off after the last round.

Part 2: Creating the Sides of the Bootie
Now we’ll work in the back loops only to create the upward curve of the bootie sides.
Round 1: Ch 1, sc in the BLO of each st around. Sl st to the first sc. (33 or 38 sts)
Round 2: Ch 1, hdc in each st around. Sl st to the first hdc. (33 or 38 sts)
Rounds 3-7 (or until desired height): Repeat Round 2. You can adjust the number of rounds here to make the bootie taller or shorter. If you want to add a color change for the cuff, do so at the beginning of a new round after the slip stitch.
Part 3: Shaping the Toe
We’ll now shape the front of the bootie to create a rounded toe.
Round 8: Ch 1, hdc in the next 10 (or 12 for larger size) sts. Now we’ll work decreases using hdc2tog (half double crochet two together) to shape the toe. Hdc2tog 6 times. Hdc in the remaining 11 (or 13 for larger size) sts. Sl st to the first hdc. (27 or 32 sts)

Round 9: Ch 1, hdc in the next 9 (or 11 for larger size) sts. Hdc2tog 5 times. Hdc in the remaining 10 (or 12 for larger size) sts. Sl st to the first hdc. (22 or 27 sts)
Round 10: Ch 1, hdc in the next 8 (or 10 for larger size) sts. Hdc2tog 4 times. Hdc in the remaining 8 (or 10 for larger size) sts. Sl st to the first hdc. (18 or 23 sts)
Fasten off and weave in the end of the second bootie.
Part 4: Creating the Cuff (Optional)
You can add a simple cuff to the booties for extra coziness and style.
- With the right side of the bootie facing you, attach your yarn to any stitch at the top opening.
- Ch 1, sc in each st around. Sl st to the first sc.
- Optional: Round 2 of Cuff: Ch 1, sc in the BLO of each st around. Sl st to the first sc. This creates a ribbed effect.
- You can repeat Round 2 for a wider cuff.
- Fasten off and weave in the end. Repeat for the second bootie.
Part 5: Adding a Strap (Optional)
For a more secure fit, you can add a simple strap with a button.
- With your chosen color, attach yarn to the side of the bootie opening.
- Ch 15 (adjust length as needed).
- Starting in the 2nd ch from the hook, sc in each ch across. (14 sc)
- Sl st to the other side of the bootie opening to create the strap.
- Fasten off and weave in the ends.
- Sew a small button to the front or side of the bootie where the strap can loop around it to fasten. Repeat for the second bootie.
Finishing Touches:
- Weave in all remaining yarn ends neatly.
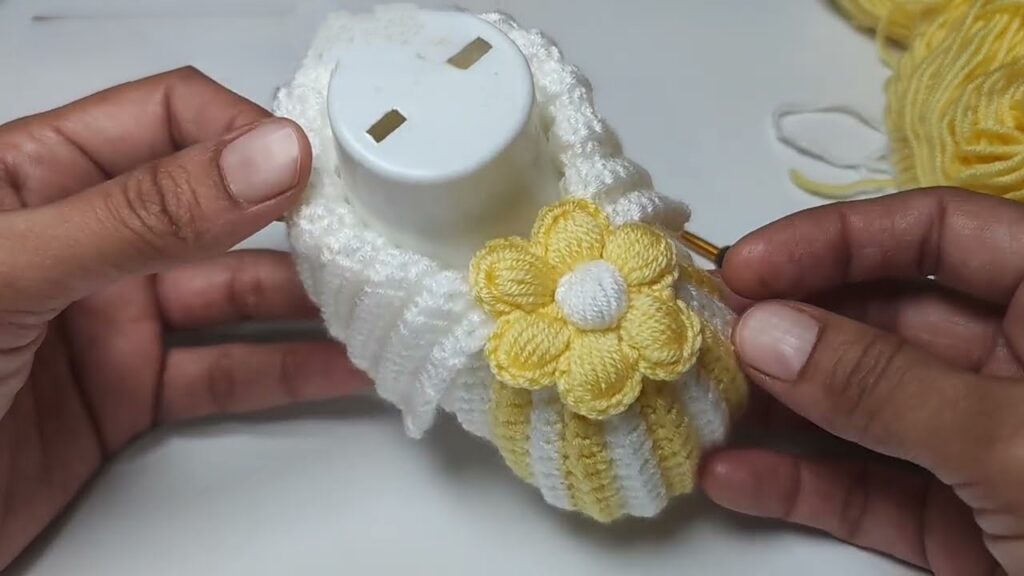
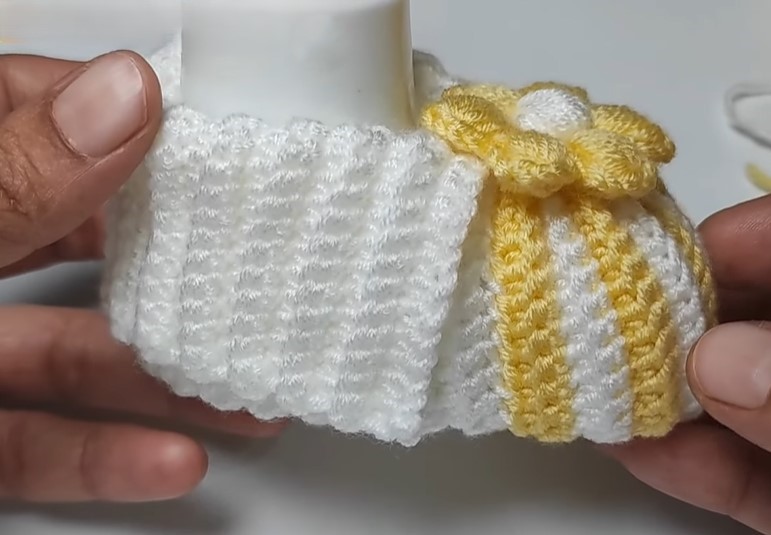
- You can add decorative elements like small crocheted flowers, bows, or appliques to personalize your baby booties. Ensure they are securely attached.
Tips for Perfect Baby Booties:
- Tension: Maintain consistent tension throughout your work for a neat and even finish.
- Seams: When changing colors or joining pieces, try to make your seams as invisible as possible.
- Symmetry: Pay attention to making both booties as identical as possible.
- Safety: Ensure any embellishments are securely attached and pose no choking hazard.
- Customization: Feel free to experiment with different colors, stripes, and simple stitch patterns for the body of the bootie.
Congratulations! You’ve now crocheted a lovely pair of easy baby booties. These little wonders will keep those precious feet warm and comfortable. Enjoy your beautiful handmade creation!