 by
by 
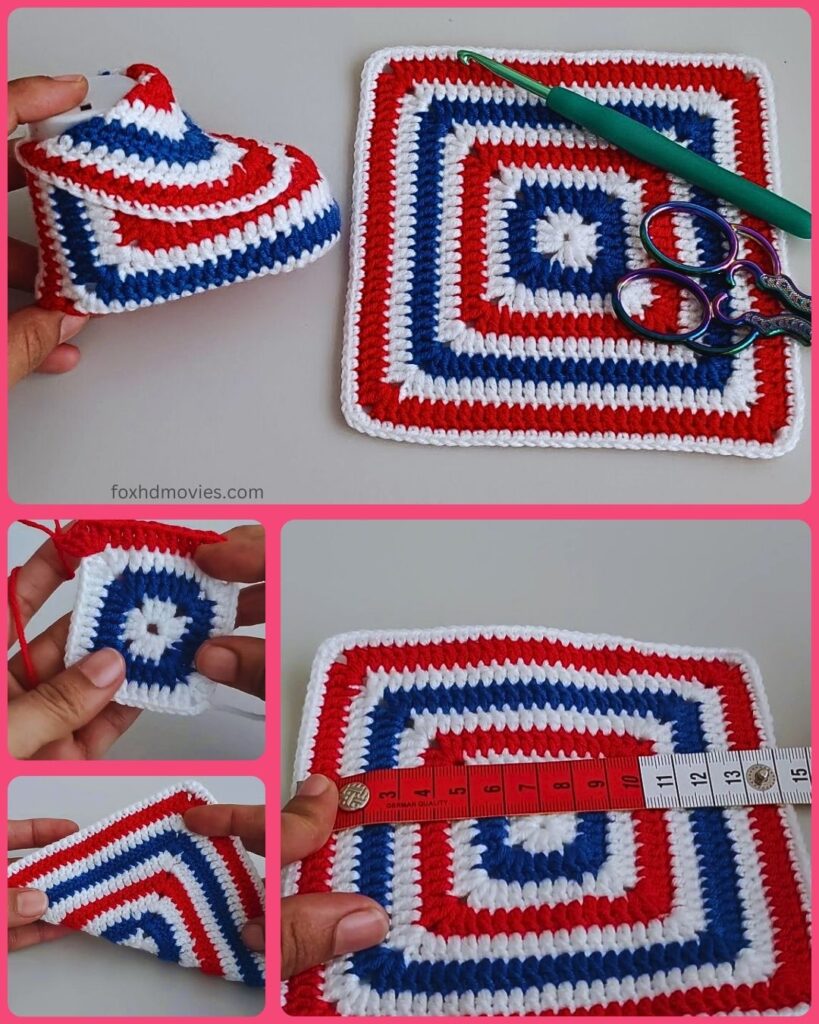
These delightful baby shoes bring together the classic charm of granny squares with a practical and adorable design for little ones. They’re a wonderful way to use up yarn scraps and create a unique, handmade gift.
Skill Level: Easy to Intermediate (requires basic granny square knowledge and some simple shaping)
Materials:
- DK or worsted weight yarn in your desired colors (you’ll need small amounts of at least two colors for the squares and a main color for joining)
- Crochet hook size G/6 (4.0 mm) or H/8 (5.0 mm) – adjust based on your yarn weight and desired size
- Yarn needle for weaving in ends
- Scissors
- Stitch markers (optional, but helpful for assembly)
Gauge:
Gauge isn’t critical for baby shoes, but for reference, aim for a finished granny square (after a few rounds) to measure approximately 2-3 inches square. Adjust your hook size if needed to achieve a similar size.
Finished Size:
This pattern is written for approximately 0-6 months (sole length around 3.5 inches). Adjustments for size will be noted.
Abbreviations (US Crochet Terms):
- ch: chain
- sl st: slip stitch
- sc: single crochet
- hdc: half double crochet
- dc: double crochet
- tr: treble crochet (optional, for a taller first round)
- sp: space
- st(s): stitch(es)
- beg: beginning
- rep: repeat
Video tutorial
Let’s Get Started!
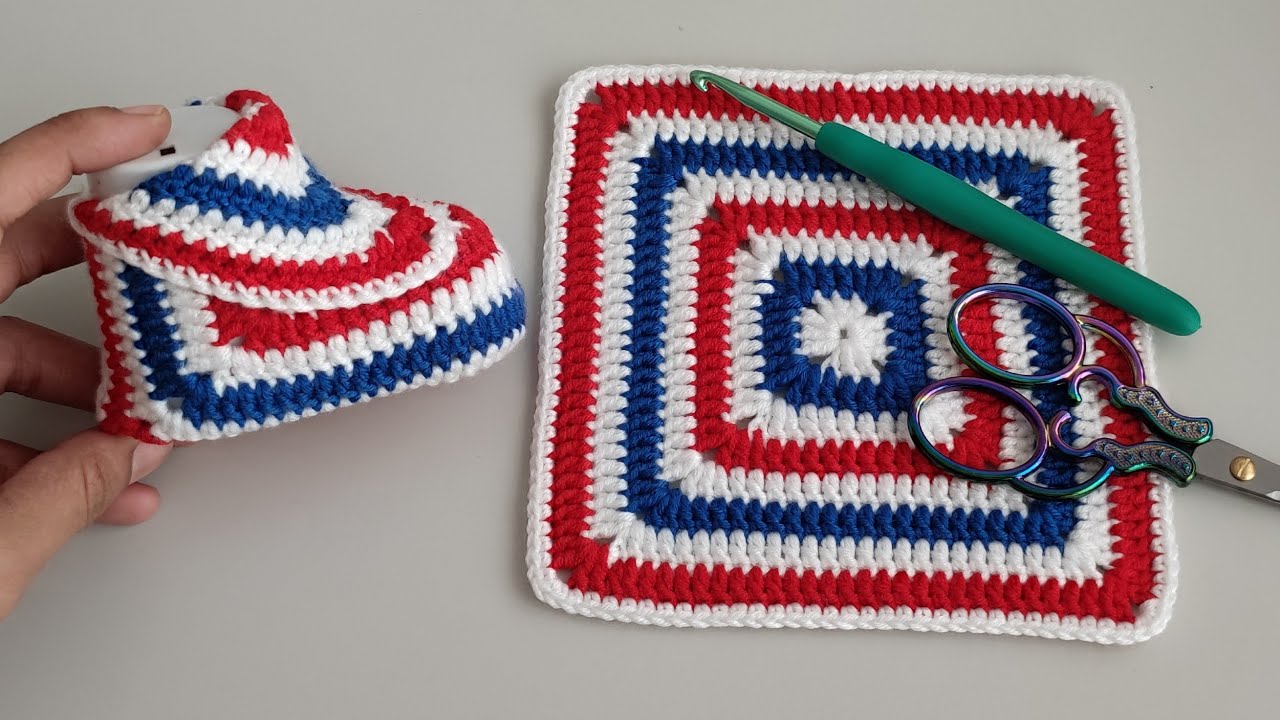
Part 1: Making the Granny Squares (Make 4)
We’ll create simple, small granny squares that will form the main parts of the shoes. Feel free to get creative with your color combinations for each square!
Round 1: With your first color, ch 4, sl st to join into a ring. (Alternatively, you can use a magic ring). Ch 3 (counts as first dc), 2 dc in the ring, ch 2, *3 dc in the ring, ch 2; rep from * twice more. Sl st to the top of the beg ch-3. (4 clusters of 3 dc, 4 ch-2 spaces)
Round 2: Sl st into the next dc and into the first ch-2 sp. Ch 3 (counts as first dc), 2 dc in the same ch-2 sp, ch 2, 3 dc in the same ch-2 sp (corner made). *Ch 1, (3 dc, ch 2, 3 dc) in the next ch-2 sp (corner made); rep from * twice more, ch 1. Sl st to the top of the beg ch-3.
Round 3: Sl st into the next 2 dc and into the first ch-2 sp. Change to your second color (optional). Ch 3 (counts as first dc), 2 dc in the same ch-2 sp, ch 2, 3 dc in the same ch-2 sp (corner made). *Ch 1, 3 dc in the next ch-1 sp, ch 1, (3 dc, ch 2, 3 dc) in the next ch-2 sp (corner made); rep from * twice more, ch 1, 3 dc in the last ch-1 sp, ch 1. Sl st to the top of the beg ch-3.
For a slightly larger square: Add a Round 4 using your main joining color: Sl st into the next 2 dc and into the first ch-2 sp. Ch 3 (counts as first dc), 2 dc in the same ch-2 sp, ch 2, 3 dc in the same ch-2 sp (corner made). *Ch 1, 3 dc in each ch-1 sp across to the next corner, ch 1, (3 dc, ch 2, 3 dc) in the next ch-2 sp (corner made); rep from * twice more, ch 1, 3 dc in each ch-1 sp across to the last corner, ch 1. Sl st to the top of the beg ch-3.

Fasten off and weave in the ends of all 4 granny squares.
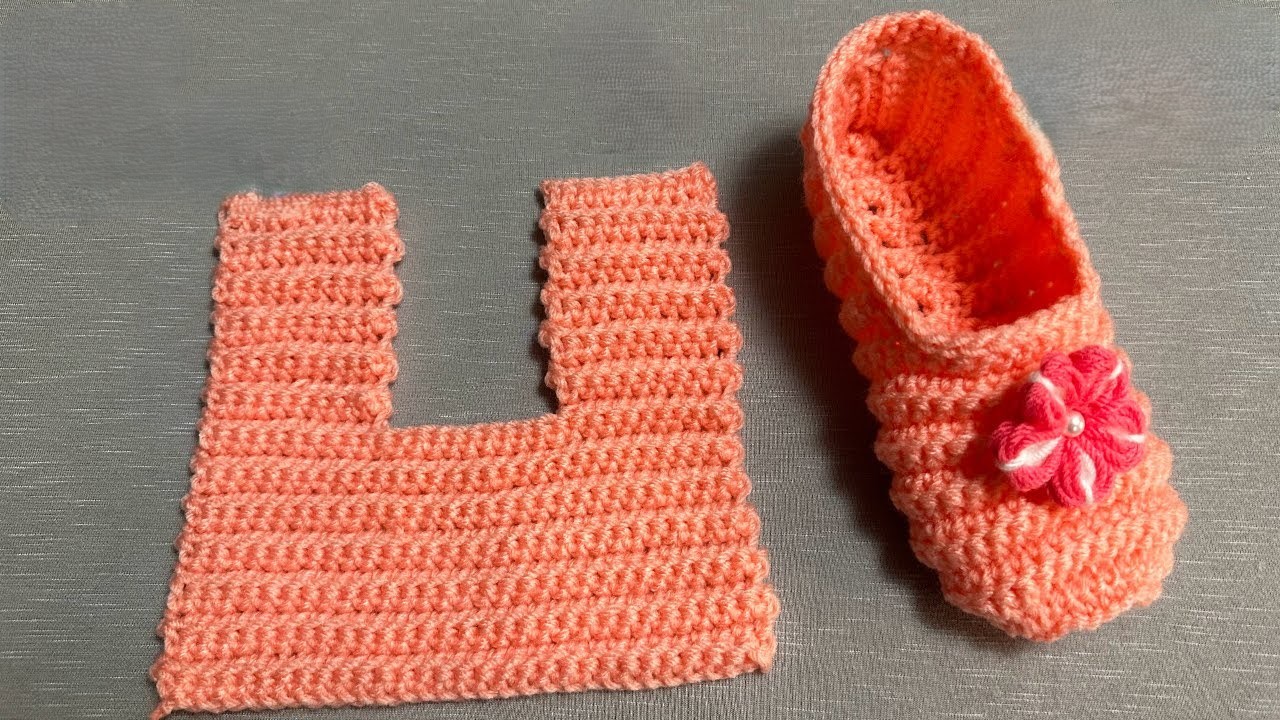
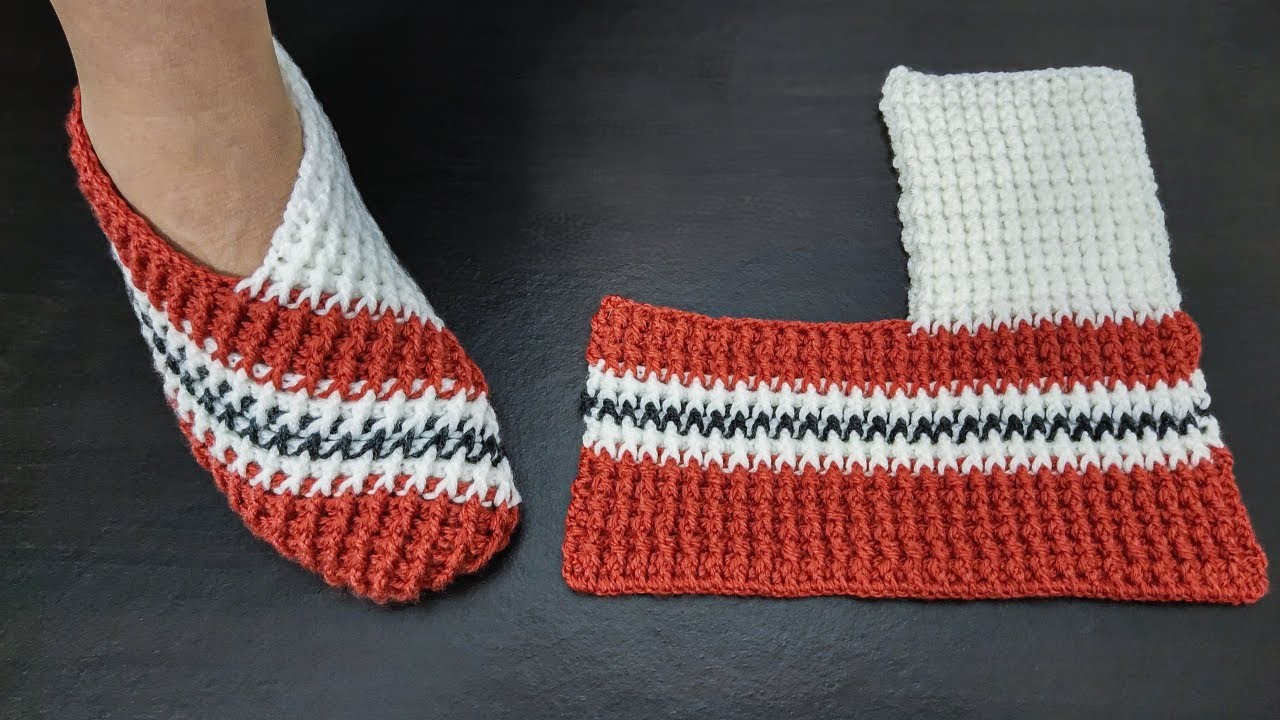
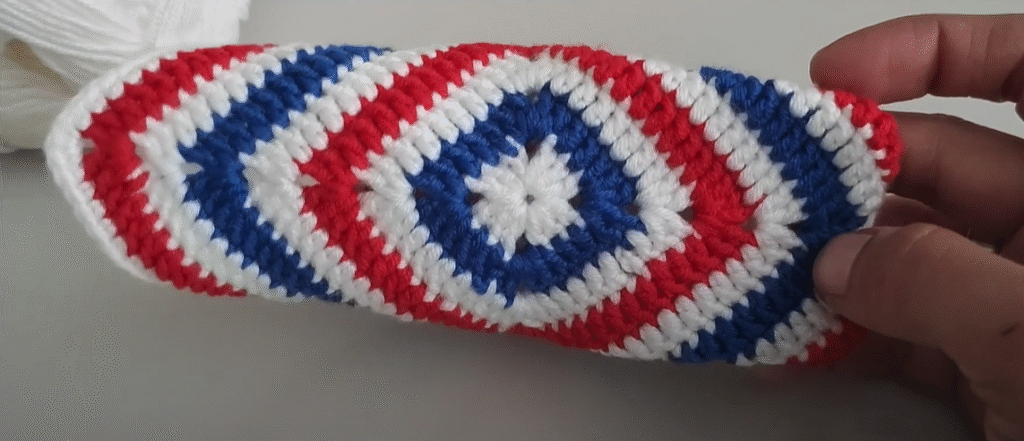
Part 2: Assembling the Shoe Sole
We’ll join two of the granny squares to form the base of the shoe.
- Place two granny squares side by side with the wrong sides facing each other.
- Using your main joining color and your crochet hook, single crochet (sc) the two squares together along one edge. Work through both loops of each stitch for a secure seam.
Part 3: Attaching the Side Squares
Now we’ll attach the remaining two granny squares to the sides of the sole.
- Take one of the remaining granny squares. Align one edge of this square with one of the unjoined long edges of the sole.
- Using your main joining color, sc the side square to the sole along this edge. Center the granny square as best as you can.
- Repeat this process with the last granny square on the opposite unjoined long edge of the sole. You should now have a basic shoe shape with the toe and heel open.

Part 4: Shaping the Toe
Now we’ll work around the front opening (toe) to create a rounded shape.
- With the right side facing you and using your main joining color, attach your yarn to one of the corners where a side square meets the sole.
- Ch 1, and work sc evenly around the edge of the toe opening. You might need to increase or decrease slightly to create a smooth curve. Pay attention to making the center front slightly more rounded.
- Continue working sc for a few rounds (2-3 rounds) to create a closed toe area. Decrease stitches as needed to narrow the opening and shape the toe nicely. Aim for a gently rounded finish.
- Sl st to the first sc of the round. Fasten off and weave in the end.
Part 5: Shaping the Heel and Ankle Opening
We’ll now work on the back opening (heel) to create a snug fit around the ankle.
- With the right side facing you and using your main joining color, attach your yarn to one of the back corners where a side square meets the sole.
- Ch 1, and work sc evenly across the back edge of the sole and up the side of the adjacent square.
- Continue working sc across the top edge of that side square.
- Now work sc down the other side square and across the remaining back edge of the sole.
- Continue working in rounds of sc, shaping the heel. You can decrease stitches at the back corners to create a more defined heel cup.
- Work until you reach the desired height for the back of the shoe, which will also form part of the ankle opening.
- To create a more secure fit around the ankle, you can work a few rounds of a tighter stitch like hdc or slip stitch around the top opening.

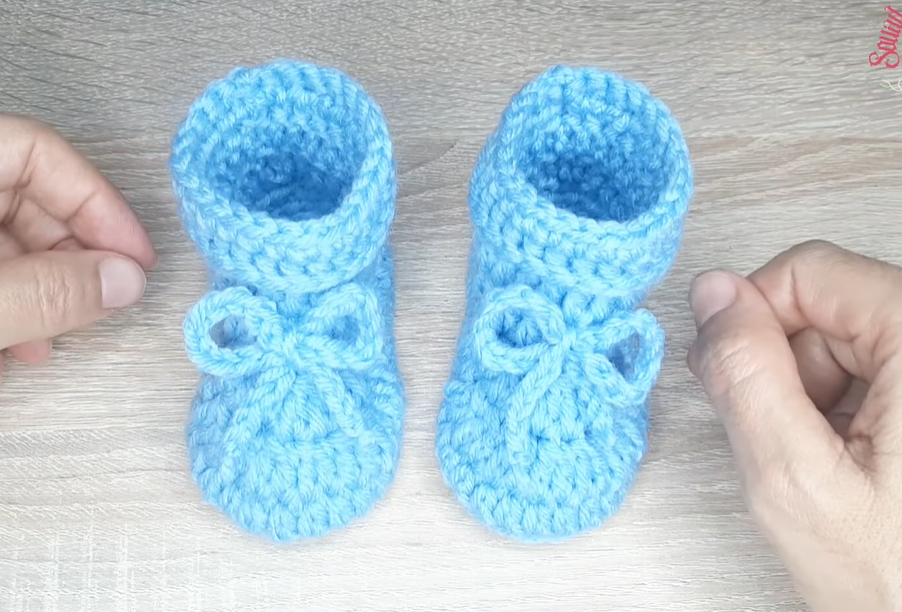
Part 6: Adding a Strap (Optional)
A strap can help keep the shoes securely on little feet.
- With your main joining color, attach your yarn to the side of the shoe.
- Ch a desired length for the strap (approximately 15-20 chains, adjust as needed).
- Sc in the 2nd ch from the hook and in each ch across.
- Attach the other end of the strap to the opposite side of the shoe.
- Optional Fastener: You can add a small button to the side where the strap begins and create a loop at the end of the strap to fasten it.
Finishing Touches:
- Weave in all remaining yarn ends securely.
- You can add decorative elements like small crocheted flowers, buttons (ensure they are securely attached and safe), or embroidery to personalize your granny square baby shoes.
Adjusting the Size:
- Smaller Size: Use a lighter weight yarn and a smaller hook. You can also make your initial granny squares with fewer rounds.
- Larger Size: Use a heavier weight yarn and a larger hook. You can also add more rounds to your initial granny squares. When joining, ensure the proportions still look right.
Tips and Variations:
- Color Play: Experiment with different color combinations for your granny squares to create a vibrant and unique look.
- Solid Color Shoes: You can adapt this pattern by crocheting four squares in the same color for a more uniform look.
- Edging: Consider adding a decorative edging around the top of the shoe or the strap using a contrasting color or a different stitch like picot or crab stitch.
Congratulations on creating your adorable crochet granny square baby shoes! These little booties are sure to be treasured and will keep those tiny toes cozy and stylish. Happy crocheting!