 by
by 
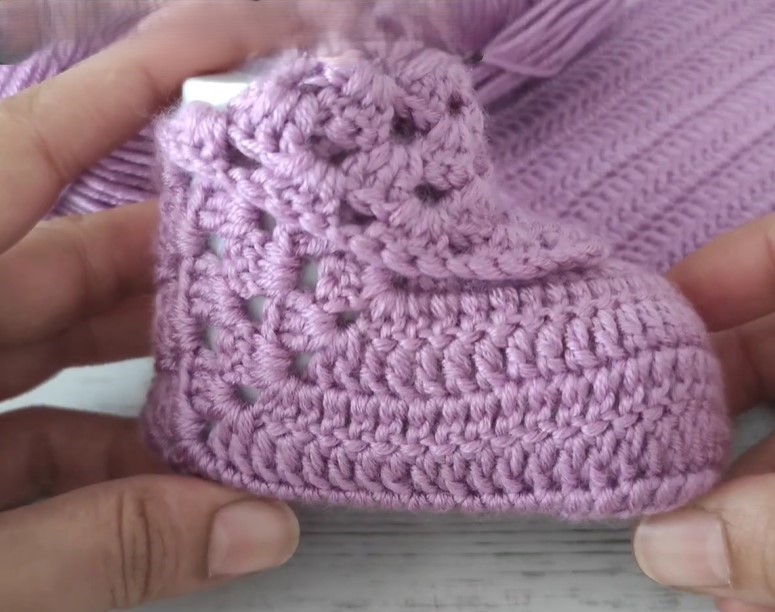
the delightful journey of crocheting tiny treasures! There’s something so heartwarming about creating something small and precious for a little one, and granny square baby shoes are just the ticket. They’re a charming blend of classic crochet and adorable functionality. Let’s dive into how you can craft these sweet little booties.

Materials You’ll Need:
- Yarn: Soft and gentle yarn is key for baby items. DK (double knit) or sport weight cotton or acrylic yarn is a great choice. You won’t need much, so those leftover bits from other projects could come in handy! Choose colors that make your heart sing – soft pastels, vibrant hues, or a mix for a playful touch.
- Crochet Hook: Select a hook size appropriate for your chosen yarn weight. Usually, a 3.5mm (E/4) or 4mm (G/6) hook works well for DK/sport weight yarn.
- Scissors: For snipping yarn ends.
- Tapestry Needle: For weaving in those pesky ends securely.
- Stitch Markers (Optional but Recommended): These little helpers can be lifesavers for marking rounds and ensuring symmetry.
- Buttons or Small Embellishments (Optional): For adding a decorative touch and helping to keep the shoes on little feet.
Gauge:
While exact gauge isn’t critical for this small project, it’s good to have a general idea. Aim for approximately 4 double crochet stitches per inch with your chosen yarn and hook. If your stitches look too loose or too tight, adjust your hook size accordingly.
Abbreviations (US Crochet Terms):
- ch: chain
- sl st: slip stitch
- sc: single crochet
- hdc: half double crochet
- dc: double crochet
- tr: treble crochet
- sp: space
- st(s): stitch(es)
- beg: beginning
- rep: repeat
Video tutorial
Let’s Get Crocheting!
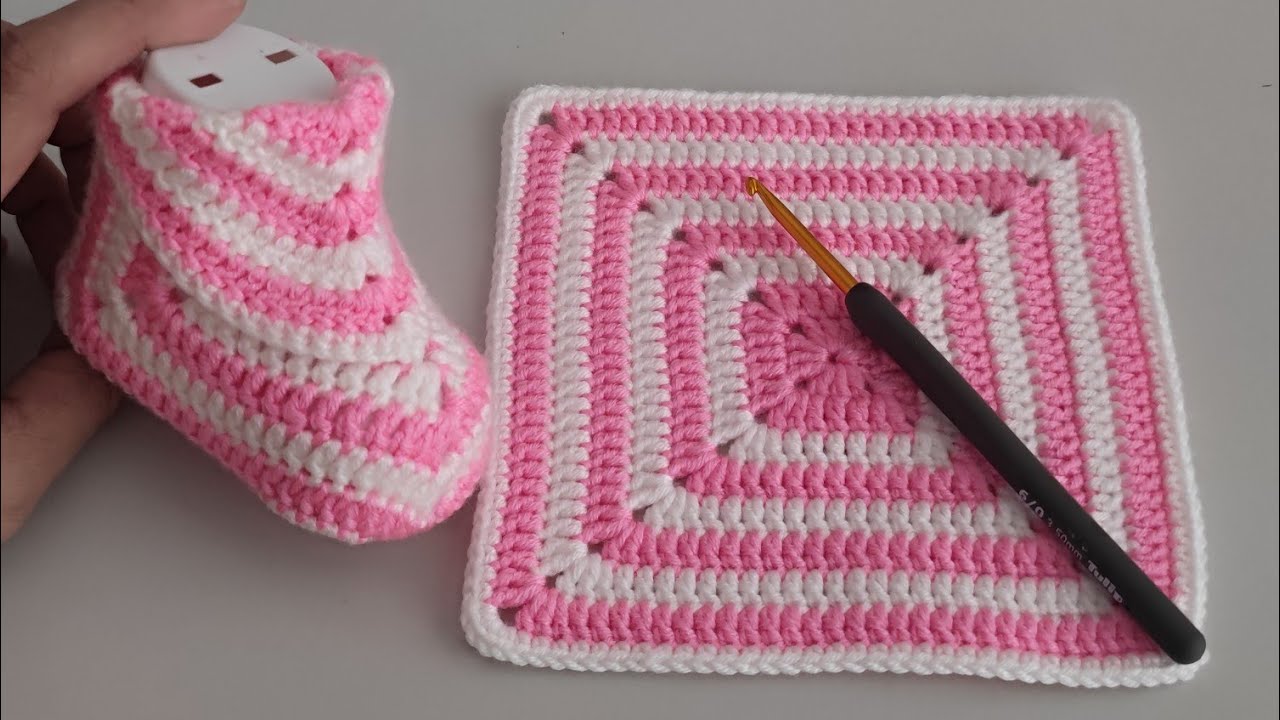
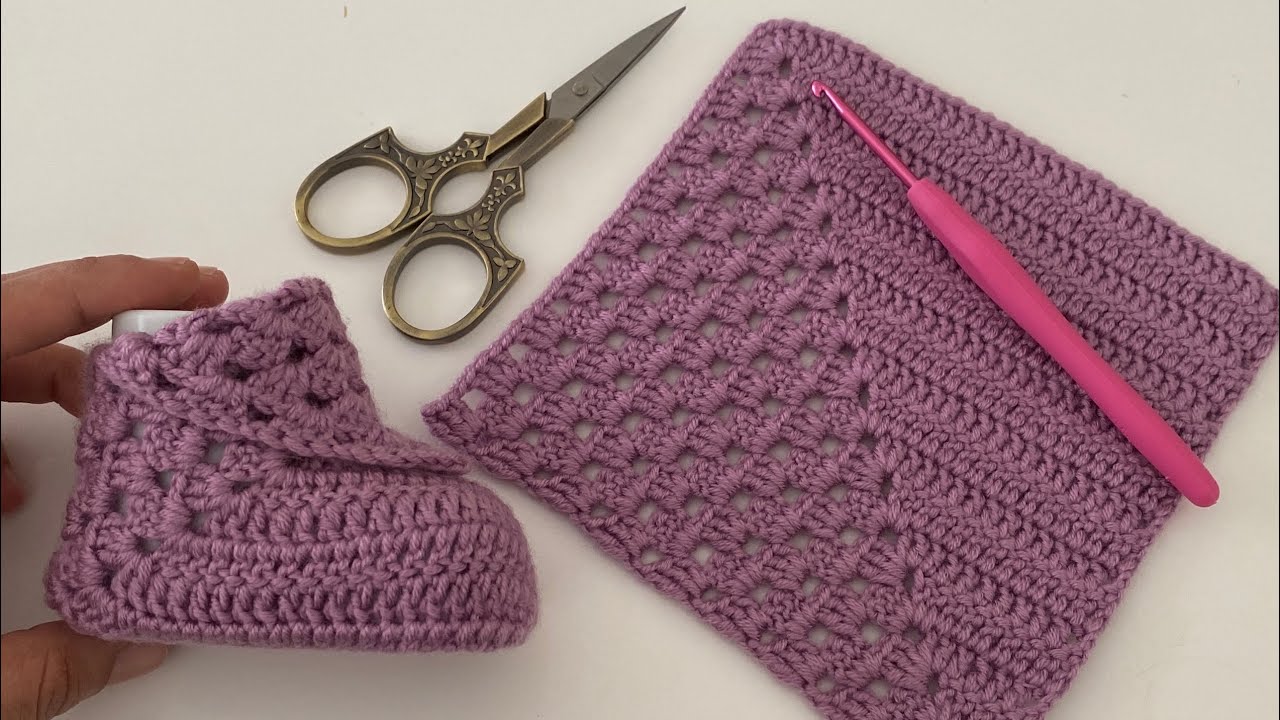
Part 1: The Granny Squares (Make 2)
We’ll start by making two classic granny squares that will form the main part of the shoe.
- Magic Ring (or ch 4, sl st to join): Begin with a magic ring. If you prefer not to use a magic ring, chain 4 and slip stitch into the first chain to form a ring.
- Round 1: Ch 3 (counts as first dc), 2 dc in the ring, ch 2, (3 dc in the ring, ch 2) three times. Sl st to the top of the beginning ch-3. You should now have four clusters of 3 double crochets separated by chain-2 spaces.
- Round 2: Sl st into the next 2 dc and into the ch-2 sp. Ch 3 (counts as first dc), 2 dc in the same ch-2 sp, ch 1, (3 dc, ch 2, 3 dc) in the next ch-2 sp (corner made), ch 1, (3 dc in the next ch-2 sp, ch 1) twice, (3 dc, ch 2, 3 dc) in the last ch-2 sp (corner made), ch 1. Sl st to the top of the beginning ch-3.
- Round 3: Sl st into the next 2 dc and into the ch-1 sp. Ch 3 (counts as first dc), 2 dc in the same ch-1 sp, ch 1. *In the next ch-2 corner sp, work (3 dc, ch 2, 3 dc), ch 1. In each of the next two ch-1 sps, work 3 dc, ch 1. Rep from * once more. In the last ch-2 corner sp, work (3 dc, ch 2, 3 dc), ch 1. In the last ch-1 sp, work 3 dc, ch 1. Sl st to the top of the beginning ch-3.
- For larger sizes, continue adding rounds in the same manner: 3 dc in each ch-1 sp along the sides and (3 dc, ch 2, 3 dc) in each ch-2 corner space. For baby shoes, 3 rounds are usually sufficient for a newborn to 3-month size. You can adjust based on your desired size.
- Fasten off after the desired number of rounds, leaving a long tail for sewing. Repeat steps 1-5 to make a second granny square.

Part 2: Shaping the Shoe Upper
Now, we’ll shape one of the granny squares to create the upper part of the shoe.
- Fold and Mark: Fold one of your granny squares in half diagonally. The corner that forms the point of the fold will be the toe. Place stitch markers on either side of the center 3 double crochet cluster on the opposite side (the heel). These markers will indicate the section we’ll leave open for the ankle.
- Attaching Yarn: With the right side facing you, attach your yarn to one of the stitch markers.
- Round 1: Ch 1, sc in the same st. Sc in each st across to the next stitch marker. Remove the stitch markers. Turn your work.
- Round 2: Ch 1, sc in each st across. Turn your work.
- Repeat Round 2: Continue repeating Round 2 for approximately 4-6 rows (or more for a higher ankle). The number of rows will depend on the size you are making and your desired ankle height.
- Fasten off, leaving a long tail for sewing.
Part 3: Creating the Sole
We’ll use the second granny square as the sole of the shoe.
Part 4: Assembling the Shoe
Now comes the exciting part – putting it all together!

- Positioning: Place the shaped upper piece on top of the sole piece, with the wrong sides facing each other. The straight edge of the upper piece should align with one side of the granny square sole, leaving the toe area of the sole extending beyond the pointed end of the upper.
- Sewing the Sides: Using your tapestry needle and the long tail from the upper piece, carefully sew the sides of the upper to the sole. Start at one side of the heel opening and work your way around to the toe, and then back up the other side of the heel opening. Use a whip stitch or a mattress stitch for a neat and secure seam.
- Sewing the Heel: Use the yarn tail from the sole (if you left one) or attach a new piece of yarn to sew the back heel seam together.
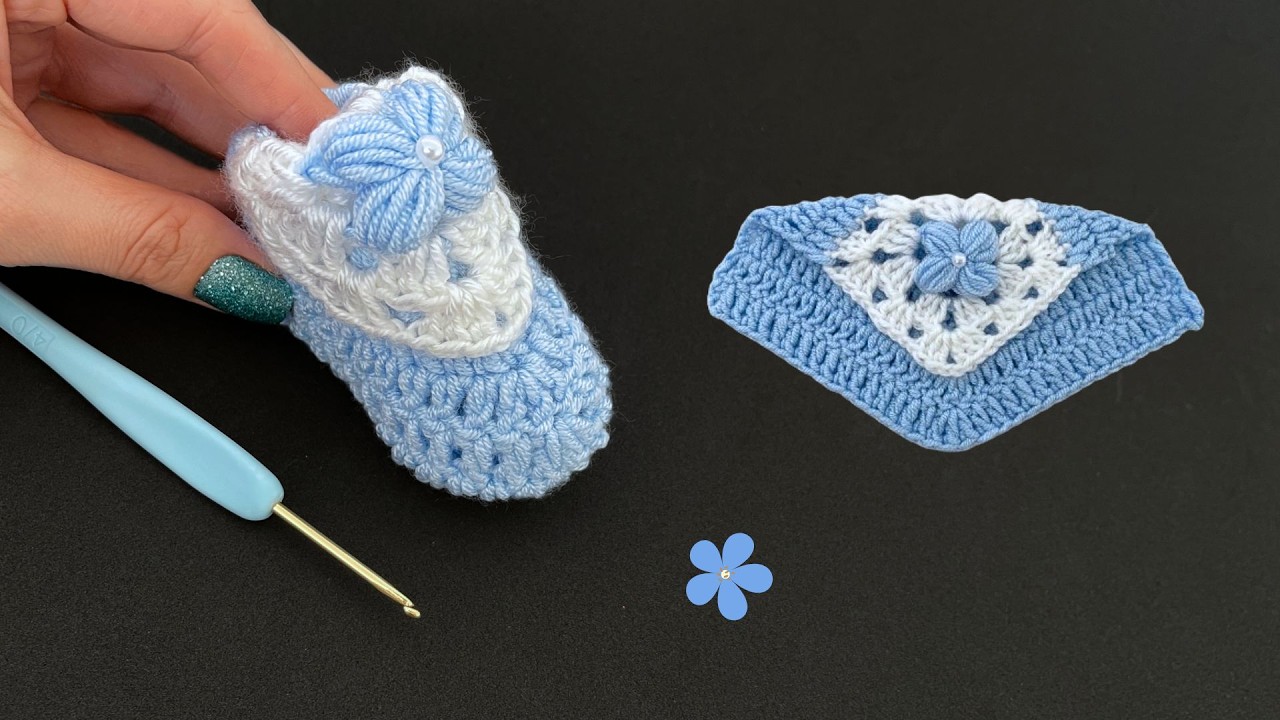
Part 5: Adding the Ankle Strap (Optional)
An ankle strap helps keep the little shoes securely on tiny feet.
- Attach Yarn: With the right side facing you, attach your yarn to one side of the heel opening on the upper part of the shoe.
- Chain: Chain a length that will comfortably go around the baby’s ankle and allow for a button or tie closure. A chain of 15-25 stitches is a good starting point, but you can adjust based on your needs.
- Row 1: Starting in the second chain from the hook, sc in each chain across.
- Fasten off, leaving a long tail for attaching a button or for tying.
- Repeat: Make a second strap on the other side of the heel opening.
- Finishing: Sew buttons onto the opposite side of the straps, or leave the ends long for tying into a bow.
Part 6: Finishing Touches
- Weave in all loose ends securely with your tapestry needle.
- Add embellishments if desired. Small crocheted flowers, buttons, or embroidered details can add a personal touch.
Tips and Variations:
- Color Play: Get creative with colors! Use stripes, color blocking, or variegated yarn for unique looks.
- Edging: Add a decorative edging around the top of the shoe or the ankle opening using a contrasting color or a different stitch like picots or reverse single crochet.
- Sizing: To adjust the size, you can add or subtract rounds to the granny squares and adjust the length of the ankle strap. Remember that babies’ feet grow quickly!
- Sole Grip: For older babies who are starting to walk, you can add non-slip dots to the soles using fabric paint or silicone.
And there you have it – adorable, handmade crochet granny square baby shoes! These little booties make wonderful gifts and are a joy to create. Enjoy the process and the sweet result of your handiwork! Happy crocheting!