by
by 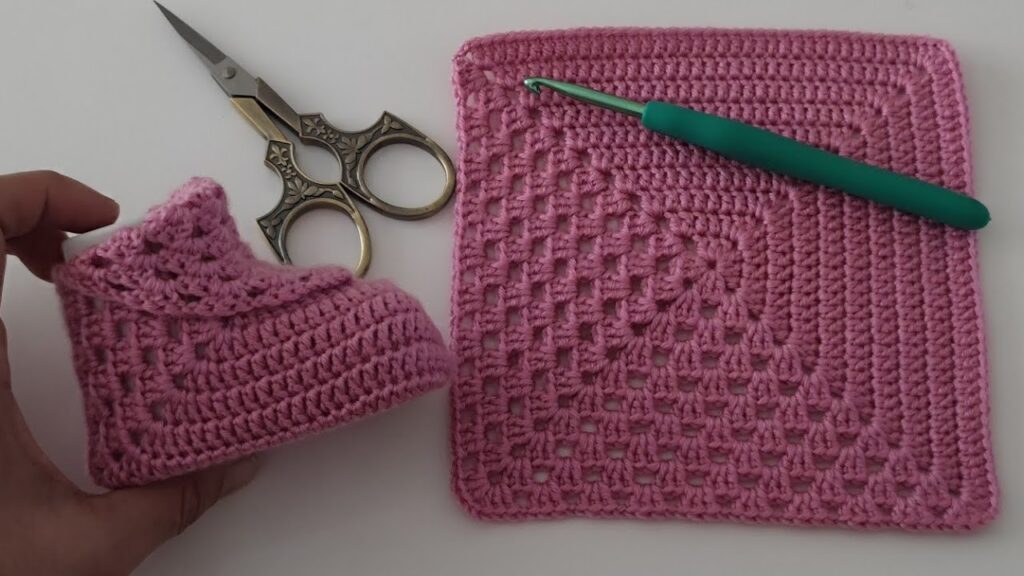
baby shoes! There’s something so sweet about those tiny little things, isn’t there? And what could be more heartwarming than a pair you’ve crocheted yourself? Today, we’re diving into a delightful project perfect for beginners: adorable granny square baby shoes. Don’t worry if you’re new to crochet; we’ll take it step by step. Get ready to create a precious keepsake!
What You’ll Need:
- Yarn: Soft and baby-friendly yarn in your choice of colors. Worsted weight (size 4) is a good starting point. You won’t need much – scraps are perfect for this project!
- Crochet Hook: A size H/8 (5.0 mm) hook is generally recommended for worsted weight yarn, but check your yarn label for suggestions.
- Scissors: For snipping yarn ends.
- Yarn Needle: For weaving in those loose ends neatly.
- Stitch Markers (optional but helpful): To mark the beginning of rounds or specific stitches.
Basic Crochet Stitches You Should Know:
- Slip Knot (sl st): The foundation of almost every crochet project.
- Chain (ch): A series of loops that forms a chain.
- Slip Stitch (sl st): A simple stitch used to join rounds or move across stitches.
- Double Crochet (dc): The main stitch used in granny squares.
Video tutorial
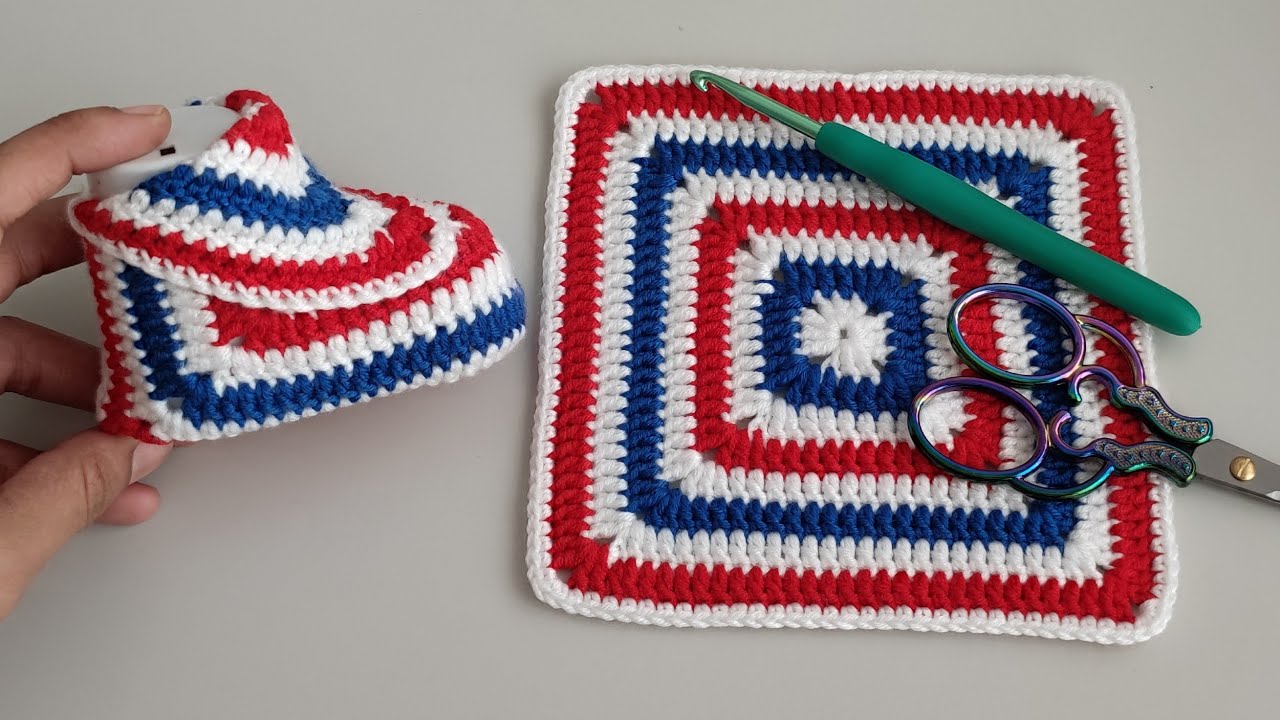
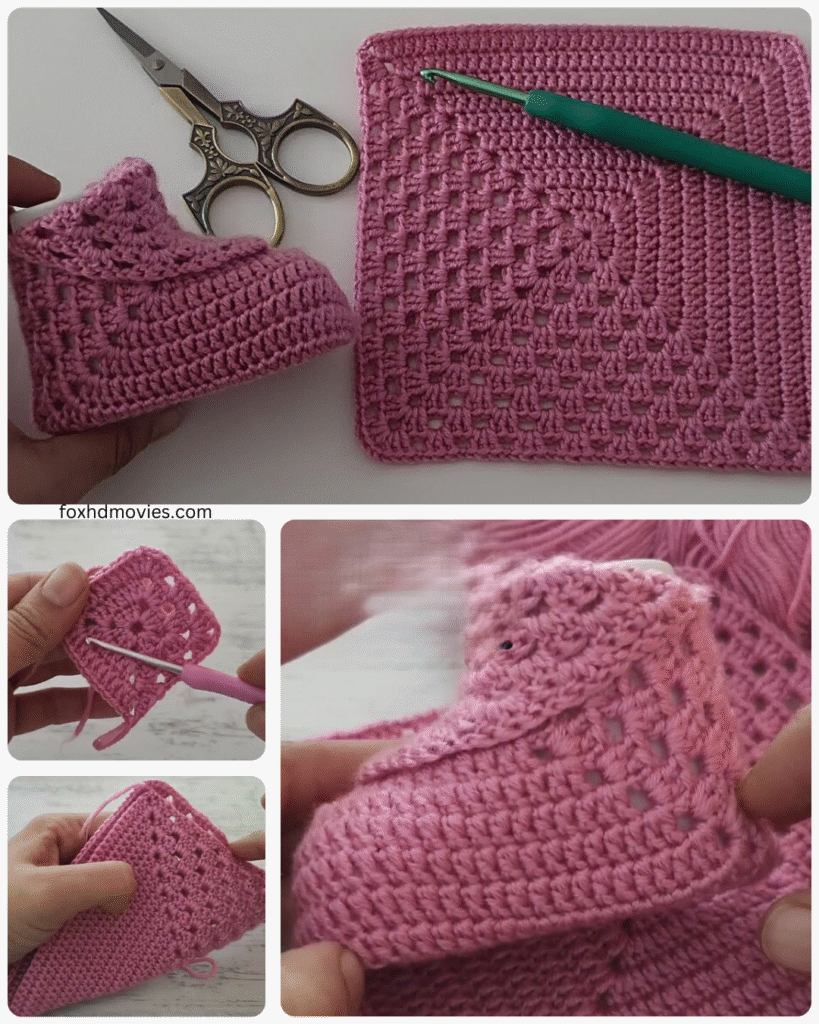
Creating the Granny Squares (Make 2):
We’ll start by making two identical granny squares that will form the main part of the shoe.
Round 1: Make a slip knot. Chain 4, then slip stitch into the first chain to form a ring. Alternatively, you can start with a magic ring.
Round 2: Chain 3 (this counts as your first double crochet). Work 2 double crochets into the ring. Chain 2. (Work 3 double crochets into the ring, chain 2) three times. Slip stitch to the top of the beginning chain 3 to join the round. You should now have four clusters of 3 double crochets separated by chain-2 spaces.
Round 3: Slip stitch into the next double crochet and then into the chain-2 space. Chain 3 (counts as first dc). Work 2 double crochets into the same chain-2 space. Chain 1. (Work 3 double crochets into the next chain-2 space, chain 2, work 3 double crochets into the same chain-2 space, chain 1) three times. In the last chain-2 space, work 3 double crochets, chain 2, work 3 double crochets, chain 1. Slip stitch to the top of the beginning chain 3 to join the round.
Round 4: Slip stitch into the next two double crochets and then into the chain-1 space. Chain 3 (counts as first dc). Work 2 double crochets into the same chain-1 space. Chain 1. (Work 3 double crochets into the next chain-2 corner space, chain 2, work 3 double crochets into the same chain-2 space, chain 1. Work 3 double crochets into the next chain-1 space, chain 1) three times. In the last chain-2 corner space, work 3 double crochets, chain 2, work 3 double crochets, chain 1. Work 3 double crochets into the last chain-1 space, chain 1. Slip stitch to the top of the beginning chain 3 to join the round.

Fasten off and weave in the ends for both squares.
Shaping the Shoe Upper:
Now, we’ll transform those squares into the shoe’s upper part.
- Folding: Lay one granny square flat. Decide which corner will be the “toe” of the shoe. Fold the two adjacent corners towards the center, overlapping them slightly. You’re essentially creating a triangular shape at the front.
- Securing: Using your yarn needle and yarn, or by slip stitching with your hook, secure these folded edges together along the top to form the toe. Ensure the seam is neat and relatively flat. Repeat this process for the second granny square.
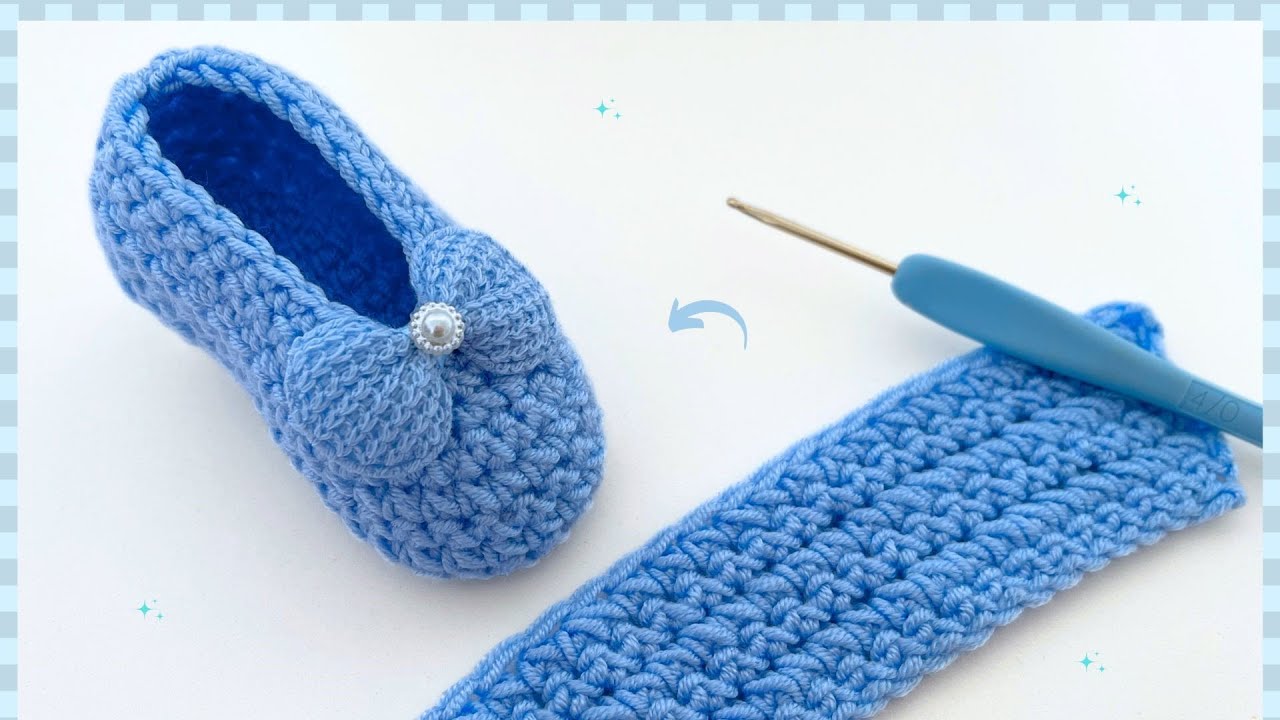
Creating the Sole:
Now, let’s crochet the sole that will attach to the upper.
Round 1: Make a slip knot. Chain 11.
Round 2: Single crochet (sc) in the second chain from the hook and in each chain across (10 sc). Chain 1, turn.
Round 3-18 (or desired length): Single crochet in each stitch across (10 sc). Chain 1, turn. Continue until your rectangle is the desired length for the baby shoe sole. You can measure against the bottom of the granny square upper.
Edging the Sole: Once you have the desired length, work one round of single crochet around the entire perimeter of the sole. This will create a nice edge for attaching. Make sure to work extra stitches in the corners to keep them rounded. Slip stitch to the first single crochet to join. Fasten off and weave in the end.

Attaching the Upper to the Sole:
Now comes the exciting part – putting it all together!
- Positioning: Align the bottom edge of the granny square upper with the single crochet edge of the sole. Make sure the “toe” part of the upper is at one end of the sole.
- Attaching: Using your yarn and yarn needle (or your crochet hook and slip stitches/single crochets), carefully sew or crochet the upper to the sole. Start at one side of the heel, work your way around the sides and toe, and finish at the other side of the heel. Ensure your stitches are secure and even.
Creating the Ankle Strap (Make 2):
These straps will help keep the little shoes on tiny feet.
- Chain: Chain approximately 15-20 stitches, or the desired length for the ankle strap.
- Finishing: Fasten off and leave a long tail for sewing.
Attaching the Ankle Strap:
- Positioning: On the outer side of each shoe, attach one end of the ankle strap securely using your yarn needle and the long tail. Position it towards the back of the shoe.
- Button/Loop (Optional): You can either sew a small button on the opposite side of the shoe for the strap to fasten around, or create a small loop with your yarn on the strap itself to go over a button.

Finishing Touches:
- Weave in all remaining loose ends carefully.
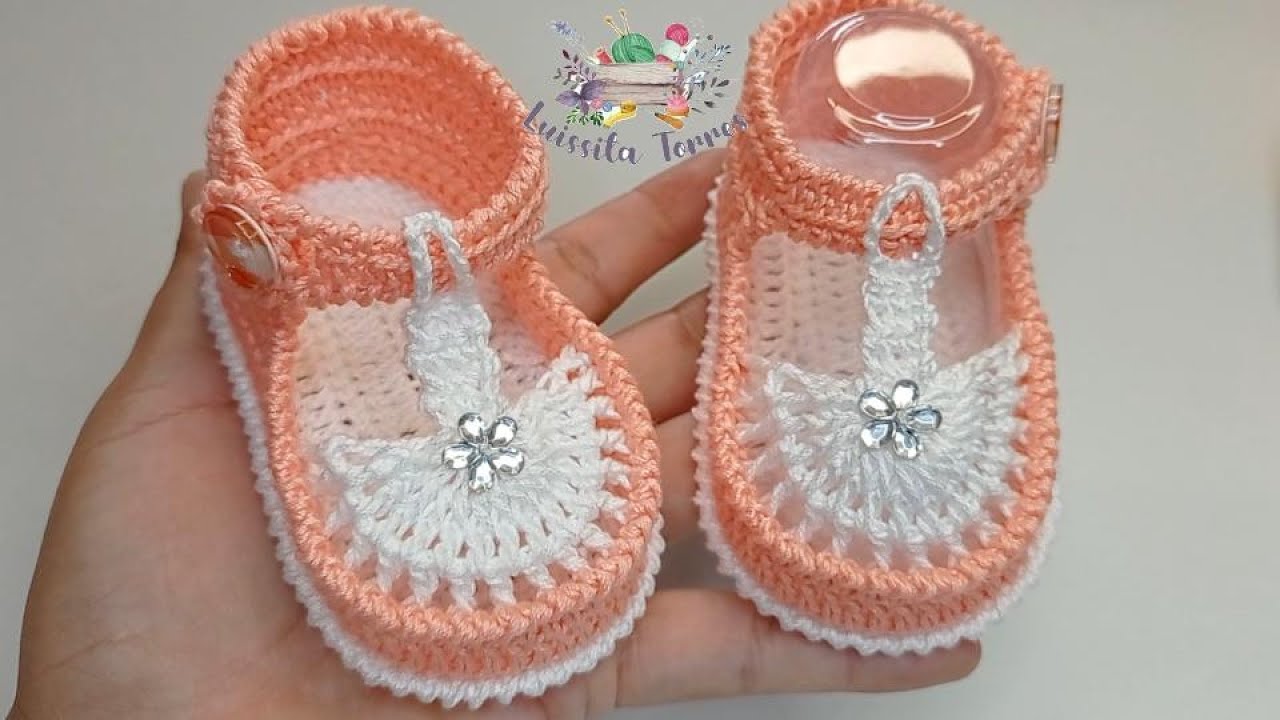
- Add embellishments (optional): You can add small crocheted flowers, buttons, or ribbons to personalize your baby shoes.
Congratulations! You’ve just created a beautiful and unique pair of granny square baby shoes. These little booties make wonderful gifts for baby showers or just because. Remember, practice makes perfect, so don’t be discouraged if your first pair isn’t flawless. Enjoy the process and the adorable result! Happy crocheting!