 by
by 
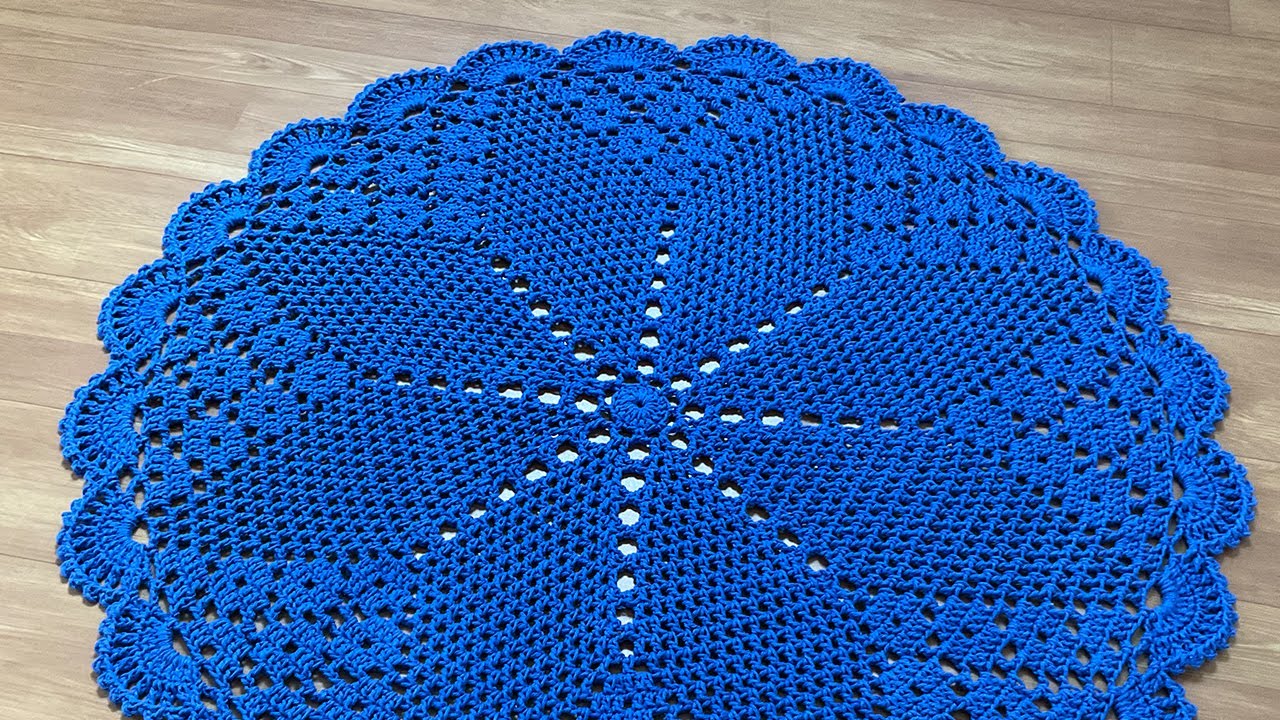
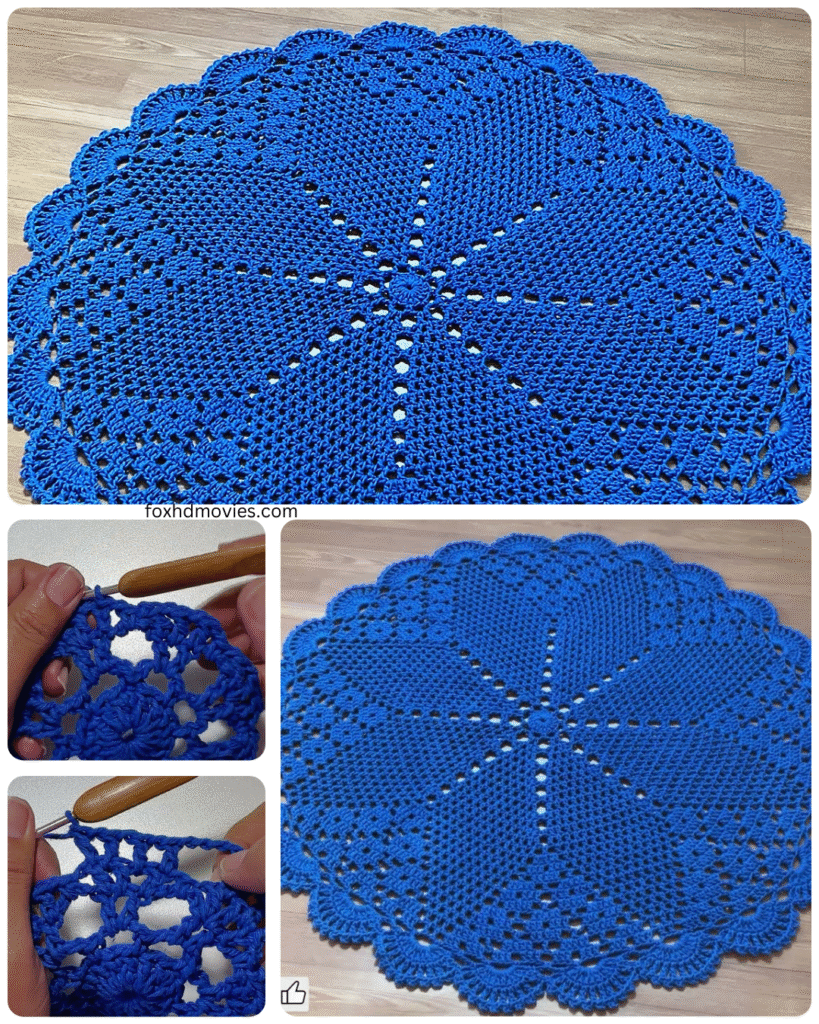
Hello, fellow crochet enthusiasts! Are you dreaming of adding a touch of regal elegance and cozy comfort to your home? Look no further! Today, we’re embarking on a journey to create a stunning Royal Blue Rug – a statement piece that will infuse your space with rich color and handmade charm.
This project, while potentially time-consuming depending on your desired size, is incredibly rewarding. The rhythmic motion of your hook and the gradual emergence of a beautiful, functional piece will fill you with a sense of accomplishment. So, gather your yarn, find a comfy spot, and let’s crochet our way to a luxurious royal blue rug!
Why Royal Blue?
Royal blue is a color that exudes sophistication, depth, and a touch of drama. It pairs beautifully with a variety of color schemes, from crisp whites and greys for a modern look to warm golds and yellows for a more traditional feel. A handmade royal blue rug instantly elevates any room, adding a personal and artistic touch that store-bought rugs simply can’t replicate.
What You’ll Need:
- Bulky or Super Bulky Yarn in Royal Blue: The amount of yarn will depend heavily on the size of your desired rug. For a small accent rug (e.g., 2×3 feet), you might need around 500-800 yards. For a larger area rug (e.g., 5×7 feet or more), you could need several thousand yards. It’s crucial to buy enough yarn of the same dye lot to avoid color variations.
- Large Crochet Hook: The size will be determined by your yarn weight. For bulky yarn, a size K/10.5 (6.5 mm) or larger is common. For super bulky, go even bigger (L/11 or larger). Check your yarn label for recommended hook sizes.
- Scissors: For snipping your yarn.
- Yarn Needle with a Large Eye: For weaving in those inevitable ends securely.
- Stitch Markers (optional but highly recommended): To help you keep track of rounds or rows, especially for larger rugs.
- Measuring Tape: To check your progress and ensure your rug is the desired size.
- Non-Slip Rug Pad (optional but recommended): To prevent slipping and protect your floor.
Choosing Your Stitch:
For a durable and textured rug, we’ll focus on a few beginner-friendly yet visually appealing stitches:
- Single Crochet (sc): Creates a dense, sturdy fabric. Perfect for a hard-wearing rug.
- Half Double Crochet (hdc): Works up a bit faster than sc and offers a slightly softer texture.
- Double Crochet (dc): Creates a more open fabric with more drape. Might be suitable for a decorative rug in a low-traffic area.
- Simple Repeats (e.g., alternating sc and dc): Adds visual interest and texture.
For this detailed pattern, we’ll focus on the Half Double Crochet (hdc) for a good balance of speed and texture.
Video tutorial
The Pattern: Crafting Your Royal Blue Masterpiece
We’ll work this rug in a simple rectangular or oval shape. You can easily adapt the starting chain for a different width and continue working rows/rounds until you reach your desired length.
Option 1: Rectangular Rug
- Foundation Chain: Chain the desired width of your rug. For example, for a 2-foot wide rug with hdc (approximately 3 hdc per inch depending on your yarn and tension), you’d chain around 72. Add 2 for the turning chain. (74 ch in this example)
- Row 1: Starting in the third chain from the hook, half double crochet (hdc) in each chain across. Turn. (72 hdc)
- Row 2: Chain 2 (does not count as a stitch). Half double crochet (hdc) in each stitch across. Turn. (72 hdc)
- Repeat Row 2: Continue repeating Row 2 until your rug reaches the desired length. Remember to chain 2 at the beginning of each row and turn your work. Use your measuring tape to keep track of the length. For a 3-foot long rug, you’d work approximately 108 rows (again, this depends on your gauge).
- Finishing: Once your rug is the desired size, fasten off your yarn, leaving a long tail. Use your yarn needle to weave in all loose ends securely.

Option 2: Oval Rug
This method starts with a chain and works in rounds to create an oval shape.
- Foundation Chain: Chain the desired length of the central part of your oval. For example, chain 50.
- Round 1: Half double crochet (hdc) in the third chain from the hook and in each chain across. In the last chain, work 3 hdc. Now, working on the opposite side of your foundation chain, hdc in each remaining chain. In the very first chain, work 2 hdc. Join with a slip stitch (sl st) to the top of the first hdc of the round. (Approximately 104 hdc in this example, adjust based on your starting chain).
- Round 2: Chain 2 (does not count as a stitch). Hdc in each stitch around. When you reach the 3 hdc at one end, work 2 hdc in the first, 2 hdc in the second, and 2 hdc in the third. Repeat this at the other rounded end (the 2 hdc from the previous round). Join with a sl st to the top of the first hdc.
- Round 3: Chain 2 (does not count as a stitch). Hdc in each stitch around. When you reach the increased stitches from the previous round (the 2 hdc in each of the 3 stitches), work 2 hdc in the next stitch, hdc in the following stitch repeat 3 times. Repeat this sequence at the other rounded end. Join with a sl st to the top of the first hdc.
- Continuing the Oval: Chain 2 (does not count as a stitch). Hdc in each stitch around, increasing at the rounded ends in each round. The increases should be worked in the increased stitches from the previous round, spreading them out evenly to maintain the oval shape. For example, in the next round, you might work 2 hdc, hdc in the next 2 stitches repeated around the curved ends.
- Continue until your rug reaches the desired size.
- Finishing: Once your rug is the desired size, fasten off your yarn, leaving a long tail. Use your yarn needle to weave in all loose ends securely.

Adding Texture and Visual Interest:
While a solid hdc rug is beautiful in its simplicity, here are some ways to add texture and visual interest:
- Changing Stitches: Alternate rows or rounds of single crochet and double crochet for a ribbed effect.
- Textured Stitches: Explore stitches like the bobble stitch, popcorn stitch, or even simple front post/back post stitches to create raised patterns.
- Stripes or Color Blocking: Introduce other shades of blue or complementary colors for stripes or larger blocks of color.
- Braided Edging: Once your main rug is complete, you can crochet a long chain or several strands of yarn and braid them together to create a unique border. Attach this border by slip stitching it around the edge of your rug.
Blocking Your Rug (Optional but Recommended for Larger Pieces):
While not always practical for very large rugs, blocking can help to flatten and even out your work, especially if you’ve incorporated textured stitches.
- Lay your rug flat on a clean surface.
- Lightly mist it with water (avoid soaking).
- Gently shape it with your hands, ensuring the edges are straight or evenly curved.
- Allow it to air dry completely.

Caring for Your Royal Blue Rug:
- Vacuum regularly: To remove dust and debris.
- Spot clean spills immediately: Use a mild detergent and a clean cloth. Blot gently; do not rub.
- Hand wash or machine wash (if size and yarn allow): For larger rugs, professional cleaning might be necessary.
- Use a non-slip rug pad: To prevent slipping and protect your floor.
The Joy of Handmade:
Creating your own royal blue rug is more than just a craft project; it’s an investment in your home’s comfort and style. Each stitch holds the warmth of your effort and the beauty of handmade artistry. Step back and admire your creation – a luxurious, royal blue statement piece that you made with your own two hands!