by
by 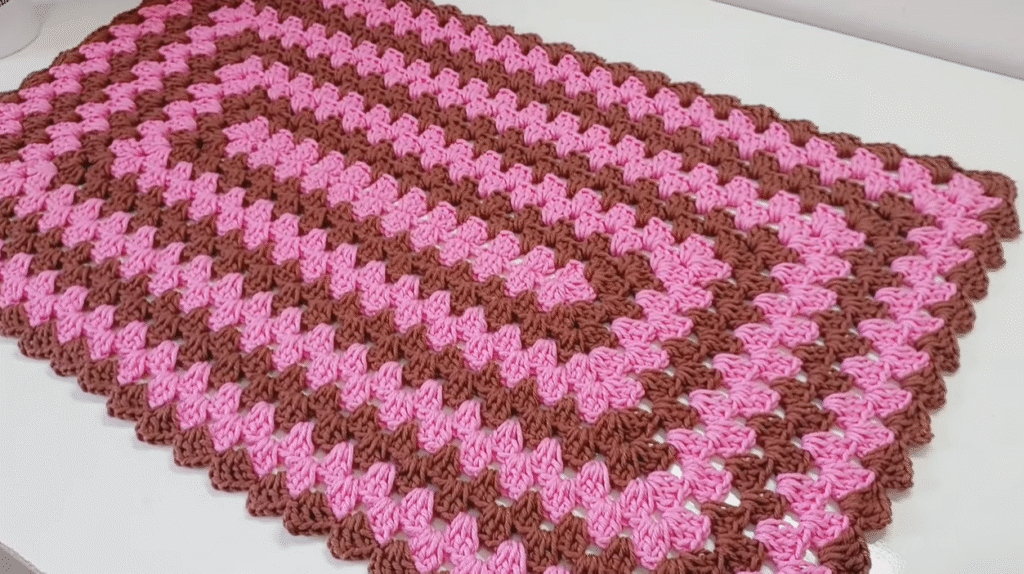
Welcome, fellow crocheters! Are you dreaming of adding a touch of handmade warmth and charm to your home? Look no further than the classic “Priscilla” style rug, adapted here for an easy rectangular crochet project. This design, known for its textured rows and simple elegance, is perfect for beginners and seasoned crafters alike.
We’ll break down the process step-by-step, ensuring a relaxing and rewarding experience as you create a beautiful and functional rug for any room in your house. Get ready to transform your yarn stash into a cozy haven underfoot!
What You’ll Need:
- Bulky Weight Yarn: Choose a durable and washable bulky yarn. The amount will depend entirely on your desired rug size. Estimate generously! Consider using a yarn specifically designed for rugs or one that can withstand regular use and washing.
- Large Crochet Hook: Select a hook size appropriate for your bulky yarn. A common size for bulky yarn is between 9mm (M/13) and 15mm (P/Q). Check your yarn label for recommendations.
- Scissors: For snipping your yarn.
- Yarn Needle: For weaving in those pesky ends securely.
- Measuring Tape: To check your progress and ensure your rug reaches your desired dimensions.
- Stitch Markers (optional but helpful): To mark the beginning or end of rows, especially for beginners.
Video tutorial
Understanding the Priscilla Stitch (Simplified):
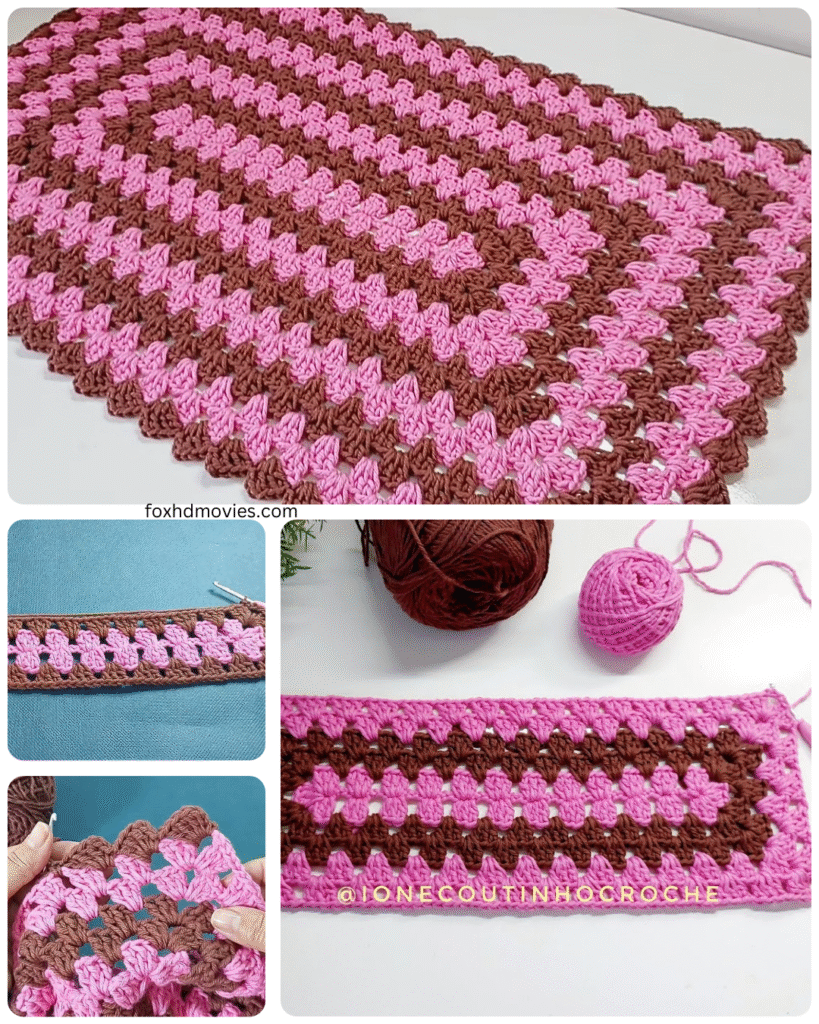
The beauty of the Priscilla stitch lies in its alternating rows of texture. We’ll be using a combination of simple double crochet (dc) and a slightly modified stitch that creates a raised “ridge.” Don’t worry, it’s easier than it sounds!
- Double Crochet (dc): Yarn over, insert hook into stitch, yarn over, pull through a loop (3 loops on hook), yarn over, pull through 2 loops (2 loops on hook), yarn over, pull through the last 2 loops.
- Modified Raised Stitch (our simple twist): Instead of a standard front post or back post stitch, we’ll simply work a double crochet into the front loop only (flo) of the stitches in specific rows. This creates a subtle but effective raised line.

The Pattern: Building Your Cozy Rectangle
This pattern provides instructions for a basic rectangular Priscilla-style rug. You can easily adjust the starting chain to change the width and the number of rows to change the length.
- Foundation Chain: Chain the desired width of your rug. For a small to medium rug, you might start with 60-80 chains. Remember, the number of chains will determine the width.
- Row 1: Double crochet (dc) in the third chain from the hook (the first two chains count as your first dc), and in each chain across. Turn.
- Row 2: Chain 2 (does not count as a stitch). Double crochet (dc) in the first stitch and in each stitch across. Turn.
- Row 3 (Textured Row): Chain 2 (does not count as a stitch). Double crochet (dc) in the front loop only (flo) of each stitch across. Turn.
- Row 4: Chain 2 (does not count as a stitch). Double crochet (dc) in both loops of each stitch across. Turn.
- Repeat Rows 3 and 4: Continue repeating Rows 3 and 4 until your rug reaches your desired length. Remember that Row 3 will create the subtle raised lines due to working in the front loop only, and Row 4 will be a standard double crochet row.
- Last Row: Work one final row of double crochet (dc) in both loops of each stitch across. Fasten off.

Finishing Touches:
- Weave in Ends: Using your yarn needle, weave in all loose ends securely on the wrong side of your rug. Make sure they are tucked in well so they won’t come undone with use or washing.
- Optional Border: For a more finished look, you can add a simple border around your rug.
- Join your yarn in any corner.
- Chain 1, then work single crochet (sc) evenly around all four sides of the rug. Work 3 single crochets in each corner to help it lay flat.
- Slip stitch to the first single crochet to join. Fasten off and weave in the end.
- You can repeat this for a wider border or use a different simple stitch like half double crochet (hdc).
- Blocking (Optional): If your rug is looking a little uneven, you can gently block it.
- Lightly dampen the rug with water (you can use a spray bottle).
- Lay it flat on a clean surface or blocking mats.
- Gently shape it to your desired rectangular form, smoothing out any wrinkles or unevenness.
- Allow it to air dry completely.

Tips for Success:
- Consistent Tension: Try to maintain consistent tension throughout your project to ensure an even and flat rug.
- Counting Stitches: Especially for beginners, counting your stitches at the end of each row can help prevent mistakes and ensure your rug stays rectangular.
- Yarn Choice Matters: Opt for a yarn that is durable, washable, and feels good underfoot. Rug yarns are specifically designed for this purpose.
- Hook Size: Using the correct hook size for your yarn will create the desired fabric density and prevent large gaps.
- Take Breaks: For larger rugs, take breaks to avoid hand fatigue.
- Embrace Imperfections: Remember that handmade items have their own unique charm. Don’t strive for absolute perfection; enjoy the process!

Endless Possibilities: Customizing Your Priscilla Rug
The beauty of this simple pattern lies in its adaptability! Here are a few ideas to personalize your Priscilla rug:
- Color Blocking: Change colors every few rows or in larger sections to create stripes or geometric patterns.
- Vary the Width of Textured Stripes: Experiment with working more or fewer rows of the front loop only double crochet to create wider or narrower textured stripes.
- Add Fringe: Once your rug is complete, you can add fringe along the short or long edges for a bohemian or traditional touch.
- Different Border Styles: Explore different border stitches or multiple rounds of borders in contrasting colors.
Share Your Cozy Creations!