 by
by 
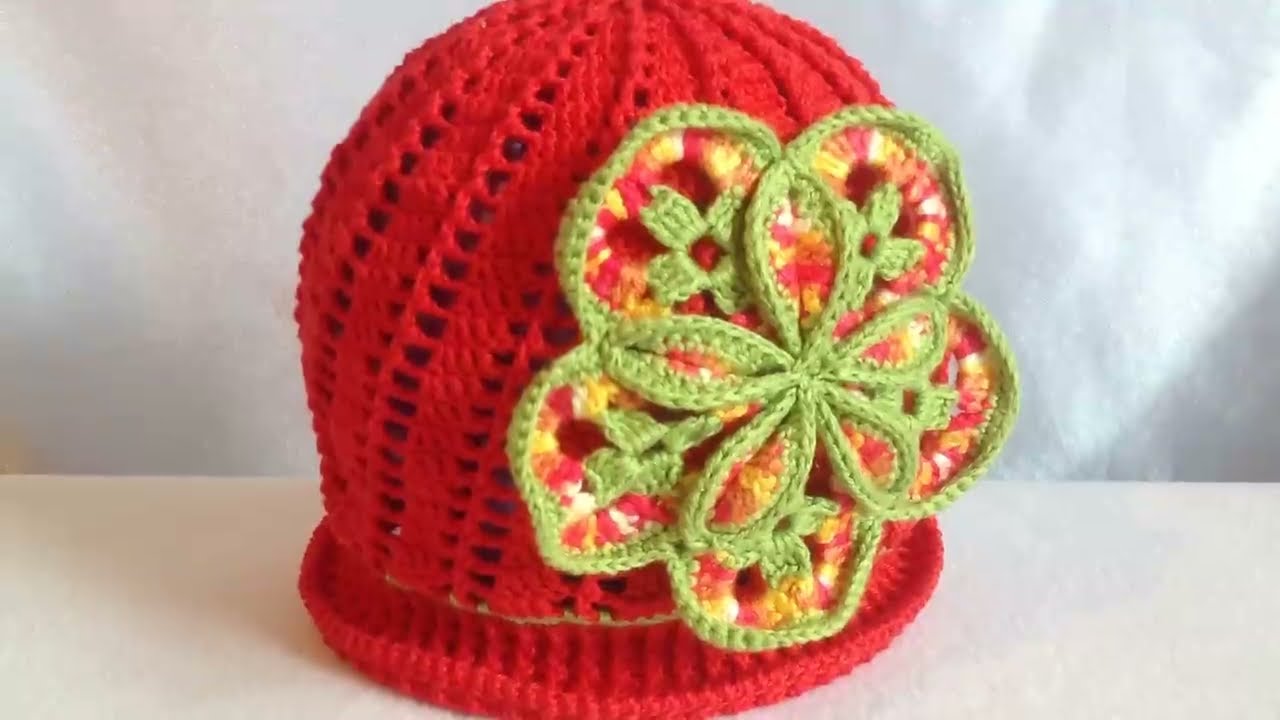
Hello sunshine seekers and crochet lovers! As the days get longer and the urge to bask in the warmth grows stronger, what could be more perfect than a stylish and handmade accessory to shield you from the sun? Today, we’re embarking on a fun and rewarding project: creating your very own Cute Crochet Panama Hat!
This pattern is designed to be approachable for crocheters with basic skills, and the result is a charming hat that’s both fashionable and functional. Imagine strolling along the beach, attending a summer picnic, or simply enjoying a sunny day in your unique, handcrafted Panama hat. Let’s grab our yarn and hooks and bring this vision to life!
What You’ll Need:
- Medium-Weight Cotton or Raffia Yarn: Choose a yarn that holds its shape well. Cotton is breathable and washable, while raffia offers a more traditional Panama hat look (though it can be a bit more challenging to work with for beginners). The amount will depend on the size of your hat, but estimate around 200-300 yards.
- Crochet Hook: Select a hook size appropriate for your chosen yarn. For medium-weight cotton, a G/6 (4.0 mm) or H/8 (5.0 mm) hook is usually a good starting point. Check your yarn label for recommendations.
- Scissors: For snipping your yarn.
- Yarn Needle: For weaving in ends neatly.
- Stitch Markers: These will be incredibly helpful for keeping track of your rounds, especially during the initial shaping.
- Measuring Tape: To check your hat size as you go.
Video tutorial
Understanding the Anatomy: Parts of Our Panama Hat
Our cute crochet Panama hat will be constructed in three main parts:
- The Crown: The top, rounded part of the hat. We’ll start here and work in increasing rounds.
- The Body (Sides): The straight section that extends down from the crown. We’ll work even rounds here.
- The Brim: The wider, often slightly floppy edge that provides shade. We’ll work increasing rounds again to create the brim.
The Pattern: From Crown to Brim
Let’s get crocheting! This pattern is written for an average adult head size (approximately 22-23 inches in circumference). Adjust the number of initial rounds for the crown to customize the size.
Part 1: The Crown
We’ll start with a flat circle and gradually shape it into a shallow bowl.
- Magic Ring (or Chain 3, slip stitch to join): Start with a magic ring. If you prefer not to use a magic ring, chain 3 and slip stitch to the first chain to form a loop.
- Round 1: Work 6 single crochet (sc) stitches into the magic ring (or the loop created by the chain). Pull the magic ring tight to close the center. Slip stitch (sl st) to the first sc to join the round. (6 sc)
- Round 2: Chain 1 (does not count as a stitch). Work 2 sc in each stitch around. Slip stitch to the first sc to join. (12 sc)
- Round 3: Chain 1. *Sc in the next stitch, 2 sc in the following stitch.* Repeat from * to * around. Slip stitch to the first sc to join. (18 sc)
- Round 4: Chain 1. *Sc in the next 2 stitches, 2 sc in the following stitch.* Repeat from * to * around. Slip stitch to the first sc to join. (24 sc)
- Round 5: Chain 1. *Sc in the next 3 stitches, 2 sc in the following stitch.* Repeat from * to * around. Slip stitch to the first sc to join. (30 sc)
- Continue Increasing: Continue in this manner, increasing by 6 stitches in each round. In each round, work one more single crochet before the increase. For example:
- Round 6: *Sc in the next 4 stitches, 2 sc in the following stitch.* (36 sc)
- Round 7: *Sc in the next 5 stitches, 2 sc in the following stitch.* (42 sc)
- And so on…
- Check for Size: Keep working increasing rounds until your circle measures approximately 6-7 inches in diameter for an average adult head. Place stitch markers periodically to ensure your increases are evenly spaced.

Part 2: The Body (Sides)
Now we’ll work even rounds to create the height of the hat.
- Round (Next): Chain 1. Single crochet (sc) in each stitch around. Slip stitch to the first sc to join. (The number of stitches will be the last count from your crown rounds).
- Repeat: Continue working rounds of single crochet in each stitch around, without increasing, until the body of your hat reaches your desired height (usually around 3-4 inches for a typical Panama hat style).
Part 3: The Brim
Now we’ll start increasing again to create the characteristic wider brim.
- Round 1 (Brim): Chain 1. *Sc in the next stitch, 2 sc in the following stitch.* Repeat from * to * around. Slip stitch to the first sc to join.
- Round 2 (Brim): Chain 1. *Sc in the next 2 stitches, 2 sc in the following stitch.* Repeat from * to * around. Slip stitch to the first sc to join.
- Continue Increasing the Brim: Continue increasing in the same manner as you did for the crown, adding one more single crochet before each increase in each round. For example:
- Round 3 (Brim): *Sc in the next 3 stitches, 2 sc in the following stitch.*
- Round 4 (Brim): *Sc in the next 4 stitches, 2 sc in the following stitch.*
- And so on…
- Desired Brim Width: Continue increasing until your brim reaches your desired width (usually around 1.5 – 2.5 inches). You can try the hat on periodically to check the brim size.
- Optional Brim Shaping: For a slightly wavy or more defined brim, you can add a few rounds of half double crochet (hdc) or double crochet (dc), or even work a simple shell stitch border in the final round. You can also slightly increase or decrease the stitch count in the final rounds to create gentle curves.
- Final Round: Work one final round of single crochet evenly around the brim for a neat edge. Slip stitch to the first sc to join.

Finishing Touches:
- Fasten Off: Cut your yarn, leaving a tail. Pull the tail through the last loop and tighten to secure.
- Weave in Ends: Use your yarn needle to weave in all loose ends securely into the body of the hat.
- Blocking (Optional but Recommended): If your hat is looking a bit uneven or you want to shape the brim, you can gently block it. Lightly dampen the hat with water (you can use a spray bottle). Shape the brim as desired and pin it to a flat surface or a hat form until it dries completely. This will help the hat hold its shape.
- Add a Decorative Band (Optional): You can add a ribbon, a crocheted band in a contrasting color, or other embellishments around the base of the crown for an extra touch of style.
Tips and Variations:
- Tension is Key: Try to maintain consistent tension throughout your project for a smooth and even fabric.
- Stitch Markers are Your Friends: Don’t hesitate to use stitch markers, especially at the beginning of each round and to mark your increase points.
- Try Different Stitches: While single crochet creates a nice sturdy fabric, you can experiment with other stitches like half double crochet or even a textured stitch for the body and brim (just be mindful of how it affects the shape and drape).
- Color Play: Have fun with colors! A solid color is classic, but you can also create stripes or color blocks for a more playful look.
- Adjusting Size: To make a smaller hat, work fewer increasing rounds for the crown. For a larger hat, work more. You can also adjust the height of the body by working more or fewer even rounds.