 by
by 
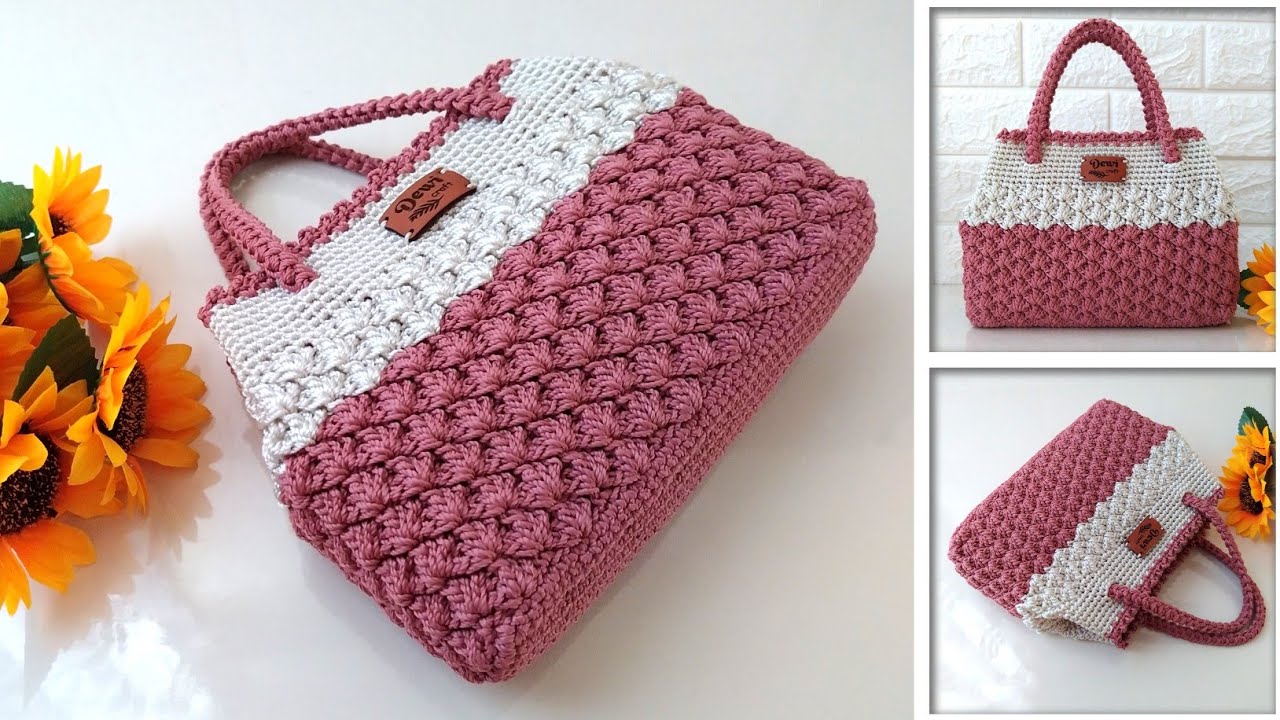
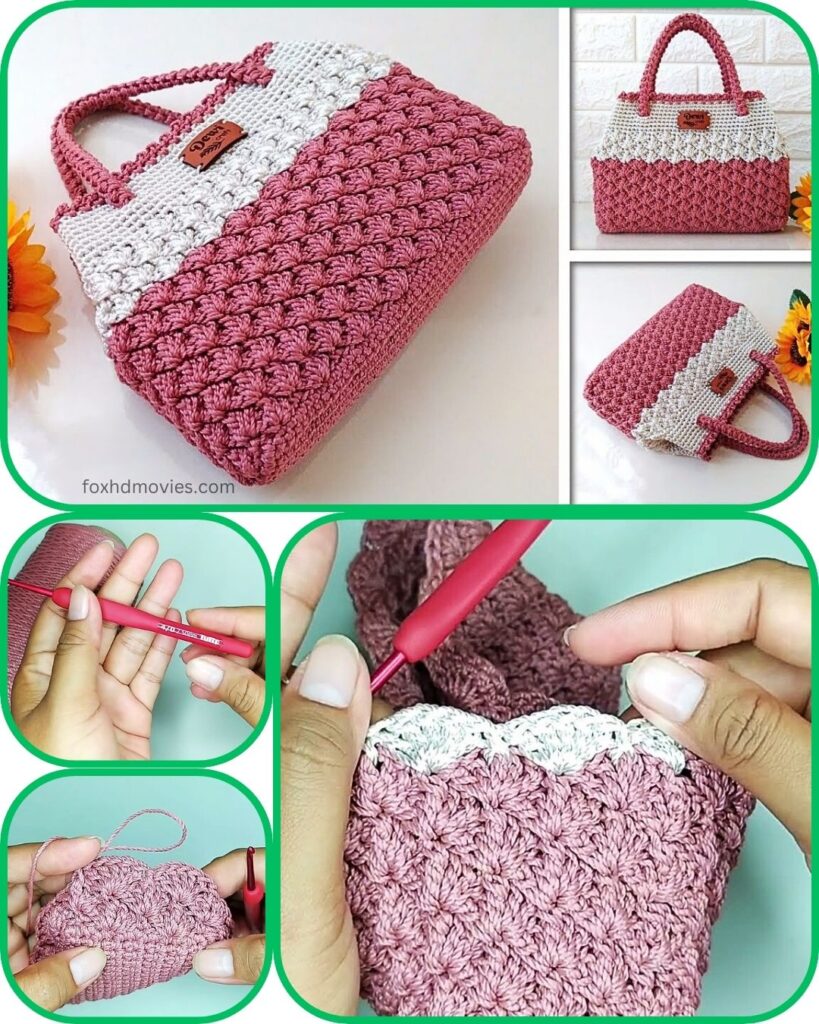
Welcome to your first crochet bag project! This tutorial is designed specifically for beginners, using only basic stitches. We’ll create a simple, sturdy bag perfect for carrying small items.
Materials You’ll Need:
- Yarn: Approximately 200-300 yards of worsted weight yarn. Cotton or a cotton blend is recommended as it’s durable and holds shape well for bags. Choose a light color so you can easily see your stitches.
- Crochet Hook: Size H/8 (5.0 mm) or size recommended on your yarn label.
- Scissors: For cutting yarn.
- Tapestry Needle: For weaving in ends.
- Stitch Marker (Optional but Recommended): To keep track of your rounds.
Stitches You Need to Know:
- Chain (ch): The foundation of most crochet projects.
- Slip Stitch (sl st): Used to join stitches or rounds.
- Single Crochet (sc): A basic, compact stitch.
Let’s Get Started!
Step 1: Creating the Base of the Bag (Oval Shape)

We will work in rounds to create a flat oval base.
- Chain: Start by making a slip knot and chaining 16 (or any even number for the length you want your base, just remember this number). This is your starting chain.
- Round 1: Sc in the second chain from the hook. Sc in each chain across until you reach the last chain.
- Turning the Corner: In the very last chain, work 3 sc into that same chain. This turns your work to the other side of the starting chain.
- Working Down the Other Side: Now, you will work sc stitches down the opposite side of your starting chain. Sc in the bottom loop of each chain across. You should have one stitch left before your very first sc.
- Turning the Second Corner: In the last chain (where your very first sc of the round was made), work 2 sc. You should now be back where you started Round 1.
- Join: Sl st to the first sc you made in this round to join.
- Round 2: Ch 1 (does NOT count as a stitch). Work 2 sc in the same stitch as the join (this is an increase). Sc in each stitch along the side until you reach the 3 sc you worked in the corner of the previous round.
- Corner Increases: Work 2 sc in the first of the 3 corner stitches, 2 sc in the next stitch, and 2 sc in the third stitch. (You’ve increased in each of the 3 corner stitches).
- Work Along the Second Side: Sc in each stitch along the side until you reach the 2 sc you worked in the second corner of the previous round.
- Second Corner Increases: Work 2 sc in the first of the 2 corner stitches, and 2 sc in the second stitch. (You’ve increased in each of the 2 corner stitches).
- Join: Sl st to the first sc you made in this round to join.
- Round 3: Ch 1 (does NOT count as a stitch). Sc in the next stitch, 2 sc in the next stitch – repeat this sequence once more (these are your initial increases). Sc in each stitch along the side until you reach the first set of corner increases from the previous round.
- Corner Increases: Sc in the next stitch, 2 sc in the next stitch – repeat this sequence 3 times (increasing in the corner).
- Work Along the Second Side: Sc in each stitch along the side until you reach the second set of corner increases from the previous round.
- Second Corner Increases: Sc in the next stitch, 2 sc in the next stitch – repeat this sequence 2 times (increasing in the corner).
- Join: Sl st to the first sc you made in this round to join.
Your base should now be a flat oval. You can continue increasing for a larger base by following the pattern of increasing at the corners (working 2 sc in the second stitch of each 2-sc increase from the previous round). For this simple bag, the size after Round 3 is usually sufficient.

Step 2: Creating the Body of the Bag (Working Straight Up)
Now we will stop increasing and work even rounds to build the height of the bag.
- Round 4: Ch 1 (does NOT count as a stitch). Work 1 sc in the back loop only of each stitch around. This creates a defined edge between the base and the body of the bag.
- Join: Sl st to the first sc you made in this round to join.
- Rounds 5 onwards: Ch 1 (does NOT count as a stitch). Work 1 sc in both loops of each stitch around.
- Join: Sl st to the first sc you made in the round to join.
Repeat Round 5 until your bag reaches the desired height. Keep your stitch count consistent in each round. Use a stitch marker at the beginning of each round if needed to help you keep track.
Step 3: Creating the Handles
Once your bag body is the desired height, we’ll create the handles. The placement of the handles depends on the size of your bag. You’ll essentially skip a section of stitches on two sides to create openings for the handles.
- Next Round (Handle Placement): Ch 1 (does NOT count as a stitch). Sc in the first few stitches along the side. The number of stitches here determines the distance from the corner to the start of your handle.
- Create First Handle: Chain a number of stitches for the length of your handle (e.g., 30-40 chains). The more chains, the longer the handle.
- Skip Stitches: Skip the same number of stitches on the bag body as the number of chains you just made.
- Continue Sc: Sc in the next stitches along the top of the bag until you reach the position for your second handle.
- Create Second Handle: Chain the same number of stitches as you did for the first handle.
- Skip Stitches: Skip the same number of stitches on the bag body as the number of chains you just made.
- Finish the Round: Sc in the remaining stitches until you reach the beginning of the round.
- Join: Sl st to the first sc of the round.

Step 4: Strengthening the Handles and Top Edge
We’ll work another round or two of single crochet around the entire top edge, including the chains of the handles, to make them sturdy.
- Next Round: Ch 1 (does NOT count as a stitch). Sc in each sc stitch around the top edge of the bag body.
- Working on the Handle Chains: When you reach the chain section for the handle, work 1 sc into each chain stitch. This can be a little tricky, so take your time.
- Continue Around: Continue working sc in the sc stitches on the bag body and then sc in each chain stitch of the second handle.
- Join: Sl st to the first sc of the round.
You can repeat this round (working sc in each sc around) one or two more times if you want thicker, stronger handles and a more finished top edge.
Step 5: Finishing
- Fasten Off: After your final round, cut your yarn, leaving a tail about 6-8 inches long. Pull the tail through the loop on your hook to secure.
- Weave in Ends: Thread the yarn tail onto your tapestry needle. Carefully weave the tail through the stitches on the inside of your bag to hide it. Weave it in different directions to secure it well. Do the same for the starting tail at the base of your bag.
Congratulations!
You’ve just completed your first crochet bag!
Video tutorial
Tips for Beginners:
- Gauge isn’t critical: For a bag, the exact size isn’t as important as for clothing, so don’t worry too much about matching a specific gauge. Just try to keep your stitches consistent.
- Count your stitches: Especially in the base, counting your stitches at the end of each round will help ensure your bag stays the correct shape and doesn’t grow or shrink unexpectedly.
- Don’t be afraid to start over: If you make a mistake, it’s okay to unravel and try again! That’s part of learning.
- Watch videos: If you’re having trouble with a stitch or technique, there are many excellent free crochet tutorials on YouTube.
Enjoy your new handmade bag!