 by
by 
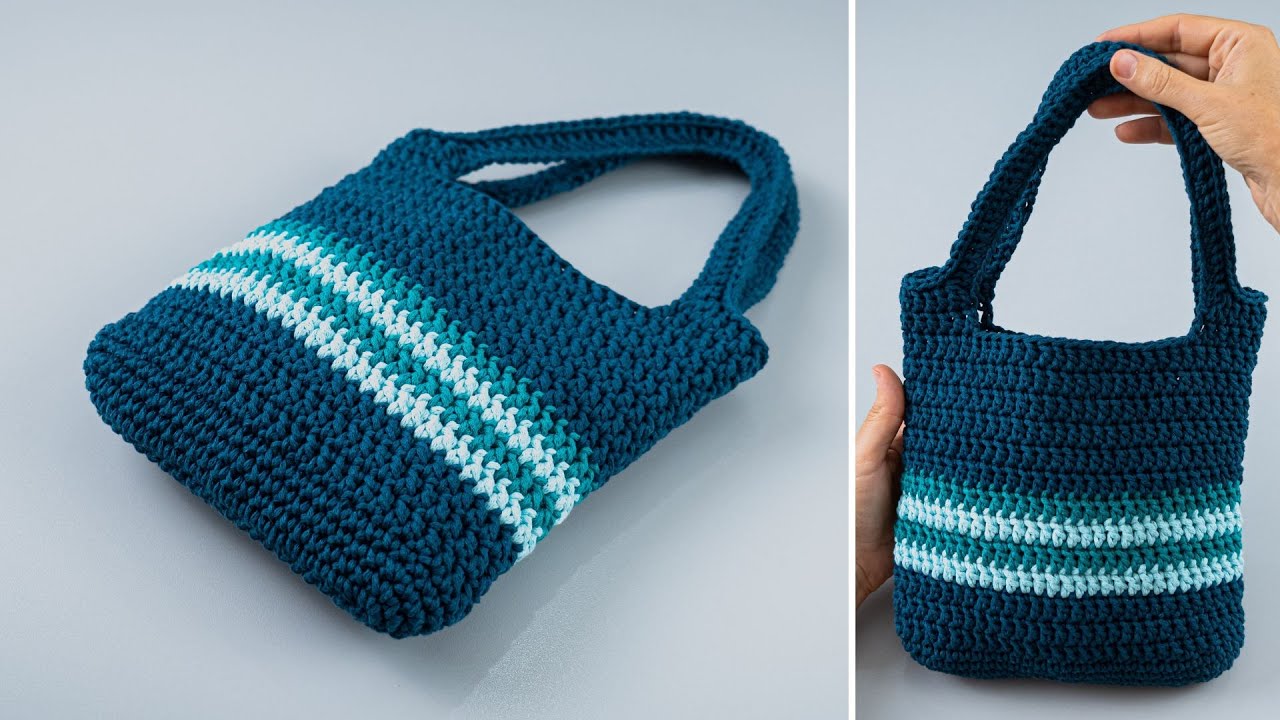
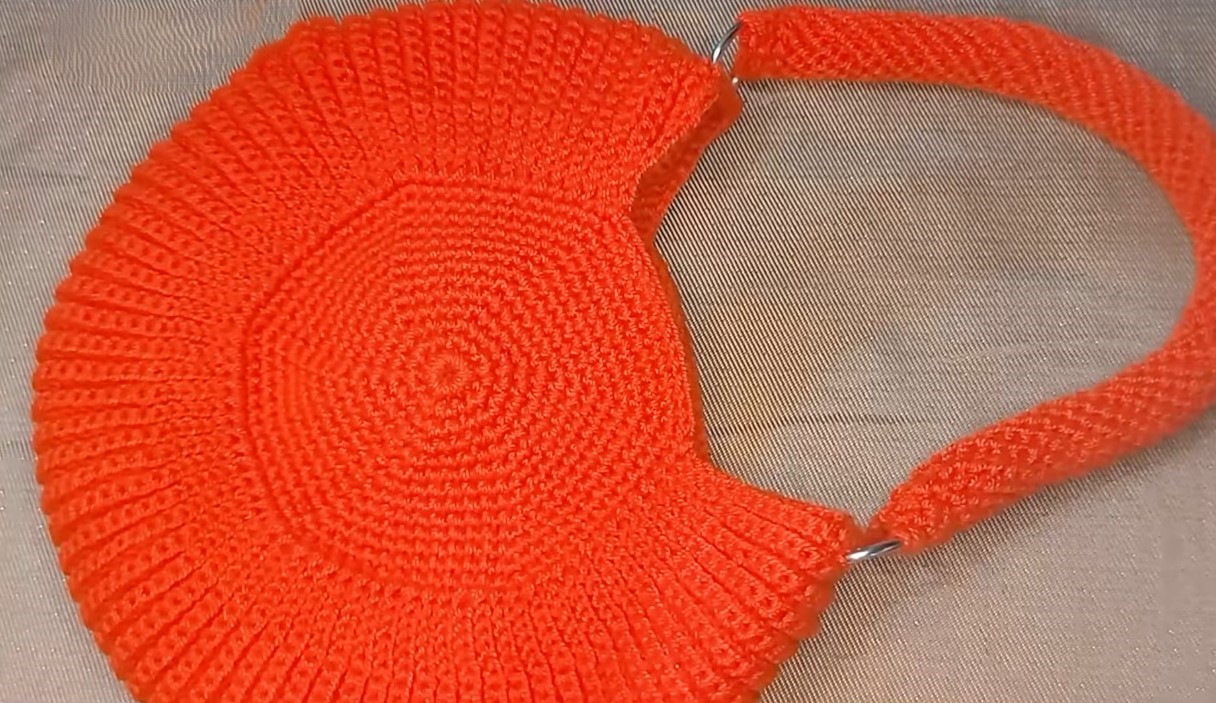
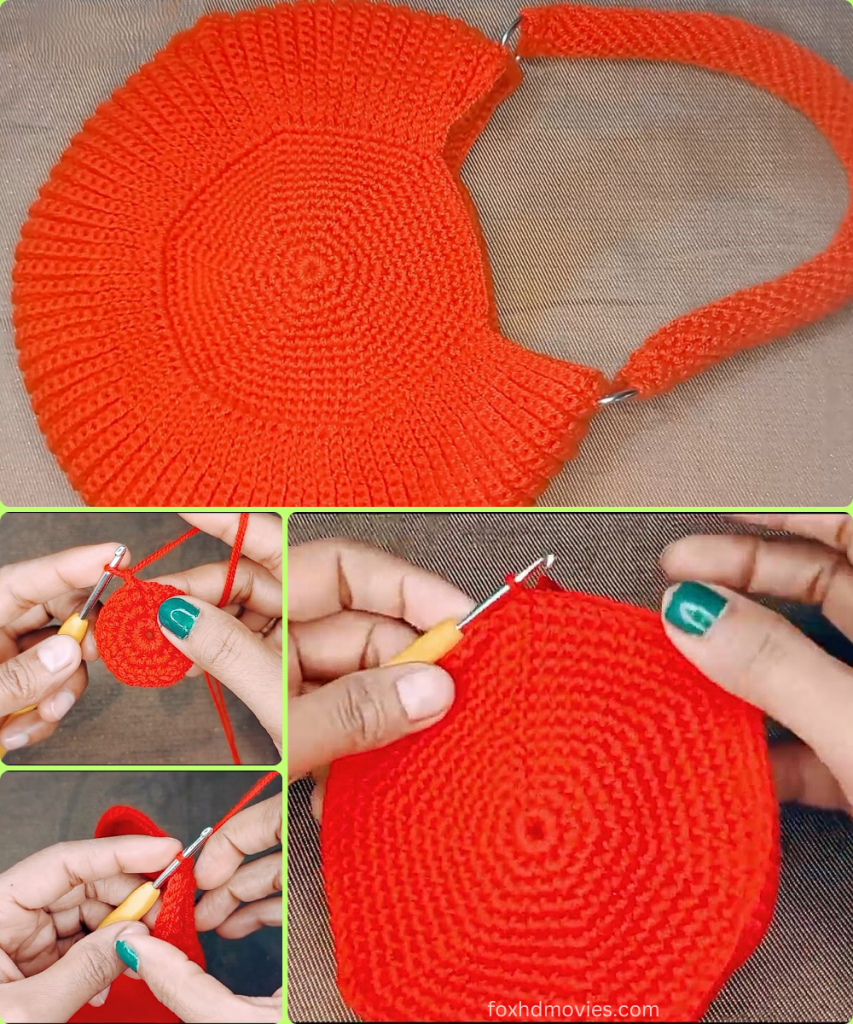
Create your own trendy and versatile round bag with this fantastic crochet pattern! Inspired by a detailed tutorial, this design guides you through the step-by-step process of creating a beautifully structured circular bag. Perfect for a casual outing or a night on the town, this bag is a wonderful way to showcase your crochet skills.
Skill Level: Intermediate
Finished Size (Approximate):
- Diameter: Approximately 8-10 inches (20-25 cm)
- Depth: Approximately 2-3 inches (5-7.5 cm)
- Size can vary based on yarn, hook, and tension.
Materials You’ll Need:
- Yarn: Approximately 200-400 grams of sturdy yarn (e.g., cotton blend, acrylic, or T-shirt yarn/trapillo for a firmer bag) in your chosen color.
- The video uses a yarn that creates a nice, structured fabric. Choose a yarn that will hold its shape well.
- Crochet Hook: A hook size appropriate for your chosen yarn, typically 4.0 mm (G/6) to 6.0 mm (J/10).
- Choose a hook size that creates a firm, dense fabric with no gaps when working with your chosen yarn.
- Tapestry Needle: For weaving in ends and seaming.
- Scissors
- Stitch Marker (Optional): To mark the beginning of rounds.
- Magnetic Clasp or Zipper (Optional): For bag closure.
- Bag Handles (Optional): Two pre-made bag handles (e.g., leather, bamboo, or metal rings) if you prefer not to crochet them. (The video mentions a separate tutorial for handles, so you can choose to follow that or use pre-made ones).
Gauge (Crucial for Bag Structure!):
Achieving a firm, dense fabric is crucial for this bag to hold its elegant shape. Work a swatch to ensure your stitches are tight with no visible gaps. If your fabric is too loose, go down a hook size.
Abbreviations (US Crochet Terms):
- ch: chain
- sl st: slip stitch
- sc: single crochet
- inc: increase (2 sc in the same stitch)
- st(s): stitch(es)
- MR: Magic Ring
- FO: Fasten off
- BLO: Back Loop Only
Let’s Crochet Your Stylish Round Bag!
This bag is constructed by creating two circular panels for the front and back, and then a side strip to connect them.
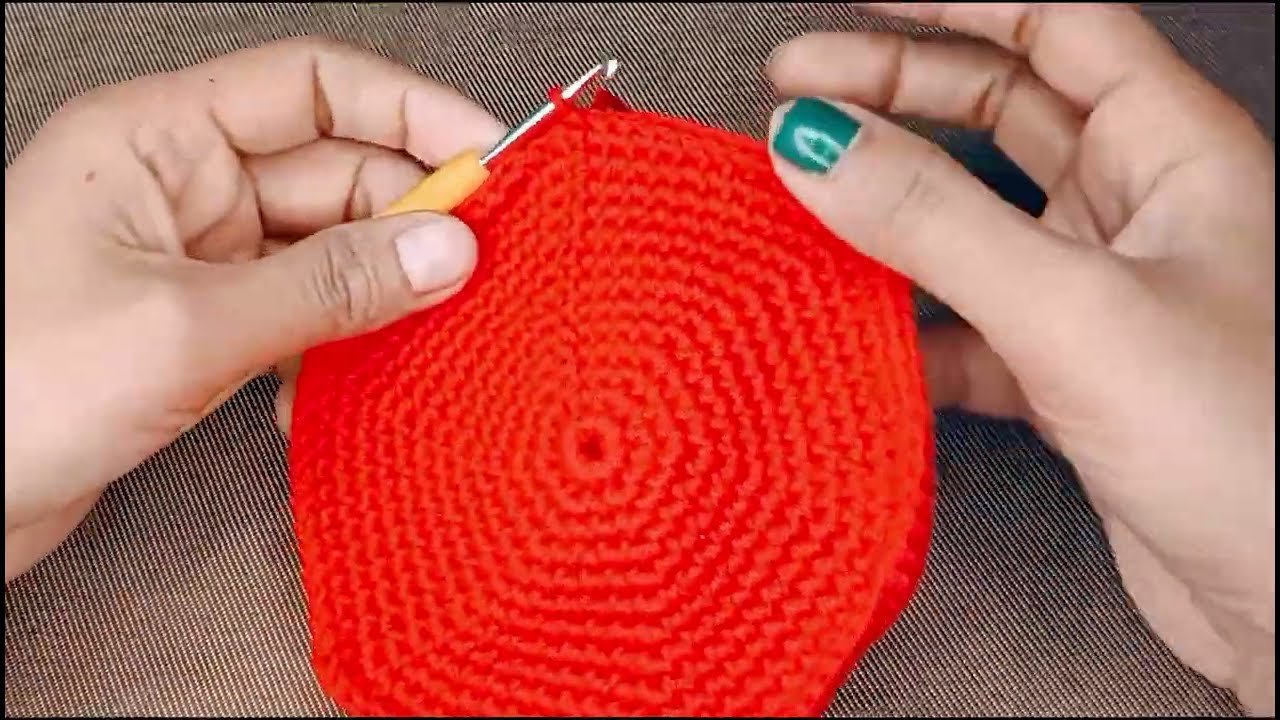
Part 1: Circular Panels (Make 2 – Main Yarn Color)
These are identical flat circles that form the front and back of your bag.
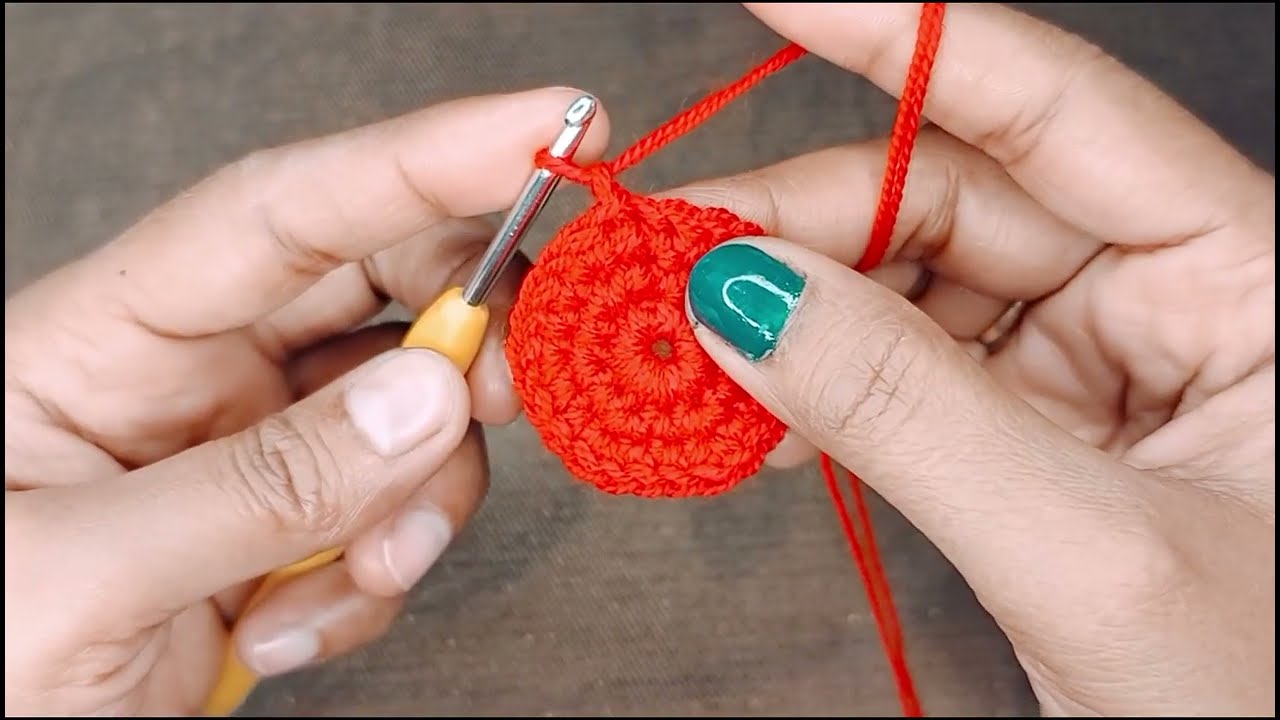
- Create a Magic Ring (MR).
- Round 1: Ch 1 (does not count as a stitch). Work 8 sc into the MR. Join with a sl st to the first sc. (8 sc)
- Round 2: Ch 1. Inc in each sc around. Join with a sl st to the first sc. (16 sc)
- Round 3: Ch 1. Sc in first sc, inc in next sc. Repeat from * to * around. Join with a sl st to the first sc. (24 sc)
- Round 4: Ch 1. Sc in first 2 sc, inc in next sc. Repeat from * to * around. Join with a sl st to the first sc. (32 sc)
- Round 5: Ch 1. Sc in first 3 sc, inc in next sc. Repeat from * to * around. Join with a sl st to the first sc. (40 sc)
- Round 6: Ch 1. Sc in first 4 sc, inc in next sc. Repeat from * to * around. Join with a sl st to the first sc. (48 sc)
- Round 7: Ch 1. Sc in first 5 sc, inc in next sc. Repeat from * to * around. Join with a sl st to the first sc. (56 sc)
- Round 8: Ch 1. Sc in first 6 sc, inc in next sc. Repeat from * to * around. Join with a sl st to the first sc. (64 sc)
- Continue increasing in this manner (adding one more sc between increases each round) until your circle reaches approximately 8-10 inches in diameter, or your desired size for the bag.
FO, leaving a long tail (approx. 15-20 inches / 38-50 cm) on one of the panels for seaming. Weave in the starting tail from the MR on both panels.
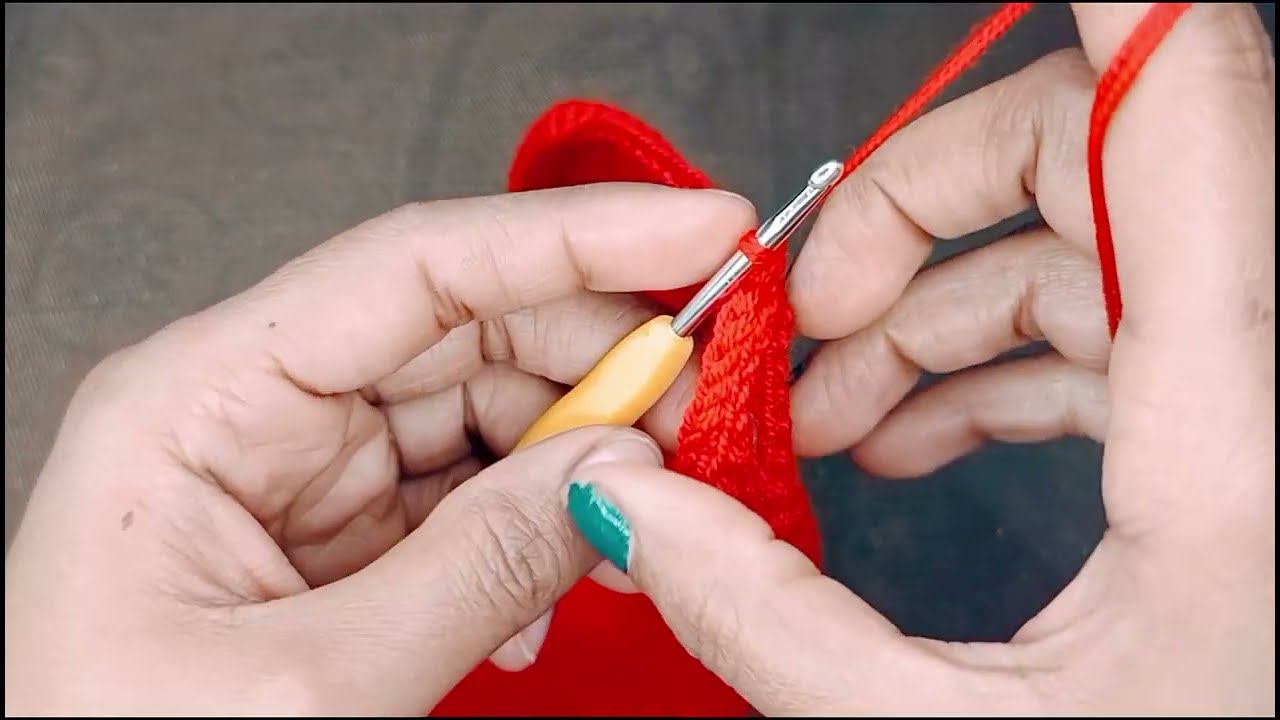
Part 2: Side Strip (Main Yarn Color)
This strip connects your two circular panels and forms the depth of the bag.
- Ch 5. (This will be the width/depth of your bag. Adjust chain count for a wider/narrower bag).
- Row 1: Sc in 2nd ch from hook and in each ch across. Ch 1, turn. (4 sc)
- Row 2 – X (Length of Strip): Sc in each sc across. Ch 1, turn. (4 sc)
- To determine the exact length, wrap the strip around the circumference of one of your circular panels. It should fit snugly around the edge. The number of rows will be roughly equal to the total stitch count of your final circular panel round.
FO, leaving a long tail (approx. 15-20 inches / 38-50 cm) for seaming.
Part 3: Crocheted Handles (Optional – Make 2 – Main Yarn Color)
If you’re not using pre-made handles, here’s a simple crocheted strap.
- Ch 60. (Adjust this chain length for a longer or shorter handle. For a wider handle, increase the initial chain).
- Row 1: Sc in 2nd ch from hook and in each ch across. Ch 1, turn. (59 sc)
- Row 2 – 3: Sc in each sc across. Ch 1, turn. (59 sc)
- Work 2-3 rows for a sturdy, flat handle. You can make it wider by adding more initial chains and rows.
FO, leaving a long tail at each end for attaching.
Part 4: Assembly & Finishing Touches
- Attach Side Strip to First Circle:
- Take one circular panel and the side strip. Align the edge of the side strip with the edge of the circular panel.
- Using your tapestry needle and the long tail from the side strip, begin sewing the side strip to the circular panel. You can use a whip stitch or a mattress stitch for a neat seam.
- Sew all the way around the circumference of the first circular panel.
- Attach Second Circle:
- Take the second circular panel. Using the long tail from this panel and your tapestry needle, sew it to the other side of the side strip, aligning it perfectly with the first circle.
- Leave a small opening (approx. 4-6 inches / 10-15 cm) on one side of the bag. This will be your opening for the bag.
- Reinforce Opening (Optional): Once the bag is mostly seamed, you can work a round of sc or sl st around the opening for a neater edge.
- Weave in all ends: Use your tapestry needle to neatly weave in any remaining loose yarn tails throughout the bag.
- Attach Handles:
- Position your crocheted handles (or pre-made handles) evenly on the top of the bag, on either side of the opening.
- Using the long tails from the handles and your tapestry needle, securely sew the handles to the bag. Ensure they are firmly attached to withstand weight.
- Add Closure (Optional):
- Magnetic Clasp: Sew a magnetic clasp to the inside top edges of the bag for a secure closure.
- Zipper: For a more secure closure, you can hand-sew a zipper into the bag’s opening.
Video tutorial
Versatile Uses for Your Stylish Round Bag:
- Everyday Carryall: Perfect for your phone, wallet, keys, and other essentials.
- Evening Bag: The chic round shape makes it suitable for dressier occasions.
- Project Bag: A unique way to carry a small crochet or knitting project.
- Gift: A thoughtful and impressive handmade gift.
Customization & Tips:
- Yarn Choice: Experiment with different colors and textures of yarn. A variegated yarn could create a unique look without complex stitches.
- Size Adjustment:
- Larger Bag: Increase the number of rounds in your circular panels. Increase the initial chain count for the side strip to make it wider, and adjust its length to match the larger circumference.
- Smaller Bag: Decrease the number of rounds in your circular panels. Decrease the initial chain count for the side strip and adjust its length.
- Stitch Variation: While single crochet creates a dense fabric, you could experiment with half double crochet or double crochet for a looser, faster-working fabric, but ensure it still holds its shape.
- Lining (Optional): For extra durability and to prevent small items from slipping through stitches, you can sew a fabric lining inside the bag.
Enjoy crocheting your own beautiful and versatile round bag! It’s a fantastic way to create a unique and functional accessory that’s sure to become a favorite.